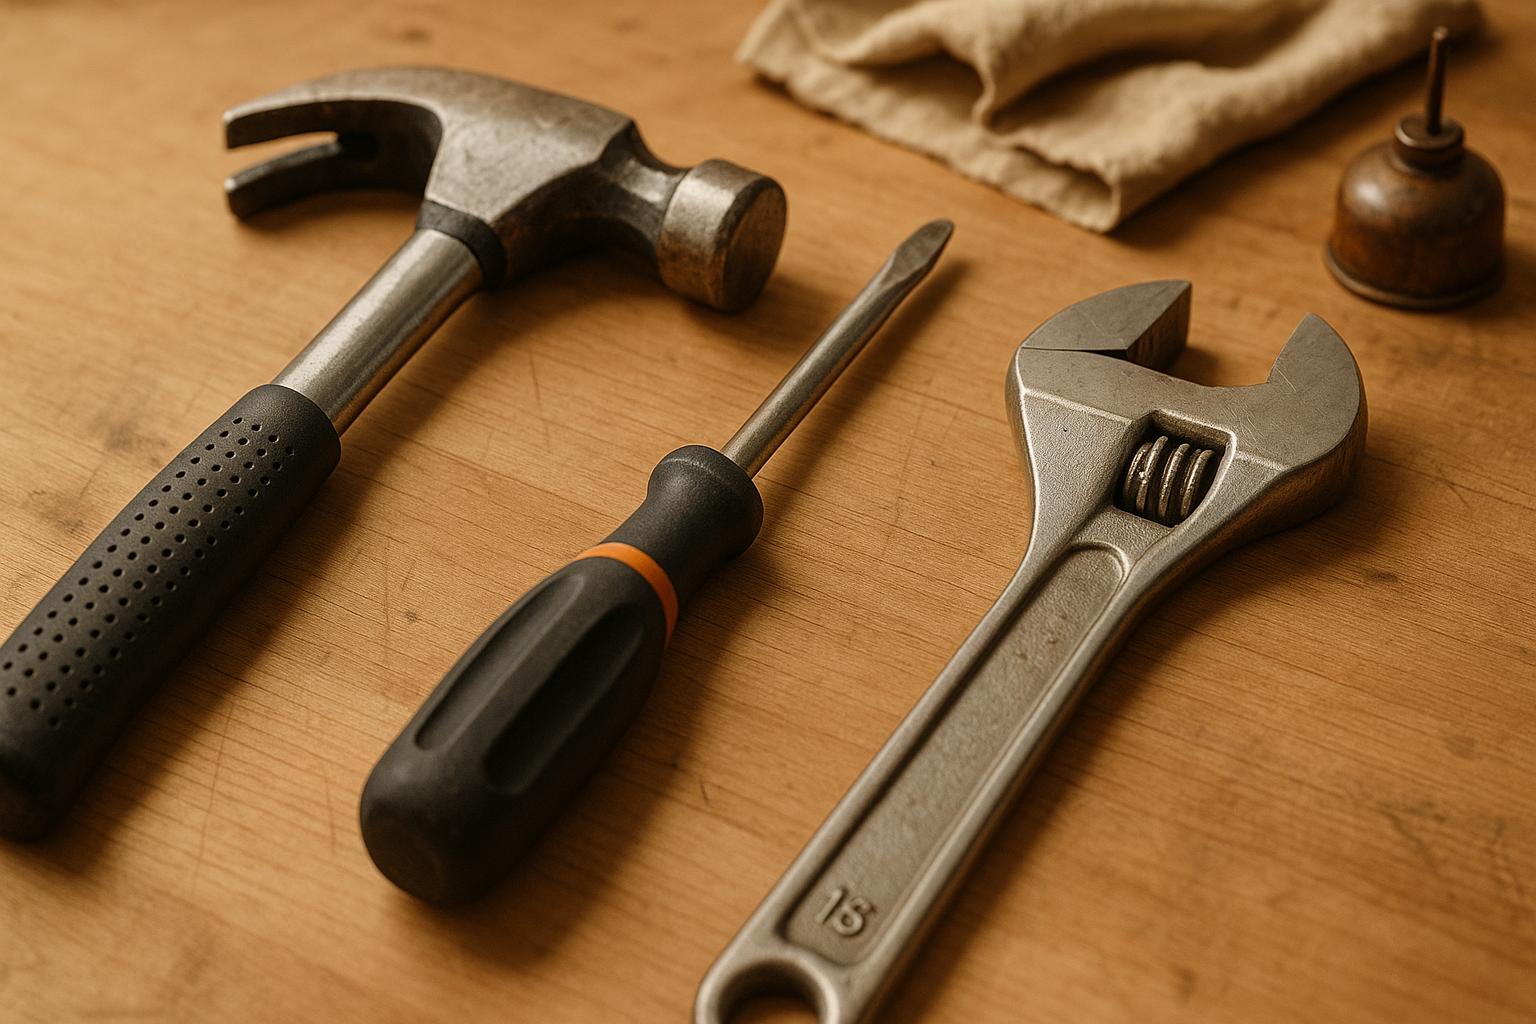
Hand tools are essential for any project, but they often face wear and tear that can lead to safety risks and inefficiencies. Regular maintenance can prevent most issues. Here are the seven most common hand tool problems and how to fix them:
- Dull Cutting Blades: Harder to cut, uneven results. Solution: Sharpen regularly or replace damaged blades.
- Loose or Broken Handles: Wobbly or cracked handles increase injury risks. Solution: Tighten screws, repair minor cracks, or replace handles.
- Rust and Corrosion: Weakens tools and seizes parts. Solution: Remove rust with a wire brush or rust remover, apply protective oil, and store tools in dry areas.
- Stuck Moving Parts: Caused by dirt, lack of lubrication, or rust. Solution: Clean, lubricate, and maintain regularly.
- Worn Tool Tips and Jaws: Reduced grip and precision. Solution: Replace or repair tips and jaws; avoid using tools improperly.
- Loose Screws and Parts: Causes instability and tool failure. Solution: Tighten or replace screws and use thread-locking compounds.
- Improper Tool Use: Leads to accidents and tool damage. Solution: Use tools as intended and follow safety guidelines.
Quick Tip: Use tools like Toolstash to track maintenance, schedule inspections, and access repair guides. Keeping tools in good shape ensures safety, saves money, and improves efficiency.
Repairing A big box of tools.
1. Dull Cutting Blades
Dull cutting blades are both dangerous and frustrating to work with. They require more force to use, which increases the likelihood of slipping and causing injuries.
Blade dullness usually stems from a few common, avoidable mistakes. Regular use without proper maintenance naturally wears down the edge, especially when cutting abrasive materials. Storing tools improperly - like exposing them to moisture or letting blades collide with other metal surfaces - can also accelerate dulling. And using a tool for tasks it wasn’t designed for, such as cutting thick materials with a utility knife, will wear down the blade much faster.
How to Spot a Dull Blade
A dull blade makes its presence known through performance. Cutting becomes harder and requires more effort, often resulting in uneven or jagged cuts instead of smooth, clean ones. You might also notice visible damage, like nicks, chips, or a rounded edge. When these signs appear, it’s time to decide whether to sharpen the blade or replace it entirely.
Sharpening Tips
Most hand tools, including chisels, utility knives, and pruning shears, can be sharpened effectively using the right tools. A whetstone, sharpening stone, or file matched to the blade’s material will do the trick. For chisels and knives, fine-grit whetstones are ideal, while saw blades benefit from a good file. Always follow the manufacturer’s recommended sharpening angle and apply steady pressure. Start with a coarse grit for very dull edges and finish with finer grits for a polished result. For specialized tools, like pruning shears or certain saws, use sharpeners designed specifically for those blades.
Knowing When to Replace
Some blades are beyond saving. If a blade is chipped, cracked, or excessively worn, it’s safer to replace it. For example, a chisel with a damaged or “mushroomed” head is a safety hazard and should not be sharpened. Similarly, saw blades with missing teeth or knives with bent tips are better off replaced. If repeated sharpening no longer restores the blade’s functionality, it’s time to invest in a new one.
Keeping Blades in Top Shape
Preventing dullness starts with good habits. Store tools in a dry, organized space, and clean them after each use to remove moisture and debris. For long-term storage, apply a light coat of oil to prevent rust. Always use the right tool for the job and inspect blades regularly before starting work. Sharpen them periodically based on how often they’re used.
To make maintenance easier, platforms like Toolstash offer helpful features like reminders for sharpening schedules and DIY guides for proper blade care. Their smart organization tools also ensure your cutting tools are stored correctly, reducing the chances of damage caused by poor storage practices.
2. Loose or Broken Handles
A loose or broken handle can turn even the most reliable tool into a safety hazard. When the connection between the handle and the tool head weakens or breaks, you lose control, increasing the risk of slips and serious injuries.
Tools like hammers, chisels, axes, and pry bars are especially vulnerable to handle issues due to the intense stress they endure during use. Picture this: a hammer head flying off mid-swing or a chisel slipping out of your hand because of a cracked handle - both scenarios can lead to dangerous accidents.
Spotting Handle Problems Early
To catch issues before they escalate, inspect wooden handles for cracks, particularly near the joint. Give them a wiggle; any movement indicates a loose connection. Metal handles aren’t immune either - look for stress fractures or signs of looseness where the handle meets the tool head.
Quick Fixes for Minor Issues
If the handle feels slightly loose, tighten any screws, bolts, or wedges with the right tool. Be careful not to overtighten, as this can cause further damage.
For small cracks in wooden handles, wood glue or epoxy can often do the trick. Start by thoroughly cleaning the damaged area, then apply the adhesive according to the product’s instructions. Use a clamp to hold the handle firmly in place while the adhesive cures. Make sure to allow enough time for the glue to set completely for a durable repair.
When Replacement Is the Only Option
Some handle damage simply can’t be fixed. Cracks or splits near the tool head, extensive damage, or repeated failures are all signs that it’s time for a replacement. And if you’ve resorted to taping a damaged handle, stop using the tool immediately - tape doesn’t restore structural strength and can give a false sense of security.
If you’ve repaired the same handle multiple times, it’s a clear signal that replacement is overdue. Each repair weakens the material further, making future failures more likely. A fresh handle ensures the tool is safe and functional again.
Prevention Through Smart Habits
Regular inspections are the best way to prevent handle failures. Before using a tool, check for any signs of wear, especially in high-stress areas. Also, avoid using tools for purposes they weren’t designed for - like using a screwdriver as a chisel or a wrench as a hammer - as this can wear down handles faster.
Proper storage is another critical factor. Keep tools in a dry, well-ventilated space, away from extreme temperatures. Moisture can cause wooden handles to swell, crack, or rot, while metal handles can develop rust or other damage. Taking care of your tools’ handles, as well as their blades or heads, ensures they remain safe and reliable for years.
To make maintenance easier, consider using tools like Toolstash. It helps you schedule regular inspections and provides handy guides for DIY handle care, so you can address issues before they become serious problems. A little effort in upkeep goes a long way in keeping your tools in top shape.
3. Rust and Corrosion
Rust isn't just about making your tools look bad - it directly affects their performance and safety. When iron or steel comes into contact with moisture and oxygen, it forms a reddish-brown coating that can cause moving parts to seize, reduce cutting power, and even compromise the structural strength of the tool[3].
Spotting the Enemy Early
The first sign of rust is usually discoloration. Keep an eye out for reddish-brown or orange spots, especially near joints or blade edges. If you see pitting - those tiny holes or rough patches - it means the damage has gone deeper. Flaking metal or stiff, jammed parts are definite red flags that corrosion has already set in.
Tools stored in damp conditions or showing a dull, rough surface need extra attention. Catching rust early can save you a lot of money and hassle. Once you notice the first signs, act quickly to remove it before the damage worsens.
Removing Rust
If rust shows up, don’t wait. Start by wiping away debris and scrubbing the affected area with a wire brush or steel wool. For tougher rust, commercial rust removers with phosphoric acid can do the trick, or you can soak the tool in white vinegar - yes, it’s surprisingly effective! Always use gloves and eye protection when handling chemical solutions, and make sure you’re working in a well-ventilated space. After cleaning, rinse and dry the tool thoroughly. Apply a light coat of machine oil, WD-40, or a protective spray to keep rust from coming back. Once cleaned, focus on storing the tool properly to prevent future issues.
Prevention: Your Best Defense
The best way to handle rust is to stop it before it starts. Store your tools in a dry, well-ventilated area. Adding silica gel packs to your toolbox or using a dehumidifier in humid climates can help keep moisture at bay. After using your tools, wipe them down with an oily rag to add an extra layer of protection. A quick monthly inspection can help you spot potential problems before they escalate.
Preventing rust is also cost-effective. Spending $10–$50 a year on rust prevention can save you from spending $20–$100 - or more - on replacements. Take this example: a construction crew in the Midwest left their tools in an unheated garage over the winter, only to end up with over $200 in replacement costs for seized wrenches and pliers.
For a smarter approach, consider using Toolstash. This tool management app lets you schedule inspections, track tool conditions, and access DIY guides for rust removal and prevention. Regular maintenance paired with proper storage ensures your tools stay in top shape, ready to tackle any job.
4. Stuck or Jammed Moving Parts
When moving parts seize up, even the most reliable tools can become frustratingly useless. Instead of solving problems, they end up feeling like dead weight in your toolbox.
What's Causing the Jam?
The most common culprits behind stuck parts are dirt and debris buildup, lack of lubrication, and rust or corrosion.
- Dirt and debris: Every use exposes your tools to dust, grime, and tiny metal particles. Over time, these settle into pivot points and adjustment mechanisms, eventually locking them in place.
- Lack of lubrication: Moving parts rely on a thin layer of oil to function smoothly. Without it - or if the oil becomes contaminated - friction builds up, making operation difficult and leading to jams.
- Rust and corrosion: Moisture causes metal surfaces to oxidize and expand, creating rough patches that bind against other components. This is especially common in tools like adjustable wrenches and locking pliers, where precision is key.
Spotting the Warning Signs
Your tools often hint at trouble before they completely seize. Stiffness or difficulty opening and closing is a major red flag. If pliers feel rigid or a wrench needs extra effort to adjust, it’s time to investigate.
Pay attention to grinding noises or increased resistance when operating the tool. These are signs of metal-on-metal contact, often due to dried-out lubrication. You might also notice visible grime or rust around hinges, pivots, or screws.
Getting Things Moving Again
Here’s how to bring your tools back to life:
- Disassemble the tool: Remove any pins or screws to access the stuck parts.
- Clean thoroughly: Use a degreaser and a small brush to scrub away dirt and grime. For stubborn buildup, let the cleaner sit for a few minutes before scrubbing.
- Remove rust: Attack rusted areas with a wire brush or a commercial rust remover.
- Lubricate: Once everything is clean and dry, apply a light machine oil or WD-40 to the moving parts. Work the tool through its full range of motion to distribute the lubricant evenly, then wipe off any excess to prevent future buildup.
Keeping Things Smooth
Preventing jams is all about regular care:
- Clean tools after each use: This prevents grime from building up over time.
- Lubricate periodically: A quick oil application to pivots and adjustments every month can save you hours of frustration later.
- Store tools properly: Keep them in a dry, clean space. If you’re dealing with humidity, add silica gel packs to your storage area to absorb moisture.
Organizing your tools to avoid unnecessary stress on moving parts can also extend their lifespan. Regular maintenance and quick inspections will ensure your tools stay in top shape.
For a more systematic way to keep track of tool care, consider using Toolstash. It offers step-by-step guides for cleaning and lubrication, maintenance scheduling, and inventory tracking - making it easier to catch small problems before they become costly repairs.
5. Worn or Broken Tool Tips and Jaws
When it comes to hand tools, worn or broken tips and jaws can create problems that feel similar to dealing with dull blades or loose handles. These parts of your tools take the most punishment during use, and when they wear out or break, they don’t just affect the quality of your work - they can also pose serious safety risks. Chipped tips or deformed jaws, for instance, can make tools less effective and increase the likelihood of injuries or damaged materials.
Recognizing the Damage
Spotting the signs of wear or damage is fairly straightforward if you know what to look for. Chipped, rounded, or worn tips and jaws reduce grip and precision, making tasks harder and less safe. Ignoring minor damage can lead to bigger problems, including accidents and further tool degradation. In short, damaged tips and jaws directly impact both safety and efficiency.
The Hidden Costs of Worn Tools
When tool tips and jaws lose their edge, their performance takes a nosedive. A screwdriver with a worn tip, for instance, will slip out of screw heads, potentially stripping them - or worse, causing your hand to slam into something nearby. Similarly, wrenches with worn jaws can lose their grip on bolts, leading to dangerous slippage and potential hand injuries. These situations are more common than most people realize, as tool-related injuries frequently rank among the top causes of workplace accidents, according to safety organizations.
But it’s not just about safety. Worn tools make your work harder and more frustrating. They reduce grip, accuracy, and overall effectiveness, often forcing you to apply extra force to compensate. This not only accelerates wear but also increases the chances of something going wrong.
Fixing Damaged Tips and Jaws
For minor damage, simple fixes can often do the trick. Filing down rough edges or replacing worn parts (if they’re replaceable) can restore functionality. However, resist the temptation to use makeshift fixes like wrapping tools in tape - they won’t restore structural integrity and can be dangerous.
That said, there’s a limit to what can be repaired. If the damage is severe, it’s best to replace the tool entirely to ensure both safety and performance. Using tools that are beyond repair is a gamble you don’t want to take.
Preventing Damage Before It Happens
The best way to avoid these issues is through regular care and proper use. Always use tools for their intended purpose, avoid applying excessive force, and inspect them regularly. These simple habits can significantly extend the life of your tools.
A quick inspection before each use only takes a few seconds but can save you hours of frustration - or worse, an injury. Look for signs of damage like chips, bends, or excessive wear on tips and jaws. Address any issues immediately rather than hoping they won’t cause problems.
Storage is another key factor. Keeping tools organized and properly stored prevents them from banging into each other or falling, which can lead to damage. A tidy toolbox isn’t just about convenience - it’s about protecting your investment.
For an extra layer of support, tools like Toolstash can help you stay on top of maintenance. It offers features to monitor tool conditions, schedule regular checks, and even provides DIY repair guides. With its inventory management, you can easily identify tools that need attention or replacement, reducing the risk of using damaged equipment on important projects.
6. Loose Screws and Parts
Keeping every screw and part securely in place is just as important as sharpening blades or ensuring handles are solid. Loose fasteners can completely undermine a tool's reliability. Even a small wobble or rattle can quickly lead to tool failure - and potentially, injury.
The Chain Reaction of Loose Fasteners
When screws or parts loosen, the entire tool can be compromised. Imagine a hammer with a loose head - it’s practically a flying hazard. A screwdriver with a shaky handle loses accuracy and might slip, causing cuts or punctures. Wrenches with loose jaws can’t grip properly, leading to stripped bolts or painful slips that bash your knuckles.
Once a fastener starts to loosen, vibrations only make the problem worse. What might have been a quick fix yesterday could turn into a full-blown replacement today.
How to Spot the Problem Early
Catching loose fasteners early can save you from bigger headaches down the line. Pay attention to any rattling or clicking sounds while using the tool. Feel for unexpected movements in joints, handles, or other parts. If you notice gaps where components should fit snugly together, it’s a clear sign something’s off.
Taking a few seconds to visually inspect and test your tools before each use can help you avoid accidents and extend their lifespan.
Preventing the Problem Before It Starts
The best way to handle loose fasteners is to stop them from loosening in the first place. Thread-locking compounds like Loctite are great for screws and bolts that tend to shake loose. These compounds create a semi-permanent hold, keeping fasteners secure while still allowing for future adjustments.
In professional environments, regular tool inspections should be part of a formal safety routine. DIY users should aim to check their tools at least once a month, or after heavy use. During inspections, tighten any fasteners that seem loose to keep everything in working order.
Proper storage also helps. Tossing tools into a cluttered toolbox where they knock against each other increases wear and tear on fasteners. Keeping tools organized not only protects them but also saves you from unnecessary repairs.
When Tightening Isn’t Enough
Sometimes, you’ll come across fasteners that just won’t tighten - whether it’s due to stripped threads, worn heads, or other damage. If a fastener can’t be secured, stop using the tool immediately. Continuing to use a compromised tool greatly increases the risk of failure and injury.
Avoid quick fixes like tape or makeshift repairs. These don’t solve the underlying problem and can give you a false sense of security, which might lead to accidents.
For tools that repeatedly develop loose parts despite maintenance, replacing the tool entirely is often the safer and more cost-effective choice. Your safety and the quality of your work are worth far more than the price of a replacement tool.
Use resources like Toolstash to keep track of inspections and find repair guides. Keeping fasteners tight is just one part of a larger commitment to tool safety, ensuring your tools are reliable and ready for the job.
7. Wrong or Unsafe Tool Use
Using tools incorrectly is one of the leading causes of hand tool injuries in the United States, sending thousands to the emergency room each year [5]. Many of these incidents could be avoided with better technique and a stronger focus on safety.
The Hidden Dangers of "Just This Once"
It’s tempting to grab the nearest tool for a quick fix - like using a screwdriver as a chisel or substituting pliers for a wrench. But these shortcuts often lead to serious problems. For example, using a screwdriver as a chisel can cause the tip to snap, sending sharp fragments flying. Similarly, using pliers instead of a properly sized wrench can round off nuts and cause your hand to slip, potentially leading to cuts or bruises. Even something as seemingly minor as using the wrong size screwdriver can strip screw heads, damaging both the tool and the fastener.
These aren't rare, dramatic accidents - they’re everyday mistakes that catch people off guard. And while they might seem small, they can have big consequences. Forcing a dull tool, for instance, increases the likelihood of slips and cuts when the tool finally gives out.
When Tools Become Weapons
Misusing a tool essentially transforms it into a hazard. Tools are designed with specific stress points, grip angles, and force distributions to ensure safe and efficient use. Deviating from their intended purpose compromises those safety features and puts you at risk.
Even minor missteps can lead to trouble. Using a wrench that's slightly too large, continuing to work with a tool that has a cracked handle, or applying force at the wrong angle can all result in sudden, often dangerous failures.
Reading the Manual Isn't Optional
Manufacturer instructions aren’t just there to fill space - they’re critical for understanding how to use a tool safely and effectively. These guidelines outline proper techniques, limitations, and safety precautions, helping you avoid accidents and unnecessary wear and tear. Following these instructions isn’t just about protecting your tools; it’s about protecting yourself. Regular maintenance, paired with proper use, ensures your tools remain safe and reliable.
Building Safe Habits That Stick
Before each use, take a moment to inspect your tools. Look for cracks, loose parts, or worn edges. Damaged tools often require extra force to operate, which increases the likelihood of accidents. If a tool is compromised, repair or replace it instead of trying to make do.
Keep your workspace clean and organized. A cluttered area can lead to rushed decisions, unsafe shortcuts, and difficulty finding the right tool - which might tempt you to grab the wrong one.
Don’t forget protective gear. For instance, safety glasses are essential when using tools that might produce flying debris, as they can prevent serious eye injuries.
When You Don't Know, Ask
If you're unsure about how to use a tool properly, take the time to ask or research. Many injuries happen because people assume they know what they’re doing, only to discover too late that they’ve overlooked important safety information.
Online resources like Toolstash provide DIY guides, safety tips, and usage instructions that can help you avoid common mistakes. Spending a few minutes learning the right technique is a small investment compared to the potential cost of an injury or broken equipment.
Don’t let pride or the pressure to save time push you into unsafe practices. Taking the extra time to choose the right tool and use it correctly is always worth it when compared to the risks of injury or damage.
Quick Reference Table
Here's a handy guide to common tool issues, their symptoms, fixes, and ways to prevent them. This breakdown provides a quick yet thorough look at how to keep your tools in top shape, saving both time and money. Check out the table below for details on each issue and its solutions.
| Issue | Key Symptoms | Fixes | Prevention Methods |
|---|---|---|---|
| Dull Cutting Blades | Tools struggle to cut, require more effort, or leave rough, uneven edges | Sharpen the blade using a file or sharpening stone; replace the blade if it's too damaged | Stick to a sharpening routine, store tools in a dry area, and avoid cutting materials they aren't designed for |
| Loose or Broken Handles | Handles wobble, show cracks or splinters, or separate from the tool head | Replace the handle entirely; for minor splits, use wood glue and clamps (never use tape) | Inspect handles regularly, store tools to avoid impacts, and choose high-quality tools with sturdy handles |
| Rust and Corrosion | Metal surfaces show orange-brown discoloration, pitting, or feel rough | Use a wire brush or sandpaper to remove rust, apply rust remover for stubborn spots, and coat with protective oil | Dry tools after use, store them in a moisture-free area, and apply a light coat of oil to metal parts |
| Stuck or Jammed Moving Parts | Hinges or pivot points don't move smoothly or are completely stuck | Apply penetrating oil, gently work parts free, clean out debris, and lubricate the moving components | Clean tools after use, lubricate pivot points often, and store in a clean, dry place |
| Worn or Broken Tool Tips and Jaws | Rounded wrench openings, chipped screwdriver tips, or pliers that slip on fasteners | Replace worn tips or jaws if possible; otherwise, replace the entire tool | Use the right tool for the job, avoid excessive force, and check tips for wear regularly |
| Loose Screws and Parts | Rattling noises, visibly loose fasteners, or unexpected part movements | Tighten screws and fasteners with the correct tool; replace any missing parts | Regularly check and tighten fasteners, use thread-locking compounds, and handle tools carefully |
| Wrong or Unsafe Tool Use | Damage from improper use, signs of accidents, or tools failing unexpectedly | Stop improper use immediately, retrain users on correct methods, and replace damaged tools | Provide thorough training, use tools only for their intended purpose, and keep tools organized for easy access |
If your tools show any of these warning signs, repair or replace them right away - no exceptions.
Routine inspections and maintenance are key to avoiding serious issues. Tools that are properly cared for tend to last longer and perform reliably, while neglected tools often fail when you need them most. To stay on top of inspections and repairs, consider using Toolstash's maintenance tracking features. They make it easy to manage schedules and ensure your tools remain safe and dependable.
A little care goes a long way. Regular maintenance not only extends the life of your tools but also ensures your safety. Always review these points before using your tools to keep them in peak condition.
Conclusion
Taking care of your tools isn't just about keeping them in good shape - it’s about staying safe and getting the job done right. According to OSHA, most hand tool-related injuries stem from improper maintenance and misuse[4]. The good news? These accidents are preventable with regular inspections, correct usage, and consistent maintenance.
The problems discussed earlier - like misuse and neglect - are common culprits behind tool failures and safety hazards. Simple habits, such as daily cleaning and monthly inspections, can go a long way in avoiding these issues. A disciplined approach to maintenance ensures your tools perform well and keeps you safe.
Misusing tools can cause stripped fasteners, broken equipment, and even serious injuries like cuts, eye damage, or fractures[1][2]. This underscores why proper training and following manufacturer guidelines are so important. It’s not just about the tools - it’s about protecting yourself and those around you.
If keeping track of maintenance feels overwhelming, digital tools can make it easier. Platforms like Toolstash help you stay organized with features like inventory tracking, maintenance reminders, and quick DIY guides for repairs and proper usage. These resources simplify upkeep, so you spend less time worrying and more time working.
FAQs
How often should I check and maintain my hand tools to keep them in good shape?
To keep your hand tools in top shape, make it a habit to check and maintain them regularly. For tools you rely on often - like hammers, screwdrivers, or wrenches - a quick inspection every few weeks works well. For those you use less often, a checkup every few months should suffice.
When inspecting your tools, watch for signs of wear, such as dull edges, rust spots, or loose components. Address any issues right away - tighten screws, sharpen blades, or add a bit of oil to ward off rust. These small steps can significantly extend your tools' lifespan and ensure they remain safe and effective to use.
How can you tell if a hand tool needs to be replaced instead of repaired?
Sometimes, fixing a hand tool just isn’t worth the time or money. When should you replace a tool? Look out for major issues like severe rust or corrosion that weaken its structure, cracks or breaks in key parts like handles or blades, or wear and tear so extreme that the tool becomes unsafe or doesn’t work properly. For instance, a hammer with a splintered handle or a screwdriver with a tip too worn to grip screws is usually better off being replaced.
Not sure whether to repair or replace? Think about the tool’s overall value, how much repairs would cost, and how often you use it. If it’s something you depend on regularly, upgrading to a new, high-quality version could save you a lot of hassle down the road.
How can I prevent rust and corrosion on my hand tools, especially in humid conditions?
To keep your hand tools in good condition and free from rust, especially if you live in a humid area, proper storage and maintenance are a must. Start by keeping them in a dry, temperature-controlled space. A toolbox with a moisture-absorbing liner or silica gel packs can work wonders in reducing humidity around your tools.
Don't skip regular upkeep - after each use, wipe your tools clean and apply a thin layer of machine oil or rust-preventive spray to protect metal surfaces. For tools you’re storing long-term, wrapping them in rust-inhibitor paper or placing them in airtight containers can provide an extra layer of protection.
If you own a large collection, managing them can get tricky. Platforms like Toolstash can help you stay organized by tracking your inventory and ensuring each tool gets the care it needs.