Choosing the right tools can make or break your DIY project. The wrong tools can lead to accidents, poor results, and wasted time or money. Here's how to get it right:
- Safety First: Use tools designed for the task to minimize risks. For example, a dull saw blade or makeshift tools increase chances of injury.
- Match Tools to the Job: Different projects (woodworking, plumbing, electrical) require specific tools. Consider materials, project complexity, and your skill level.
- Hand Tools vs. Power Tools: Hand tools offer precision, while power tools save time. Advanced tools like miter saws or routers are best for complex tasks.
- Budget Wisely: Invest in frequently used tools and rent rarely needed ones. Balance cost and quality for long-term savings.
- Organize and Maintain Tools: Keep tools clean, sharp, and stored properly. Regular maintenance extends their life and ensures safety.
Start by assessing your project needs, prioritize safety, and focus on tools that fit your skill level. With the right approach, you'll save time, reduce stress, and achieve better results.
The TRUTH About Power Tools: A Complete Buying Guide
Assess Your Project Requirements
Getting a clear picture of your project needs is the first step toward choosing tools that prioritize safety, quality, and efficiency. Before you start shopping, take a moment to evaluate what your project demands. This understanding will help you choose tools that match your goals and ensure a smoother process.
Determine Your Project Type
Different projects call for different tools. Here’s a quick breakdown of common project types and the tools they typically require:
- Woodworking projects: If you're building shelves or crafting furniture, you'll need tools like saws, chisels, sanders, clamps, and wood-specific drill bits.
- Plumbing work: Projects involving pipes will require pipe wrenches, tubing cutters, soldering tools, and fittings designed for various pipe materials.
- Electrical projects: Safety is key, so insulated tools are a must, along with wire strippers, voltage testers, and fish tape for pulling cables through walls.
- Home repair and maintenance: Basic hand tools, putty knives, paint brushes, rollers, and repair compounds are staples for patching walls or painting.
- Automotive work: Tasks like fixing your car often need socket sets, torque wrenches, jack stands, and specialty pullers for mechanical repairs.
Understanding the type of work you’re tackling helps you focus on the must-have tools for the job. For example, a bathroom renovation might combine plumbing, electrical, and general construction tasks, requiring a mix of tools from multiple categories.
Factor in Materials and Project Difficulty
The materials you’re working with and the complexity of your project also play a big role in determining the tools you’ll need.
- Wood projects: The type of wood matters. Softwoods like pine are easier to cut and work with standard blades, while hardwoods like oak demand sharper, more durable tools and possibly more powerful equipment.
- Metal work: Cutting steel or other metals requires metal-cutting blades, angle grinders, and specialized drill bits. You may also need cutting oil to keep tools from overheating.
- Drywall and plaster: These materials call for tools designed to manage dust and create smooth finishes, such as drywall saws, taping knives, and sanders.
- Masonry and concrete: For these heavy-duty projects, you’ll need masonry bits, hammer drills, diamond blades, and proper safety gear to handle dust and debris.
The difficulty of your project also affects tool selection. Simpler tasks can often be tackled with basic hand tools, but more complex projects might require precision instruments and power tools to get the job done efficiently.
Your working environment is another factor to consider. Indoor projects might allow for corded tools, while outdoor work often benefits from battery-powered options. If you’re working in tight spaces, compact tools are essential, while larger tools are better suited for open areas.
Finally, think about your skill level. Advanced tools can be powerful but may require experience to use safely and effectively. If you’re just starting out, stick to simpler tools and upgrade as your confidence and skills grow. This approach not only reduces frustration but also helps prevent accidents.
Know the Main Tool Categories
Understanding the different tool categories helps you choose the right tools for any project. Hand tools are great for precision, power tools speed things up, and advanced tools handle specialized tasks.
Hand Tools You Need
Hand tools are dependable, cost-effective, and perfect for tasks requiring accuracy and control.
Must-have hand tools:
- Measuring and marking: A 25-foot tape measure and a 12-inch combination square are essential for precise measurements. Add a 4-foot level for ensuring straight lines during installations.
- Cutting tools: Equip yourself with a utility knife with replaceable blades, a crosscut saw for wood, a hacksaw for metal, and tin snips for cutting sheet metal.
- Fastening and gripping: A 16-ounce claw hammer, both flathead and Phillips screwdrivers, needle-nose pliers, standard pliers, and adjustable wrenches cover most fastening needs.
- Specialty tools: A high-quality chisel set simplifies woodworking, while putty knives are great for applying fillers and patches. Socket wrenches offer better leverage than standard wrenches.
Hand tools don’t rely on batteries or motors, making them incredibly durable when properly maintained. Many DIY enthusiasts prefer them for projects requiring precision and control over speed.
While hand tools are reliable for detailed work, power tools are the go-to for saving time and tackling larger projects.
Power Tools That Save Time
Power tools are game-changers, offering speed and efficiency while delivering professional results.
Essential power tools include:
- Cordless drills: Opt for an 18- to 20-volt cordless drill with adjustable torque to avoid overdriving screws. Models with hammer drill functions can also handle masonry tasks.
- Circular saws: A 7¼-inch blade cuts through standard 2x lumber in one pass. Adjust the blade depth to about ¼ inch below your material for clean cuts.
- Sanders: Random orbital sanders are versatile for most projects. Sheet sanders are ideal for corners, while belt sanders remove material quickly but require more control.
- Reciprocating saws: Perfect for demolition and rough cuts, these saws handle wood, metal pipes, and other materials with ease.
- Jigsaws: Great for curved cuts and intricate shapes, jigsaws with variable speed settings adapt to different materials.
Lithium-ion batteries make these tools even more efficient, offering longer runtimes, faster charging, and consistent power. Many manufacturers now offer tool systems where a single battery powers multiple tools, cutting down on costs and storage space.
For more demanding projects, advanced tools take precision and capability to the next level.
Advanced Tools for Complex Projects
When tackling intricate or large-scale tasks, advanced tools like miter saws and routers provide the precision and functionality you need.
Specialized tools to consider:
- Miter saws: Ideal for crosscuts and angled cuts. A 10-inch compound miter saw works well for trim, while 12-inch sliding models handle wider boards.
- Table saws: Perfect for ripping lumber and making repeated cuts. Contractor-style saws with 10-inch blades are versatile for most DIY needs. Look for safety features like blade guards.
- Routers: Use these for shaping edges, cutting grooves, and creating decorative profiles. A ¼-inch router works for lighter tasks, while a ½-inch model handles heavier-duty work.
- Rotary tools: Compact and versatile, these tools are great for detail work like cutting, grinding, sanding, and polishing in tight spaces.
- Heat guns: Useful for tasks like paint removal, bending plastic pipes, and shrinking tubing. Variable temperature settings provide better control.
- Oscillating multi-tools: These tools cut, sand, and scrape in tight spaces with less aggression than reciprocating saws.
When considering advanced tools, think about how often you’ll use them. Renting can be a smart option for occasional needs, but if you find yourself renting the same tool repeatedly, it might be time to invest in your own. Build your collection gradually, focusing on quality tools that match your specific project requirements.
Balance Cost and Quality
Striking the right balance between cost and quality requires thoughtful planning. Investing in quality tools often pays off in the long run, as they tend to deliver better performance and last longer. This can save you money by reducing the need for frequent repairs or replacements.
However, price and performance don’t always go hand in hand. Sometimes, a moderately priced tool can meet your needs just as well as a high-end option with extra features you may never use. For example, a dependable corded drill might be a smarter choice for occasional tasks than a pricey cordless model with multiple batteries.
To make informed decisions, consider the cost-per-use of a tool. This can help you determine if a higher upfront price is worth it or if renting a tool might be the better route.
While established brands often carry a reputation for quality, don’t overlook newer brands. They can sometimes offer reliable performance at a more affordable price, making them a solid option for many DIY projects.
Set Your Tool Budget
Once you’ve identified your project needs, allocate your tool budget wisely. Start by distinguishing between essential tools you’ll use frequently and those you’ll only need occasionally. Focus your spending on versatile, high-use tools and plan to acquire specialty items as your projects evolve.
Don’t forget to factor in additional costs. Items like replacement batteries, blades, and storage solutions can add up quickly. Accounting for these extras ensures your budget stays realistic and avoids surprises.
Multi-purpose tools are a great way to stretch your budget. For instance, an oscillating multi-tool can handle cutting, sanding, and scraping, eliminating the need for several single-purpose tools. This approach maximizes the value of your investment.
Buy vs. Rent: Which Makes Sense
After setting your budget, decide whether buying or renting tools aligns better with your needs. The choice largely depends on how often you’ll use the tool and how much storage space you have. Tools you use regularly are typically worth purchasing, while those needed for one-time projects are often more economical to rent.
When renting, consider the total costs, including rental fees and any transportation expenses. On the other hand, owning tools provides the convenience of immediate access and allows you to practice and refine your skills at your own pace.
For DIYers with limited storage, renting bulky equipment for specific tasks can be a practical solution. But if you have ample space, building a collection of essential tools might be more worthwhile over time.
To make smarter decisions, consider using a tool management platform like Toolstash. It helps you track your tool usage and spending, making it easier to determine whether buying or renting will save you money in the long run.
Organize and Prepare Your Tools
The most effective tools won't do you much good if they're disorganized or unprepared. By taking the time to organize and prep your tools, you can streamline your workflow and ensure everything is ready to perform when you need it.
Keep Your Tools Organized
Once you've chosen the right tools for your project, keeping them organized is key to working efficiently. A well-thought-out storage system can save time and reduce frustration, especially during larger tasks.
Start by creating a designated spot for every tool. Pegboards are great for keeping hand tools within easy reach, while clear storage bins work well for smaller items like screws, bolts, and drill bits. Label storage areas clearly to make it easier for you - and anyone else helping you - to find and return tools to their proper places. If you work on multiple types of projects, consider grouping tools by project type for faster setups.
For those with extensive tool collections, digital organization can be a game-changer. Apps like Toolstash let you track inventory, categorize tools, and even note purchase dates and lending history. This is especially helpful if you own duplicates or frequently share tools with others.
Accessibility is just as important as organization. Keep your most-used tools in easily reachable locations. Store heavy tools at waist height to avoid unnecessary strain, and make sure sharp tools are stored securely to protect both their edges and your safety.
Get Tools Ready for Use
Before starting any project, inspect your tools to ensure they're in good working condition. Check for damage like loose handles, worn screws, or other signs of wear. Power tools need extra attention - look for frayed cords, test safety features, and make sure guards are securely in place.
For battery-powered tools, plan ahead. Charge all batteries the night before, and keep spares ready if you have them. Dead batteries can bring your progress to a halt, and older batteries that don’t hold a charge well may need replacing.
The condition of your blades and bits can make or break your project. Dull saw blades can lead to rough cuts and require more effort, increasing the risk of accidents. Similarly, worn drill bits can slip or break, potentially damaging your materials. Sharpen or replace these tools before starting to avoid interruptions and ensure clean, precise results.
Don't forget your safety gear. Make sure safety glasses are clean and free of scratches, hearing protection fits comfortably, and dust masks are still effective. Keep a well-stocked first aid kit nearby and ensure everyone knows where to find it.
Finally, calibrate precision tools. Double-check levels, tape measures, and square angles to avoid small errors that can add up over the course of your project. Gather essential supplies like extension cords, drop cloths, cleaning materials, and consumables such as sandpaper before you begin. Having everything ready to go minimizes distractions and helps you maintain focus and efficiency. With your tools properly organized and prepared, you'll be ready to tackle your project safely and smoothly.
Maintain Tools for Safety and Durability
Taking care of your tools not only ensures they perform well but also keeps you safe and saves money in the long run. A little regular maintenance, paired with proper organization, can make your DIY projects smoother and more efficient.
Follow Basic Safety Rules
Start with the basics: protective gear. Always wear safety glasses with side shields when working with tools that create flying debris, sparks, or dust.
For tasks involving power tools that exceed 85 decibels - like circular saws, grinders, or routers - hearing protection is a must. Whether you prefer foam earplugs or over-ear muffs, the key is to use them consistently.
When it comes to work gloves, choose wisely. Heavy leather gloves are ideal for handling rough materials or avoiding splinters. However, avoid loose gloves near rotating machinery, as they can get caught and lead to accidents.
Keep your cutting tools sharp. Dull blades not only make tasks harder but also increase the risk of slipping or binding. For hand tools like chisels or utility knives, always cut away from your body and keep your free hand out of the cutting path.
If you're handling heavy tools, proper lifting techniques are essential. Bend your knees, keep your back straight, and ask for help when moving anything over 50 pounds. Store bulky items like compressors or table saws at waist height to minimize awkward lifting.
Finally, establish a regular maintenance schedule to keep your tools in top shape and extend their lifespan.
Regular Tool Maintenance Steps
After each use, clean your tools thoroughly. Sawdust and debris can clog power tools, so use compressed air to clear vents. For hand tools, a wire brush works well to remove rust and buildup, while mineral spirits can tackle sticky residues from adhesives or finishes.
Lubrication is critical for tools with moving parts. Apply oil to pivot points on pliers, wrenches, and other hinged tools, following the manufacturer's recommendations for power tools.
Pay close attention to blades and bits. Replace saw blades when teeth are dull, chipped, or missing. Drill bits should be sharpened or replaced if they require too much pressure or produce rough holes. Keep a sharpening stone handy for chisels and plane blades - just a few minutes of sharpening can restore their cutting edge.
Don't overlook electrical components. Inspect power cords for damage like cuts, kinks, or exposed wires before each use. Replace damaged cords immediately instead of relying on electrical tape as a long-term fix. Test GFCI outlets monthly to ensure they’re functioning properly and can protect you from electrical faults.
Storage matters too. Keep tools in a dry area to prevent rust. Adding silica gel packets to your toolbox can help absorb moisture. Avoid tossing tools into drawers where they might collide and get damaged - hang them instead.
For larger tool collections, consider tracking maintenance schedules. Tools like Toolstash let you log purchase dates, monitor usage, and set reminders for routine maintenance. This is especially useful for power tools that may need professional servicing or have warranties tied to proper care.
If you use lithium-ion batteries, store them at room temperature with a 40%-60% charge to extend their life. Avoid leaving them in hot cars or freezing garages, as extreme temperatures can damage their capacity.
Lastly, don’t forget to periodically calibrate precision tools to maintain their accuracy. A little attention to detail ensures your tools stay reliable for years to come.
Conclusion: Make Smart Tool Decisions
Picking the right tools starts with understanding your specific needs, weighing costs against quality, and taking care of your equipment. For example, knowing the demands of your project can save you the headache of struggling with a manual screwdriver when an impact driver would handle the task faster and more securely.
When it comes to spending, prioritize wisely. Invest in tools you’ll use often, and consider renting specialized equipment for occasional jobs. This approach helps you manage costs while still ensuring you have the right tools for the job. Opting for reliable brands also pays off in the long run, as quality tools tend to last longer and perform better.
Don’t overlook maintenance - it’s key to keeping your tools in top shape. Regular cleaning, proper storage, and sharpening edges when needed can extend their lifespan and keep you safe while working.
If you have a large tool collection, managing it can be a challenge. That’s where Toolstash comes in. With features like inventory tracking, smart categorization, and AI-driven suggestions, it helps you quickly find the tools you need, making your workflow more efficient and organized.
FAQs
How can I choose the right tools for my DIY project?
To pick the best tools for your DIY project, start by figuring out the exact tasks you'll be tackling and the materials you'll need to work with. Pay attention to the type of project, the quality of the tools, and your budget to make smart decisions.
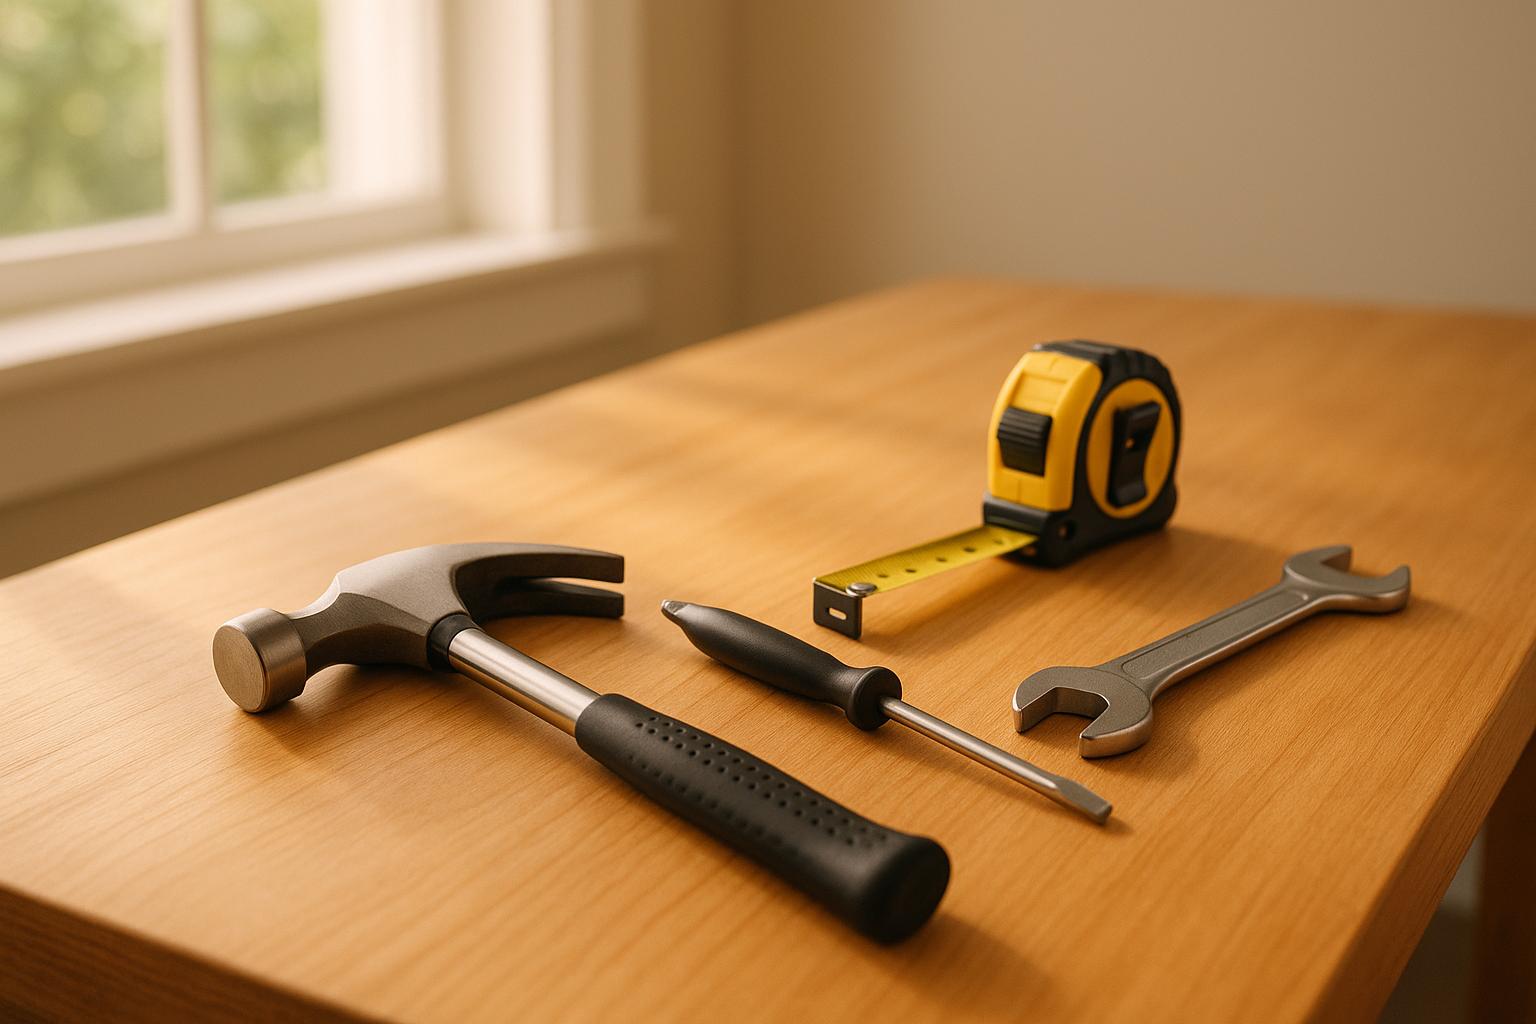
Prioritize tools that are sturdy, comfortable to handle, and safe to operate. If you're not sure where to begin, start with some versatile essentials: a solid hammer, a good set of screwdrivers, a measuring tape, and a dependable power drill. Spending a little extra on quality tools at the start can save you a lot of time and effort down the road, while also helping you achieve better results.
Should I buy or rent tools for my DIY project?
When deciding between buying or renting tools, it’s important to consider how often and how long you’ll actually need them. Renting tends to be the smarter choice for short-term or one-time projects, while buying is usually better if you’ll use the tool regularly or for multiple future tasks.
You’ll also want to think about practical details like storage space, maintenance costs, and the condition of rented tools compared to owning your own. For bigger projects or if you plan to take on similar jobs down the road, purchasing might save you money over time. On the other hand, renting is a great way to avoid extra costs and clutter if it’s a one-off or occasional need.
What are the best ways to keep my tools in good condition for DIY projects?
To keep your tools in top shape, make it a habit to clean them after every use. This helps remove dirt and debris that can cause wear over time. Be sure to dry them thoroughly to avoid rust. For tools with moving parts, like hinges or joints, apply lubricant regularly to ensure they operate smoothly.
Store your tools in a dry, cool spot, such as a toolbox or on a pegboard, to shield them from moisture and extreme temperatures. It's also a good idea to inspect your tools regularly for any signs of damage or wear. If you notice any issues, repair or replace the affected parts right away to keep them safe and functional. With consistent care, your tools will remain dependable and serve you well for years.