Want your tools to last longer and work better? Start with proper care. Neglecting tools can lead to preventable damage, costly replacements, and safety risks. A quick maintenance routine can save you time, money, and frustration.
Here’s a breakdown of key tips to keep your tools in top shape:
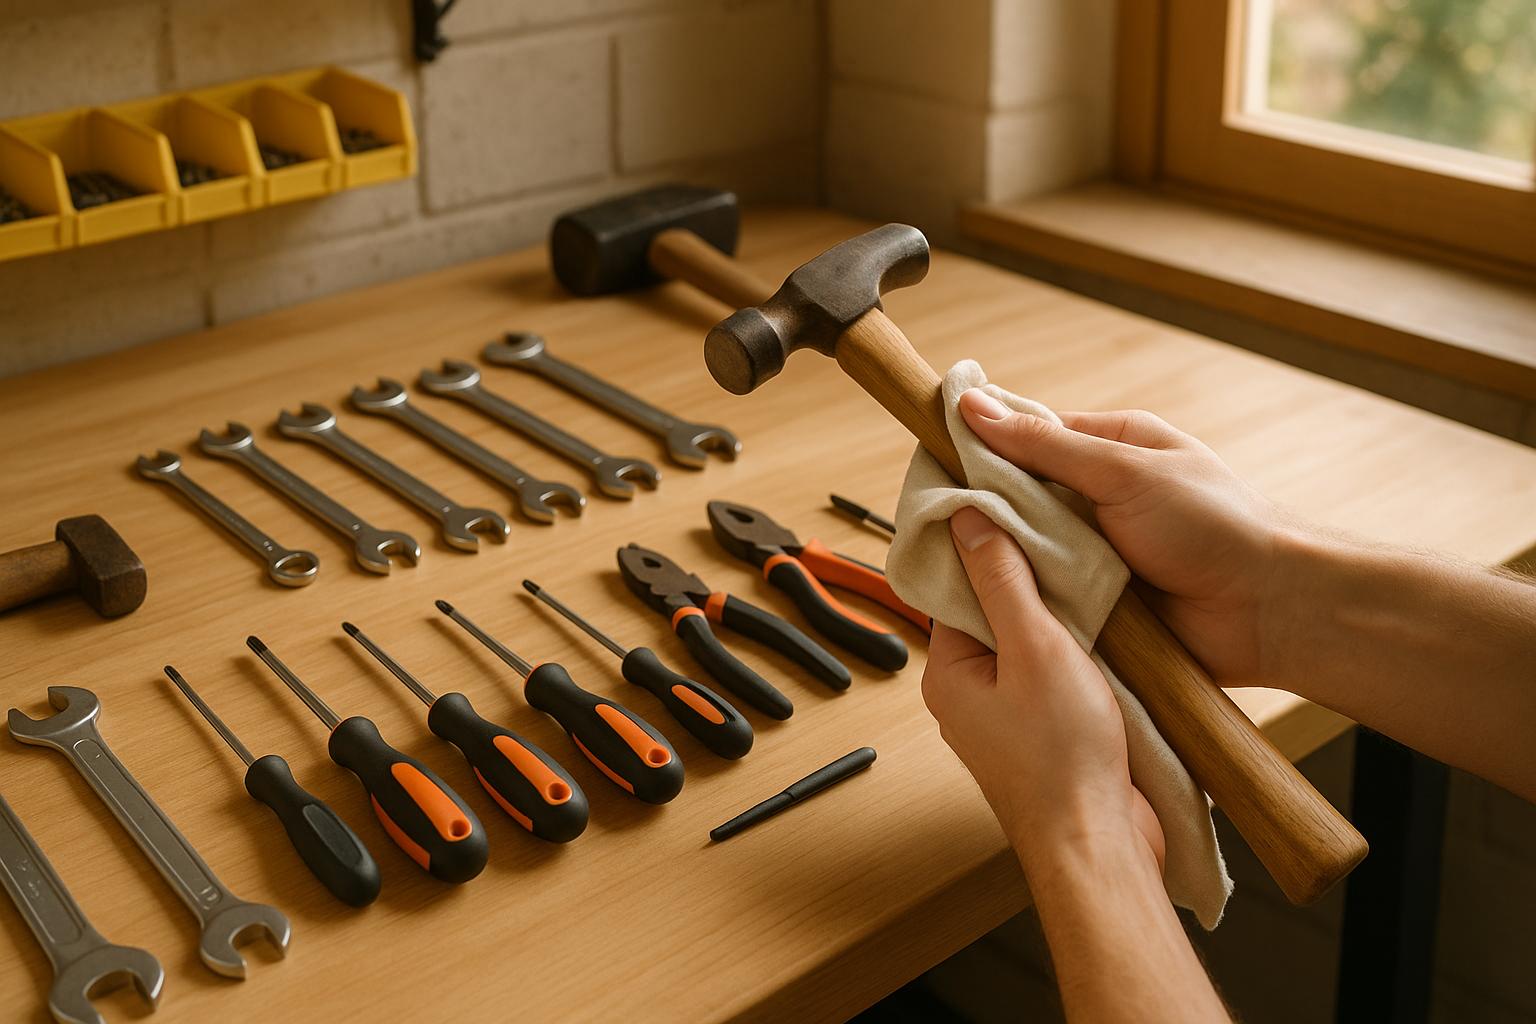
- Clean after every use: Wipe off dirt, grease, and moisture to prevent rust and wear.
- Store properly: Use a dry, organized space to protect tools from rust and damage.
- Oil moving parts: Reduce friction and extend life with regular lubrication.
- Inspect for damage: Check for loose parts, wear, or rust to avoid accidents.
- Keep tools sharp: Dull blades increase effort and risk of injury.
- Fix or replace worn handles: Secure grips improve control and safety.
- Use tools correctly: Avoid misuse to prevent breakage and injuries.
- Set a maintenance schedule: Regular checks ensure tools are always ready.
A little effort goes a long way - routine care can extend tool lifespan by up to 50% and reduce replacement costs by 30%. Platforms like Toolstash can help you stay organized with inventory tracking and maintenance reminders. Start small and turn these habits into part of your DIY routine.
How to Clean and Maintain Your Hand Tools
1. Clean Your Tools After Every Use
One of the easiest habits to adopt - and one that can make a huge difference - is cleaning your tools right after each use. Even a little moisture can lead to rust in just a few hours, especially in humid conditions. Residue like grease or dust can also speed up wear and tear.
Start with the basics: grab a clean, dry cloth and wipe down each tool before putting it away. For hand tools like hammers, screwdrivers, and wrenches, this simple step removes dirt and moisture that could lead to corrosion. If you’re dealing with stubborn grease, use a mild degreaser and a brush to clean textured areas, then dry the tool thoroughly. A soft brush or an old toothbrush works great for cleaning grooves and crevices. This quick routine lays the groundwork for deeper maintenance when needed.
Power tools require a little more attention. Always unplug them before cleaning to avoid any chance of electric shock. Instead of water or liquid cleaners, which can damage electrical components, use a damp cloth for the exterior and compressed air to clear out dust from vents and motor housings. For example, a power drill clogged with sawdust can overheat, reducing motor efficiency and potentially causing costly damage or even failure.
Don’t overlook wooden handles. Avoid soaking them in water, as this can lead to cracking or splitting. Instead, wipe them with a damp cloth and dry them immediately. Only disassemble components if the manufacturer recommends it.
To make this process easier, set up a cleaning station stocked with the essentials. Having everything within reach encourages you to clean your tools, even after a long, exhausting project. It’s a routine many professionals swear by because they know that clean tools are dependable tools.
While cleaning, take a moment to inspect your tools for issues like loose screws, worn grips, or other damage. This quick check can save you time and money, potentially reducing repair costs by up to 30% [2].
2. Store Tools in a Dry, Organized Space
Taking care of your tools doesn’t stop at cleaning and maintenance - how you store them is just as important. In fact, a 2023 survey of DIY enthusiasts revealed that over 60% of respondents cited rust as their biggest tool maintenance challenge[3].
To avoid this, store your tools in a dry, well-ventilated area, far from any sources of moisture. Damp basements or garages might seem convenient, but unless they’re climate-controlled, they can wreak havoc on your tools. If these spaces are your only option, you might want to invest in a dehumidifier or slip silica gel packets into your toolboxes to keep humidity in check[6]. Aim to keep the storage area at a steady temperature - somewhere between 50°F and 80°F - to minimize condensation that could lead to rust[1].
Keeping tools organized is just as crucial. Use toolboxes, racks, or wall-mounted pegboards to keep everything in its place. Pegboards are particularly handy for smaller hand tools like hammers and screwdrivers, making them easy to see and grab. For power tools, their original hard cases offer excellent protection from dust and damage.
Did you know that tools stored in dry and orderly conditions can last up to 50% longer[1]? For example, a well-maintained power drill can serve you for over a decade, while one left exposed to moisture might only last 2–3 years[1]. Choose storage solutions based on the type of tool. Use tool chests or drawer organizers for smaller items, and reserve shelves or cabinets for bulkier power tools. Rolling carts are a great option for heavy or frequently used tools, offering both storage and mobility[8]. Always avoid placing tools directly on concrete floors, as they can retain moisture and transfer it to your equipment.
If you have an extensive collection of tools, platforms like Toolstash can make life easier. These tools offer features like inventory tracking, smart categorization, and location tagging, helping you stay organized and ensuring you always know where everything is stored. This not only saves time but also reduces the risk of losing or damaging tools.
For an extra layer of organization, consider custom foam inserts to keep tools secure and to highlight any missing items[7]. Label your storage spaces and group tools by function - keep all cutting tools together, for instance, and do the same for measuring tools. A streamlined system like this not only makes your workspace more efficient but also ensures your tools are ready to perform whenever you need them.
3. Oil Moving Parts Regularly
Keeping your tools properly lubricated is key to extending their life and ensuring they work smoothly. Without oil, moving parts can grind against each other, leading to friction, wear, and even rust. Oiling is a simple yet powerful step in your tool maintenance routine.
Any tool with moving parts - like hinges, gears, or sliding mechanisms - needs regular attention. Think of hand saws, pliers, wrenches, garden shears, power drills, and pneumatic tools. Even a humble pair of scissors can benefit from occasional oiling at the pivot point, helping it last longer.
When choosing a lubricant, make sure it’s the right one for the job. For most hand tools and power tools, a basic machine oil or an all-purpose lubricant like WD-40® works well. Pneumatic tools, however, need specialized lubricants designed for compressed air systems. Always check your tool’s manual before applying anything - using the wrong oil can harm rubber or plastic parts and might even void your warranty.
How often should you oil? It depends on how and where you use your tools. For tools you use regularly, a few drops every few uses or on a monthly basis should suffice. Pneumatic tools often need daily lubrication, while tools used only occasionally may require oiling once per season.
Applying oil correctly is just as important as choosing the right type. Start by cleaning the tool to remove dust, debris, or old grease that could interfere with the fresh oil. Then, apply just a few drops directly to the moving parts - like pivot points, gears, or sliding mechanisms. Move the tool through its full range of motion to spread the oil evenly. Wipe off any excess to prevent it from attracting dirt. Over-oiling can lead to jams, so it’s better to use less and reapply as needed.
Pay attention to signs that your tools need care. Squeaking, stiffness, or visible rust are clear indicators that it’s time to oil. On the flip side, too much oil can cause problems by attracting debris, so aim for a light, consistent touch.
If keeping track of maintenance feels overwhelming, tools like Toolstash can help you schedule and log care for every tool in your collection.
4. Check Tools for Damage and Wear
Keeping your tools in good condition starts with regular inspections. Did you know that over 30% of DIY tool-related accidents are linked to damaged or worn tools? [6] Spotting damage early can prevent accidents and extend the life of your tools. Here's how to inspect different types of tools effectively.
For power tools, start by checking cords, plugs, and casings. Look for frayed wires, exposed insulation, or cracks in the casing. Pay attention to bent or loose plug prongs, as these can cause electrical shocks or even fires. Unusual sounds during operation might also signal a problem. Always unplug power tools before inspecting them to avoid potential hazards.
When it comes to hand tools, watch for cracks, chips, or loose parts. Tool heads, like those on hammers and chisels, should be free of damage, especially around striking surfaces. Wooden handles need extra attention - check for splinters, splits, or soft spots. If the tool has a metal handle, ensure it’s secure and that screws or bolts are tight.
Rust and corrosion can also sneak up on you, especially in humid environments. Even small rust spots can spread quickly. Inspect hinges, joints, and adjustable parts to make sure they move smoothly without sticking or wobbling. These moving parts are easy to overlook but essential for safe and efficient tool use.
Make it a habit to inspect tools both before and after each use. For tools you use frequently, do a detailed monthly check. For seasonal or stored tools, give them a thorough once-over before putting them back to work.
If you spot damage, stop using the tool immediately. A frayed cord or cracked handle is a clear sign to pause. For electrical problems, consult a professional. If the damage is severe, it may be time to retire the tool altogether.
To stay organized, consider keeping an inspection log. A digital tool like Toolstash can help you track inspection dates, record issues, and set reminders. Regular inspections and maintenance can extend a tool's lifespan by up to 50% compared to neglected tools [4]. That’s a habit worth adopting - it saves money and keeps you safer in the long run.
5. Tighten Loose Parts
Loose screws, bolts, and fasteners might seem like minor issues, but they can turn your DIY project into a potential safety hazard. Regularly inspecting and tightening these components can increase your tools' lifespan by as much as 30% - a simple yet highly effective maintenance step[10].
Frequent use causes vibrations that gradually loosen fasteners on both hand and power tools. For example, your hammer handle might start to wiggle, or a circular saw blade could develop a noticeable wobble. Adjustable wrenches and ratchets are particularly vulnerable to loosening due to the constant stress they endure[10][5].
Start by looking for warning signs like rattling noises, visible gaps between parts, wobbly handles, or a drop in performance. A loose miter saw blade, for instance, can result in inaccurate cuts, while a shifting hammer handle might slip just when you need precision the most[1][8].
Before tightening any parts, always unplug power tools or remove their batteries to avoid accidental startups. For hand tools, ensure they’re clean and dry before beginning maintenance. This preparation ensures the tightening process goes smoothly and effectively.
Use the correct tool for each fastener. Keep a basic set of flathead and Phillips screwdrivers, adjustable wrenches, and hex keys on hand for these tasks[9][8]. Using the wrong tool can strip threads or damage fastener heads, potentially creating bigger issues down the line.
When tightening, aim for secure but not overly tight. If the manufacturer provides torque specifications, follow them closely to avoid damaging the tool. For fasteners that tend to loosen repeatedly, consider using a thread-locking compound like Loctite. Clean the threads first, apply a small amount of the compound, and reassemble. This helps prevent loosening caused by vibrations[1].
Don’t overlook rolling tool carts with loose caster screws. A detached caster can cause the cart to tip, potentially leading to injuries or damage to your equipment. Check the mounting hardware on workbenches, tool stands, and storage units monthly to avoid these hazards[8].
Make it a habit to inspect and tighten loose parts regularly. Check frequently used tools before and after each project, and give all your tools a thorough once-over at least once a month. Tools that experience heavy use or generate a lot of vibration may need even more frequent checks[8].
To stay organized, consider using Toolstash to log inspection dates and set reminders for future checks. This way, no tool gets overlooked, and you can maintain a consistent maintenance routine.
Taking just a few minutes to tighten fasteners can save you hours of frustration later. Regular inspections not only reduce the risk of injuries and tool failures but also keep your projects running smoothly[8][3].
6. Keep Cutting Tools Sharp
Sharp tools are an absolute must for any DIY enthusiast, yet they often end up overlooked in home workshops. Surprisingly, dull blades account for nearly 40% of hand tool injuries in these spaces, as they demand more effort and are harder to control[10]. Struggling to make a clean cut through wood or fabric? That’s a clear sign your tools need sharpening.
The difference between a sharp and dull tool is night and day. A sharp chisel glides through wood, leaving smooth, clean edges that barely need sanding. On the other hand, a dull blade can tear and splinter material, forcing you to use more pressure - making accidents far more likely. If your tools aren’t performing like they used to, it’s time for maintenance.
Knowing when to sharpen your tools is key to both safety and quality. Watch for these red flags: trouble making clean cuts, needing extra effort to complete a cut, visible nicks or dull spots on the blade, or splintered and uneven edges[8]. If your saw blade starts binding in wood or you notice yourself pushing harder than usual, don’t ignore it - sharpening is overdue.
Different tools require different sharpening methods. For hand saws and chisels, files or sharpening stones work well. Utility knives often just need a blade replacement. Scissors can be refreshed with a fine file or dedicated sharpener, while power tool blades might need a diamond blade sharpener or even professional servicing[8]. Always check the manufacturer’s guidelines to maintain the correct blade angles.
Before sharpening, clean your tools thoroughly. Once sharpened, wipe the blade with a lightly oiled cloth to ward off rust[5][6]. These small steps ensure your tools stay in top shape and protect your investment.
How often should you sharpen? It depends on how much you use your tools. If you’re a heavy user, weekly sharpening might be necessary. For occasional DIYers, monthly maintenance should suffice[7]. Regular sharpening can extend the life of your tools by 30% or more and save you money on replacements[7]. Make it a habit to inspect and sharpen tools after big projects or whenever performance dips[8].
Safety is non-negotiable when sharpening. Always wear gloves and eye protection, secure tools firmly to prevent slips, unplug power tools, and remove blades before sharpening[1]. Using the wrong angle or technique can permanently damage your tools, so take the time to learn the correct methods for each type.
Storage is just as important as sharpening. Keep your tools in protective sheaths or cases to maintain their edges and prevent accidents. A sharp blade tossed loosely in a drawer will quickly dull from contact with other tools or materials.
For a more organized approach, consider using digital tools like Toolstash. It lets you log sharpening dates, set reminders, and categorize your cutting tools, ensuring no tool is forgotten. This simple system keeps your workshop running smoothly and your tools performing their best.
7. Remove Rust Right Away
Rust doesn’t waste time - it can spread fast. Even a little moisture can trigger corrosion within hours, weakening your tools and creating potential safety issues. What starts as a tiny rust spot can quickly grow if ignored. That’s why removing rust as soon as you spot it is essential to keep your tools in good shape and avoid accidents[2].
Tools with exposed steel surfaces - like wrenches, pliers, saw blades, and chisels - are especially at risk because they often come into contact with moisture and skin oils[2].
For light rust, you can usually handle it with simple abrasive methods. Steel wool, wire brushes, or fine-grit sandpaper are great for surface rust that hasn’t penetrated deeply. Start gently to avoid scratching or damaging the tool. If the rust is more stubborn, you may need to bring in chemical rust removers.
Products like WD-40®, Evapo-Rust, or naval jelly are effective options. Always use these in a well-ventilated area while wearing gloves and safety glasses[2]. Follow the instructions carefully - leaving these products on too long can harm the metal underneath.
For a more natural approach, household items like white vinegar, baking soda paste, or lemon juice mixed with salt can work wonders on light rust[2]. Soaking tools in white vinegar overnight can help loosen tough rust, making it easier to scrub away.
If you’re cleaning rust off power tools, always unplug them first for safety[1][2]. Once the rust is gone, make sure every part is completely dry before putting the tool back together.
After cleaning, protection is key. Dry your tools thoroughly - any lingering moisture will kickstart the rusting process all over again. Apply a thin layer of oil or a rust inhibitor to protect the metal surfaces[7][5]. Combine this with regular cleaning and inspections to keep your tools in prime condition.
Storing your tools in a dry, controlled environment is another vital step in rust prevention. If you have a large collection, staying organized can make maintenance easier. Consider using a tool management system like Toolstash to track rust treatments and keep a consistent care schedule. Categorizing tools by material can also help you focus on those most prone to rust.
Regular checks are your best defense. Inspect your tools after each use, paying extra attention to cutting edges and joints where moisture tends to collect[7][5]. Adding rust inspections to your maintenance routine will go a long way in extending the life of your tools.
8. Replace Worn Handles and Grips
A worn handle or grip isn't just inconvenient - it can be downright dangerous. Damaged grips can make it harder to control your tools, increasing the risk of slips and injuries, especially during tasks requiring precision or force. The U.S. Consumer Product Safety Commission reports that thousands of hand tool-related injuries send people to the ER each year, with many tied to slipping or loss of control[11].
To avoid these risks, check your tool handles and grips every month[7]. Look for cracks, splinters, or breaks in wooden handles, and inspect grips for looseness, tears, or missing sections. If a handle feels unstable, slippery, or uncomfortable, it’s time to replace it[2].
In fact, a 2022 survey revealed that more than 60% of DIYers noticed better tool performance and less hand fatigue after swapping out worn grips[7]. When choosing replacement materials, keep in mind their specific benefits:
- Hardwood handles (like hickory or ash) are durable and absorb shock well.
- Fiberglass handles resist weathering and are lightweight.
- Rubberized grips offer excellent comfort and slip resistance[2].
Replacement costs are minimal compared to the benefits. Basic wooden handles range from $5 to $15, while ergonomic grips can cost $15 to $40. It’s a small price for improved safety and performance[7].
| Handle Type | Comfort Level | Safety Features | Price Range |
|---|---|---|---|
| Standard Wood | Moderate | Basic | $5–$15 |
| Rubberized/Ergonomic | High | Anti-slip | $15–$40 |
| Composite/Plastic | Moderate | Varies | $10–$25 |
Replacing a handle takes care and proper safety measures. Always wear gloves and eye protection, especially when removing splintered or damaged handles. Make sure the tool isn’t under tension, then carefully remove the old handle using a saw, chisel, or solvent. Clean the attachment area thoroughly before fitting the new handle, and double-check that it’s securely in place[2].
If you own a large collection of tools, keeping track of maintenance can feel overwhelming. Consider using a tool management app like Toolstash to log conditions, set reminders for inspections, and track when handles were last replaced. Staying organized helps you address issues before they turn into bigger problems.
Users often rave about ergonomic grips, citing improved comfort and control[7]. Investing in better grips doesn’t just make your tools safer - it makes your projects more efficient and less tiring, too.
9. Use Tools for Their Intended Jobs
Using tools in ways they weren’t designed for can lead to damage and serious injuries. The U.S. Consumer Product Safety Commission reports that over 400,000 emergency room visits each year are tied to hand and power tool injuries, with a large chunk of these caused by improper use[3].
Misusing tools doesn’t just put your safety at risk - it also compromises the tools themselves. According to the National Safety Council, up to 30% of tool-related injuries in home workshops are due to using tools incorrectly[3]. These aren’t just minor scrapes or bruises; they’re significant accidents that could often be avoided by simply using the right tool for the job.
Tools are built to handle specific stresses and loads. When you push them beyond those limits, you risk internal damage that might not be immediately visible. For instance, using a screwdriver to pry open a paint can could weaken its shaft. It might look fine, but the next time you use it, it could snap unexpectedly. Proper use is just as important as regular maintenance when it comes to keeping your tools in good shape.
Here’s a quick look at some common examples of correct and incorrect tool use:
| Tool Used Correctly | Tool Misused (Wrong Job) | Consequences |
|---|---|---|
| Screwdriver for screws | Screwdriver as pry bar | Bent or broken shaft, potential injury |
| Wrench for bolts/nuts | Wrench as hammer | Deformed jaws, reduced grip strength |
| Pliers for gripping | Pliers as wrench | Damaged jaws, tool failure |
Improper use also hits your wallet. A misused tool often leads to damage that can’t be repaired, forcing you to buy replacements. Worse, manufacturers may void warranties if they determine the tool was used improperly[2]. Over time, these costs can add up, especially if multiple tools fail unexpectedly.
If you’re unsure about which tool to use for a specific task, check the manual or visit the manufacturer’s website[3]. These resources provide detailed guidance on how to use tools properly and highlight their limitations. Unfortunately, many DIYers skip this step, increasing the chances of misuse.
For larger tool collections, platforms like Toolstash can help organize and categorize your tools, making it easier to grab the right one for the task at hand and avoid costly mistakes.
Stick to the basics: use the correct tool for every job. Doing so will extend the life of your tools, improve the quality of your projects, and save you from the frustration and expense of replacing damaged equipment.
10. Set Up a Regular Maintenance Schedule
Keeping your tools in top shape requires a consistent maintenance routine. Without one, it's easy to let minor upkeep slide until a tool breaks down or shows noticeable wear. Regular maintenance not only helps you avoid costly replacements but also ensures your tools are always ready to perform, boosting productivity and efficiency.
Here’s how you can break down your tasks based on how often they need attention:
- Daily: Clean your tools after each use, inspect them for any signs of damage, and store them properly.
- Weekly: Give frequently used tools a deeper clean, lubricate moving parts, and update your inventory list.
- Monthly: Conduct a thorough inspection, sharpen cutting tools, and check the accuracy of measuring instruments.
- Annually: Calibrate precision tools, refurbish power tools, and replace any items that are no longer safe to use.
Following this structured approach keeps your tools reliable and ready for whatever your projects demand.
To stay on track, consider using digital tools to manage your schedule. For example, platforms like Toolstash provide smart categorization, inventory tracking, and maintenance reminders. Whether you prefer using your phone’s calendar, a simple spreadsheet, or a tool management app like Toolstash, setting reminders ensures you never miss an important maintenance task.
Keep a record of maintenance dates; this helps you identify which tools need extra care and attention over time.
Conclusion
Taking care of your tools isn’t just about keeping them in good shape - it’s about protecting your investment and ensuring your projects run smoothly. Research shows that sticking to a regular maintenance routine can cut tool replacement costs by up to 30% over five years and extend tool lifespan by an average of 25% [7]. Yet, a survey of DIY enthusiasts revealed that more than 60% faced tool failures simply because they skipped basic upkeep tasks [7]. It’s clear: a little effort goes a long way.
Simple steps like cleaning, lubricating, proper storage, and regular inspections make a big difference. Case studies highlight that regular maintenance not only reduces replacement costs by as much as 40% but also keeps your projects on schedule. For instance, cleaning tools after each use, storing them in dry conditions, and applying oil when needed can save you from expensive breakdowns.
The key is consistency and building habits. Start small - clean your tools after every use - and gradually incorporate a full maintenance routine. The benefits speak for themselves: fewer replacements, smoother projects, and tools that last longer.
For an extra layer of convenience, platforms like Toolstash make managing your tools even easier. With features like inventory tracking, maintenance reminders, and AI-powered assistance, you’ll never lose track of what needs attention. Plus, location tracking ensures you always know where your tools are when you need them.
FAQs
What’s the best way to protect my tools from rust in humid conditions?
To protect your tools from rust in humid conditions, start by keeping them in a dry, well-ventilated area. Adding a dehumidifier or silica gel packs to your storage space can help control moisture levels. Make it a habit to clean and thoroughly dry your tools after each use, then apply a thin layer of oil or a rust-preventive spray to shield metal surfaces.
If staying organized feels like a challenge, you might want to check out a tool management platform like Toolstash. It helps you track your tools and their condition, ensuring they’re always stored properly and ready for your next project.
How can I tell if a tool needs sharpening or oiling?
Keeping your tools in top shape is essential, and there are a few clear signs that they might need some attention. If you're working with cutting tools like saws or chisels and notice they feel dull, struggle to make clean cuts, or leave behind rough edges, it's probably time to sharpen them. For tools with moving parts - think wrenches or shears - stiffness, squeaking, or resistance during use often means they need oiling. Regular upkeep doesn’t just improve how your tools perform; it also helps them last longer. Make it a habit to check your tools after each use so you can spot these issues early on.
How often should I check and maintain my tools to keep them in good working condition?
Performing regular maintenance on your tools is key to keeping them in excellent condition. For hand tools, it’s a smart idea to give them a quick once-over after every use. This way, you can spot any wear or issues early. Power tools require a bit more attention - plan for a detailed inspection every 3 to 6 months, depending on how frequently they’re used. After each use, take the time to clean your tools and store them in a dry, secure spot to avoid rust or unnecessary damage.
To make life easier, you might want to try a tool management platform. These platforms can help you track maintenance schedules and keep everything organized, so your tools are always ready whenever inspiration hits!