Features
- Prepare and paint surface the same day with a tough, with tub and tile’s 2-part epoxy acrylic formula that withstands moisture and resists corrosion
- For best results, thoroughly mix parts A and B separately before mixing together for 2 minutes; once combined be sure to use within 6 hours of mixing
- Each kit covers up to 110 sq. ft.; two coats highly recommended; wait 1-2 hours to recoat allow bathroom paint to dry for 3 days before exposing to water
- Make sure to adequately ventilate area when using tub and tile paint by opening windows and turning on a fan to circulate air
- Properly prep surface and read all directions included in kit thoroughly before beginning project
Specifications
| Color | White |
| Size | 32 Fl Oz (Pack of 1) |
| Unit Count | 1 |
Related Tools
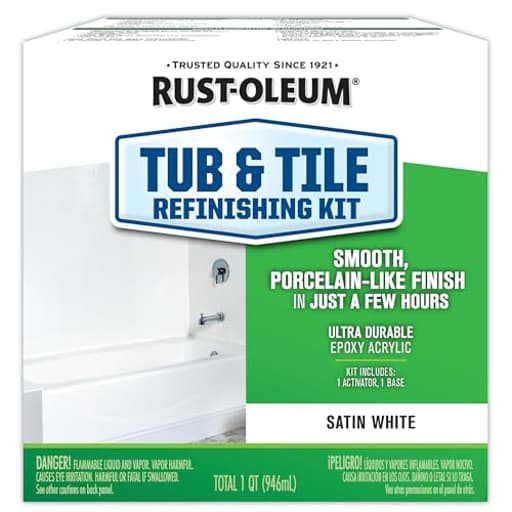
Two-part epoxy-acrylic tub and tile refinishing kit in satin white for restoring and coating bathroom surfaces. Mix parts A and B separately, then together for 2 minutes; one 32 fl oz kit covers about 110 sq ft, two coats are recommended, recoat after 1–2 hours and allow 3 days before exposing to water. The coating resists moisture and corrosion; use within 6 hours of mixing, ventilate the area, and follow surface preparation and instructions.
Rust-Oleum 385279 Tub And Tile Refinishing 2-Part Kit, Satin White, 32 Fl Oz Review
Why I reached for this kit
A tired bath can make an entire home feel dated. Mine had a perfectly sound enameled tub and a tile surround that had yellowed over the years. Replacement would have meant demolition, a plumber, and weeks of disruption. I wanted a fast, budget‑friendly refinish that could stand up to daily moisture. That’s how I ended up using the Rust‑Oleum tub‑and‑tile kit in satin white.
This is a two‑part epoxy‑acrylic coating designed for bathroom surfaces. It’s not spray-on; you mix, roll, and brush it like a paint. The appeal is clear: prepare and coat in a day, recoat in 1–2 hours, and get a hard, moisture‑resistant finish after a full cure.
What’s in the box and surface prep
The kit includes Part A and Part B, and basic instructions. You’ll need to supply:
- Abrasive cleaner and sandpaper for scuffing
- Painter’s tape, drop cloths, and plastic sheeting
- A high‑quality 1/4" nap or microfiber roller and a fine‑bristle brush for edges
- Respirator with organic vapor cartridges, goggles, and nitrile gloves
- A couple of disposable roller covers and trays
As with any coating, the finish is won or lost in prep. I removed all caulk, scrubbed the tub and tile with an abrasive cleaner to cut soap scum, rinsed thoroughly, and let everything dry completely. Then I lightly sanded the glazed tile and tub with fine grit to dull the sheen and improve adhesion, vacuumed the dust, and wiped down with a lint‑free rag. Finally, I masked every edge and fixture and draped plastic over the floor and vanity.
If you’re on the fence about the prep effort, this isn’t a product to “wing.” Give yourself the time to do it right—the coating rewards a clean, scuffed, dust‑free surface.
Mixing and working time
The chemistry matters here. I stirred Part A and Part B separately to reincorporate any settled solids, then combined them and mixed for a full two minutes. Once mixed, the clock starts; you’ve got roughly six hours of usable pot life. I poured small amounts into a roller tray so I wasn’t constantly exposing the full batch to air.
Plan your path before you start so you’re not painting yourself into a corner. I cut in tight spots with a brush, then rolled larger faces. Thin, even coats are key. The coating self‑levels, but only if you resist the urge to keep going back over the same spot once it starts to tack.
A note on tools: skip foam rollers. They tend to soften and shed with this formula. A tight‑weave microfiber or 1/4" nap cover lays it down more predictably with fewer bubbles.
Application cadence and dry times
The kit recommends two coats and allows a recoat window of 1–2 hours. On my darker tile, I ended up doing three thin coats to fully hide the old color. I waited about 90 minutes between coats—long enough to be dry to the touch, not so long that I missed the recoat window. If you see a dust nib or a small run after the first coat, a light pass with fine sandpaper once it’s dry to the touch will knock it down; just wipe away the dust before recoating.
Once you’ve finished, patience is non‑negotiable: the instructions call for a three‑day wait before exposing the surface to water. I left the room taped off and well ventilated the entire time.
The elephant in the room: odor and ventilation
The odor is strong—industrial strong. This is not a mild, latex‑paint smell. I wore a respirator with organic vapor cartridges and sealed goggles during application, opened windows, ran the bath fan, and set a box fan to exhaust out the window. Even with that, the smell migrated into adjacent rooms during the first day.
My advice: plan to keep people and pets out of the area, run fans continuously, and, if possible, schedule the project for a time you can leave the house for several hours after each session. The odor diminishes after the first day but lingers faintly until full cure.
Finish and appearance
The satin white reads as a clean, modern white with a soft sheen—less reflective than a high‑gloss porcelain but still bright. On vertical tile, the finish leveled nicely. On the tub floor and curved apron, I could see a hint of orange‑peel texture if I went looking for it under side light. That’s the tradeoff with brush‑and‑roll application. It’s not a factory finish, but it’s cohesive, uniform, and a drastic improvement over yellowed tile and a scuffed tub.
Edges, corners, and grout lines looked surprisingly even. Cutting in with a high‑quality brush helps. Any small dust flecks I spotted after the first coat were easy to nib‑sand before the next coat.
Coverage tracked closely with the spec—up to about 110 square feet per kit. My surround and tub consumed most of a single kit with three coats on the tile and two on the tub. If you’re covering a very dark color or tackling extra surfaces (like a vanity top), consider having a second kit on hand to avoid stretching the material too thin.
Durability and day‑to‑day use
Once cured, the surface feels hard and non‑chalky. Water beads, and soap scum wipes off with a non‑abrasive cleaner and a soft sponge. I avoid harsh abrasives and scouring pads to preserve the coating. The high‑wear areas—the tub floor and around the drain—are the places I watch most closely. Good prep and full cure time make a big difference there.
Because this is a two‑part mix, you can’t store leftovers for touch‑ups beyond the working window; if you need to repair a chip months later, you’ll be opening a new kit. The upside is that the chemical cure yields a tougher film than most one‑part “tub paints.”
Tips to get better results
- Respect the prep. Degrease thoroughly, rinse, dry, and scuff the surface. Any residue will telegraph into the finish or interfere with adhesion.
- Stage ventilation in advance. Windows open, fans exhausting, doors closed to the rest of the home. Wear a proper respirator, gloves, and eye protection.
- Mix by the book. Stir A and B separately, then together for two minutes. Don’t guess.
- Work thin and don’t overbrush. Let the product self‑level. If you chase every little mark, you’ll introduce more texture.
- Use the right roller. A tight microfiber or 1/4" nap cover will out‑perform foam.
- Plan your coats. Two coats are typical; darker substrates may need three. Stick to the 1–2 hour recoat window.
- Give it the full cure. Protect from water for three days. Re‑caulk after cure, not before.
Where it shines—and where it doesn’t
Strengths:
- Cost‑effective alternative to replacement or professional reglazing
- Can transform a room in a weekend with basic tools
- Hard, moisture‑resistant film once cured
- Fast recoat times keep the project moving
Tradeoffs:
- Very strong odor during application and early cure; ventilation and PPE are essential
- Limited working time once mixed
- Roll‑and‑brush finish may show slight orange peel compared with a sprayed, factory surface
- Surface prep is non‑negotiable and takes time
A quick word on compatibility: I had excellent results on glazed ceramic tile and an enameled metal tub. For other substrates, especially flexible plastics, verify suitability before committing.
Value
Compared with the cost and disruption of replacement, the kit is a clear value. One kit can cover a typical tub and a modest surround with multiple coats. The real “cost” is your time, preparation, and comfort working with a solvent‑heavy, two‑part product. If you can handle that, the return on investment is high.
Recommendation
I recommend the Rust‑Oleum tub‑and‑tile kit to homeowners and pros tackling sound but dated ceramic tile and enameled tubs who want a budget‑savvy refresh. It delivers a durable, uniform satin finish and moves quickly thanks to short recoat times. You must be willing to do meticulous prep, ventilate aggressively, and live with a slight roller texture versus a factory gloss. If you need a low‑odor, kid‑and‑pet‑friendly project or can’t vacate the area during application and cure, this isn’t the right choice. For everyone else, it’s a practical, hardworking kit that can make an old bath look clean and contemporary without tearing anything out.
Project Ideas
Business
Mobile Tub & Tile Touch-Up Service
Offer on-site quick refinishing for tubs, sinks, and tile surrounds as an affordable alternative to replacement. Market to homeowners and landlords, schedule same-day prep-and-paint visits (kit allows same-day prep and painting), and guarantee a water-ready finish after the prescribed cure period.
Turnkey Turnover Package for Property Managers
Create a standardized bathroom-refresh package for rental turnovers: tub/sink refinishing, grout touch-up, and minor cosmetic repairs. Faster and cheaper than replacements, this reduces vacancy time and can be sold as a recurring contract service.
Home Staging & Real Estate Refresh
Partner with real estate agents and home stagers to offer quick bathroom brightening prior to showings. A satin-white refinished tub and tiles can significantly improve listing photos and perceived value at modest cost and lead time.
Refurbish-and-Resell Vintage Fixtures
Buy damaged but salvageable bathtubs, sinks, or enamelware from estate sales, refinish them with the kit, and resell as 'like-new' vintage fixtures to boutique renovation clients. Keep a workflow that respects the kit's mixing/use window and cure times for consistent quality.
Workshops & DIY Kits for Homeowners
Host small-group workshops teaching homeowners how to safely prep and apply two-part tub-and-tile coatings (emphasize ventilation, mixing, and recoat timing). Sell ready-to-go kits, PPE, and follow-up consulting—position as a hands-on, lower-cost renovation alternative.
Creative
Vintage Tub Revival
Refinish an old enamel or fiberglass tub to a bright satin-white finish. Thoroughly prep, apply two coats per kit instructions (recoat after 1–2 hours), and finish with 3 days cure before use—gives an instant spa-like upgrade without replacing the tub.
Shower Tile Mural Refresh
Paint a worn tile surround with a clean, uniform satin-white base to brighten a small bathroom, then add waterproof stencils or waterproof-safe pigments on top to create a subtle mural. Use the kit's moisture-resistant formula for the base coat and wait full cure before exposing to water.
Upcycled Ceramic Sink Makeover
Resurface a dated or stained ceramic sink or bathroom countertop to match modern fixtures. The epoxy-acrylic finish resists moisture and corrosion—follow mixing/use windows (use within 6 hours) and apply two thin coats for a durable, resale-ready surface.
Pet Wash Station or Laundry Tub Recoat
Convert a grimy utility tub into a clean, hygienic pet-wash or laundry station by refinishing it with the kit. The moisture-resistant coating makes cleaning easier and the satin-white finish reflects light, making the workspace feel fresher.
Weatherproof Small Outdoor Planters
Refinish the interior or exterior of ceramic or metal planters to refresh their look and add a moisture-resistant layer—good for sheltered outdoor spots. Ensure adequate ventilation while applying and avoid heavy outdoor exposure until full cure.