Features
- Prepare and paint surface the same day with a tough, with tub and tile’s 2-part epoxy acrylic formula that withstands moisture and resists corrosion
- For best results, thoroughly mix parts A and B separately before mixing together for 2 minutes; once combined be sure to use within 6 hours of mixing
- Each kit covers up to 110 sq. ft.; two coats highly recommended; wait 1-2 hours to recoat allow bathroom paint to dry for 3 days before exposing to water
- Make sure to adequately ventilate area when using tub and tile paint by opening windows and turning on a fan to circulate air
- Properly prep surface and read all directions included in kit thoroughly before beginning project
Specifications
| Color | White |
| Size | 32 Fl Oz (Pack of 1) |
| Unit Count | 1 |
Related Tools

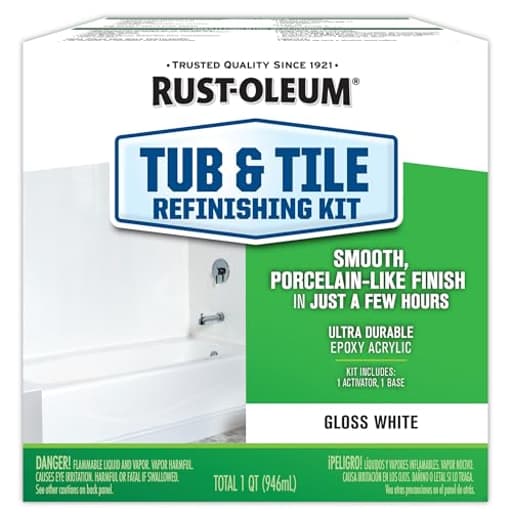
This 2-part epoxy-acrylic tub and tile refinishing kit provides a gloss white coating for refinishing bathtubs and ceramic tile surfaces and resists moisture and corrosion. The 32 fl oz kit covers up to 110 sq ft, requires thorough mixing of parts A and B and use within six hours, and typically needs two coats with 1–2 hours between coats and a 3-day cure before water exposure; ensure adequate ventilation and follow all surface-preparation instructions.
Rust-Oleum 384165 Tub And Tile Refinishing 2-Part Kit, 32 oz, Gloss White Review
Why I reached for this kit
I had two bathrooms begging for attention: one with a dated, beige tile surround and another with a tired, off-color tub and vanity top. Full replacement wasn’t in the budget or timeline. I needed something that could make a dramatic visual change, bond well to slick surfaces, and stand up to moisture. That’s exactly why I chose the Rust-Oleum tub-and-tile refinishing kit. It’s a two-part epoxy-acrylic system in a high-gloss white, designed for tubs and ceramic tile, with a working window long enough to coat a typical project in a single day.
This is not a casual “slap it on” paint. It’s a coating that rewards careful prep and methodical application—and punishes shortcuts. Used correctly, it can transform an old surround or vanity into something that looks clean, bright, and modern.
What I used it on
- Ceramic tile surround (beige to white)
- Enameled steel tub (cream to white)
- Laminate vanity top (as a test, over a proper bonding primer)
- Brief adhesion test on an older fiberglass panel I keep for product trials
Results varied by surface. On tile and the steel tub, adhesion was excellent. On the vanity (with primer), the finish cured hard and cleaned up well. On the fiberglass test, adhesion was less confidence-inspiring—more on that in the limitations section.
Prep is most of the job
If there’s a secret to getting this product to work, it’s surface prep. I followed a routine that has served me well for coatings like this:
- Remove all caulk and hardware. Mask meticulously; this coating flows and will find its way under sloppy tape lines.
- Scrub with an abrasive cleaner to cut soap scum and body oils. Rinse thoroughly and dry.
- Sand with 220–320-grit to dull the shine and create a uniform scratch profile. Vacuum and wipe with a lint-free rag.
- Wipe-down with a solvent such as acetone or denatured alcohol to remove residual dust and oils. Let flash off completely.
Skipping any of these steps is where most failures start. If your surface still beads water after cleaning, keep cleaning; this coating wants a squeaky-clean substrate.
Mixing and pot life
This is a two-part system. I stirred Part A and Part B separately, then combined and mixed for a full two minutes. The mixture is usable for about six hours, which is generous enough to get two to three coats on a surround without rushing.
I recommend decanting into a smaller tray as you go to minimize skinning and keeping a loose cover over the tray between coats. Don’t thin it. Keep an eye on temperature and humidity—warmer, drier conditions accelerate working time.
Application: tools and technique
I tried foam and short-nap rollers. Foam broke down almost immediately in contact with the coating; skip it. A 1/4-inch microfiber or mohair roller paired with a good-quality brush for edges worked best. My approach:
- First coat: very thin. Think of it as a bonding coat, not a hiding coat. Roll in one direction and resist the urge to go back over spots that start to tack. This coating self-levels if you leave it alone.
- Second coat: after 1–2 hours, when the first is dry to the touch but still within the recoat window. Slightly heavier, still careful not to overwork.
- Third coat (optional): for darker substrates or if you want the gloss to really pop. Before the third, I lightly wet-sanded with 220–320 grit to knock down dust nibs, wiped clean, and recoated.
Plan your exit—literally. Start at the farthest point and work toward the door so you’re not stepping over freshly coated surfaces.
Ventilation and safety
The odor is intense. This is a high-VOC, solvent-rich coating. I wore an organic vapor respirator, safety glasses, and gloves, and I had a box fan exhausting to a window with another fan pulling make-up air from a different room. I closed adjacent doors and sealed the bottom gaps with towels. Even with that, I could smell it faintly in the hallway.
If you have pets, kids, or sensitive lungs, plan to be out of the house for a while after application. The coating dries to the touch fast, but the smell lingers until the solvents fully dissipate.
Finish quality
The cured finish is a high-gloss white—bright enough that it can make neighboring “white” fixtures look a shade darker. On vertical tile, the coating leveled surprisingly well and hid grout lines uniformly. On the tub, I saw a slight orange-peel texture under raking light. That’s normal for rolled epoxies. If you want a glass-flat finish, you’d need to spray professionally; with a roller, “very good” is the realistic target.
Edges and inside corners benefit from carefully “tipping off” with a brush immediately after rolling. Don’t chase drips for more than a minute or two; you’ll create tracking and drag marks as it tacks.
Dry time and cure
I kept 1–2 hours between coats and then left everything alone for 72 hours before any water exposure, per the instructions. That wait is non-negotiable. The surface hardens quickly, but full cure takes days. I held off on re-caulking until after cure, and I avoided placing anything heavy or rubber-footed on the surface for a week.
Durability and maintenance
After curing, the finish is hard and cleans up well with non-abrasive cleaners. On the tile surround and vanity, it’s been easy to keep bright and stain-free. On the tub floor (a high-wear, high-immersion area), the coating feels tough, but I treat it with care:
- No suction-cup bath mats.
- No abrasive powders or scouring pads.
- Wipe down after use to minimize standing water.
- Use a mild, non-bleach cleaner.
Expect years, not decades. If you go in with that mindset, you’ll be pleased with how far a single kit gets you.
Limitations and lessons learned
- Substrate matters. On ceramic tile and enameled steel, adhesion was excellent. On my fiberglass test panel, I could scratch through more easily, even with aggressive prep. If your tub is fiberglass or acrylic, confirm compatibility and be realistic—flexing and thermal cycling can challenge any rigid coating.
- Fumes are no joke. Use a real respirator with organic vapor cartridges and plan ventilation in advance.
- Don’t overroll. The coating wants to level; constant back-rolling introduces texture and can lift the film as it tacks.
- Coverage is honest. One kit was enough for a standard tub surround with two to three coats, with a little left over. Large surrounds or multiple fixtures may need a second kit.
- Color match. The white is bright. If you’re only doing the tile and leaving an off-white tub, the contrast will be obvious.
Practical tips
- Stir both parts separately before combining, then mix together for two minutes.
- Work in sections and keep a wet edge, but stop fussing once it starts to tack.
- Lightly sand between coats if you have nibs, runs, or dust; wipe with a solvent-dampened cloth and let it flash dry before recoating.
- Remove tape while the final coat is still soft to avoid chipping the new edge.
- Re-caulk after full cure, not sooner.
Who it’s for
This kit is ideal for DIYers comfortable with careful prep, patient application, and strong odors for a day or two. If you want a clean, glossy white refresh on ceramic tile, enameled steel tubs, or a primed vanity top without ripping out fixtures, it’s a fantastic budget move. If your substrate is flexible fiberglass, or you need a flawless, sprayed-on showroom finish, you may be better served by a professional refinishing service.
Recommendation
I recommend the Rust-Oleum tub-and-tile kit for ceramic tile surrounds, enameled steel tubs, and properly primed vanities where cost, speed, and a bright, durable finish matter. It delivers a convincing transformation at a fraction of replacement cost, provided you respect the prep, manage the fumes, and give it the full cure time. I would be cautious on fiberglass or acrylic tubs and any surface that flexes; adhesion and long-term durability are less predictable there. Used in its sweet spot, this kit is a high-value upgrade that looks good, cleans easily, and buys you years before a full remodel.
Project Ideas
Business
Quick Tub & Tile Refinish Service for Landlords
Offer a low-cost, fast turnaround reglazing service aimed at property managers and landlords who need unit refreshes between tenants. Package includes cleaning/prep, two coats of the 2‑part epoxy finish, silicone touch-ups, and a 3‑day cure schedule. Profitability comes from quick job times (often a single day of on-site labor) and low material cost per kit (one kit covers up to 110 sq ft). Market via local real estate groups and maintenance networks.
Airbnb/Short-Term Rental Upgrade Package
Create a specialized offering for short-term rental hosts: tub/tile refinishing plus aesthetic upgrades (new caulking, refreshed hardware, non-slip mats). Emphasize how a bright, clean bathroom increases booking appeal and reduces guest complaints. Offer service tiers (express 48-hour booking, standard, or seasonal maintenance) and partner with local cleaners/photographers to provide a bundled listing refresh.
Mobile Refinish Pop-Up
Run a mobile, location-based business where you bring the refinishing service to clients (homes, rental properties, small hotels). Use a van equipped with prep tools, ventilation fans, and PPE. Promote through local Facebook groups, Nextdoor, and Google Local Services. Benefits: lower overhead than a fixed shop and ability to serve emergency jobs or quick turnovers.
DIY Refinish Workshops & Kits
Host hands-on classes teaching homeowners how to use the 2‑part kit safely and effectively (prep, mixing, application, ventilation, curing). Charge per attendee and sell take-home mini-kits, PPE, and tool bundles. Workshops position you as an expert and drive sales of materials and follow-up services (for clients who prefer pros do the job). Ensure safety coverage and clear instructions about cure times and ventilation.
Refinished Fixtures for Home Stagers & Set Rentals
Refinish and rent out tubs, tile panels, and sink basins to home stagers, photographers, or film/TV production companies. A refurbished glossy tub can be an affordable prop that looks like new on camera. Offer short-term rentals and delivery/installation. This creates recurring revenue from a one-time refinish investment.
Creative
Spa-Style Tub Refresh
Turn a dingy bathtub into a high-gloss spa focal point. Thoroughly clean and etch the surface per kit instructions, mask fixtures, mix parts A and B, and apply two even coats of the epoxy-acrylic. After the 3‑day cure, add waterproof peel-and-stick trim (wood-look or stone-look) around the outer apron and surround for contrast. Benefits: fast same-day application, dramatic brightening, low cost versus replacement. Tip: ventilate well while working and allow full cure before use.
Worn Tile Rescue — Gloss Over
Refresh old ceramic bathroom tiles without re-grouting. Prep tiles (clean, sand, degloss), fill chips, then apply the 2-part coating to create a continuous glossy surface across walls or half-walls. For a decorative touch, apply waterproof decals or tile-safe stencils after curing rather than trying to tint the mixed kit. Suitable for backsplashes, tub surrounds, and low-traffic bathroom walls. Important: follow drying times and use recommended PPE while mixing.
Built-In Shower Seat & Shelf Makeover
Unify the look of a shower by refinishing the seat, ledges, and soap shelves with the epoxy-acrylic kit so they match a restored tub/tile finish. The product resists moisture and corrosion, making it ideal for horizontal ledges that collect water. Prep surfaces well, use a roller and foam brush for corners, apply two coats, and allow a 3-day cure before wetting. Seal seams with silicone for extra protection where recommended.
Upcycled Tub Planter or Water Feature (Outdoor)
Repurpose an old cast-iron or porcelain tub into a planter or small outdoor fountain by refinishing the interior with the kit to restore gloss and resist moisture. For planters, line the tub with a heavy-duty pond liner (to avoid any chemical contact with soil/plants) after the coating fully cures. For fountains, seal connections and test for leaks. This creates a durable decorative item for patios or gardens. Note: ensure the cured coating is fully outgassed before planting or filling with water.