Features
- Prevents the marring or denting of hardwood boards during installation and board bending
- Bright color-coded design makes finding the right spacer easy
- Special blade design prevents denting and marring of the deck boards
Specifications
| Color | Multicolored |
| Size | Assorted |
Related Tools

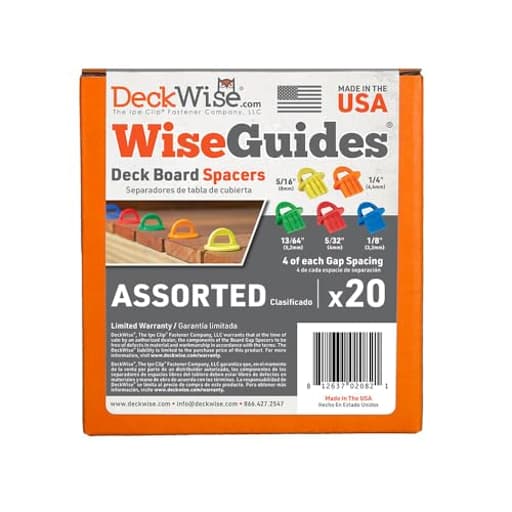
Set of 20 assorted, multicolored deck board spacer guides that provide consistent spacing and protect hardwood, pressure-treated, thermal wood, PVC and composite boards during installation. Color-coded blades allow quick selection of the correct spacer size, and the blade shape prevents marring or denting when aligning or bending boards.
DeckWise WiseGuides Assorted Deck Board Spacer Guides for Hardwood, Pressure Treated Lumber, Thermal Wood, PVC and Composite Decking Alignment Review
Why I reached for these spacers
On any deck build, a consistent gap between boards is the quiet detail that makes the whole surface look intentionally laid. I’ve tried DIY gauges, nails, and clip systems over the years. For my latest projects—an ipe resurfacing, a composite rebuild, and a couple of outdoor benches—I used the WiseGuides spacers. They aren’t flashy, but they solved three notorious site problems at once: repeatable spacing across long runs, gentle contact on finished edges, and quick size changes without hunting around.
What stands out in the design
- Color-coded sizes: Each thickness is easy to identify at a glance. That matters when you’re moving fast and juggling multiple spacings (picture frames, stairs, or furniture).
- Blade profile that won’t bruise edges: The contact surfaces are broad and slightly radiused, so they don’t dent hardwoods or telegraph a mark into softer pressure-treated stock. I pushed them hard when bending a few stubborn boards with a deck jack and never saw a witness mark.
- A top “handle” loop: This makes them simple to place, pull, and reposition. The loop also keeps the spacer from dropping through the gap—a small but meaningful improvement over sticks and shims.
The set includes 20 spacers with assorted sizes, four per thickness. In practice, that assortment has been enough to do long runs as I leapfrog them forward.
Setup and workflow on real decks
On a 14-foot composite run, I placed spacers at every joist intersection—about 16 inches on center—then set the board, tightened into the spacers, and drove fasteners. On wide surfaces, spacing five or six boards ahead helped me spot any cumulative drift early. With 20 spacers, I could establish a consistent “ladder” and then move the earliest pair to the next joist as I advanced.
A few notes from use:
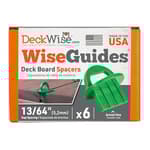
- The 13/64-in size has been a sweet spot for composite in my climate, offering clean visuals and reliable drainage without looking too open.
- On hardwood benches and small table tops, the 1/8-in spacer gave a tighter, furniture-grade look that still sheds water.
- For pressure-treated boards that will shrink as they dry, start tighter and let the lumber do the work over time. It’s nice having sizes on hand to adjust to the stock’s moisture content.
Accuracy and repeatability
Consistency is the point. Across large surfaces, these produced uniform gaps with minimal fuss. Because the blades have a positive stop at the top, each spacer seats to the same depth, so you’re not guessing about insertion. That tiny detail saves time—you’re not fiddling to match the “feel” each time you slip one in.
Thickness tolerance felt tight; the gaps read as truly even to the eye and measured reliably with a feeler gauge. On long, sun-soaked runs, I didn’t see spacers soften or deform.
Material compatibility
- Hardwood (ipe, cumaru, thermally modified): No marring or glazing. The broad blade edges spread force well when using a board bender, and they held up to side pressure.
- Pressure-treated: No compression scars and no adhesion to sap/pitch; clean removal.
- Composite/PVC: The spacers didn’t leave drag marks or shiny rubs on capped composites. They’re handy even if you’re using hidden fasteners because you still need to control spacing at picture frames, butt seams, and stair treads.
Ergonomics and durability
They’re easy to grip with gloves. The color-coding never wore off on me, even after dust and sun. The only weak point—and the one real downside—is the loop. If a spacer gets wedged and you hook the loop with a hammer claw and yank, the loop can crack. It doesn’t happen often, but it’s the spot that fails under abusive extraction.
Two mitigations:
- Rock the board or back off a fastener a quarter turn before removal.
- If you must pull with a claw, go gently and pull straight rather than twisting.
I kept a small flat bar handy for stubborn extractions and cracked only one loop across a full-season’s work.
Choosing the right gap
Gap size isn’t just aesthetics; it’s drainage, debris management, and thermal movement. My general rules:
- Composite/PVC main field: 3/16 to 13/64 in, per manufacturer. It looks right and drains reliably.
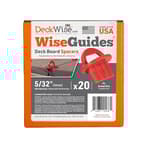
- Hardwood decking (kiln-dried): 1/8 to 5/32 in for a refined look, especially under shade. In full sun or humid climates, bump slightly wider.
- Pressure-treated (installed wet): 1/8 in to account for shrinkage, sometimes even card-thin on very wet stock.
- Furniture, benches, and table tops: 1/8 in gives a comfortable feel without catching phone edges or keys.
Because the set includes multiple sizes, you can fine-tune per zone: tighter at seating, standard on the main field, maybe a touch wider near heavy leaf fall.
Practical tips from the field
- Stage more than you think: If you’re tackling a big deck or working on diagonal layouts and borders, consider two sets. Being able to span 6–8 boards at once keeps the pattern honest.
- Keep a carabiner: The loops make it easy to clip each size together so the box doesn’t become a rainbow jumble.
- Clean edges matter: If you’re ripping a board or scribing a curve, ease the edge with a sanding block. Spacers glide in and out cleaner, and you avoid scuffing.
- Don’t overdrive: If your board is pinched, loosen a fastener or coax the board with a jack instead of using the loop as a pry point.
Value
You could cut a bucket of plywood shims and call it a day. But those won’t be dimensionally consistent, they’ll swell or split, and they’ll mark softer materials. What you’re buying here is speed, predictability, and a design that prevents accidental damage. For me, the time saved aligning long runs and borders pays for the set quickly.
Where they fall short
- Loop strength: It’s the right idea and generally effective, but it’s the failure point if you extract aggressively under load. A reinforced loop or a slightly thicker section would improve durability.
- Limited count per size: Four per thickness is workable for most scenarios, though large surfaces and diagonals benefit from more of the same size on hand.
Neither is a deal-breaker, but both are worth noting for planning.
Who will benefit most
- DIYers laying their first deck who want pro-looking, consistent spacing without overthinking it.
- Pros who need a reliable, non-marring spacer for hardwood or capped composites and want to move fast without a jig.
- Woodworkers and outdoor furniture builders who prefer tighter gaps for seating and table surfaces.
If you already rely on a hidden fastener system, you might still want these for borders, stairs, and odd angles where clips don’t govern the spacing.
The bottom line
These spacers do a simple job exceptionally well. They’re quick to deploy, gentle on finished edges, and accurate enough to carry a visual line across a long span without drift. The color-coding and assorted sizes make them adaptable, and the pack of 20 is a practical count for most installations. I wish the loop were tougher, but with mindful removal, it’s a minor issue.
Recommendation: I recommend the WiseGuides spacers to both homeowners and pros who care about clean, consistent deck gaps and want to speed up installation without risking damage to their boards. The combination of non-marring blades, easy size identification, and a useful quantity in the box offers real day-to-day value. If you’re tackling a large deck or complex layout, consider buying a second set; otherwise, one box will serve you well across decking and smaller outdoor builds.
Project Ideas
Business
Deck Installation Premium Kit Upsell
Bundle branded WiseGuides sets with premium decking installations as a value-added upsell. Market the kit as a guarantee of consistent, non-damaging spacing and include a color-coded guide card so crews or homeowners can quickly select the correct gap, reducing rework and callbacks.
Tool Rental & DIY Weekend Package
Offer a short-term rental kit of WiseGuides for DIY customers who want to install their own decks or outdoor features. Include a laminated quick-start sheet, YouTube tutorial link, and optional one-hour phone/video coaching. Charge per weekend plus deposit—appeals to homeowners who prefer to save on labor without buying specialized tools.
Hands-On Workshops / Classes
Run paid workshops teaching deck installation basics, slatted furniture, or outdoor woodworking using WiseGuides as the standard spacer tool. Attendees get to keep a spacer set with course materials. This builds local brand recognition and creates recurring revenue through follow-up advanced classes.
Retail Display & Demo Program for Lumberyards
Pitch a point-of-sale demo program to lumberyards and decking retailers: supply demo WiseGuides and branded instruction cards showing how consistent gap sizes affect drainage and appearance. Staff can demo ease-of-use for shoppers; sell spacer sets as an add-on impulse item at checkout.
Contractor Efficiency Consultation
Offer a niche consultancy for small contractors that standardizes deck gap specs, production jigs, and training using WiseGuides. Sell a package that includes branded sets for crews, on-site training to reduce install time, and a simple guarantee policy that helps contractors charge a premium for certified-precision installs.
Creative
Slatted Headboard with Perfect Gaps
Use the color-coded spacers to lay out and clamp evenly spaced slats for a wall-mounted headboard. The non-marring blade protects finished hardwood or stained boards while you adjust spacing, so you can create crisp, repeatable gaps and even paint or stain patterns using the different spacer colors as guides.
Modular Wall Art Grid
Create a geometric wall sculpture by arranging short deck boards or reclaimed wood into a grid using the assorted spacers to guarantee consistent negative space. The multicolored blades can be used temporarily as part of a color-coded layout or left in place as integrated color accents before sealing the piece.
Precision Plant Screen / Trellis
Build a lightweight slatted plant screen or trellis with even spacing to support climbing plants. The WiseGuides keep slats consistently spaced without denting pressure-treated or composite boards, making assembly faster and preserving the finish for outdoor display.
Floating Shelf Jig
Repurpose the spacers as a quick assembly jig when mounting floating shelves or building bookcase faces. Use specific color sizes for repeatable gap tolerances (air gaps behind shelves, reveal around insets) and rely on the non-marring blade to protect visible faces during final alignment.
Miniature Boat or Model Planking Aid
For hobbyists building small boats, kayaks, or scale models, the slim, non-marring spacers serve as repeatable clamps/spacers when dry-fitting planks. The assorted sizes let you tune plank gaps for realistic seams while protecting delicate wood veneer.