
Features
- Ideal for use on fiberglass, wood or metal surfaces above the waterline
- Oil-based formula is flexible and applies easily with excellent leveling
- Dries to the touch in as little as 1 to 2 hours and covers up to 100 sq ft
- Durable coating resists abrasion and extreme weather conditions and provides long-lasting UV protection
- Superior semi-gloss retention and smooth finish help maintain the beauty and elegance of your surfaces
Specifications
| Color | Semi-Gloss White |
| Size | 32 Fl Oz (Pack of 1) |
| Unit Count | 1 |
Related Tools
An oil-based semi-gloss topside paint formulated for use on fiberglass, wood, and metal surfaces above the waterline. It dries to the touch in 1–2 hours, covers about 100 sq ft per quart, and provides a flexible, abrasion- and weather-resistant coating with UV protection and good leveling for a smooth finish.
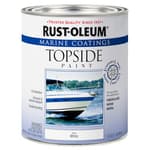
Rust-Oleum 207000 Marine Coatings Topside Paint, Quart, Semi-Gloss White 32 Fl Oz Review
What this paint is—and isn’t
Rust-Oleum’s marine topside paint, in semi-gloss white, is a single-part, oil-based enamel designed for use above the waterline on fiberglass, wood, and metal. In plain terms, it’s a straightforward, brush-and-roll solution for refurbishing hull sides, decks, rails, and compartments without stepping into the prep and complexity of two-part polyurethanes. It dries to the touch in roughly 1–2 hours, a quart covers around 100 square feet per coat, and the formula flexes enough to handle seasonal movement without cracking. It also brings solid UV resistance, so the finish stays brighter and glossier longer than a bargain enamel.
What it isn’t: a below-waterline or constant-immersion coating, nor a low-odor indoor paint. It’s a classic solvent-borne marine enamel, for better and worse.
Prep and application: what worked for me
I used this white semi-gloss on a tired fiberglass canoe hull (exterior), a small aluminum rub rail, and a pair of fiberglass hatch lids. The prep that yielded the best results was methodical but not heroic:
- Clean, degrease, and dewax thoroughly (I used a dedicated marine dewaxer).
- Sand to a uniform dullness (220–320 grit on gelcoat; 180–220 on bare wood; 220 on primed metal).
- Spot prime bare substrate with an appropriate primer (aluminum and any sand-throughs especially).
- Tack off dust right before coating.
For application, a short-nap mohair/velour roller produced the smoothest finish. A fine-bristle natural brush was helpful for tipping off edges and breaking bubbles. I did two medium-thin coats on the canoe hull and hatch lids, plus a third light coat where I wanted extra build. On the aluminum rail, I applied two lighter coats over primer.
A few practical notes from the sessions:
- The paint levels well if you lay it on evenly and leave it alone. Overworking it introduces bubbles and faint roller texture.
- In warm, moderately humid weather, it flowed out better and looked closer to a sprayed finish. On a dry, breezy day, it skinned faster and showed more stipple.
- If you see micro-cratering, lighten your load, slow down, and give it a fresher surface—lightly scuffing between coats with 320 grit eliminated defects for me.
- Between coats, I waited overnight, then scuff-sanded to knock down dust nibs and any raised texture. That step made a clear difference in the final look.
Cleanup took mineral spirits, and I wore nitrile gloves—the coating grabs onto bristles and skin like a marine enamel should.
Dry time and coverage
The “dry to the touch in 1–2 hours” guidance matched my experience when temperatures sat in the mid-70s to low 80s Fahrenheit. Heavier spots and inside corners took longer. I allowed at least 12–24 hours between coats to be safe and to avoid lifting the previous layer while sanding.
Coverage was on-spec: roughly 95–110 square feet per quart per coat depending on how aggressively I rolled it out. One quart comfortably handled the canoe exterior (three thin coats) and both hatch lids (two coats each), with a little left for touch-ups.
If you plan to coat a full small runabout topside area, budget more than one quart, especially if you want three coats for uniformity and depth.
Finish and appearance
This is a bright, clean white in a semi-gloss sheen. On smooth fiberglass, the finish reads closer to a “high semi-gloss”—more sheen than satin, less wet-look than full gloss. Rolled unassisted, I saw a faint, uniform orange-peel from certain angles. Rolled and lightly tipped-out, it settled into a very even, refined surface that looked surprisingly close to a light spray pass—especially on the hatch lids.
Brush marks were minimal if I didn’t chase them. The paint’s leveling helps, but it isn’t magic; the smoother you prep, the better it looks. Edges and corners benefit from a quick tip-off to pop surface bubbles.
One thing to note: oil-based enamels can yellow slightly over time in low light. On sunlit topsides, mine stayed true. In a shaded locker sample panel I left as a test, the white warmed a touch after a few months—typical of alkyds.
Durability after real use
After a season outdoors, the topside areas I coated are holding up well. The paint still wipes clean, and the semi-gloss hasn’t chalked. UV exposure didn’t knock the sheen down appreciably. It’s not indestructible—dragging an anchor chain across the rail left scuffs—but abrasion resistance is solid for a single-part enamel. Light rubs from fenders and the odd dock kiss polished out with a mild cleaner-wax.
Moisture hasn’t been an issue on areas that get wet but drain and dry quickly. I wouldn’t use it for constant immersion, bilge bottoms that stay damp, or submerged components. That’s outside the design intent.
Smell, safety, and practicality
This is an old-school solvent system with a strong odor. Ventilation is mandatory. For indoor spaces or compartments, I used a fan for crossflow and an organic vapor respirator. Plan your work so you can leave the area to cure; you won’t want to button up a cabin immediately after painting.
Rags used with mineral spirits are a spontaneous combustion risk—spread them out to dry flat or store in a sealed metal container.
Where it fits—and where it doesn’t
Use it for:
- Fiberglass topsides, decks, rails, and locker lids above the waterline.
- Painted wood trim and transoms (with the right primer).
- Metal hardware covers and rails, after proper priming.
- Brightening interior compartments where you want a reflective white and easy wipe-down.
Avoid or think twice for:
- Below-waterline surfaces and anything constantly immersed.
- High-traffic decks where a dedicated non-skid system or tougher two-part topcoat is preferable.
- Enclosed indoor projects without robust ventilation.
- Situations demanding the hardness and chemical resistance of a two-part polyurethane.
Tips to get the best result
- Prep matters most: clean, dewax, sand uniformly, and spot prime bare spots.
- Favor thin to medium coats and let the paint do the leveling. Don’t overwork it.
- Roll with a mohair/velour cover and tip off lightly with a quality natural-bristle brush.
- Scuff between coats with 320 grit and tack off to remove dust nibs.
- Paint in the manufacturer’s temperature range; a slightly humid, warm window improves flow.
- If you need to tweak viscosity, use the manufacturer-recommended thinner sparingly.
- Allow generous cure time before hard use or waxing; I wait at least 72 hours in warm weather.
Value and alternatives
Cost-wise, this topside paint lands in the attainable zone, especially if you’re refreshing a small boat or doing targeted repairs. You’re trading away the ultimate hardness and chemical resistance of a two-part polyurethane for easier application, simpler equipment, and lower risk. For many DIY projects above the waterline, that’s a fair trade.
If you need a bulletproof deck or a show-car gloss, a two-part LPU is still king—just be ready for stricter prep, mixing, pot life, and safety requirements. For quick touch-ups on already-painted surfaces, this single-part enamel is a more forgiving option.
Recommendation
I recommend this topside paint for DIYers and small-shop users who want a durable, clean, semi-gloss white finish above the waterline without the complexity of two-part systems. It lays down smoothly with a roller and brush, levels well, stands up to sun and weather, and cleans easily. The caveats—strong odor, longer overall cure, and limits around immersion—are manageable with planning and proper ventilation. If your project fits its intended use and you’re willing to commit to good prep and a couple of coats, it’s a reliable, cost-effective way to make tired fiberglass, wood, or primed metal look crisp again.
Project Ideas
Business
Mobile Marine Touch-Up Service
Offer a pickup/mobile service focused on topside touch-ups, small repaints and stripe repairs for boat owners. Pitch same-day or next-day small-area jobs taking advantage of the paint’s 1–2 hour dry time and fast return-to-service. Charge per linear foot or per panel plus materials; upsell counter-top clear coats and regular maintenance plans.
Coastal Home Décor Line
Produce and sell a line of upcycled, marine-finished home goods—chairs, signs, planters, floating shelves—online (Etsy/shop) and at local markets. Emphasize durability, UV resistance and weather-ready finishes as a selling point for buyers in coastal or lake communities. Use the semi-gloss white as a signature base color and offer complementary accent colors.
DIY Topside Paint Kits & Video Guides
Package small-quart kits (paint, brush, abrasive pad, masking tape, mini-sandpaper, instructions) for owners who want to do small repairs. Create short how-to videos covering surface prep, priming, masking and feathering to avoid visible seams. Sell kits via a website, partner marinas, or hardware stores and monetize premium video courses or one-on-one coaching.
Fleet/Marina Maintenance Contracts
Contract with marinas, rental shops and tour operators to provide routine topside maintenance for their fleet of rental boats, SUPs and kayaks. Offer scheduled inspections, touch-ups and seasonal prepping using the product’s fast dry time to minimize downtime; price per craft with volume discounts and retainers for seasonal contracts.
Workshops & Certification Classes
Host hands-on workshops teaching proper topside preparation and painting techniques for boat owners, yacht clubs and community centers. Charge per attendee and offer a certification or printed checklist for maintenance best practices. Partner with local marine retailers to supply paint and tools, and upsell paint kits and follow-up private sessions.
Creative
Custom Boat Name & Striping
Use the semi-gloss topside paint to hand- or stencil-paint boat names, registration numerals and crisp accent stripes on small boats, dinghies or kayaks. The oil-based formula levels smoothly for clean edges, resists UV and abrasion, and dries fast enough (1–2 hours) to allow multi-coat layering and masking techniques in a single day.
Upcycled Outdoor Furniture with Marine Finish
Transform Adirondack chairs, porch benches, metal patio tables or planter boxes into weatherproof, coastal-style pieces. The paint’s flexibility and UV protection make it ideal for wood and metal exposed to sun and salt air; sand, prime if needed, then apply semi-gloss for an easy-to-clean, elegant finish.
Nautical Wall Art from Reclaimed Wood
Create textured, coastal-themed wall panels or signs using reclaimed planks. Use the paint to build layered backgrounds (blocking in white, then sanding and distressing) and add stenciled anchors, maps or coordinates. The smooth leveling gives a gallery-friendly semi-gloss sheen while being durable for humid bathrooms or beach cottages.
Weatherproof Dock & Garden Signage
Make durable, attractive signage for docks, boathouses, cabins or garden gates. Apply multiple coats for good coverage (100 sq ft/quart coverage helps estimate materials), then seal or add raised lettering. The abrasion resistance and UV protection prolong readable, attractive signs in outdoor conditions.