Organizing your tools can save you time, reduce frustration, and protect your equipment. Whether you're a DIY enthusiast or a professional contractor, categorizing tools and using digital management apps can simplify your workflow. Here's what you need to know:
- Why it matters: Categorized tools are easier to find, reducing delays and unnecessary trips to the store. Businesses using digital systems report a 15% decrease in tool loss within a year.
- Digital apps help: Mobile apps offer features like AI-powered categorization, location tracking, and lending management. For example, Toolstash can automate inventory setup and track tools in real time.
- Steps to get started:
- Physically inventory all tools and record details like name, type, serial number, and storage location.
- Use apps to input tools via manual entry, barcode scanning, or AI photo recognition.
- Create categories (e.g., "Power Tools", "Hand Tools") and use tags for more specific organization.
- Assign precise storage locations (e.g., "Garage - Shelf 2") and set maintenance reminders.
ORGANIZE Your Toolbox Like a Pro!
Getting Ready to Categorize Tools
Before diving into digital organization, laying the groundwork is crucial for a smooth and efficient setup. This step ensures that your tool management process runs seamlessly.
Collecting Tool Information
The first step to organizing your tools digitally is gathering all the necessary details about each one. While it might seem like a lot of effort upfront, having accurate and detailed records will save you time and headaches later. Plus, it allows your app's features to work effectively.
Start by doing a physical inventory of every space where your tools might be stored. Check your garage, workshop, shed, toolboxes - basically, anywhere tools could be hiding.
For each tool you find, make sure to note the following:
- Basic Information: Write down the tool's name, type (e.g., hand tool, power tool, measuring tool), brand, and model number. For instance, instead of just "drill", record "Cordless Drill - DeWalt DCD771C2." This level of detail helps with finding replacement parts or tracking warranties.
- Identification Details: Record serial numbers (if available) to assist with warranty claims or in case of theft. Also, note the purchase date to monitor the tool's age and plan for replacements.
- Physical Location: Be specific about where each tool is stored, like "Garage - Tool Cabinet, Second Shelf." This will make location tracking features in your app much more useful.
- Condition Assessment: Evaluate and document the tool's condition - excellent, good, fair, or in need of repair. This helps prioritize maintenance or decide when to replace items.
To stay organized, consider using a spreadsheet or checklist with columns for each of these details. Focus on one storage area at a time to avoid missing tools or duplicating entries. Once you've completed this step, you're ready to move on to setting up your digital tool management system.
Setting Up Your Tool Management App
With all your tool information in hand, the next step is configuring your app to make the most of its features. A well-set-up app can simplify tracking, categorization, and even maintenance.
- Download and Account Setup: Start by downloading your chosen app from a reliable source like the App Store or Google Play Store. For example, Toolstash offers features like free inventory tracking, AI-powered tool addition, and automatic categorization. Set up your account and review any onboarding instructions for helpful tips.
- Enable Permissions: Grant permissions for the camera, location, and notifications. These ensure you can use features like AI tool recognition, location tracking, and alerts for missing items. Without location access, for instance, you won't be able to track where tools are stored or receive alerts when something is out of place.
- Adjust Preferences: Configure the app to align with U.S. standards - imperial measurements, MM/DD/YYYY date format, and dollar currency. This ensures consistency across your records and avoids potential confusion later.
Many apps include tutorials or guided tours during the setup process. Don’t skip these! They often highlight features that can save you time, like Toolstash’s Smart Categorization, which automatically organizes tools as you add them.
- Test the Features: Before inputting all your data, test the app with a few sample tools. Try photographing a tool to see how AI-powered addition works, create a custom category, and check that location tracking functions in your storage areas. This testing phase helps you spot any issues early, saving you time and effort down the line.
Taking the time to collect detailed tool information and properly set up your app may feel like extra work, but it pays off in the long run. A solid foundation ensures smoother tool management and makes every future project easier to tackle.
Tool Categorization Checklist
Organizing your tools effectively starts with a solid system for managing them. This checklist walks you through everything from adding tools to your digital inventory to keeping them organized and easy to locate.
Adding Tools to Your Digital List
To create a reliable digital inventory, start by entering your tools. You can do this manually, with barcode scanning, or by using AI-assisted methods. Each approach has its strengths depending on the type of tool and your setup.
- Manual Entry is ideal for older tools or unique items without barcodes. Simply open your app, select "add tool", and input details like the tool's name, type, brand, model, and serial number. For example, you might log "Cordless Drill - DeWalt DCD771C2" to make warranty tracking and part replacement easier.
- Barcode Scanning works well for newer tools with visible product codes. Most apps can scan these codes and automatically populate the details, saving you from typing everything manually.
- AI-Powered Addition is a modern, time-saving option. Tools like Toolstash's "AI Snap" feature let you take a photo of a tool, and the app identifies and logs it for you. This is especially handy for managing large inventories or quickly adding tools on-site.
Be sure to include details like purchase date, cost, and multiple photos of each tool. These details are invaluable for warranty claims, insurance purposes, and even tax documentation. The photos also serve as visual references for your records.
Once your tools are added, the next step is categorizing and tagging them for quick and easy access.
Creating and Assigning Categories
Organizing tools effectively starts with grouping them based on their function. Begin by sorting your inventory into broad categories like hand tools, power tools, measuring tools, safety equipment, and fasteners and hardware.
Within these main categories, break them down further into subcategories that match how you use them. For instance:
- Under "hand tools", you might include subcategories like "screwdrivers", "wrenches", "pliers", and "cutting tools."
- For "power tools", you could separate them into "cordless tools", "corded tools", and "pneumatic tools."
Custom tags add a second layer of organization tailored to your needs. For example, a cordless drill might fall under "power tools" but also be tagged with "woodworking", "electrical", and "portable." This dual system of broad categories and specific tags makes searching for tools much faster. If you need something for electrical work, filtering by the "electrical" tag will pull up all relevant tools, regardless of their primary category.
Many apps offer smart categorization features that suggest categories and tags based on the tool type. These suggestions can save time, but you can always tweak them to better fit your workflow.
To keep things simple, stick with broad categories but make your tags as specific as possible. For instance, all measuring tools might go under one category, but a laser level could be tagged with "construction", "indoor", and "precision" for more targeted searches.
After categorizing your tools, assign specific locations and set up alerts to stay on top of maintenance and organization.
Setting Locations and Alerts
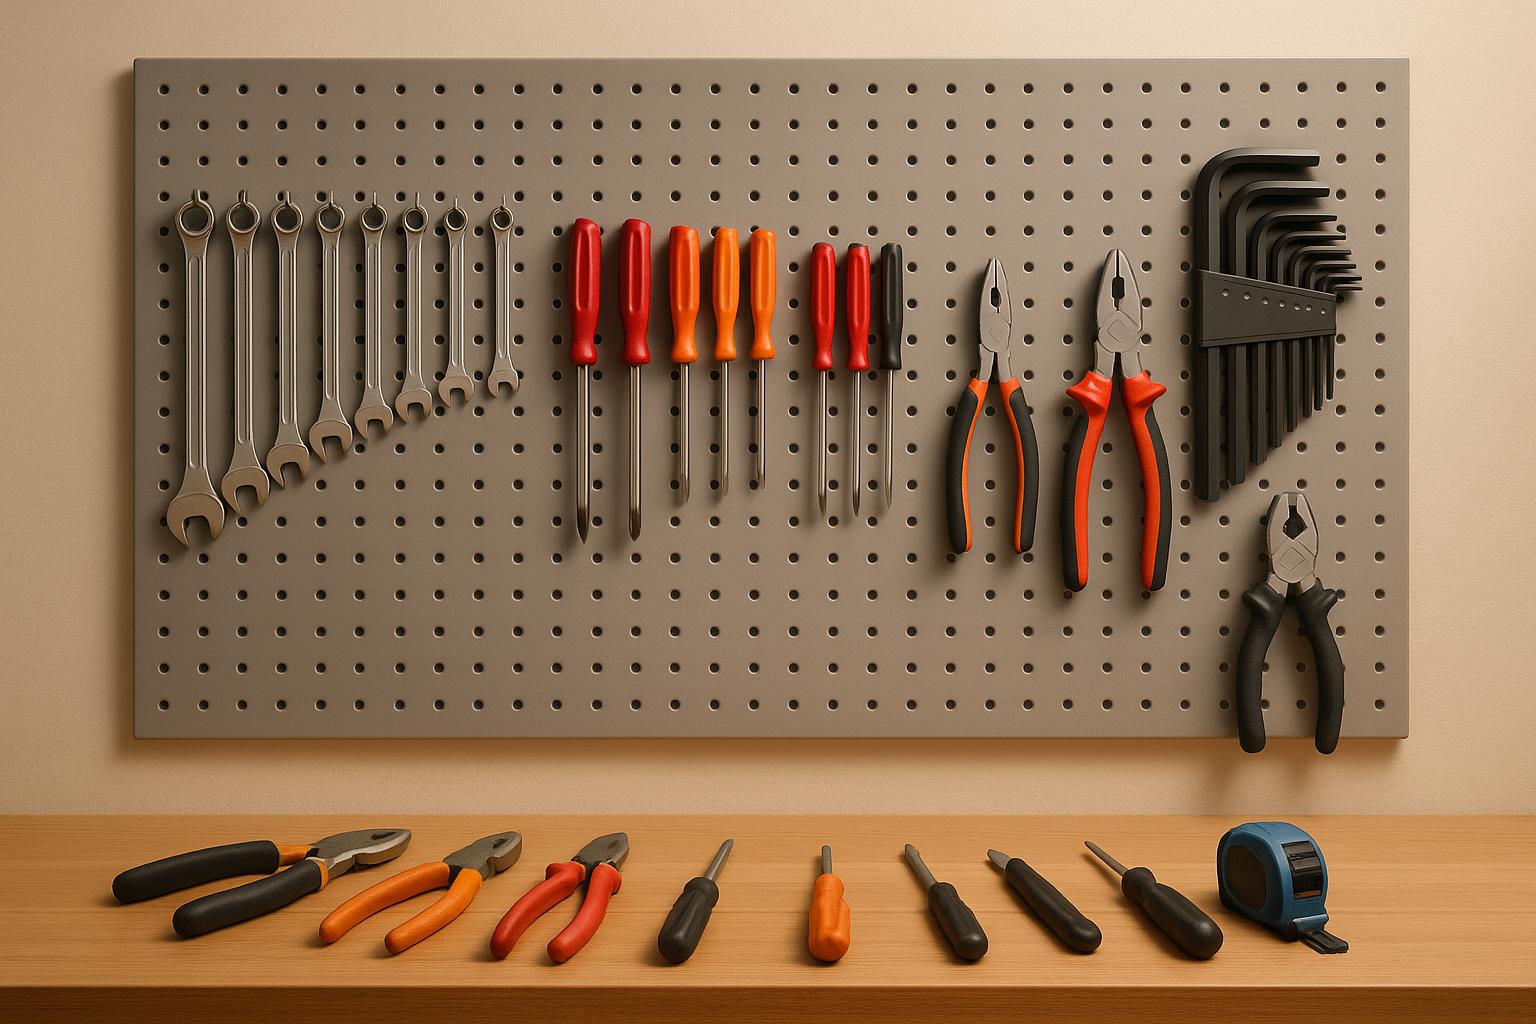
Assigning precise locations to your tools turns your inventory into a practical tracking system. Instead of vague labels like "garage", use detailed descriptions such as "Garage - Tool Cabinet, Second Shelf" or "Workshop - Pegboard, Left Side." This level of detail eliminates the frustration of knowing you own a tool but not being able to find it.
Keep your inventory updated as tools move. Many contractors use labels like "Home Base", "Job Site A", or "Truck Storage" to track where tools are currently located. Apps with location tracking features can help you stay organized, even as projects change.
Maintenance alerts are another key feature for keeping your tools in top shape. Set reminders for tasks like "oil chainsaw every 3 months" or "replace drill bits - check 06/15/2026." Push notifications ensure you don’t miss essential upkeep, which helps extend the life of your tools.
For tools you lend out, lending and borrowing management can save you from losing track of them. Record the borrower's name and set a return date. For instance, log "Return circular saw by 11/30/2025 - borrowed by Mike Johnson." Apps like Toolstash can automate this process, sending reminders as return dates approach.
Customize your notification preferences to match your workflow. Some people prefer daily summaries of overdue returns, while others want instant alerts for maintenance tasks. You can even set different lead times for notifications, like a 7-day heads-up for expensive tool maintenance and same-day alerts for overdue returns.
Once you’ve established your system of categories, tags, locations, and alerts, stick to it. Consistency is key to keeping your tools organized and easy to find, especially when you’re under pressure to locate something quickly or track down equipment for a major project.
Using Advanced Tool Management Features
Once you've set up your digital tool inventory, advanced features can take your tool management to the next level by adding automation and improving security.
AI-Powered Tool Identification and Organization
AI makes building and organizing your tool inventory a breeze. With Toolstash's AI Snap, you can simply snap a photo of a tool, and the system will automatically log details like its type, brand, and model. It also uses smart categorization to group tools, making them easy to find when needed. This automated organization saves time and ensures your inventory is always up to date.
Keeping Track of Tool Locations and Loans
Toolstash also helps you stay on top of where your tools are and who has them. Its advanced tracking system monitors tool locations, while the loan management feature makes it easy to oversee tool checkouts and returns. This keeps your inventory organized and ensures nothing goes missing [1].
Together, these AI-powered tools and tracking features provide a streamlined system that keeps your inventory well-organized and always within reach.
Maintaining Tool Categories
Keeping your digital tool inventory organized requires regular attention. By building on your initial setup and categorization, routine maintenance ensures your tool management system remains accurate and efficient over time.
Best Practices for Staying Organized
Schedule monthly audits to ensure your tool inventory stays accurate. These reviews help you spot tools that may have been moved, borrowed, or returned without proper logging. Using the checklist feature during these audits can cut down misplaced tools by 30% over six months, as it consistently flags duplicates and missing items [2].
Stick to consistent naming conventions across your tool entries. For example, use standardized names like "Hand Tools", "Power Tools", and "Safety Equipment." Many apps allow hierarchical categorization, helping you create parent-child relationships that make navigation more intuitive [2].
Update categories as your collection grows to reflect new tools or workflow changes. When you acquire new equipment or adjust your processes, take a moment to review whether your existing categories still fit. This avoids tools being miscategorized or dumped into catch-all groups, which can undermine your system’s purpose.
Set automated reminders to stay on top of maintenance tasks. Notifications from your tool management app can prompt you to review and update your inventory regularly. Over 60% of small businesses report that automated reminders help improve efficiency and reduce tool loss [4].
While these best practices are essential, addressing common issues in your inventory system is equally important.
Fixing Common Problems
Duplicate entries are a frequent issue in digital inventories. Use your app's search function to check for tools with similar names or serial numbers before adding new items. Many platforms also include duplicate detection features that alert you when a potential duplicate is identified [2].
Misplaced tools can disrupt your workflow, but location tracking features can help resolve this quickly. If a tool goes missing, check the app’s location tracking to see its last recorded position. Review lending or borrowing records to see if someone else has it. If it remains unfound, mark its status as "missing" until recovered. Tools like Toolstash make it easy to see where each tool is stored with just a few clicks [1].
Syncing errors between devices can create inconsistencies in your tool data. To avoid this, ensure all devices are running the latest version of your tool management app and have a stable internet connection. If syncing issues persist, restart the app or free up storage on your device. Cloud-based syncing helps keep your data consistent and minimizes the risk of loss [2][3].
Inconsistent categorization often arises when multiple people add tools to the system. Using smart categorization features in your app can help maintain order and consistency during ongoing updates.
Research from Zapier shows that teams using digital checklists and regular maintenance routines spend 30% less time searching for tools compared to those relying on manual systems [5]. This time savings highlights the importance of maintaining organized tool categories through consistent upkeep and the right digital tools.
Conclusion
Organizing your tools with the help of mobile apps can completely change the way you manage your equipment, whether you're tackling weekend DIY projects or running a professional operation. By combining smart categorization, location tracking, and lending management, these apps create a streamlined system that saves time, cuts costs, and reduces the stress of misplaced tools.
Mobile apps eliminate the hassle of paper lists and relying on memory. With features like AI-powered tool addition, you can snap a photo to instantly log a tool into your inventory. Smart categorization then groups your tools logically, removing the guesswork and inconsistencies of manual sorting.
The benefits are clear. A 2023 survey by SafetyCulture revealed that over 60% of small and medium businesses experienced at least a 20% drop in lost or misplaced tools within their first year of using such systems[6].
Location tracking is another game-changer. It helps you know exactly where each tool is - whether it's in your garage, on your truck, or at a job site. Plus, it simplifies tracking who borrowed which tool and when it's due back, avoiding the frustration of tools disappearing into informal lending.
Apps like Toolstash bring all these features together - inventory tracking, AI-powered additions, smart categorization, and location tracking - into one cohesive system. This means no juggling multiple platforms or worrying about syncing data across different tools.
An all-in-one system like this doesn’t just simplify tool management; it ensures long-term efficiency. Consistent use and regular updates to your inventory are key. By sticking to the practices outlined in this guide, you’ll build a reliable system that grows with your collection and adapts to your evolving needs. The result? Better organization, fewer replacement costs, and clear accountability for every tool.
FAQs
How can I keep my tool categories organized as my collection grows or changes?
Keeping your tool categories organized as your collection evolves is no small task, but regular reviews and updates can make a big difference. A platform like Toolstash can streamline this process with features like smart categorization, which organizes your tools automatically for quick and easy access.
You might also want to group your tools by factors like their common use, size, or how often you reach for them. This can save you time when you're in the middle of a project. And don't forget to periodically declutter - removing tools you no longer use keeps your system efficient and free of unnecessary clutter.
How do AI-powered features in tool management apps make organizing and managing tools more efficient?
Tool management apps, like those from Toolstash, are stepping up their game with AI-powered features that make organizing tools a breeze. Take AI Snap, for instance - it allows you to add tools to your inventory in seconds. Just snap a photo, and the AI takes care of identifying and logging the tool's details. No more tedious manual entries.
Another standout feature is AI Chat Assistance, which offers tailored DIY advice based on the tools you already own. Whether you're starting a new project or troubleshooting an issue, this feature makes it easier to dive in with confidence. These smart tools don’t just save time - they make managing your collection simpler and more user-friendly.
How do location tracking and lending management features help reduce tool loss and increase accountability?
Keeping track of your tools just got simpler with location tracking. This feature lets you know exactly where your tools are stored or being used, so there’s no guessing involved. Pair that with lending management, which keeps a record of who borrowed a tool and when, making it easier to follow up if something goes missing. Together, these tools reduce the chances of losing equipment and encourage users to take responsibility.