Struggling to find tools or finish projects efficiently? A well-organized home workshop can save you time, reduce stress, and improve safety. Here's how you can transform your workspace:
- Plan Your Layout: Measure your space, define work zones (e.g., workbench, cutting, assembly), and ensure proper lighting, ventilation, and electrical access.
- Optimize Storage: Use wall-mounted systems (pegboards, French cleats, magnetic strips), cabinets, and mobile solutions like tool carts or rolling workbenches.
- Organize Small Parts: Store screws, bolts, and hardware in labeled bins, drawer organizers, or compartmented boxes for easy access.
- Use Digital Tools: Track tools, schedule maintenance, and manage inventory with platforms like Toolstash.
- Maintain Regularly: Clean daily, inspect monthly, and perform seasonal tasks like rust prevention and decluttering.
- Prioritize Safety: Keep safety gear accessible, maintain fire extinguishers, and store hazardous materials properly.
A clean, organized workshop ensures smoother workflows and safer DIY projects. Let’s dive into the details!
11 Simple Ways to Organize Any Workshop
Planning Your Workshop Layout and Space
A well-organized workshop starts with a solid layout plan. Smart use of space can turn wasted time into productive hours. The key is to understand your workshop's potential and optimize it for efficiency.
How to Assess Your Workshop Space
Start by measuring everything - the length, width, and height of your workshop. Take note of fixed features like doors, windows, outlets, water heaters, and support beams. These details will guide your layout decisions.
As you walk through the space, identify natural zones. Most workshops benefit from having dedicated areas for specific tasks. For example, a corner might be ideal for your main workbench, while wall space could be perfect for tool storage. Areas with good natural light are great for detail-focused work.
Don’t forget to consider ceiling height. Taller ceilings (8 feet or more) allow for overhead storage, while lower ceilings mean you'll need to focus on wall-mounted or floor-level storage. If your workshop is on an upper floor, think about weight limits for your equipment and materials. Use these measurements and observations to assign a purpose to each part of the space.
Setting Up Work Zones for Different Tasks
To maximize efficiency, create zones for different activities. A good layout minimizes the distance between related tasks, much like the "work triangle" concept used in professional woodworking. This approach connects your three most-used areas for seamless workflow.
Your primary work zone should revolve around your main workbench. This area needs the best lighting and easy access to frequently used tools. Position it away from high-traffic areas to avoid interruptions.
If you work with materials like lumber, set up a cutting and prep zone. This area should have good ventilation and enough space for power tools like table saws or miter saws. Make sure there’s room on both sides of these tools to support larger materials.
For larger projects, you may need a dedicated assembly zone. While this might overlap with your main work area, some people prefer a separate assembly table that can double as storage when not in use.
Finally, your finishing zone should be well-ventilated and away from dust-producing activities. Placing it near a door or window can make a big difference.
Once your zones are defined, focus on the details that improve overall efficiency.
Key Factors for Workshop Efficiency
Lighting is crucial. While natural light is ideal, most workshops require additional lighting. Aim for at least 50 foot-candles of light at your work surfaces - similar to a bright office. Under-cabinet LED strips can reduce shadows on your workbench, while overhead fixtures like fluorescent or LED lights provide general illumination.
Electrical access is another priority. Map out existing outlets and add more if needed, spacing them every 4–6 feet along work surfaces. If you plan to use heavy-duty equipment like welders or large table saws, consider installing a dedicated 240V outlet.
Ventilation is essential for health and comfort. Even if you’re not working with chemicals, sawdust and metal filings need to be managed. A basic exhaust fan can improve air quality significantly. Set it up to create cross-ventilation, pulling fresh air in from one side and exhausting stale air from the other.
Traffic flow impacts both safety and productivity. Pathways between major work areas should be at least 3 feet wide. Your main walkway should connect the entrance to your primary work zone without obstacles. Keep frequently used storage along these paths for easy access.
Temperature control matters for both your comfort and your tools. Extreme temperature changes can cause metal tools to rust or wooden handles to crack. If your workshop is in a garage, consider insulation and a space heater for colder months. In hotter climates, proper ventilation becomes even more important.
A well-thought-out layout doesn’t require a massive space. Even a compact 10x10 foot workshop can be highly functional with clear zones, good lighting, and efficient traffic flow. These foundational elements will set the stage for effective tool storage and inventory management, which we’ll explore next.
Tool Storage Systems and Solutions
Having a solid storage system for your tools is key to keeping your workspace organized and efficient. A well-thought-out setup can save you a lot of time that might otherwise be wasted hunting for misplaced tools. Your storage choices should reflect the size of your workshop, the types of tools you own, and how you like to work. Below, we’ll dive into some specific storage options to help you optimize your setup.
Wall-Mounted Storage Systems
Wall-mounted storage is a smart way to keep tools visible and accessible while freeing up floor space.
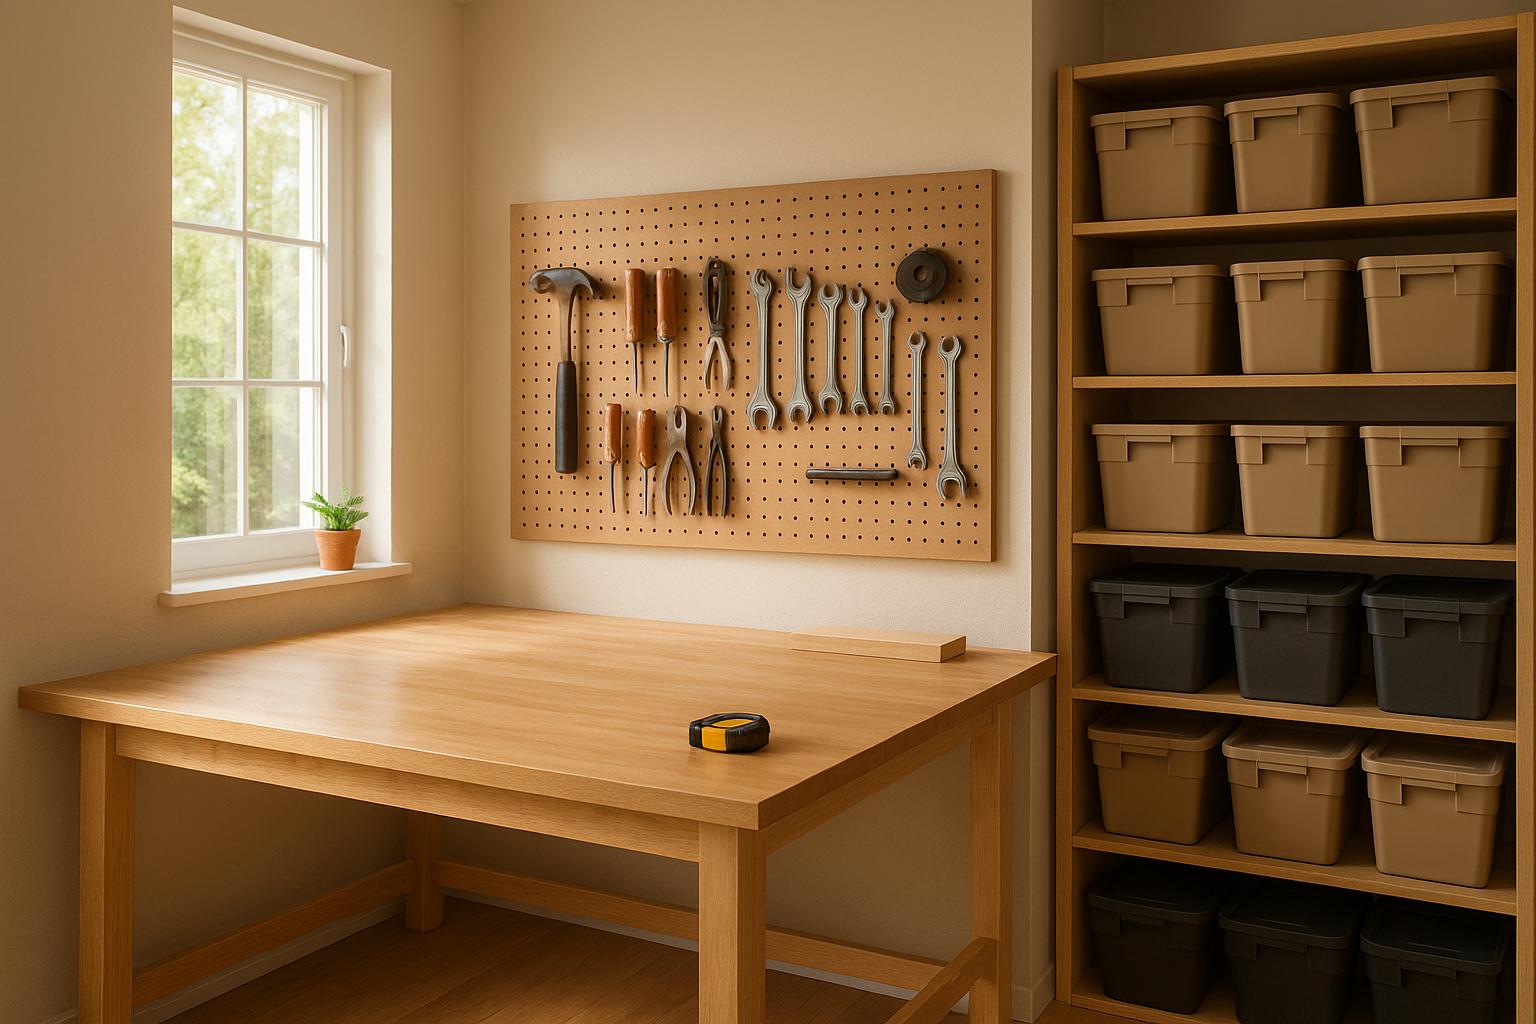
Pegboard systems are a popular choice because they’re versatile and customizable. With the help of hooks and accessories, you can hang a wide range of tools right where you can see them. For heavier tools like hammers or wrenches, opt for sturdy metal hooks to ensure they stay securely in place. Adding small bins or containers to the pegboard can help you keep smaller items, like screws or nails, organized and easy to find. To make the most of this setup, install the pegboard at eye level for quick access.
French cleat systems are another excellent option, particularly for heavier tools or power equipment. These systems use angled wooden or metal strips to create a strong, adaptable mounting solution. You can design custom holders for your tools and easily rearrange them as your collection grows, making it a flexible choice for evolving needs.
Magnetic tool strips are ideal for compact workshops. These strips hold metal tools like screwdrivers and pliers securely in place, right where you need them. Mount them near your primary work area to keep your most-used tools within arm’s reach.
While wall-mounted systems are great for saving space, cabinets and shelves provide additional secure storage options.
Cabinets and Shelving Units
If you need more enclosed storage, cabinets and shelving units can help you organize your tools and supplies while keeping them protected.
Rolling tool chests are a classic choice for secure, organized storage. By grouping tools by type or frequency of use, you can make your workflow smoother. Everyday tools should go in the most accessible drawers, while less-used items can be stored lower down. Adding drawer liners or foam organizers helps keep everything in place and prevents surface damage.
Wall-mounted cabinets are perfect for storing items like manuals, supplies, or tools that don’t see daily use. They save floor space and keep your items clean and dust-free. Mounted at a convenient height, these cabinets are easy to access and can even double as extra storage or display surfaces.
Adjustable shelving units are great for larger tools and materials. Heavy-duty shelving can handle significant weight, making it ideal for storing items like lumber, paint, or bulk supplies. Adjustable shelves let you customize the space to fit tools of varying sizes. Wire shelving works well for visibility and air circulation, but you might need bins or trays for smaller items to prevent them from falling through.
Mobile and Flexible Storage Solutions
For those who prefer flexibility, mobile storage options let you bring your tools directly to the work area.
Tool carts are a convenient way to keep your tools organized and mobile. With multiple levels, hooks for hanging tools, and smooth-rolling casters (often with locking mechanisms for stability), tool carts make it easy to transport your setup wherever you’re working. Multi-tiered designs help you organize tools, hardware, and power tools into dedicated zones.
Rolling workbenches combine a sturdy work surface with built-in storage. These units often include drawers, cabinets, and even power outlets, making them a versatile choice for tasks that require both workspace and tool access. They’re especially helpful for assembly or finishing projects.
Modular systems - such as stackable toolboxes or interlocking bins - offer a scalable solution as your tool collection grows. These systems are perfect for workshops that see varying levels of use. Start with the basics for your most-used tools and expand your setup over time.
Ultimately, your storage system should match your specific needs. If you only use your workshop occasionally, wall-mounted storage might be enough to keep things tidy without taking up too much space. On the other hand, if you’re a frequent user, mobile and modular systems can offer the flexibility and capacity you need. Start small, focusing on the essentials, and build your system as your projects and tool collection evolve.
Organizing Small Parts and Hardware
Small hardware can easily take over a workshop. These tiny yet essential components are crucial for most projects, but they often become the primary source of clutter. Having a smart organization system for small parts can save time and prevent the frustration of buying duplicates just because you can't find what you already have.
Container Systems for Small Parts
Clear plastic bins are a great choice for organizing small hardware since they let you see what's inside at a glance. Opt for stackable designs with secure lids to avoid spills. Smaller bins are perfect for frequently used items like wood screws or machine bolts, while larger ones can handle bulkier supplies.
Drawer organizers with adjustable dividers allow you to create compartments tailored to your needs. Metal organizers are better suited for heavier items like carriage bolts or lag screws. The key is to size the compartments properly so tiny parts don’t get lost or mixed up.
Compartmented storage boxes are another excellent option, especially for projects requiring a variety of fasteners. These boxes usually have 10 to 30 compartments, keeping related hardware neatly grouped. For instance, one box could be dedicated to electrical supplies - separating wire nuts, electrical tape, and different gauge wires - while another could store plumbing hardware like pipe fittings, washers, and O-rings.
If bench space is limited, rotating storage carousels can be a lifesaver. These multi-tiered units spin for easy access, making them ideal for screws, nuts, and washers that you frequently reach for during projects.
Labeling and Sorting Methods
Once you’ve chosen your containers, labeling them effectively is the next step. Use clear, detailed labels that specify both the type and size of the hardware. Instead of simply writing "screws", include details like "Wood Screws – 2 inch #8" or "Machine Screws – 1/4-20 x 1 inch." This extra detail will save you time when you're in the middle of a project.
Color-coded labels can make your system even more efficient. For example, you could use blue for plumbing supplies, red for electrical components, and green for woodworking hardware, making it easier to locate the right category at a glance.
For larger collections, an alphanumeric system can help keep everything organized. Start with broad categories (e.g., A for automotive, E for electrical, P for plumbing), then add numbers for subcategories (like E1 for wire connectors, E2 for switches, E3 for outlets). This approach works well as your collection grows and ensures items are returned to their proper places.
Another useful trick is photo labels. A close-up image of the item can be printed and attached to the container, which is especially helpful for specialty fasteners or uniquely shaped washers. To take it a step further, create a master inventory list that matches your labeling system. Keep this list in a visible spot or store it digitally for quick reference and updates.
Once everything is labeled and sorted, maintaining the system becomes much easier. But staying organized also means tackling clutter before it gets out of hand.
Preventing Hardware Clutter
Keeping clutter at bay requires regular maintenance. Make it a habit to go through your hardware collection every few months, removing items that are broken, unused, or duplicates. For example, bent nails, stripped screws, and rusty bolts should be discarded without hesitation. If you find you have an excess of certain fasteners, consider donating or disposing of the extras.
A simple "one-in, one-out" policy can help control inventory. Whenever you buy new hardware, check if you already have similar items. Consolidate or remove duplicates to avoid unnecessary buildup.
Avoid creating a dreaded "miscellaneous" pile by properly categorizing items. If you're unsure where something belongs, set up a temporary holding area and sort through it during your regular decluttering sessions.
When working on a project, gather all the small parts you'll need in a dedicated container and return any unused items afterward. Keeping a small container or magnetic tray on your workbench for loose hardware - and emptying it at the end of each session - can also help maintain order.
Digital Inventory Management for Tools and Materials
Keeping a workshop organized can feel like a never-ending task, especially as your collection of tools and materials grows. While physical organization systems help with visible storage, they often fall short when it comes to tracking everything. That’s where digital inventory management steps in, offering a clear snapshot of what you own, where it’s stored, and when it needs attention.
Benefits of Digital Workshop Management
Digital systems can transform how you manage your workshop. No more wasting time hunting for misplaced tools - a digital inventory puts everything at your fingertips, accessible right from your smartphone.
- Location tracking: Quickly find any tool and know exactly where it’s stored. This is especially handy in larger workshops or when you’ve lent out tools to friends or neighbors. Instead of relying on memory, you can log where each item belongs and its current status.
- Maintenance scheduling: Keep your tools in peak condition by setting reminders for routine upkeep. Whether it’s sharpening a table saw blade or changing the oil in your air compressor, staying on top of maintenance prevents costly repairs and ensures tools perform efficiently.
- Purchase planning: Avoid buying duplicates by checking your inventory before heading to the store. You can also identify missing accessories or tools needed for upcoming projects, making your shopping trips more efficient.
- Project preparation: Digital checklists make getting ready for projects much easier. Instead of gathering tools one by one, plan ahead and ensure everything you need is ready before you start.
With these advantages in mind, let’s explore what features to look for in a tool management platform.
Features to Look for in a Tool Management Platform
The best tool management platforms combine user-friendly design with powerful tracking features. Here are some standout capabilities to consider:
- AI-powered tool recognition: Simplify setup by letting the system identify tools from photos. This eliminates the hassle of manually entering details for each item.
- Smart categorization: Organize tools logically, grouping similar items together while allowing custom categories that fit your workflow. This becomes increasingly useful as your collection expands.
- Lending and borrowing management: Keep track of who borrowed your tools and when they’re due back. Automated reminders help ensure timely returns and avoid awkward conversations. You can also document the condition of tools before lending them out, reducing the risk of disputes.
- Photo documentation: Create a visual record of your tools. This not only makes them easier to identify but also serves as proof of ownership for insurance claims. Clear images can also help when shopping for compatible parts or accessories.
- Advanced tracking: Map tools to specific zones in your workshop or even across multiple locations. This is a game-changer for contractors who split time between home workshops and job sites.
Platforms like Toolstash combine all these features into a free, easy-to-use system tailored for workshop management. Its AI Snap feature can instantly identify tools, and its smart categorization adapts to your specific needs.
Adding Digital Tools to Your Workshop Routine
Once you’ve chosen a platform, integrating it into your daily workflow can make a big difference. Here’s how to get started:
- Start small: Begin by photographing and cataloging your most-used tools. This gives you immediate benefits while you gradually expand to your entire inventory.
- Build habits: Make it a routine to add new tools to your digital inventory as soon as you purchase them. Snap a photo, log the details, and you’re done - no backlog to worry about later.
- Use your smartphone during projects: When pulling tools from storage, check them off in the app. Do the same when returning them. This quick step keeps your location tracking accurate without disrupting your workflow.
- Set maintenance reminders: Base reminders on actual usage rather than fixed schedules. For example, track hours of operation for power tools or plan seasonal care for hand tools like cleaning and rust prevention before winter.
- Manage lending proactively: Document the condition of tools before lending them out. Take photos, set clear return dates, and use automatic reminders to ensure everything goes smoothly.
- Sync with project planning: Create tool lists for upcoming projects. Review your inventory, note any missing items, and plan purchases ahead of time. This prevents delays and ensures you’re fully prepared before starting.
The right digital system should enhance your workflow, not complicate it. Platforms like Toolstash strike this balance by offering intuitive features that fit seamlessly into your workshop routine, making organization effortless and efficient.
Maintaining a Clean and Safe Workshop
Keeping your workshop clean and organized isn’t just about aesthetics - it’s about protecting your tools, improving efficiency, and ensuring a safe environment. A cluttered space can quickly become chaotic, but with consistent maintenance, you can enjoy a workspace that’s both functional and enjoyable.
Daily and Weekly Cleaning Routines
The secret to maintaining order in your workshop lies in small, regular efforts. Spending just 10-15 minutes a day on simple tasks can prevent larger messes from building up.
Start each session by clearing your workbench. This simple habit not only gives you a fresh start but also ensures tools from previous projects are put back where they belong. As you work, make it a rule to return tools to their designated spots immediately after use.
Dust and debris can quickly accumulate, especially around power tools like sanders or table saws. To keep things safe and functional, sweep or vacuum high-traffic areas daily. Sawdust and metal shavings aren’t just messy - they can create slip hazards and even damage sensitive equipment if left unchecked.
On a weekly basis, focus on deeper cleaning and organization. Wipe down work surfaces with a degreaser, clean tool handles to remove grime, and empty the trash. Take a moment to check that all tools are stored correctly. If certain tools consistently end up in the wrong place, it might be time to rethink your storage system. Also, dispose of hazardous materials like used solvents or batteries according to local regulations - many areas offer special collection days for these items.
These daily and weekly routines set the stage for more thorough monthly and seasonal upkeep.
Monthly and Seasonal Maintenance
Monthly tasks go beyond surface tidying to address the deeper needs of your workshop. Start by inspecting all storage systems - check that pegboard hooks are secure, shelves are sturdy, and drawers open smoothly. Tighten loose hardware and replace worn components before they cause bigger issues.
Precision tools like squares and levels should be calibrated monthly to ensure accuracy. Even a minor drop can throw off their alignment, which could compromise the quality of your projects.
Seasonal maintenance focuses on long-term storage and environmental factors. For example, before winter, apply rust prevention treatments to cast iron surfaces on machinery like table saws and jointers. If you live in a humid area, consider using a dehumidifier during the summer to protect tools from corrosion.
Spring is the perfect time for a full inventory review. Declutter by donating or selling tools you haven’t used in the past year and reorganize storage systems based on what you’ve learned about your workflow.
Don’t forget to check and replace batteries in smoke detectors, carbon monoxide alarms, and emergency lighting. Clean out ventilation systems, inspect exhaust fans, and replace your shop vacuum’s filters as needed.
Organizing Safety Equipment
A clean workshop goes hand-in-hand with a strong safety plan. Your safety gear should be as organized and accessible as your tools. Store personal protective equipment (PPE) near the workshop entrance so it’s impossible to overlook. Hooks are great for hanging safety glasses, ear protection, and dust masks, while clear containers make it easy to monitor supplies like gloves and masks.
Your first aid kit should be mounted on the wall in a clearly visible, easily accessible spot - eye level is ideal. Check expiration dates on supplies every six months and restock immediately after any incident.
Fire safety equipment needs careful placement and regular checks. Fire extinguishers should be mounted near potential fire hazards, such as the electrical panel, welding station, or finishing area, but not so close that a fire could block access. Inspect pressure gauges monthly and schedule professional servicing annually.
For hazardous materials, use a dedicated metal cabinet with proper ventilation. Flammable liquids like solvents and adhesives should never be stored near heat sources or in direct sunlight. Keep Material Safety Data Sheets (MSDS) for all chemicals in a binder near the storage area. These sheets provide critical handling and emergency information.
Label all hazardous materials clearly, using chemical-resistant labels that won’t fade or peel. Consider a color-coded system: red for flammables, blue for health hazards, and yellow for reactive substances.
Make safety inspections part of your monthly routine. Test emergency lighting, ensure exit routes are clear, and verify that safety equipment is in its proper place. A few minutes of attention each month can go a long way in preventing accidents and keeping your workshop a safe, productive space.
Conclusion: Building a Productive and Organized Workshop
Setting up an organized home workshop lays the groundwork for better efficiency, creativity, and safety. By following practical strategies, you can transform a chaotic space into a functional and inspiring workspace.
Whether you're working with a compact 10×12 ft garage bay or a larger basement room, thoughtful planning and zoning make a big difference. A centralized workbench can streamline your tasks, while clearly defined areas for specific activities eliminate the hassle of constantly rearranging tools and materials mid-project.
Smart storage solutions play a key role in keeping your workshop running smoothly. Mobile carts allow you to keep tools within arm's reach, saving time and avoiding unnecessary searches. For smaller items like screws and bolts, a labeled container system ensures everything has its place, cutting down on frustration and preventing unnecessary purchases of items you already own.
Digital tools can also help you stay on top of your inventory and maintenance schedules. As your collection of tools grows, tracking what you have and when it needs servicing becomes increasingly important. These systems help maintain long-term efficiency and prevent redundant purchases.
Daily cleanup and routine inspections are essential for keeping your workshop functional. Spending just 10–15 minutes tidying up each day and scheduling deeper cleanings weekly can prevent minor messes from turning into overwhelming chaos. Monthly inspections help you catch issues early, and seasonal maintenance ensures your tools and equipment stay in top condition.
Start by tackling the messiest areas first - you’ll see immediate improvements in how smoothly everything runs. By organizing step by step, you'll quickly notice how much easier and more enjoyable your projects become.
Your workshop should be a place that motivates and excites you to dive into new projects, not a source of stress. With the right systems in place, it can become a space where productivity thrives.
FAQs
How can I make the most of limited space while creating distinct work zones in a small home workshop?
Maximizing space in a small home workshop starts with creating dedicated zones for specific tasks like cutting, assembly, or finishing. This approach not only keeps your workspace organized but also makes your workflow smoother and more efficient.
To keep tools within reach without crowding the floor, use vertical storage solutions such as pegboards, wall-mounted shelves, or hooks. These options are perfect for keeping everything neatly arranged and easy to find.
For even more flexibility, think about incorporating modular or foldable furniture. Collapsible workbenches or mobile tool carts can be adjusted for different projects and then tucked away when not in use. With careful planning and smart storage solutions, you can create a functional, clutter-free workshop, even in a compact space.
How can I keep my tools in good condition and prevent rust in a workshop with changing temperatures?
To keep your tools in top shape and avoid rust, it's essential to manage humidity and keep temperature changes in your workshop to a minimum. Sudden temperature shifts can create condensation, which is a major culprit behind rust. A dehumidifier or moisture-absorbing products can go a long way in keeping the space dry.
Make it a habit to apply protective coatings like oil or rust inhibitors to your tools. Store them in dry, insulated spaces - toolboxes with silica gel packs are a great option. After using your tools, always wipe them down to remove any lingering moisture or dirt. For extra peace of mind, consider rust-preventive products. These straightforward practices can help your tools stay in excellent working condition, even when the environment isn’t ideal.
How can Toolstash help me better organize and manage my home workshop?
Toolstash brings order and efficiency to your home workshop with its digital inventory system. It keeps tabs on your tools and materials in real time, so you always know exactly what’s available and when it’s time to restock. Forget the frustration of running out of crucial supplies mid-project - Toolstash takes the guesswork out of managing your inventory.
Equipped with features like automated tracking, categorization, and labeling, Toolstash makes finding your tools a breeze. No more wasted time rummaging through cluttered drawers or shelves. By simplifying organization and reducing manual errors, it frees you up to focus on what really matters - your projects. Whether you’re a casual DIYer or a seasoned pro, Toolstash transforms your workspace into a more efficient and enjoyable place to create.