Features
- Engineered to work with 18‑gauge 1/4 in. narrow crown staplers
- Suitable for cabinetry, furniture, floor underlayment, and paneling
- Coating intended for interior use only
- Chisel point reduces splitting of material
- Fits most 18‑gauge 1/4 in. narrow crown staplers
Specifications
| Staple Type | 1/4" Crown |
| Gauge | 18 GA |
| Crown Width (In.) | 0.25 |
| Staple Leg Length | 1 in. |
| Collation Material | Glue |
| Head Type | Chisel point |
| Finish/Coating | Coated (interior use only) |
| Package Quantity | 1000 |
| Product Weight | 0.008 lb |
| Returnable | 90-Day |
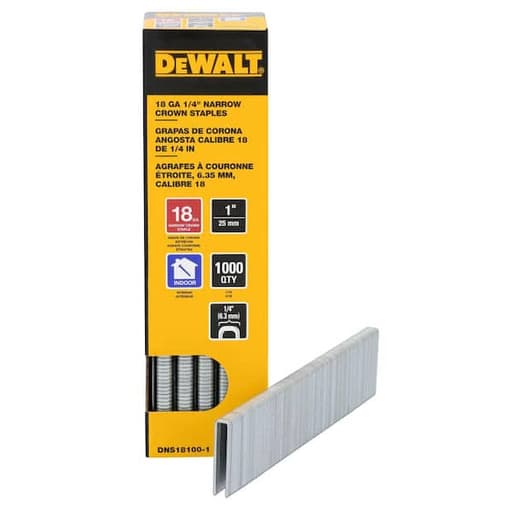
Box of 1 in., 18‑gauge narrow crown staples with a 1/4 in. crown. Glue‑collated and fitted with a chisel point to help reduce splitting. Coating is intended for interior use. Compatible with most 18‑gauge 1/4 in. narrow crown staplers. Common applications include cabinetry, furniture, floor underlayment, and paneling.
DeWalt 1 in. x 18-Gauge 1/4 in. Narrow Crown Staples (1000 per Box) Review
Why these staples earned a spot in my shop
I’ve cycled through plenty of narrow crown staples over the years, and the DeWalt 1-inch 18-gauge narrow crown staples have quietly become a reliable, go-to consumable for interior work. They’re straightforward: 1/4-inch crown, 1-inch legs, glue-collated, and a chisel point on each leg. The details matter more than the spec sheet suggests, and in day-to-day use—cabinet backs, light furniture assembly, paneling, and underlayment—they’ve behaved predictably and cleanly across a range of woods and sheet goods.
Setup and compatibility
These are 18-gauge, 1/4-inch crown staples, so they fit the common “narrow crown” class most carpenters carry. I ran them through two staplers: a compact pneumatic 18-gauge narrow crown stapler that lives on my bench, and a jobsite unit that tends to be less forgiving. Both fed the strips without fuss. The glue collation is consistent—no thick glue ridges that cause magazine drag, and no crumbly residue left behind that would clog the nosepiece over time.
Feeding and strip breakage were non-issues. Strips held together well during loading yet snapped cleanly when I needed to shorten a strip to finish a run. If you’ve ever dealt with brittle collation that shatters in your pouch, you’ll appreciate the small things here.
Driving and depth control
At 80–95 PSI on pine, ply, and MDF, I got full drives without crushing the crown or dimpling the surface. In maple and white oak face frames, I bumped pressure toward 95–105 PSI and used a shallower depth setting to avoid overdriving. The leg hardness feels tuned well for 18-gauge: stiff enough to resist wandering in denser material, but not so hard that it rebounds and leaves proud legs. I did not see any curling on the legs in plywood crossbands, which sometimes happens with cheaper staples.
The chisel points help more than marketing suggests. They consistently started clean and reduced surface splits near edges, especially in soft pine and thin hardwood edging. I still recommend staying at least 3/8 inch from an edge on hardwoods and bumping to 1/2 inch in brittle stock or veneered plywood. That said, I intentionally stapled closer than I should have on a piece of poplar to see what would happen—no visible splits, and only one minor lift of grain that scraped away easily.
Holding power in real tasks
Cabinet backs and bottoms: In 1/4-inch birch ply into poplar and maple cases, holding power was solid, with no telegraphing through the inside face. The 1/4-inch crown remains discreet, and any small crown marks hide under a quick pass of filler or are invisible inside cabinets.
Furniture jigs and knockdown fixtures: In 3/4-inch plywood, a single 1-inch leg has enough bite to keep parts aligned while glue cures. I often pair staples with a sparse scattering of brads; the staples’ cross-grain grip helps prevent parts from skating.
Floor underlayment: For 1/4-inch underlayment over a wood subfloor, the 1-inch leg is right in the comfort zone. I stapled on a 4-inch grid with tighter spacing at edges and seams. No blowouts, no pogoing off the subfloor when hitting a dense knot. As always, check local guidelines for spacing and fastener type in your area.
Paneling and beadboard: The narrow crown disappears into profiles better than brads in a few cases, and you get a stronger mechanical hold across seasonal movement. With painted finishes, the crowns fill quickly; with clear finishes, I’d still default to brads unless the paneling design hides the crown line.
Surface quality and repairability
Crown marks are consistently neat and shallow. Because these staples drive cleanly, you’re not excavating oversized divots to hide proud metal. On paint-grade work, two quick swipes of a lightweight filler and a sanding block were enough to make them vanish. The chisel point also means fewer blow-outs on thin veneers—still, test on scrap if you’re working with a fragile face veneer or fiber-core panel.
Pulling them later—if you need to adjust a panel or re-square a cabinet—was manageable with end nippers. The legs don’t excessively mushroom when reversed out, which makes rework less destructive.
Interior-only coating: know the limits
These are coated for interior use and are not galvanized or stainless. In practice, that means they’re great for dry, conditioned spaces and substrates that won’t see moisture. I wouldn’t use them in bathrooms with persistent humidity, basements with moisture issues, or anywhere near exterior openings without a moisture barrier. For trim around showers, mudrooms, or utility areas, I’d step up to galvanized or stainless depending on exposure. That’s not a knock against these staples; it’s about using them where they belong.
The coating itself didn’t gum up the driver or leave stains on pale woods, which can be a problem with some adhesives and coatings. After a day’s work, the stapler nose was clean enough to blow out and put away—no scraping needed.
Consistency and waste
Across several hundred shots, I didn’t encounter malformed crowns, bent legs out of the box, or staples that were short on one leg—defects that cause jams and misfires. Jams were essentially a non-event; I had one partial drive when I short-cycled the trigger while repositioning, which is operator error. Glue residue in the magazine was minimal. Little touches like that save time you’d otherwise spend clearing the nose and fishing for one-off defects.
Ergonomics and workflow notes
A 1/4-inch crown is the sweet spot for staying unobtrusive while still providing lateral grip that a brad can’t match. The 1-inch leg length is versatile for most interior assembly tasks; it’s long enough to bridge thin sheet goods into frames or subfloors without blowing through on the far face. If you routinely staple thick materials or stack multiple layers, keep a box of longer legs on hand, but for general shop and finish work, 1 inch covers a lot of ground.
For best results:
- Start at 85–90 PSI and tune up or down per material.
- Test depth on scrap—flush crowns hold best without crushing fibers.
- Keep at least 3/8 inch from edges in hardwoods; a bit more in brittle veneers.
- Orient panels so you’re not driving into end grain where possible.
- Use a straightedge or fence for consistent spacing on underlayment; staples shine when the grid is tight and uniform.
Where they fit—and where they don’t
Strength-wise, these are ideal for interior casework, trim carpentry, panel attachment, jig building, and underlayment. They are not framing staples and not intended for structural loads or exterior exposure. If you’re fastening treated lumber, working in damp spaces, or doing exterior soffits and fascia, go galvanized or stainless. For ultra-delicate trim where fill is unacceptable, a micro pin or 18-gauge brad might be more appropriate.
Bottom line
The DeWalt narrow crown staples deliver what I want out of a consumable: consistent feed, clean drives, minimal splitting, and predictable holding power across common interior materials. The chisel point does its job, the glue collation is tidy, and the 1/4-inch crown strikes a good balance between grip and invisibility. Just respect the “interior use only” limitation, and they’ll serve you well.
Recommendation: I recommend these for anyone doing interior cabinetry, furniture assembly, paneling, and floor underlayment with an 18-gauge narrow crown stapler. They’re reliable, clean-driving, and easy to work with. If your work involves moisture-prone areas or exterior applications, choose a galvanized or stainless alternative instead.
Project Ideas
Business
Accent wall and paneling installs
Offer turnkey interior accent walls: slat panels, beadboard, and wainscoting. The staples speed installation of thin panels and trim while minimizing splits in delicate mouldings. Package pricing by wall size, include design mockups, and upsell paint/stain finishes.
Cabinet refacing and trim upgrades
Provide fast cabinet refreshes by stapling on new end panels, toe-kick skins, light-rail trim, and scribe mouldings, backed with adhesive for longevity. Narrow crown staples are ideal for face frames and thin veneers. Market to realtors and homeowners seeking budget-friendly kitchen updates.
Home studio acoustic panel service
Design, build, and install fabric-wrapped acoustic panels for podcasts, music rooms, and conference spaces. Use these staples to assemble frames and stretch fabric cleanly. Offer tiered packages (starter, pro, premium fabrics) and on-site installation for a polished look.
Chair seat reupholstery pop-up
Run a mobile or weekend workshop re-covering dining chair seats. The staples quickly secure fabric to plywood seats without large staple heads showing. Partner with cafes or markets, offer fabric options, and price per seat with volume discounts.
Trade show and retail display builds
Fabricate lightweight indoor displays: panel backdrops, product risers, and fabric skins over wood frames. The 18‑ga staples speed assembly and reduce material splits in thin panels. Offer rentals and custom branding, with flat-pack designs for easy shipping.
Creative
Mid-century slat wall art panel
Create a decorative wall panel by stapling 1/2–3/4 in. wood slats onto a plywood backer. The 18‑ga narrow crown staples with chisel points reduce splitting in thin slats and hold firmly when paired with wood glue. Finish with stain or paint. Interior-only use makes this perfect for living rooms, entryways, or offices.
Fabric-wrapped acoustic panels
Build lightweight frames from 1x2s, insert mineral wool or acoustic foam, then stretch fabric over the face and staple to the backside. The 1 in. staples deliver strong hold without bulky heads telegraphing through fabric. Hang as a grid for a studio, theater room, or home office.
Custom drawer organizers
Cut thin plywood or hardboard dividers and staple them into a shallow frame that drops into existing drawers. The narrow crown and chisel point minimize splitting on thin stock. Add felt liners and labels to organize utensils, tools, or craft supplies.
Upholstered headboard or bench
Create a plywood base, add foam and batting, then wrap with upholstery fabric and secure from the back using the 18‑ga staples. The narrow crown reduces visible marks while holding fabric tight. Finish the edges with trim or a simple wood frame and mount indoors.
Shadow boxes and display cases
Assemble shallow frames from 1/2–3/4 in. stock with glue and staples, then attach a thin plywood backer. The 1 in. leg length gives good penetration without poking through. Paint or stain, add a glass/acrylic face and hinges if desired, and use for medals, botanicals, or miniatures.