Features
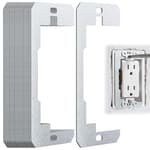
- Easy Outlet Repair & Secure Installation:Is your outlet loose or recessed into the wall? Our 10-pack of wall plate spacers is the perfect solution for securing loose, crooked, or recessed outlets. Simply turn off the power, install the spacer between the outlet and the wall, and restore a level and secure outlet. This process is quick, safe, and hassle-free.
- Premium Galvanized Metal Construction:Crafted from high-quality galvanized metal, these electrical outlet spacers are built to last. Resistant to rust, corrosion, and wear, they provide long-lasting durability, making them perfect for both indoor and outdoor use. These spacers will not warp or degrade over time, ensuring your outlets remain secure.
- Thicker, Stronger, and More Reliable:At 50% thicker than typical spacers, these outlet leveling plates provide superior support for your electrical outlets. They keep outlets flush with the wall, preventing them from becoming wobbly or loose. With a stronger, more stable design, you can trust these spacers to keep your electrical connections safe.
- Versatile Compatibility for Multiple Applications:Designed to fit all standard single outlet devices, these spacers are versatile enough to work with switches, outlets, and other wall-mounted electrical devices. Whether you're upgrading your home, office, or any space with electrical outlets, these spacers offer the perfect fit.
- Hassle-Free Installation & Customer Support:Installing these spacers is as easy as 1-2-3—just turn off the power, remove the cover plate, insert the spacer, and replace the cover plate. For any issues or concerns, our customer service team is available 24/7 to assist you and ensure your satisfaction.
Specifications
| Unit Count | 10 |
Related Tools

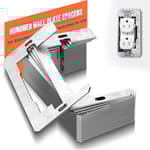
Pack of 10 galvanized metal wall plate spacers designed to level and secure recessed or loose single outlet devices and switches. Each spacer is 50% thicker than typical spacers for increased support, resists rust and corrosion for indoor or outdoor use, and installs by placing the spacer between the device and wall before replacing the cover plate.
Showhol 10 Pcs Wall Plate Spacer,Spacers for Electrical Outlets, Metal Flush Fit Device Leveling Plates for Electrical Outlet Repair, Fix Loose Outlets and Electrical Boxes Review
Loose or recessed outlets are one of those small annoyances that make a space feel unfinished—and in some cases, unsafe. I put the Showhol spacers (model XH250120) to work across a handful of problem spots in my house to see if a simple metal shim could bring crooked, wobbly devices back into line. Short answer: they’re effective, quick to use, and sturdier than the plastic accordion shims I usually keep in my kit. They’re not the right answer for every scenario, but when they fit the use case, they solve the problem cleanly.
What these spacers are (and aren’t)
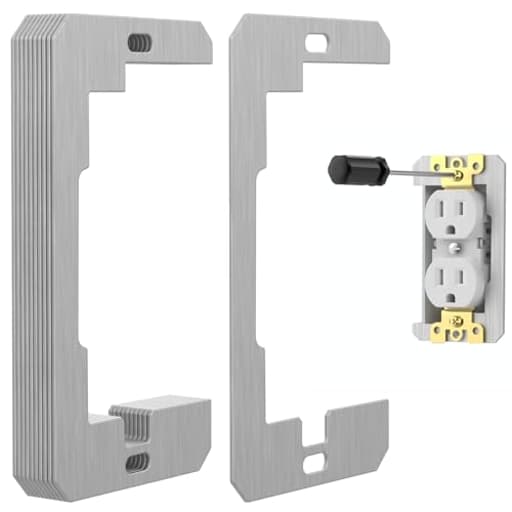
Each piece is a thin, galvanized steel plate shaped to sit behind a standard single device—duplex receptacles, Decora/GFCI outlets, or toggle/rocker switches. The U-shaped notch “hooks” over the device’s top mounting screw, and two large clearance holes let the cover plate screws pass through. Showhol claims these are about 50% thicker than typical spacers; while I didn’t mic them, they do feel noticeably more rigid than the flimsy sheet-metal shims I’ve used before. You can stack them if you need more build-out.
A key point: these are device-level shims. They’re designed to stabilize and level a device that sits slightly recessed or wobbles because the wall surface is proud of the box (tile, shiplap, thick paint builds, or uneven drywall). If your electrical box is recessed too far back to meet code, you should be using a box extender—not just a device shim.
Installation experience
- Power off at the breaker and verify the device is de-energized.
- Remove the cover plate and slightly loosen the device’s top and bottom screws.
- Hang a spacer on the top screw with the U-shaped cutout facing upward. This orientation keeps the plate from slipping while you position the device.
- Center the device, snug the screws, then reinstall the cover plate. The large holes in the spacer line up so the plate screws pass right through.
On a bathroom GFCI that sat about a millimeter below a tile backsplash, a single spacer brought the device perfectly flush. The outlet no longer flexed when plugging in a hair dryer, and the cover plate tightened evenly with no gaps. I repeated the process on a garage receptacle set in an older metal box with slightly warped drywall; again, one spacer eliminated the wobble and stopped the plate from bowing.
In a third case—an old plaster wall with a box set a bit deeper—two stacked spacers were needed to get the device face where it belonged. Stacking worked fine, but you do have to recheck that the cover plate can still sit flat. If you need more than two, that’s generally a sign you should switch to a box extender.
Fit and performance
The most obvious advantage here is rigidity. Plastic accordion shims compress over time and can leave devices feeling loose again, especially where travel adapters or heavy plugs get used a lot. These metal plates don’t give, so once you’ve tightened the device yoke, it stays put. I could feel the difference immediately when pushing a bulky charger into the outlet—no more spongy movement, and less risk of cracking a brittle cover plate.
Because the plates are galvanized, they’re resistant to rust. I don’t hesitate to use them in damp-prone areas like bathrooms or a covered garage, where untreated steel would corrode. Outdoors, they technically live behind the cover plate and should be sheltered, but I’d still pair them with an in-use (weatherproof) cover and be sure the installation is appropriate for the location.
One nuance: on a couple of slightly lumpy drywall openings, the spacer’s flat, stiff profile highlighted imperfections at the perimeter, making it harder for a thin cover plate to sit perfectly flush. The workaround was simple—re-seat the device and lightly adjust the drywall edge with a utility knife—or switch to a mid-size cover plate if the cutout is chewed up. In one situation, I mixed one metal plate with a small plastic shim on the opposite screw to correct a subtle angle, which worked nicely.
Safety and code notes
These plates are metal and therefore conductive. In normal use, they sit behind the device yoke, not touching any terminals. Still, it’s good practice to:
- Kill power at the breaker and verify it’s off.
- Keep the plate clear of hot terminals and any exposed conductor.
- If your box is set back beyond the allowable limit (often 1/4 inch in noncombustible walls), use a listed box extender to bring the box flush. A device shim isn’t a substitute for proper box extension.
If you’re working with a plastic box, the device yoke is not inherently grounded; that doesn’t change the installation, but it’s another reason to double-check clearances as you tighten.
Where these spacers shine
- Quick fixes for minor recesses: Tile, paneling, or a slightly proud wall surface can push a cover plate off-kilter. One spacer levels the device without any fuss.
- Firming up wobbly devices: If the outlet rocks when you plug in, these plates remove the flex that cracks cover plates over time.
- Durability: The thickness and galvanization make them less prone to warping or rusting than thinner sheet-metal shims.
- Stackability: Using two gives you a bit more adjustment range without jumping to an extender.
- Value: A 10-pack is practical for a small home refresh, and I like having extras on hand for the inevitable “mystery wobbler” I find during other work.
Where they struggle
- Irregular wall openings: On heavily chipped drywall or plaster, a flat metal plate can reveal imperfections. You may need to clean up the opening or use a larger cover.
- Deep set-back boxes: If you’re more than a couple of spacer-thicknesses away from flush, it’s time for a box extender—not more shims.
- Multi-gang situations: These are shaped for single devices. They can help in a multi-gang box on a per-device basis, but they don’t address a whole crooked bank of switches.
- Screwless cover systems: They usually still work, but check that the sub-plate and cosmetic cover can seat without interference, especially when stacking spacers.
Practical tips from use
- Hang the U-notch up: With the U at the top, the spacer hangs on the screw while you work. Flipped, it can slip and make alignment fiddly.
- Start with one plate: Tighten, test the plug feel, then decide if you need a second. It’s easy to overdo it.
- Keep an assortment: A couple of these metal plates plus a pack of plastic incremental shims covers nearly every leveling scenario.
- Don’t overtighten cover plate screws: Once the device is properly supported, the plate screw just needs to be snug. Overdoing it can distort thin covers.
Build quality and finish
The galvanization is even and smooth, with cleanly punched holes. Edges on my set were free of burrs and didn’t snag gloves or drywall paper. After installation, they disappear behind the device yoke; nothing protrudes beyond the cover plate footprint. They’re simple parts, but the extra thickness pays off—especially on outlets subjected to frequent, firm plug-ins.
Value
As utility items go, these earn their keep. The 10-pack is enough to tune up a bathroom and kitchen suite of outlets and still have a handful left for future projects. Because they’re metal and don’t deform, they’re also reusable if you’re reconfiguring a space. If you already rely on plastic shims, consider keeping both on hand: plastic for micro-adjustments and odd angles, these metal plates for primary support and rigidity.
Verdict
The Showhol spacers do exactly what I want from a device shim: they stabilize outlets and switches quickly, bring device faces flush with the wall, and stay put over time. They’re especially useful in tiled areas and anywhere heavy plugs or adapters tend to make outlets flex. They won’t replace box extenders where the box is significantly recessed, and they can highlight the sins of a ragged drywall cut. But used in the right scenarios, they’re a tidy, durable fix that improves both function and finish.
Recommendation: I recommend these spacers for DIYers and pros who need a fast, reliable way to level and firm up single-gang devices. They’re sturdy, rust-resistant, and easy to install, and a 10-pack offers solid value. Just pair them with proper box extenders when code or deeper recesses demand it, and you’ll have a simple, safe solution to most wobbly or recessed outlet issues.
Project Ideas
Business
DIY Outlet Repair Kit
Assemble and sell a branded kit that includes several spacers, replacement screws, a small insulated screwdriver, clear step-by-step safety instructions, and a QR code linking to an install video. Market to homeowners, DIYers, and gift-for-new-home packages on Amazon, Etsy, or local hardware stores.
Upcycled Industrial Jewelry Line
Produce a line of handmade jewelry (necklaces, cufflinks, keychains) using spacers as core components. Emphasize eco-friendly upcycling and industrial design. Sell on Etsy and at craft fairs, use high-quality photos and short videos, and offer customization (finish, stamping) to command higher margins.
Maintenance Subscription for Landlords/Hosts
Offer a small recurring box (quarterly or semiannual) that supplies property managers, Airbnb hosts, and landlords with outlet spacers, screws, and a short maintenance checklist. Add tiered plans, bulk discounts, and an option to include remote troubleshooting videos—position it as time-saving preventive maintenance.
Workshops & Video Tutorials
Run local classes or online workshops teaching safe outlet repair and creative upcycling projects using the spacers. Monetize via ticket sales, hosted content (Udemy/Skillshare), or Patreon. Include downloadable templates and sell physical kits to attendees to boost per-class revenue.
Wholesale & Co-Branded Supply Packs
Pitch bulk spacers in custom-branded packs to electricians, handyman services, property management companies, and hardware stores. Offer private labeling, bundled how-to inserts, and short training videos they can share with technicians or customers. Low-cost, high-turnover B2B channel.
Creative
Industrial Pendant Necklaces
Turn a spacer into an industrial-chic pendant: clean and patina the galvanized surface (or leave raw), drill or use the center hole for a jump ring, add a leather cord or plated chain, and pair with small washers or beads. Make sets (different finishes, stamped initials) for gifts or a small Etsy line. Quick, low-cost, and highlights the rugged hardware aesthetic.
Mini Shadowbox Magnets
Create tiny industrial shadowboxes by mounting a spacer on a 2" x 2" wood square, arranging small found objects (nuts, tiny screws, enamel dots) behind it, and finishing with a strong magnet on the back. These make unique fridge art, stocking stuffers, or desk magnets—easy to batch-produce and customizable by color/theme.
Stamped Metal Tags & Bookmarks
Use the spacer as a durable tag or bookmark base. Flatten slightly if needed, texture or sand the surface, then use metal stamps to add names, short quotes, or dates. Drill a hole and add ribbon or twine. These are great as personalized gift tags, wedding place cards, or boutique bookmarks.
3D Geometric Wall Mosaic
Make a modern wall sculpture by painting groups of spacers in complementary colors and stacking or offsetting them on a plywood backing to form repeating geometric patterns. The hole and raised edges add shadow and depth; arrange in grids or spirals for a striking, tactile piece that plays with light.
Mini Wind Chime / Mobile
String several spacers on fishing line or thin wire with beads and small metal bits to make a tiny wind chime or mobile. The spacers' metal tones produce a soft tinkling when they touch. Use different lengths for a cascading effect; ideal for porches, sunrooms, or craft markets.