Features
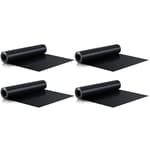
- Ideal Size and Dimension: ensuring appropriate coverage is a critical part of deck waterproofing; Our under deck drainage system boasts dimensions of about 16.14 inches/ 41 cm in width and 52.49 ft/ 16 m in length and its thickness of about 0.03 inch/ 0.75 mm ensures ideal protection, making it the nice deck waterproofing membrane
- Durable Material: an effective under deck drainage system begins with the materials adopted; This specific deck drainage features HPDE material, renowned for its nice durability and resilience; Resistant to harsh weather conditions, this system provides lasting service for decks, serving as a solid waterproofing material for decks
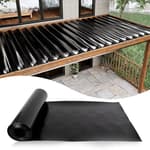
- Improve Space Utilization: our deck waterproofing membrane not only prevents your deck but also increases under deck storage space; By providing a waterproof seal, you can utilize the area beneath the deck as a storage space and convert the under deck space into a dry storage area, ideal for storing outdoor furniture, barbecue equipment and more
- Aesthetically Pleasing design: a deck is not just functional, but also a part of your home's aesthetic appeal; Our under deck waterproofing system comes in a classic black color, nicely blending in with your outdoor decoration; It provides not only efficiency but also contributes to enhancing your space
- Simple Installation: with our deck waterproofing, complex installation processes are a concept of the past; It's easy to install, and can keep framing and underneath deck area dry; You can first staple to top of joists, next use self sealing tape at joints and then crew downspout to drain hole
Specifications
| Color | Black |
| Size | 52.49 ft x 16.14 inches |
| Unit Count | 1 |
Related Tools
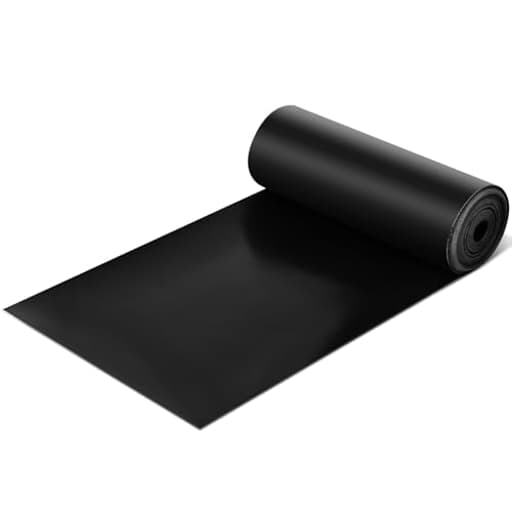
This under-deck drainage membrane is a black HDPE sheet about 16.14 inches wide, 52.49 feet long and 0.03 inch (0.75 mm) thick that channels water away from the underside of a deck. It creates a waterproof ceiling to increase usable dry storage beneath the deck and is installed by stapling to joist tops, sealing seams with self-sealing tape, and attaching a downspout at the drain hole.
Pushglossy 52.49 ft x 16.14 inches Under Deck Drainage System, Black Waterproofing System for Under Deck Ceiling 0.03 Inch Thick Review
What this membrane is trying to solve
I put the Pushglossy under‑deck membrane to work on a ground‑level deck rebuild where the homeowner wanted a reliably dry patio and storage area below. The product is a roll of black HDPE about 16.14 inches wide, 52.49 feet long, and 0.03 inch (0.75 mm) thick. The idea is simple: staple it to the tops of joists, slope it toward a drain point, tape the seams, and send water to a small downspout so rain never reaches the space beneath.
There are countless under‑deck solutions, from proprietary interlocking ceiling panels to DIY membranes. This one sits in the “over‑joist” camp: it goes on before deck boards and turns each joist bay into a tiny gutter. That has upsides—hidden from view, protected from UV, and relatively inexpensive—but it also demands careful planning around slope, spacing, and ventilation.
Installation experience
I installed the membrane on a new frame, which is the ideal scenario. I laid it out on a warm day; that matters because the HDPE relaxes noticeably with heat and is far more cooperative. In cold weather, it feels stiff and holds coil memory.
My process:
- I set a consistent fall of roughly 1/8 inch per foot from the ledger to the outer beam and marked each joist with a pencil line to reference the membrane’s “low” edge.
- I pre‑cut manageable lengths off the roll (about 10 feet pieces) and dry‑fitted them to confirm overlap.
- Fasteners: 1/2-inch stainless crown staples held well. I ran fasteners every 6–8 inches on the high side first, then eased the sheet into a shallow trough and tacked the low edge to keep the slope.
- Seams: a high‑quality self‑sealing butyl tape is essential. I used a 4-inch tape, rolled it hard, and left 3–4 inches of overlap.
- Drainage: at the beam line I punched a drain hole in each bay, screwed a small outlet fitting to the beam face, and connected short downspouts that feed into a perimeter drain.
Two things stood out. First, the 0.75 mm thickness is durable and resists puncture from the occasional proud fastener or splinter—good news during deck board installation. Second, that same thickness, combined with the narrow width, means you must be very deliberate about how you form each trough.
Fit and spacing: where it shines and where it struggles
This roll is about 16.14 inches wide, which dictates where it makes sense. On 12-inch on‑center framing, it’s a comfortable fit. You get enough material to form a trough and still reach the joist tops for fastening and overlap.
On 16-inch on‑center joists, you’re at the margin. To make a functional trough, the membrane needs to dip below the joist edges while still providing fastening surface on both sides. With only a hair over 16 inches to work with, you have almost no allowance for dip, overlap, or crooked cuts. On a test section of 16-inch spacing, I could make it work only by:
- Reducing the effective span with 1x cleats fastened to the inside faces of the joists, or
- Accepting a very shallow trough and adding more tape insurance at the edges, which I don’t recommend for long-term reliability.
If you’re planning to use this on existing 16-inch on‑center frames and want generous troughs, budget time and material for those cleats or be prepared to step down to 12-inch on‑center during a reframe. For new builds, spec 12-inch spacing if you intend to use this membrane—life is easier.
Performance once in service
After installation, I soaked the deck with a hose and later watched two heavy summer storms. Water collection was consistent: it shed quickly, and I didn’t see drips anywhere in the test bay area below. The butyl‑taped seams stayed tight. The membrane’s black surface gets warm, which actually helps shed small amounts of debris and encourages flow, but it also highlights why slope is non‑negotiable. Flat spots pool.
Noise is minimal; there’s a gentle “ping” the first minute of rainfall as droplets hit the deck boards above, then it quiets. Because the system is above the joists, it’s not visible from below and doesn’t change the look of the space—nice if you’re keeping the underside open rather than adding a finished ceiling.
Durability and material behavior
HDPE is the right call for this application. At 0.75 mm, it’s thick enough to shrug off incidental abuse but still cuttable with shears or a sharp utility knife. It’s non‑hygroscopic, so it won’t wick moisture, and being sandwiched between framing and boards means UV exposure is minimal after install. I’d still store it out of direct sun before use; the roll can take a set if it bakes in place.
The stiffness is a double‑edged sword. It helps the trough hold shape once set, but it means you need warmth and patience during install, especially at the start of a run or where you transition over hangers.
Moisture management and deck health
Any over‑joist membrane raises a fair question: are we trapping moisture against the deck boards? I mitigated that with three practices:
- I used spacers to maintain a consistent board gap, which lets the assembly breathe from above.
- I pre‑sealed all fresh‑cut board ends and the ledger connection with flashing and butyl.
- I kept ventilation open at the rim so air can move through the joist bays.
Done that way, the underside framing stayed visibly dry after storms. If you’re working with wood decking (not composites), those gaps and ventilation are especially important.
Design and aesthetics
Because it sits on top of the joists, the membrane doesn’t alter the look of the underside much, aside from the small downspouts at the beam. The black color is a practical choice: it hides dirt at the rim, and if any edge is visible between boards at the outer perimeter, it recedes into shadow.
What I liked
- Durable thickness: 0.03 inch (0.75 mm) HDPE feels robust and takes staples well.
- Hidden system: nothing to see under the deck, just a dry zone.
- Straightforward materials: staples, butyl tape, and a utility knife cover most of the install.
- Modular: repairable. If a future board replacement punctures a section, you can patch with tape or splice in a short piece.
What gave me trouble
- Width vs. 16-inch spacing: at 16.14 inches wide, it’s not friendly to 16-inch on‑center joists unless you add cleats or accept a shallow trough.
- Stiffness in cool weather: install on a warm day; otherwise, it fights you.
- Planning required: slope, outlet locations, and seam direction need thought. It’s not the kind of product you “figure out as you go.”
Tips for a smoother install
- Work warm. Leave the roll in the sun to relax (but not so hot it deforms), or start mid‑day.
- Snap or pencil your slope lines on each joist. That visual guide prevents accidental back‑pitch.
- Use butyl tape, not generic duct tape. Roll it firmly with a J‑roller.
- Pre‑drill and fit your outlet/downspout hardware before cutting drain holes.
- Keep overlaps consistent, and always shingle your seams in the direction of flow.
- If you must use it on 16-inch on‑center, fasten 1x ripping cleats on the inside faces of the joists to narrow the trough opening and gain fastening land.
Value and where it fits
As an affordable path to a dry area under a deck, this membrane makes sense on new builds or rebuilds where you control joist spacing and can plan outlets from the start. It’s less compelling for quick retrofits on existing 16-inch on‑center frames without modification. Compared with under‑joist ceiling systems, it’s simpler and cheaper but places more responsibility on install quality.
Final recommendation
I recommend the Pushglossy under‑deck membrane for builders or experienced DIYers installing on 12-inch on‑center framing, or for anyone willing to add cleats to tighten up 16-inch bays. It’s durable, effective, and disappears once the boards go down. That said, I would not recommend it as a drop‑in solution for standard 16-inch on‑center decks unless you’re prepared to adjust framing or accept the compromises of a very shallow trough. Plan your slope, use proper tape, and install warm—do that, and it delivers a reliably dry space below.
Project Ideas
Business
Under-deck waterproofing & storage conversion service
Offer a local service installing the membrane to convert wet under-deck areas into usable dry storage or living space. Package tiers can include basic drainage install, framed storage cubbies, lighting and outlet installation, and decorative ceiling finishes. Use the product's low cost and quick installability to provide fast, high-margin jobs for homeowners.
DIY kits + online tutorial bundles
Sell pre-cut DIY kits for common deck sizes that include measured membrane lengths, self-sealing seam tape, fasteners, a pre-drilled downspout kit, and a step-by-step video course. Market to handy homeowners and rental property managers—offer digital downloads or printed templates, plus live virtual installation coaching for an upsell.
Event & contractor rental stock
Buy rolls wholesale and rent them to event planners, builders, and landscapers for temporary waterproofing, ground protection, or pop-up shelters. Create rental bundles with grommeted frames, tie-down kits, and quick-attach downspouts. Rentals reduce customer capital outlay and create recurring revenue from the same inventory.
Modular waterproof storage products
Manufacture and retail finished modular storage modules—pre-lined boxes, bin liners, or stackable waterproof cabinets—using the membrane as the waterproof lining. Target niches like pool owners, RV/boat storage, and tiny-home builders. Sell through e-commerce platforms, home shows, and local dealers; offer custom sizes for contractors.
Creative
Under-deck dry-storage cubbies
Build custom waterproof storage cubbies or lockers beneath a deck by stapling the HDPE membrane to simple plywood frames or directly to joist undersides. Use self-sealing tape at seams to create watertight boxes and attach a small downspout or drilled drain hole for routed runoff. Great for storing cushions, grills, gardening tools and creating an organized, dry basement-like space without heavy construction.
Outdoor shower / changing stall
Make a lightweight, quick-install waterproof enclosure for an outdoor shower, pool changing stall, or dog-washing station. Stretch the membrane between a simple timber frame, seal overlapping edges with tape, and cut a drain hole with an attached downspout or hose adapter. The black HPDE blocks wind, sheds water, and is easy to clean—ideal for seasonal backyard upgrades.
Roll-out awnings and temporary shade
Create portable roll-out awnings, sun shades, or festival covers by taping multiple widths together to reach the desired coverage, then reinforcing edges with grommets or sewn webbing. The thin, weather-resistant material is light to transport and can be fastened to trees, poles, or a frame for quick event shelters, tailgating canopies, or market stalls.
Planter liners & self-watering raised beds
Cut and form the membrane into liners for raised beds, long planters or troughs to protect wood and contain moisture. Use taped seams to create internal water channels or a reservoir layer, add controlled drain holes, and you have a low-cost, durable self-watering system that extends the life of wooden boxes and concentrates moisture where roots need it.