Features
- latex paint lasts up to 5-10 years, The product is marked with the production date and not the expiration date.
- Use at 5-27 degrees Celsius.
Specifications
| Color | White |
| Unit Count | 1 |
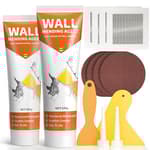
Related Tools

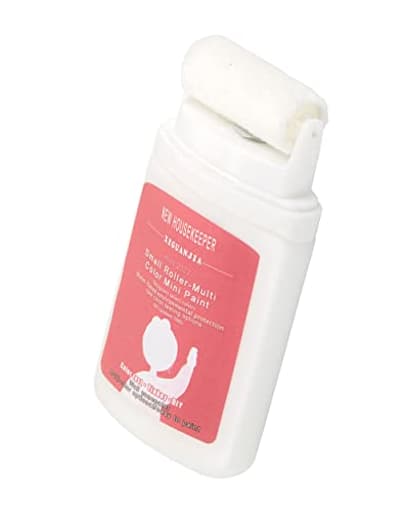
Small roller and brush set designed for applying wall repair paste and spackle to fill small holes and touch up painted surfaces; includes 100 g of white latex paint. The latex paint is marked with a production date (not an expiration date), is rated to last approximately 5–10 years, and should be used at temperatures between 5°C and 27°C.
Limecute Small Roller Wall Patching Brush Wall Repair Paste Mini Spackle Roller Paint Brush Tool with Latex Paint 100g White Review
Why I Reached for This Tool
Moving out of a rental with a tight timeline, I wanted something faster than the classic spackle–sand–prime–paint dance for tiny nail holes and scuffs. The Limecute mini spackle roller promised a one-hand, one-bottle solution: roll on a white, slightly thicker latex paste that would both fill and cover small blemishes. That convenience is the draw here—and with the right expectations and some technique, it can be a truly handy little fixer.
What You Get
This is a compact roller-and-brush set paired with a 100 g bottle of white latex paint. The bottle is marked with a production date (not an expiration date), and the paint is rated to remain usable for roughly 5–10 years if stored properly. It’s water-based with a low odor, and it performs best within 5–27°C. Color is a bright, neutral white with a flat, chalky look—helpful for hiding scuffs on matte walls, less ideal on satin or semi-gloss finishes.
The roller is integrated into the top of the bottle so the paint/paste feeds the nap as you squeeze. There’s also a small brush for corners and tighter spots.
Design and Build
The form factor is clever: one hand to control pressure and flow, the other to steady your reach. The roller’s small diameter helps with precision, and the included brush saves a trip back to the toolbox for cut-in work around door frames and outlet covers.
It’s not without quirks. The roller relies on being firmly seated onto its axle, and if you don’t snap it on perfectly it can loosen mid-use. Also, the feed path from the bottle to the roller sits just far enough that you need to prime the nap—usually by giving the bottle a gentle squeeze while rolling on a piece of scrap cardboard—before paint flows evenly. The good news: once primed, it lays down predictably. The bad news: squeeze too hard and it will drip.
Setup and Technique
Here’s the routine that gave me the best results:
- Shake the bottle for 30–45 seconds, then knead it briefly to loosen the paint.
- Check that the roller is fully clicked into place.
- Prime on scrap by squeezing lightly as you roll to saturate the nap. You want “damp cake frosting,” not “milk.”
- Keep the bottle roughly vertical while rolling to encourage consistent feed.
- Apply with light pressure; let the roller do the work and avoid crushing the nap.
- Feather edges with the dry side of the roller to blend.
For the included brush, use it as a dabber rather than a painter when you’re trying to coax material into pinholes. A light dab, a quick roll, and a second dab if necessary often does the trick.
Performance on Common Fixes
- Scuffs and handprints on flat white walls: Excellent. Two quick passes hid most marks completely with no visible flashing. The finish is matte and low-sheen, so it blends well on flat paint.
- Hairline marks and light pencil: Also excellent. One coat was usually enough; two for darker marks.
- Small nail holes (typical picture hangers): Mixed to good, depending on size and technique. Press the nap softly across the hole from multiple directions and let the paint/paste bridge rather than gouge. I typically needed two to three passes with a few minutes between to let the first pass stiffen up.
- Slightly larger holes (drywall anchors, oversized nails): This is where the tool hits its limit. The material doesn’t have the body of true spackle. I had to pre-fill with a separate lightweight spackle, knock it down with a sanding sponge, then use the roller to blend the patch invisibly. The roller excels at the final blend, not at filling deeper voids.
- Door and trim scratches: Good coverage on white trim and doors, but be mindful of sheen mismatch if your trim is semi-gloss. On a white door with a satin finish, the color matched closely but the sheen looked flat. A quick buff with a microfiber cloth after it dried helped slightly, but it didn’t fully mimic satin.
- Ceilings: Possible, but I don’t recommend it. Overhead work amplifies drips if you misjudge the squeeze.
Finish, Color, and Blend
Color is a bright, clean white. On truly white walls with a flat finish, blending is surprisingly convincing. On off-white or warmer whites, you’ll notice a subtle mismatch. If your home uses eggshell, satin, or semi-gloss, expect a difference in sheen. You can minimize this by feathering wide, using very light pressure on the last pass, and coming back after it dries for a thin, dry roll to diffuse the transition.
The texture is slightly chalky, which helps it “stack” into tiny holes, but it won’t replace a traditional spackle for larger repairs.
Mess and Maintenance
Clean-up is easy—warm water and a little soap on the roller and brush gets you back to clean if you plan to reuse it. If you’re done for the day, rinse the roller thoroughly or it will stiffen as the latex sets in the fibers. Store the bottle upright with the cap on tight. Remember, the printed date is the production date; don’t toss it assuming it’s expired.
One caveat: the roller can pop off if it’s not set correctly. I had it happen once, and it made a small mess. Push it firmly onto the axle and wiggle to confirm it’s locked. Work over a drop cloth if you’re on hardwoods or carpet.
Practical Tips
- Work within the recommended temperature range (5–27°C). Below that, the paint thickens; above that, it can get runny and harder to control.
- Lightly scuff glossy spots with a sanding sponge before touching up to improve adhesion and reduce flashing.
- For pinholes, dab with the included brush first, then roll over the spot after a minute.
- Use slow, short squeezes. Let the roller load gradually.
- Test on a scrap or inconspicuous area to confirm color and sheen.
- For bigger patches, spackle first, sand smooth, then use the roller to blend. That’s where this tool shines.
Durability and Storage
Latex longevity here is respectable when stored sealed—think years, not months. The bottle size (100 g) is meant for small jobs, not repainting a room. For property managers or frequent movers, it’s an easy keep-in-the-caddy item you can reach for repeatedly without worrying it’ll go bad in a season.
Where It Fits—and Where It Doesn’t
This tool is ideal for renters, realtors prepping a listing, or homeowners maintaining flat white walls. It’s a speed tool, not a complete repair kit. If you need perfect color matching or you’re dealing with anything larger than small nail holes, you’ll still want traditional spackle and a matching can of paint. If your walls are eggshell or satin, plan on a wider feathered area to hide sheen differences.
The Bottom Line
The Limecute mini spackle roller wins on convenience and speed for light-duty touch-ups on white, flat walls. It lays down a chalky, low-odor coat that hides scuffs and many tiny holes with minimal fuss, and it’s easy to keep on hand. The downsides are real: a finicky roller fit, the risk of drips if you over-squeeze, limited filling power for anything beyond pinholes, and a color/sheens mismatch on anything but white matte walls.
Recommendation: I recommend this tool for quick, white-on-white touch-ups, especially for renters and anyone doing frequent minor maintenance. It’s not a replacement for proper patch and paint on larger repairs or for color-matched finishes, but as a fast, simple way to erase scuffs and tiny nail holes, it earns a spot in the drawer.
Project Ideas
Business
Rapid Touch-Up Service for Rentals
Offer a quick wall-repair and touch-up service targeted at landlords, Airbnb hosts, and property managers. Use the mini roller kit for fast fixes between tenants. Charge per-room or per-repair; upsell end-of-stay maintenance packages. Emphasize speed, low-cost, and minimal disruption. Keep spare kits labeled with production dates and track stock by temperature guidelines to ensure product performance.
Mobile SPACKLE Pop-Up Booth
Set up pop-up booths at craft markets or home & garden shows offering 10–15 minute 'make and take' workshops: teach attendees to fill holes, texture, and touch up paint with the mini kit. Sell travel-sized spackle refills and branded mini-roller kits as impulse purchases. Use short demos to capture emails for follow-up sales of larger maintenance or decor services.
Subscription Refill Kits
Create a subscription product for small landlords or DIYers that delivers refill packs of spackle, replacement rollers/brushes, and single-use touch-up paint sachets every 6–12 months. Include usage tips and seasonal storage guidance (remind customers to store between 5–27°C and note production dates). Offer tiered plans: basic refills, pro kit with color-matching cards, and on-demand repair video consultations.
Branded Mini Repair Kits for Contractors
Wholesale custom-branded mini repair kits to realtors, staging companies, and cleaning services. Each kit contains the roller, brush, 100g latex, and a fold-out quick guide. Sell in bulk with volume discounts; add co-branding and a QR code linking to instructional videos. Provide product handling tips (temperature range, production date tracking) to reduce complaints and returns.
Creative
Mini Mended Gallery
Use the roller and spackle to create a series of small repaired-hole artworks. Intentionally drill or use existing tiny wall dings, fill them with tinted spackle (mix a little acrylic pigment into the provided white latex), then texture with the mini roller to create raised shapes. Once dry, sand lightly and paint over with contrasting colors to make a tactile mini-relief wall series — great as a modern, low-cost gallery wall or gift set.
Hidden Message Wall Patches
Create secret messages or patterns by cutting small stencils, applying spackle through them with the mini brush, and removing the stencil before drying. Paint the patched shapes the same color as the surrounding wall so the message is disguised from afar but visible up close. Works well for nursery décor, couple's hidden notes, or playful home details.
Textured Accent Strips
Use the roller to lay thin textured strips of spackle along a wall to form subtle, raised stripes or geometric accents. After curing, paint the entire wall with the latex included to unify the look. This produces an upscale, plaster-like texture without a full re-plaster job — ideal for renters wanting temporary upgrades (paintable with minimal damage).
Upcycled Frame Inlays
Turn old picture frames into 3D panels by applying spackle inside the frame interior with the mini roller to create a sculpted background, then paint with the latex for a uniform finish. Add small embellishments (gold leaf, fabric scraps) on top. These make lightweight, durable wall decorations or custom gift plaques.