Features
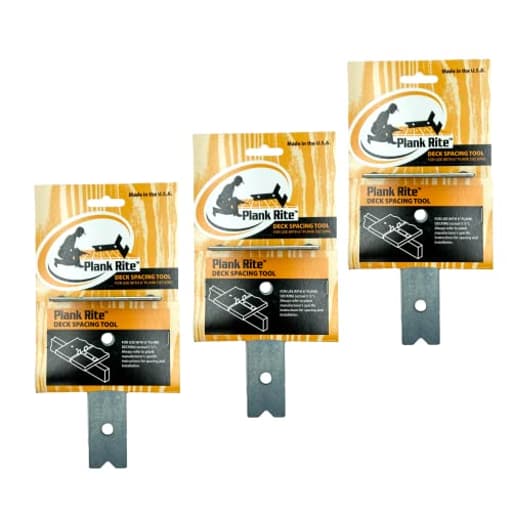
- 3 PACK DECK SPACING TOOLS FOR WOOD OR COMPOSITE DECKING - Plank Rite sets the correct amount of space between boards for wood or composite decking boards according to manufacturers specification.
- SCREW OR NAIL HOLE GUIDES FOR NEAT INSTALL - The screw or nail hole guides allow the user to fasten the screws or nails in the same position on each deck board giving a neat professional finish.
- WORKS FOR 6 INCH (5 1/2 INCH ACTUAL) WOOD OR COMPOSITE DECKING - Our deck jig spacing tool has 2 sides and spaces both wood or composite decking material. Use the 1/8th side of tool for treated wood or turn tool over to use 3/16th side of tool for composite decking.
- HELPS STRAIGHTEN SLIGHTLY BOWED DECKING BOARDS - If boards are bowed, just use the metal Plank Rite tool to push the boards into correct spacing, user can tap tool with hammer in between boards to straighten bowed boards outwards.
- 100% MADE IN THE USA FROM STEEL - Plastic can become distorted over time. Our deck spacing tool is durable and made 100% in the USA from steel.
Specifications
| Size | 1 Tool Pack |
Related Tools
Three steel decking jigs (three-pack) that set consistent spacing and guide screw or nail placement for 6-inch (5-1/2-inch actual) wood or composite deck boards. Each two-sided tool provides 1/8" spacing for treated wood and 3/16" for composite, includes fastener hole guides, can be tapped between boards to help straighten slight bowing, and is made from steel in the USA.
Plank Rite Steel Deck Spacing and Fastening Tool 3 Pack for Use with 5-1/2 Inch Deck Boards | Works for Treated Wood or Composite Decking | Deck Jig for Professional Neat Finish | Made in USA Review
First impressions and setup
Halfway through my latest deck build, I laid three small steel jigs on the joists and felt the usual layout stress drop a notch. The Plank Rite jig is a simple idea executed with the right material: a two-sided spacer and fastening guide sized for 5-1/2-inch deck boards (the common “6-inch” nominal width). One side delivers a 1/8-inch gap for treated wood, the other a 3/16-inch gap for composite. Each jig also has paired holes that serve as drill guides, so the screws land in the same spot on every board.
There’s no assembly—just choose the side for your material and go. The steel has enough heft to sit flat and stay put, and it doesn’t flex, which is a bigger deal than it sounds. Plastic spacers I’ve used tend to creep, swell in the sun, and distort under a mallet. These stayed true across the job.
Build quality and design choices
The jigs are 100% steel and made in the USA. Edges on my set were cleanly finished with no burrs, and the hole guides didn’t flake or oval out after repeated driving. Each jig hangs over the board edges to define the gap and establish a consistent screw pattern. On the “wood” side (1/8-inch), those flanges are a bit shorter than on the composite side. It’s a sensible compromise for clearing imperfections, but it does limit how hard you can leverage the tool when straightening a stubborn board. For light correction, though, the design holds up.
Because the tool sets both spacing and screw location, it imposes a uniform look that reads as professional from the first plank. If you care about straight screw rows that march across the deck, this is the simplest path I’ve found that doesn’t involve snapping endless chalk lines.
On the deck: workflow and speed
I used the three-pack to leapfrog down each course:
- Two jigs set the gaps at both edges while I tacked the leading screws into the joist.
- The third jig moved ahead to the next joist so spacing remained consistent as I advanced.
This rhythm works especially well if you’re building solo. With an extra set of hands, adding another set of jigs speeds things further, but three was enough to keep me moving without constant reset.
The drill guides are the real time-saver. Instead of measuring or eyeing the screw position from the board edge, I dropped the bit through the jig’s holes and drove. There’s enough clearance that chips don’t bind the bit, but not so much slop that your screw heads wander. On my finished surface, the rows were visually straight and evenly spaced across the entire deck.
One note on technique: I still marked the first few joists so I could align the jig over solid structure as I began each row. After that, muscle memory and spacing took over. I didn’t miss the chalk line.
Accuracy and finish quality
Spacing consistency was excellent. Using the 3/16-inch side on composite, the gap stayed uniform from the first board to the last, with a variance I could barely pick up with a feeler gauge. The 1/8-inch side on treated lumber likewise delivered predictable drainage gaps. Having a fixed physical reference removes a lot of human error—and the fixed screw offsets mean you can quickly visually verify you’re on pattern before committing with the driver.
The end result looked intentionally designed rather than hand-placed. If your standard is cabinetmaker-level symmetry on an outdoor surface, this tool gets you most of the way there with very little thought.
Straightening bowed boards
Plank Rite pitches the jig as a way to help straighten slight bowing. That’s fair—with a caveat. For mild crowns or cups, tapping the jig into the joint does nudge the board into compliance, and the steel takes the abuse without deforming. For anything more than “slight,” you’ll still want a dedicated board bender or cam tool. The shorter flange on the 1/8-inch side in particular limits how much leverage you can safely apply. I used a rubber mallet and snuck up on corrections in small increments, which worked well without scarring composite edges.
Compatibility and limitations
A few practical boundaries to keep in mind:
- Board width: The jig is sized for 5-1/2-inch boards (5/4-decking and 2x6 both qualify). It won’t align screws correctly on narrower or wider stock.
- Fastener type: It’s made for face-fastening with screws or nails. If you’re using hidden fasteners or side-clips, this tool isn’t the right match.
- Joist proximity: Near ledgers or picture-frame borders, expect to swap to a shorter bit or a right-angle attachment to clear the jig and still hit center. The guides work fine in those tight zones, but driver clearance can get snug.
- Warped lumber: It helps, but it’s not a miracle worker. Have a bow wrench handy for the occasional rogue board.
Durability and maintenance
After a composite deck and a smaller treated-wood landing, my set shows minor finish scuffs but no deformation. The holes haven’t gone egg-shaped, and the edges remain square. Compared to the plastic spacers I’ve retired over the years, these don’t mind sun, a mallet, or the occasional drop off the joist. I’ve been tossing them into a bucket at the end of the day; a quick wipe keeps them clean. If you work in wet conditions often, store them dry like any steel tool to avoid surface rust down the line.
Value
You’re essentially buying accuracy and speed that multiply over dozens of boards. The three-pack format hits a sweet spot: enough to maintain spacing across two edges and stage your next move, without cluttering the work area. Given the finish quality and the time saved, the price is easy to justify—especially when you factor in reuse across multiple projects. There’s nothing exotic here to wear out.
Who will benefit most
- DIY builders who want professional-looking spacing and screw rows without complex layout.
- Pros who face-fastening 5-1/2-inch boards, especially on larger surfaces where consistent spacing compounds into a cleaner look.
- Crews training newer helpers; the jig acts like a template that reduces judgment calls and keeps everyone on the same pattern.
If you exclusively install hidden-fastener systems or frequently work with nonstandard board widths, this won’t earn a spot in your kit.
Tips for better results
- Use all three jigs in a leapfrog pattern to keep momentum and alignment.
- Start rows by confirming the first joist center, then rely on the guides to maintain the pattern.
- Tap the jig with a rubber mallet to coax slight bows; save the heavy leverage for a board bender.
- Keep a short driver bit or right-angle attachment for border work where clearance is tight.
- Label the 1/8 and 3/16 sides with a paint pen so there’s no confusion mid-build.
Where it could improve
Two small tweaks would make this tool even better:
- Longer flanges on the 1/8-inch (wood) side to increase engagement on imperfect boards.
- A high-contrast finish or stamped markings to quickly distinguish wood vs. composite sides in low light.
Neither is a dealbreaker, but both would add polish to an already practical design.
Recommendation
I recommend the Plank Rite jig for anyone face-fastening 5-1/2-inch decking who cares about clean lines and consistent gaps. It’s durable, fast to deploy, and visibly improves the finish quality of a deck without adding complexity. While it won’t replace a dedicated board bender for badly warped lumber and it’s not meant for hidden fasteners, the combination of accurate spacing and repeatable screw placement makes it a reliable, reusable upgrade over improvised shims and mark-and-measure routines. For me, it has earned a permanent spot in the deck bucket.
Project Ideas
Business
Premium Deck Finishing Service
Offer a niche installation/finishing service that guarantees factory-consistent board gaps and screw alignment using the steel jigs. Market to homeowners and builders who want a high-end look without the premium price — charge per-board or per-project for the “perfect gap” finish.
Mobile Deck Repair & Re-spacing
Start a mobile service that fixes loosened/warped deck boards, re-establishes correct spacing, and re-fastens with consistent placement. Use small-job pricing for quick calls (replace boards, re-space, re-screw) and advertise seasonal maintenance packages.
DIY Deck Kits & How-To Content
Create and sell DIY deck kits that include a 3-pack of the steel jigs, a spacing template, recommended fasteners, and illustrated instructions. Pair with short how-to videos or online classes demonstrating accurate spacing and fastening for upsell and SEO-driven lead generation.
Hands-On Workshops & Trade Classes
Host local workshops teaching homeowners and tradespeople how to achieve professional decking finishes using the jig. Charge admission, sell the jigs and accessory packs on-site, and build repeat business with seasonal advanced classes (composite-specific techniques, repair, finishing).
Creative
Precision Deck Inlay Pattern
Use the steel jigs to lay out a geometric inlay (herringbone, chevron, or square-inlay) by keeping consistent gaps and perfectly aligned fasteners. The hole guides let you pre-drill and countersink screws in identical spots for a professional-looking contrast between board directions or wood species.
Slatted Outdoor Bench or Coffee Table
Build a bench or table top from 5-1/2" deck boards using the jig to ensure equal spacing between slats and consistent screw placement. The steel tool doubles as a spacer and straightener for slightly bowed boards, producing a long-lasting, weather-ready piece with a factory-finish look.
Louvered Privacy Screen or Trellis
Create a modern privacy screen by installing horizontal slats with exact gaps for light/airflow. Use the 1/8" or 3/16" side depending on material, and the fastener guides to keep mounting hardware hidden or uniformly placed. The result is a repeatable, clean aesthetic ideal for courtyard or balcony projects.
Planter Boxes with Drain Gaps
Construct raised planter boxes or window boxes from deck boards and use the jig to set consistent drainage gaps between floor slats. Neat screw alignment keeps the look tidy while the steel construction handles tapping to straighten boards during assembly.