Features
- Translucent colors used to create beautiful decorative finishes
- Specially formulated to give you a longer open time
- Use over any completely cured finish
Specifications
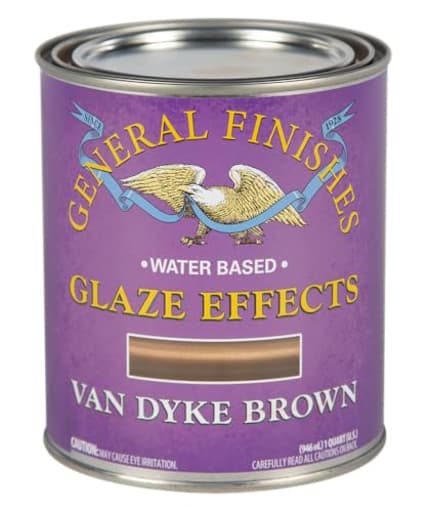
| Color | Van Dyke Brown |
| Size | 1 Quart |
| Unit Count | 1 |
A water-based glaze in Van Dyke Brown formulated for creating translucent decorative finishes on wood and furniture. It provides extended open time for easier blending and can be applied over any completely cured finish; packaged in a 1-quart container.
General Finishes Water Based Glaze Effects, 1 Quart, Van Dyke Brown Review
Why I reached for this glaze
I picked up General Finishes’ water‑based Van Dyke Brown glaze to rescue a tired oak cabinet door and a flat, painted tabletop that needed depth. I wanted a translucent color that would settle into profiles, soften bright paint, and add a hint of age without turning everything orange or muddy. This glaze did exactly that—reliably and with a forgiving working window that made blending and cleanup easy.
What it is
This is a water‑based, semi‑transparent brown glazing medium in a quart can. Van Dyke Brown is a classic, neutral-leaning dark brown—not too warm, not too cool—that reads like an antiquing tone on whites and colors, and like a rich toner over wood tones. It’s designed to sit on top of a fully cured finish (paint, clear coat, or sealed stain) so you can manipulate it: brush on, wipe off, feather, and leave as much or as little color as you want. It’s not a topcoat; it’s a color layer you protect with clear finish afterward.
Application experience
I’ve used it over:
- Waterborne clear coats on stained maple and oak
- Milk paint and acrylic furniture paint
- Factory poly finishes scuff‑sanded and cleaned
My workflow that produced consistent results:
1. Prep the surface. Scuff with a fine abrasive (320–400) and wipe clean. If I’m glazing over paint, I like a thin barrier coat of water‑based poly first; it makes the glaze easier to move and prevents hotspots.
2. Stir thoroughly. The pigment settles hard on the bottom. I use a stir stick and take time to fully reincorporate; don’t shake—you’ll introduce bubbles.
3. Work in sections. On cabinet doors, I do rails and stiles first, then the field. On a tabletop, I work in thirds.
4. Apply and manipulate. A soft synthetic brush or foam brush lays it on evenly. I remove and shape with microfiber shop towels or a barely damp lint‑free rag, always moving with the grain. For corners and profiles, a dry chip brush pulls glaze into crevices without leaving smears.
5. Blend edges. Keep a wet edge and feather transitions so you don’t create visible lap lines.
6. Let it set, then topcoat. I wait overnight before clear coats.
The viscosity is just right—thin enough to spread and wipe, but pigmented enough that a single pass can create a noticeable effect. If I need more working time on a large surface, I add a splash of water or a few drops of a water‑based extender and slow down the room’s airflow. The built‑in open time is longer than most water‑based glazes I’ve used, but not as leisurely as oil; plan your sections accordingly.
Color and the look
Van Dyke Brown is a versatile, “safe” antiquing tone. On satin white paint, it brings out panel details and reads as a classic café‑au‑lait shadow. Over blues and grays, it desaturates and modernizes, behaving more like a subtle smoke than a sepia. On wood with a clear coat, it warms and deepens without obliterating grain.
A few looks I liked:
- Pin-washing door profiles, leave heavier color in recesses, wipe almost clean on flats.
- A very thin “toner” wash over bright paint to knock back the brightness and add depth.
- Light streaking on a large tabletop using a damp towel pulled straight with the grain for a hand‑rubbed, timeworn effect.
Because it’s translucent, you control intensity by removal, not by loading pigment. If you overdo it, you can erase and reset within the open window. After it tacks, stop fussing; overworking late in the cycle can cause slight pilling.
Dry time and working window
In my shop around 70°F and moderate humidity:
- It stayed movable for roughly 10–15 minutes on small parts, 5–8 minutes on a wide table before it started to set.
- Touch‑dry in about 30–45 minutes.
- I let it sit overnight before topcoating. You can get away with sooner, but waiting reduces the chance of reactivation or streaking with a water‑based clear.
Compared with oils, you trade some open time for much faster overall turnaround and low odor. If you’re glazing a dining table or a wall of doors, use an extender or break the job into smaller sections to keep your blend consistent.
Durability and topcoating
Important: this is not a protective finish. Unprotected glaze will mark. I tested a shelf by leaving it untopcoated for a day; a fingernail could mar the film and a book’s cloth spine picked up faint brown at the edges. That’s expected behavior for a glaze layer. With two to three coats of water‑based polyurethane (satin), the finish felt tough and resisted casual scratching. For high‑touch surfaces—kitchen cabinets, tables, shelves—plan on at least two clear coats, three on horizontals. Let the full stack cure before hard use.
If you want a warmer cast, an oil‑modified waterborne topcoat adds a gentle amber that plays nicely with brown glazing. If color fidelity is crucial over white or cool colors, stick with a non‑yellowing waterborne poly.
Compatibility and substrate notes
- Over paint: Works best if the paint is fully cured and lightly sealed first. Directly over uncured latex, I’ve seen some smudging during wipe‑back.
- Over wood: Seal raw wood with a clear coat, then glaze. Going straight onto bare wood tends to blotch and grab.
- Over existing finishes: Scuff, clean, and make sure the surface is free of wax or oil. I’ve had no adhesion issues over factory polys after a careful prep.
Cleanup is with water. Odor is low, and it’s far less fussy than solvent glazes in a small shop.
Coverage and value
Because you remove most of what you apply, a quart goes a long way. I glazed eight cabinet doors (faces only), a pair of drawer fronts, and a 72-inch tabletop with two light passes and used a bit under half the can. If you’re doing heavy, all-over toning on large surfaces, you’ll use more; for targeted antiquing on profiles, very little.
Pigment load is consistent from project to project. Once stirred, the color lays down predictably and doesn’t surprise you with random darker specks. I appreciate that repeatability, especially when I’m touching up a piece weeks later.
Limitations
- It will highlight defects. Sanding scratches, filler halos, and uneven base coats become more obvious with a translucent layer. Your prep needs to be clean.
- Large, flat fields are the hardest to make perfectly even. You can get lap lines if you don’t manage your wet edge. Extender helps, but you still need a plan.
- Not a standalone finish. If you want color and durability in one step, this isn’t it. It’s a glazing system that expects a clear topcoat.
Practical tips
- Stir thoroughly and often; the heavier pigments settle.
- Pre-seal porous paint with a thin coat of clear for predictable glide.
- Use microfiber towels for wipe‑back; they grab consistently without lint.
- For panels, start with profiles and corners, then feather onto flats.
- On big surfaces, pull a damp towel straight end‑to‑end with the grain to avoid blotchy wipe marks.
- Stop touching it once it starts to tack; let it dry and adjust with a second light pass if needed.
- Wait overnight before clear coating, then apply two to three thin coats of water‑based poly for durability.
The bottom line
This Van Dyke Brown glaze hits a sweet spot: water‑based convenience with enough open time to blend gracefully, a balanced brown that flatters a wide range of base colors and woods, and a predictable, repeatable application. It’s not foolproof—you need to respect working time, surface prep, and the requirement for a topcoat—but it rewards a straightforward process with professional-looking results.
Recommendation: I recommend this glaze to furniture refinishers and DIYers who want to add dimension, age, or subtle tonal warmth without the fumes and slow cure of oil-based glazes. It’s forgiving enough for a first project and consistent enough for production work. Just treat it as one layer in a system: prep well, work in sections, and protect it with a clear coat. Do that, and it’s a reliable, versatile tool for elevating painted and sealed wood surfaces.
Project Ideas
Business
Boutique Furniture Refurbishing
Offer a specialty service refurbishing vintage or mass-market furniture with custom Van Dyke Brown glazing to achieve high-end aged finishes. Market to homeowners and decorators seeking one-of-a-kind pieces; charge premium rates for custom color matching and layered glazing.
Signature Finish Product Line
Develop a small product line of pre-matched finish kits (base paint + Van Dyke Brown glaze + instructions) for DIYers who want the 'aged' look. Sell kits online and at local craft stores, bundling small brushes/rags and QR-code video tutorials to increase perceived value.
Workshops & Live Demos
Host in-person or virtual workshops teaching glazing techniques using this product. Charge per seat and upsell starter kits. Partner with furniture stores, makerspaces, or paint shops to run recurring classes that build a local customer base and repeat purchasers.
High-End Staging & Set Dressing
Target real estate stagers, photographers, and set designers by offering glazed accent pieces or on-site glazing for props and furniture to achieve cohesive, warm tones. Position as a fast, reversible finish solution that works over cured coatings—useful for rentals and temporary sets.
Restoration & Historic Reproduction Service
Specialize in historic reproduction and restoration for homeowners and preservation projects, using Van Dyke Brown glazing to match period-appropriate tones and patinas. Emphasize the water-based, low-VOC profile for sensitive environments and offer documentation of color-matching methodology for institutional clients.
Creative
Antique Furniture Glaze
Use the Van Dyke Brown glaze to create a soft, aged look on a cured painted or stained piece. Apply a thin wash, let the extended open time allow feathering into crevices, then wipe back selectively to highlight edges and moldings for a believable antique patina.
Layered Wood Grain Enhancement
Enhance plain or low-grade wood by brushing on translucent Van Dyke Brown in multiple thin layers to deepen the grain visually. Because it works over cured finishes, you can seal the wood first, then glaze to create contrast and dimension without raising fibers.
Faux Reclaimed-Plank Panel
Create a faux reclaimed wood panel on plywood or MDF: paint base tones, then apply the glaze and drag with rags, combs, or brushes to mimic dirt, age, and wood variation. The long open time helps blend transitions between 'boards' for realism.
Decorative Wall Framing & Molding
Use the glaze to accent wainscoting, picture frames, or crown molding. Apply over a cured finish to subtly tone down bright whites or add warmth, then wipe selectively to emphasize profiles and create consistent, integrated architectural detail.
Mixed-Media Art Panels
Incorporate the Van Dyke Brown glaze into mixed-media canvases or wood panels as a unifying wash. Its translucency lets underlying textures and metallics show through; the open time makes it easy to blend into pigments, inks, and collage elements.