Features
- 100% Waterproof: This 100% silicone formula offers ultimate protection against water damage, providing a reliable seal in areas prone to consistent water exposure
- 10-Year Product Protection: Cured sealant is resistant to stain causing mold and mildew growth
- Strong and Flexible: Stays permanently flexible with a high-performing, durable seal
- 30-Minute Water-Ready: Ready for water exposure in as little as 30 minutes
- Shrink and Crack Proof: Withstands extreme expansion and contraction associated with temperature fluctuations
- Compatible with Most Materials: Adheres to most metals, plastics, and woods; glass, drywall, plaster, granite, cultured marble, ceramic and porcelain tile, and more
Specifications
| Color | White |
| Size | Pack of 1 |
| Unit Count | 1 |
Related Tools
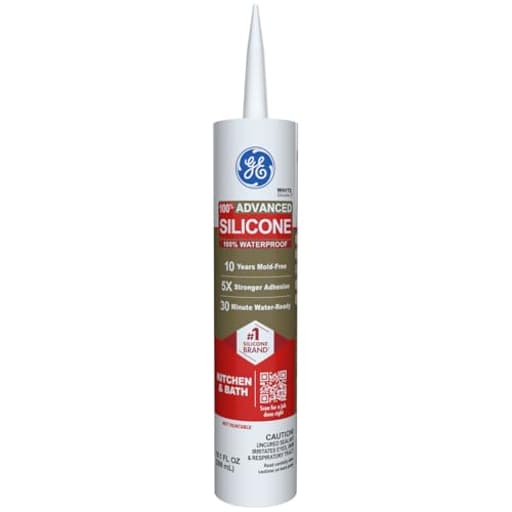
This 100% silicone caulk (10 fl oz cartridge, white) is designed to seal joints and gaps in kitchens and bathrooms, creating a flexible, waterproof barrier. Once cured it resists stain-causing mold and mildew for up to 10 years, becomes water-ready in about 30 minutes, resists shrinking and cracking with temperature changes, and adheres to common materials including metal, plastic, wood, glass, tile, and stone.
GE Advanced Silicone Caulk for Kitchen & Bathroom, White, 10 fl oz Cartridge, 1 Pack - 100% Waterproof Silicone Sealant, 5X Stronger Adhesion, Shrink & Crack Proof Review
Why I reached for this caulk
Bathrooms and kitchens are merciless on sealants. Constant moisture, temperature swings, and movement around tubs and sinks will expose any weakness. I picked up GE Advanced Silicone (white) specifically to re-seal the tub-to-tile joint, the sink rim, and a few hairline gaps around a kitchen faucet where older acrylic caulk had started to discolor and peel. I wanted something truly waterproof and flexible—not another “paintable” fix that looks good for a few months and then fails.
What stood out during application
Out of the tube, the consistency is smooth and predictable—thick enough to hold shape, but not gummy. I cut the nozzle at a shallow angle for a narrow bead and used a dripless gun. The flow was even, with no sudden surges or bubbles, which makes it easier to keep a steady line along tile corners and around the sink radius. As with any silicone, it skins relatively quickly, so planning and masking matter. I laid painter’s tape on both sides of the joint, ran a continuous bead, and tooled it immediately with a damp finger and a plastic caulk tool for the inside corners.
The bead didn’t slump, even on vertical runs around the tub surround. That’s a big win: some silicones can sag or pull away before you get a chance to tool them. Removing the tape right after tooling left a crisp edge with minimal cleanup.
A note on cartridges: puncture the inner foil fully and avoid over-squeezing the gun. I had no blowouts or back-end leaks, and the plunger advanced cleanly. If you’ve ever had a tube rupture at the rear, you know it’s usually a combination of a partially punctured seal and too much trigger force.
Adhesion and compatibility
Adhesion was excellent on glazed ceramic tile, porcelain tub enamel, stainless steel, and a polished stone countertop. I also tested a small patch on ABS and PVC trim; no issues bonding once the surface was clean and dry. This silicone grabbed fast and wet out the surfaces nicely—it didn’t shrink back from the edges as it cured. The label claims stronger adhesion than standard caulks; I can’t quantify the “5x,” but the bond feels secure and continuous, especially where I bridged slightly uneven tile grout lines.
Silicone isn’t universal. It won’t stick to polyethylene, polypropylene, or PTFE, and it won’t bond over oily residues or silicone left behind from previous failed repairs. I fully removed old caulk with a plastic scraper and razor, cleaned twice with isopropyl alcohol, and dried the area before applying. If you skip that prep, any caulk will underperform.
Waterproofing and durability (early and ongoing)
This product earns its “100% waterproof” claim. The tub edge sees daily soaking and splashback, and after several weeks of use the bead remains intact—no soft spots, no discoloration, no lifting at the corners. The joint at the sink-to-countertop is equally solid, despite the micro-movement that happens when you lean on the sink or run hot water. The sealant stays elastic; you can press it gently and feel the give without any cracking sounds or surface crazing.
Thermal cycling is where cheaper formulas tend to fail—what looked neat on day one turns into a pulled edge after a few hot showers. Here, I’ve seen no shrink lines or gaps forming. The bead profile I left is the bead profile I still have. That’s the advantage of a true silicone: it remains permanently flexible and accommodates expansion and contraction without breaking its seal.
The 30-minute “water-ready” claim
The “ready for water in 30 minutes” line is helpful but deserves context. In a warm, well-ventilated bathroom with moderate humidity and a standard 1/8–3/16 inch bead, I was comfortable running the shower after about 45 minutes. Heavier beads or cooler rooms will need longer. The silicone skins rapidly, which protects it from incidental splashes, but full cure takes longer (typically 24 hours for a thin bead). If you can wait overnight, do it; if you can’t, the fast skin time still makes day-of use feasible.
Appearance and finish
The white is a clean, bright sanitary white that matches most tubs and showers. After curing, the finish is smooth and slightly satin—easy to wipe down and not chalky. Tool marks were minimal once I got into a rhythm. Along a glossy tub, it blends well; against matte grout lines, it looks crisp rather than glaring. If you’re working around clear glass or mixed-color materials and want the joint to disappear, choose the clear version. For white tile and porcelain, this white looks right.
Maintenance, cleaning, and mold resistance
Silicone is inherently hydrophobic, so water beads off and soap scum lifts with routine cleaning. I’ve been wiping the joints during regular bathroom cleanups, and the surface stays slick and unstained. The product is rated to resist stain-causing mold and mildew for up to ten years. No caulk is magic in an unventilated shower, but the fungicide package here seems effective—no pinking or spotting so far.
Cleanup and odor
Silicone is not water-soluble. Keep mineral spirits or a dedicated silicone remover on hand for fresh squeeze-out. I used a paper towel dampened with mineral spirits to catch smears right after tooling; once it cures, you’ll be shaving it off. I recommend masking for cleaner edges and less cleanup.
Odor is present but not overwhelming—a typical silicone smell during application that dissipates as it cures. Ventilation helps.
Limitations and caveats
- Not paintable: As a 100% silicone, this is not paintable. If you need to paint the joint, use a high-quality paintable sealant or a hybrid designed for that purpose.
- Surface prep is non-negotiable: Any soap film, oil, or residual old silicone will compromise adhesion.
- Working time: It skins quickly. Plan your passes in manageable sections and tool immediately.
- Removal later: Its strong bond makes future removal slower (a trade-off for durability).
- Temperature and humidity matter: The fast “water-ready” window assumes favorable conditions. Thicker beads need extra time.
Coverage and bead control
From a single 10 oz cartridge, I covered roughly 55 linear feet at a small bead size with consistent tooling—about what I expect for a 3/16-inch bead. Cutting the nozzle small and moving steadily gives better results than trying to fill with a fat bead and shaping it later. A 45-degree cut and keeping the nozzle pressed into the joint helps push silicone into the gap rather than laying it on top.
Tips for best results
- Remove all old caulk and residue. A silicone digester or a plastic scraper plus patience pays off.
- Degrease and dry. Wipe with isopropyl alcohol right before caulking.
- Mask the joint. Tape saves time and produces straighter lines.
- Use a dripless gun and light pressure. Avoid overfilling.
- Tool immediately. A moistened finger or a caulk tool works well; wipe off excess often.
- Pull tape right away. Don’t wait for it to skin fully.
- Protect for an hour if you can. Even though it’s “water-ready” fast, a little extra cure time increases your margin.
Where it fits (and where it doesn’t)
GE Advanced Silicone shines in wet, high-movement areas: tub-to-wall joints, shower surrounds, sink rims, faucet bases, backsplash edges, and around fixtures. It bonds reliably to tile, porcelain, glass, metal, and most finished stone. It’s less appropriate where you need to paint over the joint or where adhesion to low-energy plastics is required. For gaps in dry, paint-grade trim or drywall transitions, a paintable acrylic or hybrid would be a better match.
The bottom line
In use, this silicone delivers what matters most in kitchens and baths: a consistent bead that adheres well, becomes water-ready quickly, and stays flexible without shrinking or cracking. The white color is clean and matches standard fixtures, the mildew resistance keeps maintenance low, and the bond feels trustworthy across a mix of materials.
I recommend GE Advanced Silicone (white) for sealing tubs, showers, sinks, and other wet-area joints where long-term waterproofing and flexibility are non-negotiable. Choose it when you want a durable, mold-resistant seal and you don’t need to paint the joint. The modest learning curve—masking carefully, working briskly, and cleaning with mineral spirits—is worth it for the performance you get once it cures.
Project Ideas
Business
Express Caulking Refresh Service for Hosts
Offer a fast-turnaround caulking service targeted to Airbnb/property managers: remove old caulk, apply fresh 100% silicone that’s water-ready in ~30 minutes, and leave bathrooms/kitchens guest-ready the same day. Package as a rapid-turnover add-on to cleaning services—sell by bathroom or unit and emphasize mildew resistance and a 10-year protection benefit.
Small-Batch Waterproof Decor & Planters
Build a product line of stylish, waterproof home decor—sealed planters, shower-safe wall panels, countertop trays and outdoor-safe lantern liners—made using the silicone caulk technique. Market items as low-maintenance, mildew-resistant, and built for humid spaces. Offer customization (sizes, shapes) for local boutiques and garden centers.
Repair & Emergency Seal Kit Retail
Create branded emergency repair kits containing a 10 fl oz cartridge, disposable nozzles, gloves, a plastic spreader, and quick how-to instructions (kayak patches, leaky roofs, window seams). Position kits at hardware stores, marinas, and outdoor retailers as a compact, visitor-friendly solution for waterproof fixes—offer online tutorials and a subscription refill option.
Custom Mold-Making Service for Makers
Use the caulk-based mold technique to produce low-run flexible molds for local soapmakers, candle artisans, and concrete craft studios. Sell molds or a mold-making service (turnaround on demand), and provide guidance about material compatibility. Add digital patterns or bespoke designs (logos, shapes) as an upsell for small craft businesses.
Creative
Waterproof Planter Liners & Flexible Pots
Use the 100% silicone to coat cardboard, thin plywood, or recycled plastic containers to create flexible, fully waterproof liners and small hanging planters. Build a simple mold from cardboard, apply multiple thin layers of caulk (smoothing with a gloved finger or spreader), let cure, then peel away the mold for a custom-shaped waterproof pot that resists mildew and won’t crack in temperature changes.
Raised-Relief Mosaic & Accent Art
Apply caulk through a cartridge or squeeze tube to draw raised outlines and textures on wood or canvas (think faux lead lines for a stained-glass look or raised patterns for mosaic grout). Once cured the flexible relief holds glass pebbles, tile fragments, or beads in place and resists moisture—ideal for bathroom-safe wall art or shower-friendly decorative panels.
Custom Non-Slip Grips, Bumpers & Feet
Form grips, bumpers, or protective feet by depositing caulk into small molds (or directly onto tool handles, furniture legs, jars) then letting it cure. The rubbery, flexible finish makes excellent non-slip pads for cutting boards, custom jar grips, drawer bumpers, or replacement feet for electronics and small furniture.
DIY Molds & Texture Stamps
Mix 100% silicone caulk with a little cornstarch or talc to thicken into a moldable putty (popular DIY technique). Press objects (shells, buttons, small ornaments) into the putty to make quick, flexible molds or create texture stamps for clay, plaster, or cement crafts. (Always test any mold before using with a specific casting material—some resins can be inhibited by certain silicone types.)