Features
- Adhesives & Sealants
- Country of manufacture: United States
- Manufacturer: Dap
- Minimal shrinkage.
- Sands easily.
- For interior applications.
Specifications
| Color | white |
| Size | 3 lb. |
| Unit Count | 1 |
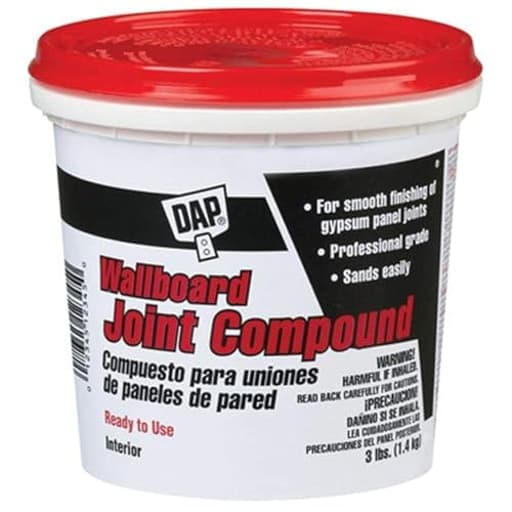
A 3-pound pre-mixed white joint compound for interior drywall finishing and patching. It has minimal shrinkage and sands easily to produce smooth seams and repairs.
DAP 10100 Wallboard Joint Compound, White , 3-Pound Review
A reliable small-batch joint compound that punches above its size
I keep a few sizes of joint compound on the shelf, but the DAP 3‑lb joint compound has become my default for small to mid-sized interior repairs and quick patch work. It’s a pre-mixed, white, all-purpose mud that’s billed for minimal shrinkage and easy sanding. In practice, that’s exactly what I found—plus a few quirks that are easy to manage once you know what to expect.
Setup and first impressions
Out of the tub, consistency can vary a bit. Sometimes the top layer has a thin sheen of water or feels looser than the material deeper in the container. That’s normal for pre-mixed compounds; they can settle in storage. A quick but thorough stir with a 6-inch taping knife or a paint paddle brings it back to a smooth, frosting-like thickness. My advice: don’t pour off the surface water—fold it in. If you need the compound a touch stiffer for filling deeper voids, let it sit open for 5–10 minutes after mixing to off-gas a bit of moisture, then stir again.
The tub itself seals well, which matters with small sizes that may sit between uses. Wipe the rim clean and reseal firmly and you won’t come back to a crusted top layer.
Application and workability
Spreadability is excellent. The compound loads nicely on the knife and lays down cleanly without tearing the paper face of drywall. It’s creamy enough for feathering edges, yet cohesive enough not to slump out of modestly sized holes or seams. For typical interior patches—nail pops, small dings, and even 4–6 inch holes with a backing plate—two to three thin coats did the job.
For taped seams, it beds paper or mesh without fighting you. I prefer paper tape for long-term durability, and this mud wets it out consistently with a light pass. For wider feathering on butt joints, the material stays workable long enough to make two or three passes without ridging, especially if you keep the knife clean.
A note on thickness: as with any drying-type joint compound, thick applications can crack as water evaporates. I keep layers to about 1/8 inch and build up in multiple passes for any sculpted or deep repairs. Doing so minimized any cracking for me.
Drying time and shrinkage
This isn’t a hot mud (there’s no chemical set), but for thin applications it still dries on the quick side. In a temperate, low-humidity room, skim coats were ready to sand in roughly 45–90 minutes. Deeper fills took several hours, occasionally overnight. That’s a comfortable pace for same-day progress without the rush of a fast-setting compound.
Shrinkage is minimal compared to some lightweight spackles I’ve used. After a first coat over a recessed screw or a hairline crack, I often only needed one light skim to finish. On larger fills, you’ll still want that second or third pass, but I saw very little telegraphing once everything dried.
Sanding and finishing
Sanding is where this compound really earns its keep. It cuts cleanly without clogging the paper and produces a fine powder that vacuums easily. A light hand with 150–220 grit is usually all it takes to blend into surrounding paint. Because it sands so readily, it’s forgiving of small ridges—you don’t have to fight them.
It dries bright white and takes primer uniformly. I always prime joint compound before paint; a stain-blocking or PVA drywall primer prevents flashing and evens absorption. Over two coats of latex wall paint, patches disappear.
Beyond drywall: texture and craft
While it’s made for drywall, the smooth consistency makes it friendly for texture work and small decorative projects. I’ve used it with a putty knife and trowel to create subtle plaster-like reliefs and to knock down heavy orange peel. For sculptural texture, keep layers thin and build slowly to avoid cracking, then sand gently between passes. Once dry, it accepts acrylics and wall paint without lifting.
If you’re coming from modeling paste, you’ll find this more economical and easier to sand, though it’s less dense. For high-build texture in one pass, a setting-type compound or lightweight plaster can be a better fit, but for most wall-bound designs, this strikes a great balance between workability and finish.
Size and storage
The 3‑lb tub is a sweet spot for homeowners, renters, and pros doing punch-list repairs. It’s enough for multiple patches, a few taped seams, or a small room’s worth of touch-ups—without committing to a bulky bucket that risks drying out. If you’re rehanging entire rooms or tackling large skim coat projects, you’ll want a larger pail. For day-to-day fixes, this size keeps waste and clutter down.
Storage is simple: scrape down the sides, mist the surface lightly with water if you’ll be storing it for more than a week, and seal the lid tight. Properly sealed, mine has stayed usable for months.
Limitations and caveats
- Interior only. This is not rated for exterior or high-moisture areas. In bathrooms with poor ventilation or in shower surrounds, use appropriate backer materials and moisture-resistant compounds.
- Not a speed demon for deep fills. If you need guaranteed same-hour sanding on thick repairs, a setting-type powder compound (20- or 45-minute) is faster.
- Occasional separation. Expect to mix before use. That’s a characteristic of pre-mixed muds, not a defect, but it can surprise first-time users.
- Dust is dust. It sands easily, which also means it creates fine dust. Use a sanding sponge with vacuum attachment or damp-sand where possible, and mask up.
Tips for best results
- Mix before every session. Stir from the bottom and fold to a consistent texture.
- Apply in thin layers. Aim for 1/16–1/8 inch per coat, allowing full dry between passes.
- Feather wide. Use a 6–10 inch knife to blend patches beyond the immediate repair area.
- Prime every time. A quick primer coat prevents flashing and uneven sheen.
- Keep tools clean. Wipe your knife between passes; a clean edge gives a clean surface.
- Seal the tub. Clean the rim and press the lid fully to keep the compound fresh.
Who it’s for
- Homeowners and renters handling routine wall repairs, picture-hanging holes, and minor damage.
- DIYers tackling small drywall replacements or skim smoothing accent walls.
- Makers who want a sandable, paintable medium for low-relief textures on interior surfaces.
- Pros who want a compact, reliable tub for punch lists and callbacks.
If you’re a contractor mudding full rooms daily, you’ll still buy in bulk and supplement with setting compounds. But as a grab-and-go solution for everyday interior work, this size and formula make sense.
Bottom line
I keep reaching for the DAP 3‑lb joint compound because it’s predictable: it mixes to a smooth consistency, spreads cleanly, dries with minimal shrinkage, and sands to an easy, invisible finish. It’s not the fastest option for deep repairs, and you should expect to give it a stir before use, but those are minor trade-offs for a compound that’s this forgiving and consistent in finish quality.
Recommendation: I recommend this for interior drywall repairs, small taping jobs, and decorative texture work. It offers a dependable balance of workability, drying time, and sandability in a compact size that won’t go to waste. If you routinely tackle thick, time-sensitive fills or work in wet environments, pair it with a setting-type compound or a moisture-rated alternative. For everything else, this little tub earns its spot on the shelf.
Project Ideas
Business
Airbnb/Landlord Rapid Patch Service
Offer on-demand drywall patching and touch-up services targeted at short-term rental hosts and landlords. The pre-mixed 3 lb tub and minimal-shrink formula speeds repairs and reduces callbacks. Bundle with quick paint touch-ups for fast turnarounds between guests.
Handmade Accent Panel Product Line
Produce and sell small runs of textured wall panels or faux-stone tiles made with joint compound. Market as lightweight, affordable accent pieces for renters and boutique interiors. Offer custom sizes, finishes, and installation instructions to increase value.
Furniture Upcycle & Resale
Use the compound to repair and add custom decorative details to thrifted furniture, then resell upgraded pieces online or at local markets. Minimal shrinkage and easy sanding make the workflow efficient—turnaround time and finish quality improve margins.
Interior Trim & Medallion Fabrication for Designers
Create a small studio producing custom medallions, rosettes, and decorative trim pieces for interior designers and contractors. Offer design mockups, quick samples from the 3 lb tubs, and installation-ready finished items. Emphasize lightweight, paint-ready pieces as a lower-cost alternative to plaster.
Workshops & DIY Kits
Teach hands-on classes or sell DIY kits that include a 3 lb tub, tools, templates, and finish instructions for making small projects (frames, panels, medallions). Charge for instruction and supply kits for passive income; the pre-mixed compound simplifies the learning curve for beginners.
Creative
Low-Relief Wall Panels
Use the pre-mixed joint compound to build up shallow bas-relief designs on primed plywood or MDF panels. Apply in layers with a putty knife, sculpt patterns (geometric, floral, topographic) while damp, sand lightly for smooth transitions, then prime and paint or gild. Result: lightweight, durable decorative panels that hang like art.
Faux Stone/Brick Accent Tiles
Spread compound over foam board or thin plywood and sculpt brick or stone textures with a knife and stamps. Let cure, sand edges for realism, then paint with layered washes to mimic mortar and stone. Cut to modular sizes for backsplash-style installations or small accent walls.
Custom Ceiling Medallions & Rosettes
Form classic or modern medallions by layering compound into silicone or wooden templates or sculpting freehand. After drying and light sanding, seal and paint to match trim. These lightweight medallions can be a cost-effective decorative upgrade for lighting fixtures and ceilings.
Sculpted Picture Frames & Mirror Borders
Add ornate or contemporary raised patterns directly onto plain wooden frames using the compound. Carve or press textures while pliable, sand smooth once cured, then finish with primer, paint, or metallic leaf for custom frames that sell well at craft fairs.
Furniture Repair & Detail Restoration
Use the compound to fill gouges, reconstruct missing veneer details, or recreate carved motifs on vintage furniture. It sands easily for shaping and can be painted or distressed to match the original finish—great for upcycling projects.