Features
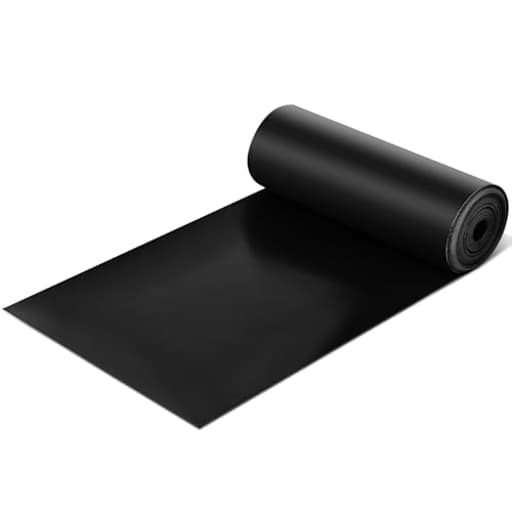
- Ideal Size and Dimension: ensuring appropriate coverage is a critical part of deck waterproofing; Our under deck drainage system boasts dimensions of about 16.14 inches/ 41 cm in width and 52.49 ft/ 16 m in length and its thickness of about 0.03 inch/ 0.75 mm ensures ideal protection, making it the nice deck waterproofing membrane
- Durable Material: an effective under deck drainage system begins with the materials adopted; This specific deck drainage features HPDE material, renowned for its nice durability and resilience; Resistant to harsh weather conditions, this system provides lasting service for decks, serving as a solid waterproofing material for decks
- Improve Space Utilization: our deck waterproofing membrane not only prevents your deck but also increases under deck storage space; By providing a waterproof seal, you can utilize the area beneath the deck as a storage space and convert the under deck space into a dry storage area, ideal for storing outdoor furniture, barbecue equipment and more
- Aesthetically Pleasing design: a deck is not just functional, but also a part of your home's aesthetic appeal; Our under deck waterproofing system comes in a classic black color, nicely blending in with your outdoor decoration; It provides not only efficiency but also contributes to enhancing your space
- Simple Installation: with our deck waterproofing, complex installation processes are a concept of the past; It's easy to install, and can keep framing and underneath deck area dry; You can first staple to top of joists, next use self sealing tape at joints and then crew downspout to drain hole
Specifications
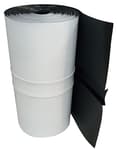
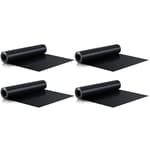
| Color | Black |
| Size | 65.62 ft x 16.14 inches |
| Unit Count | 1 |
Related Tools

A black under-deck drainage membrane made from HDPE that provides waterproofing for the space beneath a deck. It measures 65.62 ft long by 16.14 in wide and is 0.03 in (0.75 mm) thick, offering weather-resistant durability and enabling conversion of under-deck space to dry storage. Installation is simple: staple to the top of joists, seal joints with self-sealing tape, and attach a downspout to the drain hole.
Pushglossy 65.62 ft X 16.14 Inches Under Deck Drainage System, Black Waterproofing System for Under Deck Ceiling 0.03 Inch Thick Review
Why I Tried This Under‑Deck Membrane
I tested the Pushglossy under‑deck membrane on a retrofit deck project where the homeowners wanted to keep the area below dry for storage. On paper, a 0.03‑inch (about 30 mil, 0.75 mm) HDPE sheet in a long, narrow roll sounds like a straightforward way to channel water to a gutter without investing in a full ceiling system. The idea is simple: run the membrane along the joist bays, create a trough with a gentle pitch, seal seams, and direct water to a downspout.
I used a single roll (black, 65.6 ft long by 16.14 in wide) and set up a test across several bays before committing to the whole deck.
Build Quality and What’s in the Roll
- Material: The membrane is HDPE, and it feels every bit of 30 mil. It’s tough, abrasion‑resistant, and not prone to random tears. It’s also stiff—more like pond liner than housewrap.
- Finish: The black color helps it disappear in shadowed spaces and typically indicates good UV stability. That said, I’d still avoid long‑term direct sun exposure.
- Edges and consistency: My roll arrived with clean cut edges. I measured widths at multiple points along the roll: most of it hovered around the advertised 16.14 inches, with a few spots closer to 16.0. Not a deal‑breaker, but precision matters on tight joist spacing.
- Smell/off‑gassing: Minimal and dissipated quickly.
In short: durable and weather‑resistant, but the stiffness dictates how you design and install the system.
Installation: What Worked, What Didn’t
I approached installation two ways on my test bays to compare outcomes.
1) Top‑of‑joist, under‑deck‑board method (as many membrane kits prescribe)
- Process: Lay strips across the joist tops, staple, tape seams, then install deck boards above.
- Result: I don’t recommend this approach. Any membrane sandwiched between deck boards and joists increases the risk of trapping moisture at the joist/deck board interface. Even with sealing tape at seams, water can migrate through fastener penetrations and capillary between layers. That’s a recipe for rot and is tough to inspect once the boards are installed.
2) Under‑joist trough method (my recommendation)
- Process: Run the membrane along each bay below the top of the joists. Staple to the side faces or underside of joists to create a “V” or shallow “U” trough between joists, with a consistent slope toward a gutter or downspout.
- Result: This worked, but the stiffness of the membrane demanded some extra steps to get a reliable pitch and a clean trough.
Key installation notes from my hands‑on:
- Pliability: Cold weather installation is a struggle. Leave the roll in the sun to relax, or gently warm it with a heat gun on low. It becomes more cooperative and holds shape better.
- Fasteners: Use cap staples or wide‑crown staples; narrow crowns can tear under tension. I also used furring strips (1x2) screwed along the joist edges to sandwich the membrane and protect it from staple pull‑through.
- Pitch: Aim for at least 1/8 in per foot; 1/4 in per foot is safer if you can afford the drop. The membrane will not “drape itself” into a slope. I had to set reference lines with a laser, then pull and staple to those lines to maintain fall.
- Seams: Overlap by 2–3 inches and use a high‑quality butyl tape, not generic acrylic. Roll the tape firmly with a J‑roller.
- Terminations: I used a short ledger strip to form a drip edge at the low end and screwed a small PVC downspout box and gutter to carry water away from the structure. Precut holes with a sharp hole saw for downspout connections; back the cut with scrap wood to prevent ragged edges.
Joist Spacing Matters More Than You Think
The 16.14‑inch width is the make‑or‑break detail. On decks with joists 16 inches on center (which leaves a 14.5‑inch clear bay), there isn’t much material left for side fastening and still have a deep trough. With a stiff membrane, you need extra width to create both side attachment flanges and a meaningful sag or slope. On my test:
- 16 in. O.C. bays: Feasible, but fussy. The trough depth was shallow unless I dropped the side attachment lines significantly, which then made the side flanges small and prone to pull‑out without furring strips.
- 12 in. O.C. bays: Much easier. There’s more material to create a deeper trough with solid fastening flanges, and the system feels more secure.
If you’re retrofitting a standard 16 in. O.C. deck, plan on adding cleats, furring, or intermediate nailers to give yourself more attachment points and control over the trough shape. Otherwise, expect pooling in low spots, especially around staples and seams.
Water Test and Performance
After installing three contiguous bays with slope to a shared gutter, I ran a hose for 20 minutes across the deck surface:
- Water capture: Once the membrane was tensioned properly, it captured surface water and directed it as intended. However, there’s very little forgiveness—any sag without slope holds water. The stiffness means you see “flat spots” rather than graceful curves, so layout precision matters.
- Seams: The butyl‑taped overlaps stayed dry during my test. I would not trust generic tapes long‑term in temperature swings.
- Noise: Rain on the membrane is audible but not intrusive. Tensioning reduces “drumming.”
- Debris: Leaves tend to collect at the trough entry. A simple leaf guard at the deck edge helps.
Net: It can keep the area below dry for storage, but the margin for error is small. The system rewards careful prep and penalizes shortcuts.
Durability and Maintenance
- Abrasion and puncture: The membrane shrugged off incidental contact with tools and hardware. It’s not easily punctured.
- UV: Protected under the deck, UV exposure is minimal. I wouldn’t leave it exposed long‑term.
- Cleaning: Rinse the gutter and downspout seasonally. Check tape seams annually.
I expect the HDPE to hold up for multiple seasons if installed with adequate mechanical support (furring strips) and quality tape.
What I’d Use It For (and Avoid)
- Good for: New builds or rebuilds where you can plan joist spacing and add cleats/furring to accommodate the membrane. Also useful for general waterproofing tasks around the shop—lining utility shelves, protecting shed roofs under corrugated panels, or wrapping non‑structural outdoor boxes.
- Caution for: Retrofits on 16 in. O.C. decks where you can’t add attachment surfaces; top‑of‑joist installations under deck boards; any situation where you can’t maintain a consistent slope to a proper termination.
Practical Tips
- Warm the roll before installation for better handling.
- Use cap staples plus 1x furring strips to protect the edges and add clamping pressure.
- Plan slope with a laser or stringline; snap lines on joist faces.
- Use butyl tape, rolled firmly; avoid acrylics.
- Terminate into a real gutter/downspout to move water away from the foundation.
- Preplan bay transitions—stagger seams so water doesn’t chase along tape edges.
Pros and Cons
Pros
- Thick, tough HDPE; resists tears and abrasion
- Black color hides well and likely has decent UV stability in shaded installs
- Long roll covers multiple bays; cost‑effective compared to panel systems
- Works well when you can control slope and attachment points
Cons
- Very stiff; hard to form smooth, self‑draining troughs without extra carpentry
- Width is tight for 16 in. O.C. bays; better suited to 12 in. O.C. or added furring
- Top‑of‑joist usage risks trapping moisture against framing
- Demands quality tapes and careful detailing; little tolerance for sloppy installs
Recommendation
I conditionally recommend the Pushglossy under‑deck membrane for installers who can control framing details and are willing to add furring or cleats to create a reliable trough with proper slope—ideally on 12 in. O.C. joists. In that scenario, its durability and weather resistance make it a pragmatic, budget‑friendly way to keep the space under a deck dry.
I do not recommend it for simple, top‑of‑joist installations under deck boards or for quick retrofits on 16 in. O.C. decks where you can’t add attachment surfaces. The stiffness and tight width make it hard to achieve consistent drainage, and the moisture risks to framing aren’t worth it.
If you’re set up to install it as a true under‑joist trough with good mechanical fastening and butyl‑taped seams, it can be a solid performer. Otherwise, consider a purpose‑built under‑deck panel system that hangs below the joists and bakes in the pitch for you.
Project Ideas
Business
Turnkey Under‑Deck Conversion Service
Offer a specialized service converting damp under‑deck spaces into dry, usable areas using this HDPE drainage membrane plus accessories (tape, downspouts, framing). Package options can include storage installs, outdoor kitchens, or covered patios — promote quick installs (staple to joists, seal seams) and upsells like lighting and shelving.
DIY Kits and Online Installation Course
Sell pre‑measured kits (membrane cut to common deck lengths, self‑sealing tape, fastening kit, instructions) and a paid video course covering planning, cutting, stapling, sealing seams and attaching downspouts. Kits reduce buyer hesitation and the course builds trust and drives accessory sales.
Wholesale & Co‑Branding for Deck Contractors
Create a wholesale program targeting deck builders and remodelers: bulk rolls, contractor pricing, co‑branded membrane options and installation training. Position the product as an add‑on to deck builds to increase contractor revenue and differentiate their offerings.
Upcycled Waterproof Goods Line
Collect leftover membrane scraps from installs to make waterproof products (tool rolls, tote bags, boat gear covers, outdoor cushion protectors) and sell them as durable, eco‑friendly items online or at local markets. Market the line as repurposed HDPE with a rugged, weatherproof advantage.
Event Waterproofing & Short‑Term Rental Service
Provide temporary waterproofing for outdoor events — install membrane panels to protect vendor booths, stages or walkways and remove after the event. Offer fast‑install crews, rental pricing per square foot and packaged add‑ons like temporary downspouts and seam sealing for high‑traffic venues.
Creative
Under‑Deck Dry Storage Conversion
Use the HDPE membrane as a finished ceiling under your deck to create a dry, usable storage or patio space. Staple the 16"‑wide strips to the top of the joists, seal seams with self‑sealing tape and attach a downspout at the drain hole to channel water away — ideal for storing outdoor furniture, grills or creating a sheltered seating area.
Black Drop Ceiling with Hidden Lighting
Create a sleek black drop ceiling beneath a deck by installing overlapping membrane strips; hide LED strip lights or string lights above the membrane for indirect, weatherproof lighting. The membrane’s matte black finish gives a clean, modern look while protecting fixtures from moisture and allowing easy access for wiring.
Raised Bed & Planter Liner with Rain Routing
Line large planters or raised beds with the waterproof membrane to protect wood and soil from rot, then route overflow to a small downspout to collect rainwater. The durable HDPE material resists tearing and makes it simple to create custom‑sized liners from the 65 ft roll.
Pet Shelter / Kennel Roof
Build a compact, waterproof pet shelter or kennel roof using cut sections of the membrane. Staple or screw to a simple frame to create a water‑shedding top that uses the product’s weather resistance and black aesthetic for a low‑maintenance, durable pet area.
Temporary Canopy or Groundsheet for Outdoor Events
Divide the roll into panels for temporary canopies, aisle covers, or heavy‑duty groundsheet protection at markets and outdoor events. Lightweight, tear‑resistant and easy to seam with self‑sealing tape, the membrane provides a fast, cost‑effective waterproofing solution for short‑term needs.