Features
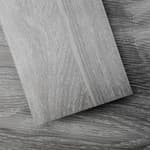
- 🏡Sample of Peel and Stick Floor Tiles - We specially prepare 5 kinds of floor color samples for customers to buy, you can try to buy the sample to compare which color is more suitable and like, and you can see whether our material is good before buying the floor set !
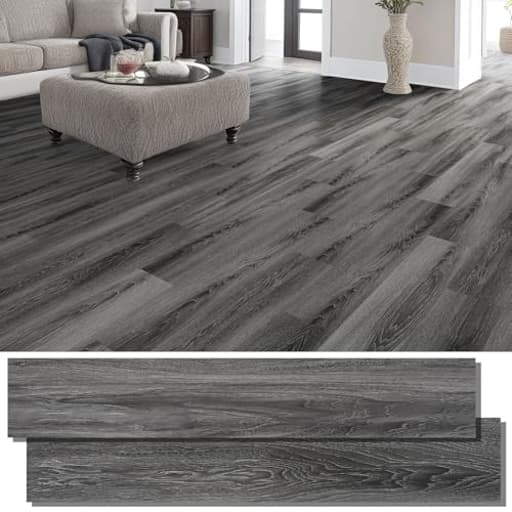
- 🏡Premium Quality Material - Peel and stick vinyl plank flooring Tiles are crafted with the high quality vinyl, ensuring durability and longevity. The package contains 36 pack tiles, each measuring 36x6 inches, providing a total coverage of 54 square feet.
- 🏡Easy to Install - Peel and stick down to practically any surface, make your home improvement easier and save your time & money. Great for Living Room wall Bathroom Kitchen RV Camper any room decoration.
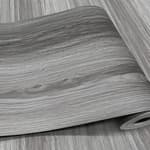
- 🏡Superior Performance - Boasting a rigid surface with a robust core, INMOZATA vinyl plank flooring Tiles are 100% waterproof. The wear, scratch, and abrasion-resistant properties ensure longevity, while the high strength guarantees no expansion and stability.
- 🏡Comfort & Warmth - INMOZATA waterproof peel and stick vinyl flooring tiles not only add elegance to your space but also offer a warmer, more comfortable surface to walk on compared to traditional tiles. They are ideal for creating a cozy atmosphere in any room.
Specifications
| Color | Deep Gray |
| Size | 36 pcs |
| Unit Count | 36 |
Related Tools
Self-adhesive vinyl plank flooring tiles (36 pieces, each 36 × 6 inches; total coverage 54 sq ft) designed for peel-and-stick installation on most existing surfaces. The planks are waterproof with a rigid, wear- and scratch-resistant surface for dimensional stability and use in rooms such as bedrooms, kitchens, bathrooms, and RVs.
INMOZATA Peel and Stick Floor Tile Vinyl Flooring, Waterproof Vinyl Plank Flooring 36-Pack 54 Sq.Ft Wood Grain Self Adhesive Peel and Stick Flooring for Bedroom, Living Room, Kitchen, RV Review
I set aside a weekend to refresh a tired hallway and small powder room, opting for INMOZATA’s peel-and-stick vinyl planks as a quick, low-mess route to a cleaner look. I’ve installed plenty of floors—from click-lock LVP to ceramic and sheet vinyl—and this product sits squarely in the “fast DIY makeover” category. It’s not trying to be a premium, thick luxury plank; it’s designed to go down quickly over a smooth, existing surface and immediately modernize a space.
What you get and how it looks
Each box includes 36 planks at 36 x 6 inches, covering 54 square feet. I like the proportion: narrower planks read more convincingly as “wood” in small rooms, and they’re easier to handle around doors and tight corners. I chose a deep gray tone that lands on the cooler side and works well with white trim and black hardware. The finish has a low sheen that hides dust and minor scuffs better than a glossy surface would.
Pattern repeat is present—as with most budget peel-and-stick options—so I recommend dry-laying a few stacks and shuffling planks to avoid clumping similar graining. Edges are straight and consistent; when the subfloor is prepped correctly, seams sit tight and uniform.
INMOZATA offers sample color packs, and I found that useful. In my lighting, the gray reads slightly cooler than online photos. If exact color match matters in your space, order samples first.
Installation: straightforward, with a few caveats
The appeal here is the simplicity: peel the backing and stick. That said, your results hinge on prep:
- Subfloor prep: I scrubbed and degreased an old sheet-vinyl surface in the powder room, then filled divots and seams with a patching compound. In the hallway, I skimmed the old plywood to knock down ridges and screw heads. These planks will telegraph irregularities because they’re on the thinner side—get the floor smooth and level.
- Layout: I snapped a centerline and dry-fit a couple of rows to avoid sliver cuts at the walls. A 1/8-inch perimeter gap (later concealed by base or quarter-round) prevents binding if the house shifts.
- Cutting: Score-and-snap with a sharp utility knife works great. For long rips, a metal straightedge and steady pressure made clean edges. I also used cardstock to template tricky door jambs and notches; that reduced waste significantly.
- Sticking it down: I peeled 4–6 inches of backing to place the end and side, then fed the backing out as I pressed forward. Once this adhesive bites, there’s very little repositioning, so align carefully. A J-roller (or even a heavy paint roller) helps set the bond, especially at seams and ends.
Adhesion has been solid on clean, smooth surfaces. On a lightly textured area and over an old grout line I had filled, I added a mist of flooring adhesive spray as insurance. In wet-prone spaces like a bathroom, I prefer that belt-and-suspenders approach; it doesn’t add much time and improves long-term hold.
Performance underfoot
After several weeks of use, the floor has handled everyday traffic well. A few observations:
- Waterproofing: Spills and splashes wipe up cleanly without swelling or discoloration. The vinyl itself is waterproof; as with any plank system, the weak point is the seams and the adhesive bond. Proper prep and good roll-down pressure go a long way here.
- Wear and scratch resistance: The wear layer resists casual scuffs and my dog’s nails without visible damage. I’d still put felt pads under chair legs—standard practice for any hard-surface floor.
- Comfort and warmth: Compared to ceramic, this is noticeably warmer and has a slight give that’s kinder on your joints. It’s still a firm surface, but it doesn’t have the hollow “clack” of some floating LVP systems.
- Noise: Footfall is quiet. There’s no click-lock edge to amplify sound, and the adhesive bond keeps resonance down.
Where it shines—and where it doesn’t
This product excels as a cosmetic upgrade in spaces where you want minimal tools and minimal downtime. The hallway and powder room transformation was immediate: cleaner lines, cohesive color, and a consistent wood look without the complexity of a floating floor or the mess of thinset.
A few constraints to keep in mind:
- Thickness: The planks aren’t as thick as mid-range click LVP. That’s part of why they’re so easy to cut, but it also means they aren’t forgiving of subfloor defects. Any ridge, hump, or deep grout line you don’t address will show.
- Color accuracy: In my space the gray leaned cooler than expected. Samples help set expectations.
- Wet areas and RVs: The vinyl is waterproof, but adhesives are sensitive to moisture and temperature swings. In bathrooms or kitchens, I strongly recommend meticulous prep, full roll-down, and optionally a pressure-sensitive adhesive primer or light spray adhesive. For RVs, extreme heat/cold cycles can challenge any adhesive floor; plan to reinforce edges and monitor early on.
- Packaging/handling: My boxes arrived intact, and plank edges were clean. As with any rigid peel-and-stick, avoid bending the planks—the adhesive backing can crease and compromise alignment.
Tips for a better install
- Clean is king: Degrease thoroughly; any residue will undermine adhesion.
- Smooth the surface: Skim or patch seams, fill grout lines, and sand down ridges.
- Dry-lay and shuffle: Mix planks from multiple boxes to blend pattern.
- Peel gradually: Expose a few inches of adhesive, align, then advance.
- Roll it: Use a J-roller to lock adhesion, especially at ends and seams.
- Finish edges: Quarter-round or base shoe hides the perimeter gap and gives a finished look.
- Plan waste: Coverage is 54 sq ft per box; add 5–10% for offcuts, more in quirky rooms.
Comparisons and value
Relative to click-lock LVP, this is dramatically faster to install, lighter to carry, and requires fewer tools. You lose some forgiveness on imperfect subfloors and some ability to float over minor waves. Compared with sheet vinyl, you gain a wood-plank visual with simpler handling—no giant roll to maneuver or seam welding.
In terms of value, it’s a strong bang-for-buck option for rentals, guest rooms, small kitchens, bathrooms, and hallways where you want a modern, wood-look upgrade without the cost and effort of a full flooring overhaul. It also suits accent walls or quick RV refreshes (with the caveats noted).
Durability outlook
I can’t speak to multi-year performance yet, but early indications are positive. The wear layer has resisted daily scuffs, seams have stayed tight, and the adhesive bond shows no edge lift in conditioned spaces. With proper prep and mindful use (felt pads, prompt cleanup of standing water), I’d expect this to outlast paint cycles and survive a few rearrangements of furniture without drama. If you’re planning for heavy commercial-level abrasion or truly uneven subfloors, a thicker click LVP with underlayment or a fully glued commercial LVT might be a better fit.
Bottom line
INMOZATA’s peel-and-stick vinyl planks hit their target: a straightforward, DIY-friendly way to give a room a clean, modern wood look with minimal tools and time. The combination of easy cutting, reliable adhesion on prepared surfaces, and a low-sheen, convincing finish makes it a practical choice for quick upgrades.
Recommendation: I recommend these planks for homeowners and renters who prioritize a fast, budget-conscious refresh over premium thickness. They’re especially compelling for small to mid-sized rooms, bathrooms (with careful prep), and hallways where you want a durable, waterproof surface without the learning curve of floating floors. If your subfloor is rough or you expect heavy, long-term wear, step up to a thicker LVP; otherwise, this is a solid, satisfying install that delivers exactly what a peel-and-stick floor should.
Project Ideas
Business
One-Day Room Refresh Service
Offer a fast-turnaround service for homeowners, landlords, and Airbnb hosts: replace worn flooring or add an accent wall in a single day using peel-and-stick planks. Pricing model: flat-rate packages (e.g., 54 sq ft starter pack install $X, full bedroom $Y) plus materials. Upsells: trim, threshold strips, small repairs, staging for listings. Marketing: local Facebook groups, Airbnb host forums, realtor partnerships; target quick ROI customers who need fast, affordable updates.
Mobile RV Flooring & Trim Business
Specialize in on-site RV installs at campgrounds, marinas, or storage facilities. Mobile service addresses RV owners who prefer not to ship their vehicle. Offer tiered packages (floor only, floor + cabinet faces, full mini-makeover). Pricing: premium for convenience and travel; partner with RV parks for referral deals. Add-on revenue: maintenance kits, replacement panels, and seasonal refresh subscriptions.
Sample Kits + Virtual Color Consultations
Sell curated sample kits (5–8 planks, trim pieces, adhesive testers) and offer paid 30–60 minute virtual consultations to help customers pick colors and layouts. Charge for consultations or credit the fee toward a full kit purchase. Use an online booking system, before/after portfolio, and upsell installation guides or cut lists tailored to the client’s room dimensions.
DIY Video Courses & Templates
Create short, monetized video courses teaching planning, cutting, and professional-looking installs for homeowners and small contractors. Include printable templates (room layout, waste calculator, cut lists) and affiliate links to tools and materials. Distribute via Gumroad, Teachable, or YouTube with paid tiers. Add value with community access or monthly Q&A webinars.
Home Stager & Small Remodeler Partnership
Form partnerships with real estate stagers and small remodelers to supply/install peel-and-stick floors for quick flips and listing photos. Offer wholesale pricing for bulk orders and priority scheduling for staging jobs. Sell turnkey staging bundles (floor + accent wall + trim) that stagers can deploy within a day to boost listing appeal and time on market.
Creative
Checkerboard Accent Wall
Use the 36"x6" planks to create a large-scale checkerboard or geometric wall in a living room or entryway. Plan a grid, mark studs and level lines, then peel-and-stick in alternating directions or colors to emphasize contrast. Tools: level, pencil, utility knife, straightedge, small roller to press seams. Time: 3–5 hours for a standard accent wall. Tips: start from the center, stagger seams for a more natural look, and trim edges for a crisp finish.
Rustic Headboard and Bed Backdrop
Cut and assemble planks into a floating headboard or full wall backdrop behind a bed for instant warmth. Mount planks to a thin plywood substrate (for easy removal) and add hidden cleats to hang on the wall. Finish with a light sanding and wax or matte sealant if desired. Variations: extend to bedside niches, add integrated LED strips behind top edge for ambient lighting.
Waterproof Backsplash or Shower Niche
Create a durable, waterproof backsplash in kitchens or a decorative shower niche surround. Use manufacturer-recommended waterproof adhesives and seal all exposed seams with clear silicone or a grout-style sealant. Avoid using on surfaces that are constantly submerged or on floors with heavy standing water unless the manufacturer confirms floor-grade usage. Benefits: fast install, easy to clean, consistent wood-grain look without real wood maintenance.
RV Mini-Makeover Pack
Design a compact remodel kit for RVs: replace flooring, refinish cabinet faces, and line countertops with matching planks and trim pieces. The lightweight, waterproof planks are ideal for campers — cut to fit, relocate easily, and replace as needed. Package idea: 1-day RV refresh service or DIY kit with pre-cut pieces for common floor plans. Tips: use adhesive recommended for mobile environments and allow for expansion gaps at doorways.
Framed Flooring Art Panels
Build framed decorative panels or headboard tiles by mounting 2–4 planks inside shallow wooden frames to create modular wall art. Mix colors/textures, paint the frames for contrast, and hang in a grid for a custom gallery wall. These panels are lightweight, portable, and reversible if you want to change decor seasonally.