
Specifications
| Color | Acorn, Terra Cotta, Arbor, Hunter Green, Black, Storm, Clay, Granite, Midnight, Spice, Linen, Canvas, Haystack, Cobblestone, Wheat, Oatmeal, Earth, Light Ash, Gray Mist, Pewter, Putty, Rosemary |
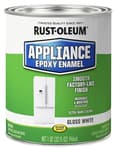

A 29 oz tintable specialty countertop coating designed for refinishing and protecting kitchen and bathroom countertops. It can be tinted to a wide range of colors (Acorn, Terra Cotta, Arbor, Hunter Green, Black, Storm, Clay, Granite, Midnight, Spice, Linen, Canvas, Haystack, Cobblestone, Wheat, Oatmeal, Earth, Light Ash, Gray Mist, Pewter, Putty, Rosemary) and applies as a coating that cures to form a protective surface.
Rust-Oleum Rustoleum Specialty 254853 29 Oz Tintable Specialty Countertop Coating Review
Why I reached for this
I wanted a budget-friendly refresh for a tired laminate vanity and a small section of kitchen counter without committing to a full replacement or a complex multi-step kit. A tintable, roll-on solution sounded like the right middle ground, so I picked up this countertop coating and had it tinted to a soft Pewter from the provided palette. The idea seemed perfect: pick a color, prep the surface, roll it on, and give the counters a second life.
Tinting and color options
The tinting part was straightforward. My local paint desk had the formula sheet, and the color landed where I expected: neutral, slightly warm gray that hides small imperfections better than black or bright white would. The palette leans practical—earthy tones, grays, and a few deeper options—so if you’re trying to mimic stone without large flakes or pattern, these colors will do a passable job. If you want speckles, metallics, or high-gloss marble effects, this isn’t that product.
Prep is everything
If this coating has a secret, it’s not in the can—it’s in the prep. I degreased the surfaces thoroughly (twice) with a heavy-duty cleaner, rinsed, then scuff-sanded until the old laminate lost its sheen and felt uniformly dull under a gloved hand. Any silicone caulk has to go; it will sabotage adhesion. I vacuumed, wiped with a lint-free rag, and let everything dry overnight. I also removed the faucet and masked the sink and backsplash meticulously. Plan on more time prepping than painting; it’s worth it.
Environmental control matters, too. I kept the room around 70°F with a dehumidifier to stay below 50% RH. This product is sensitive to humidity and film thickness, and cutting corners here shows up later as curing trouble.
Application: workable, but finicky
The coating is thicker than standard paint and wants to self-level, but only to a point. I got my best results with a high-density foam roller and a light “tipping off” pass using a good synthetic brush. Edges first, then roll the field, keeping a wet edge and resisting the urge to overwork it. Thin coats are key—this is not the product to slather on.
Coverage was reasonable for small projects. One can was sufficient for a bathroom vanity (two thin coats) with a little left for touch-ups. For a typical kitchen, you’ll need multiple cans and a staged approach.
Between coats, I waited a full 24 hours. On the second coat, I strained the material through a paint filter to reduce nibs and kept stirring periodically; pigments and binders separate more than you’d expect, and consistent mixing matters.
Finish and feel
Visually, the finish sits between matte and low satin. It hides shallow scratches and blends seams better than glossy options. On my test board and vanity, it looked even and professional from a few feet away, with faint roller texture only visible under raking light. It’s not a thick build like a two-part epoxy; think of it as a robust enamel-like shell.
Tactilely, it’s smooth but not slippery. I liked the feel for a vanity and laundry top. In the kitchen, it’s “fine” out of the gate—until you start using it like a kitchen counter.
Curing and the reality of daily use
This is where my experience diverged from the promise on the label. Even with conservative, thin coats and controlled conditions, the coating took much longer to lose its soft, tacky feel than I expected. After 72 hours, it was dry to the touch, but heavy objects left slight impressions. A gentle tape test at five days lifted color in a few spots along an edge. After a full week, the surface improved, but still felt more delicate than a factory laminate or a catalyzed topcoat.
In the kitchen section, early water exposure and sliding a ceramic mug across the edge telegraphed faint marks that didn’t buff out. Heat is off-limits—no surprise there—but even warm cookware placed briefly on a trivet transferred a faint ring while the coating was still curing. By the two-week mark, it stabilized, yet remained easier to mar than I’d like for a high-traffic counter.
On the vanity, it fared better. Toothpaste, soap, and water droplets wiped away cleanly, and the lower traffic let it cure without drama. For low-use surfaces, the promise is closer to the reality.
Odor, ventilation, and cleanup
Expect a strong odor during application and the first couple of days of curing. Good cross-ventilation and a respirator rated for organic vapors made the process tolerable. I used disposable rollers and brushes to avoid solvent cleanup. Plan your work so you can leave the room closed off to pets and children while it off-gasses.
Durability and maintenance
Once fully cured, the coating resists gentle cleaners and daily wipe-downs. Use non-abrasive pads and avoid citrus solvents or anything harsh. Cutting directly on it is a bad idea; plan on cutting boards and trivets always. If you manage expectations and handle it with care, it’ll maintain its look on low- to medium-traffic surfaces. The problem is that most kitchen counters don’t live a careful life.
Touch-ups are possible, but color matching depends on how your can was tinted and how the existing surface has aged. Feathering in a repair takes a steady hand.
Where it fits—and where it doesn’t
Good fit:
- Bathroom vanities, laundry room counters, craft tables
- Rental refreshes where a modest improvement is enough
- Home staging and interim upgrades before a remodel
Poor fit:
- Busy family kitchens and heavy-use prep areas
- Households that can’t strictly control temperature/humidity or keep the surface idle for a week or more
- Users who expect stone-like hardness or thick-build protection
Tips if you go for it
- Prep like a pro: deep clean, degloss thoroughly, and remove all silicone.
- Control the environment: moderate temps, low humidity, no drafts on the surface while it levels.
- Go thin: two or three thin coats beat one heavy coat every time.
- Stir often: keep the mix uniform for color and performance.
- Be patient: extend cure time before returning to normal use—think a week, not days.
- Protect edges: they’re the first to show wear. A small bead of compatible caulk at backsplashes helps.
A word on alternatives
If you want a kitchen-grade upgrade, consider a two-part countertop epoxy system or a high-solids, waterborne 2K urethane clear over a compatible color base. They’re more demanding and pricier, but they cure harder and faster with better chemical resistance. If you’re set on paint-only systems, a dedicated bonding primer plus a catalyzed enamel and a hard clearcoat can outperform a single-can countertop coating—at the cost of complexity.
Verdict
I appreciate the concept: a tintable, roll-on countertop coating that can rescue dated laminate without major expense. On a bathroom vanity and other low-stress surfaces, it largely delivered a clean, uniform finish with reasonable effort. In the kitchen, though, the finicky cure and softer-than-expected film held it back. I found myself babying the surface longer than planned and still seeing marks that a more robust system would shrug off.
Recommendation: I would not recommend this coating for primary kitchen counters or any surface that sees hard daily use. If you need a quick, budget-friendly refresh for a bathroom vanity, laundry counter, or staging project—and you can control the environment and be patient with cure times—it can serve as a stopgap. For a lasting, kitchen-ready result, invest in a more durable, multi-part system.
Project Ideas
Business
Mobile Countertop Resurfacing Service
Offer a on-site countertop resurfacing service for homeowners who want a fast, affordable alternative to full replacement. Market to busy families and landlords: book, color-consult, prep, and refinish in a day or weekend. Upsell services: edge repairs, sink caulking, and faux finishes (marble, concrete). Pricing model: flat rate by square foot plus materials and color consultation; good margins because labor is the primary cost and materials are inexpensive.
Short-Term Rental Renovation Package
Target Airbnb/VRBO hosts with a package to refresh kitchens and bathrooms quickly between bookings or during host upgrades. Emphasize rapid turnaround, improved guest photos, and scratch/stain resistance. Offer seasonal refreshes or bulk discounts for multiple properties. Add-on services: color staging advice, matching backsplashes, and fast-tracking for high-demand listings.
Custom Upcycled Furniture Shop
Create a product line of upcycled furniture (tables, vanities, coffee carts) with durable, stylish tops finished in signature tints and textures. Sell online via Etsy, Instagram, local craft markets, or consignment in boutique home stores. Differentiate with bundled customization (color, pattern), limited-run finishes, and small-batch seasonal palettes. Promote sustainability angle to attract eco-conscious buyers.
Hands-On DIY Workshops
Host paid workshops teaching homeowners how to refinish countertops and furniture using tintable countertop coating. Offer beginner and advanced classes (faux marble, concrete looks, stenciling). Workshop revenue streams: class fees, material kits sold at checkout, private group bookings, and follow-up consulting. Workshops build local reputation and generate leads for paid resurfacing services.
Property Management Maintenance Contract
Offer a recurring maintenance/refinishing contract to property managers and small landlords: scheduled inspections and resurfacing of worn countertops between tenants. Sell it as a cost-saving alternative to replacements, reducing vacancy times. Provide bundled pricing for multi-unit buildings, emergency touch-ups, and color-standardization across units to streamline turnover.
Creative
Faux Marble Countertop
Use several tinted shades (linen, gray mist, pewter) to create a realistic faux-marble finish over an old laminate or worn countertop. Prep the surface with cleaning and light sanding, apply a bonding primer, then base coat with a light color. While still tacky, feather in veins with a fine brush or feather and a darker tint, then soften with a damp sponge or brush. Finish with the countertop coating topcoat for protection. Result: high-end marble look for a fraction of replacement cost.
Upcycled Furniture Tops
Refinish table tops, dressers, vanities or nightstands with tinted countertop coating to create durable, spill-resistant surfaces. Choose colors like earth, clay, or midnight for different styles. Use painter's tape to create color-blocked designs or stencils, then apply two thin coats for durability. This is ideal for making mismatched or dated furniture look modern and water-resistant.
Concrete-Look Dining Table
Create an industrial faux-concrete tabletop by layering gray mist, putty, and pewter tints with a stipple or rag technique to add texture and depth. Lightly sand between coats for a subtle worn look, then seal with the countertop coating for a matte, durable finish that resists stains and heat marks.
Outdoor Picnic Table Renewal
Renew and protect an outdoor picnic table or bench by refinishing the top with a weather-resistant tintable coating. Pick a darker granite or storm tint to hide wear; use marine-grade primer where needed and apply multiple thin coats. The cured surface will resist spills and be easier to clean, extending the furniture's outdoor life.
Graphic Inlay Counter Designs
Combine masking tape or vinyl stencils with different tinted coats to create geometric patterns, faux tile grids, or inset 'inlay' motifs (hexagons, compass roses) on countertops or table tops. After base coats cure, remove masks and touch up edges, then encapsulate with the protective coating. Great for personalized kitchens, craft tables, or statement vanities.