Features
- 3 simple steps that will transform Formica, laminate, Corian, ceramic tile, butcher block, cultured marble, and traditional granite in a single weekend.
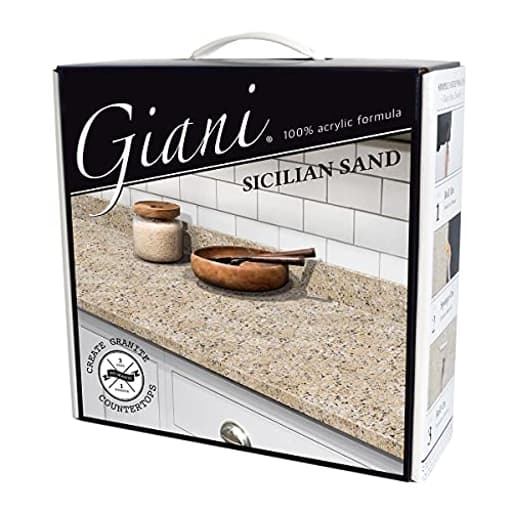
- Authentic granite finish offered in 5 contemporary colors, that cover 35 sq. ft. or 16 running ft. of 24 in. wide countertops.
- 100% Acrylic formula - Low odor, low VOC, water-based, durable, high-gloss, food safe topcoat that lasts for years.
- Simple sponge on and roll on application that is customizable to the look of your space. Step by step detailed instructions.
- All Giani Paints and Coatings are 100% Manufactured and Packaged in the USA.
Specifications
| Color | Sicilian Sand |
| Size | 46 Fl Oz (Pack of 1) |
| Unit Count | 1 |

A countertop paint kit that provides a three-step system to refinish Formica, laminate, Corian, ceramic tile, butcher block, cultured marble, and traditional granite, covering about 35 sq ft (or 16 linear ft of 24‑inch‑wide countertops) in a single weekend. The 100% acrylic, water‑based formula is low‑odor and low‑VOC and includes a durable, high‑gloss, food‑safe topcoat in Sicilian Sand; the kit is supplied as a 46 fl oz container. Application is by sponge‑on and roll‑on techniques and includes step‑by‑step instructions.
Giani Granite Countertop Paint Kit 2.0-100% Acrylic Review
What it is and why I tried it
I used the Giani kit in Sicilian Sand to rescue a set of dingy laminate countertops that weren’t worth replacing. The promise is straightforward: a three-step, sponge-and-roll system that creates a granite-like finish over a weekend, with a low-odor, water-based, 100% acrylic formula and a high-gloss, food-safe topcoat. On paper, it offers 35 square feet of coverage—about 16 linear feet of standard-depth counters—which is right in the sweet spot for a small kitchen or a couple of bathrooms.
I went in with tempered expectations. Faux-stone paint systems can look contrived if the technique isn’t controlled. But this kit rewards patience and planning. If you’re willing to mask carefully, control dust, and work in good light, the results can be surprisingly convincing.
What’s in the kit (and what you’ll still need)
The kit includes the primer/base coat, three mineral colors for the stone pattern, and a clear, high-gloss acrylic topcoat, along with instructions and basic applicators. It’s enough to complete a typical galley kitchen or a pair of vanities. The acrylic chemistry keeps odor and VOCs down compared with solvent-based finishes, which I appreciated indoors.
You’ll still want a few extras:
- Painter’s tape and a roll of masking paper or plastic
- A paint tray and liners
- A couple of extra sponges (the included one can be cut up, but having spares helps)
- A quality 2-inch angled sash brush for backsplashes and edges
- A foam roller (high-density, smooth finish)
- Bright task lighting or a flashlight for spotting misses in the clear coat
- Disposable gloves and baby wipes/damp rags for quick cleanup
If you’re working over tile, you’ll also want a good degreaser and a scuff pad. Silicone caulk should be removed and replaced after finishing; paint won’t stick to silicone.
Surface prep
As with any coating, prep determines outcome. I degreased twice, scuffed the old laminate with a fine abrasive pad, vacuumed, and wiped with a damp cloth to remove dust. Masking took time, especially around the sink and range. It’s worth sealing the tape edges with the primer at the backsplash line to reduce bleeding; pull tape while coatings are still tacky for cleaner lines.
The base coat is a dark primer that gives depth to the stone effect and bonds to the substrate. It rolled on smoothly and hides a multitude of minor sins in older laminate. If you have deep chips or seams, fill and sand them before priming—don’t expect the topcoat to level major defects.
Application: the granite effect
The mineral colors are sponged on in layers, creating the speckled, mottled pattern that reads as granite. This is the part that intimidates most first-timers, but the technique is forgiving. My approach:
- Start with lighter tones to establish the field.
- Introduce mid-tones sparingly.
- Use the darkest accent last to add depth and break up uniformity.
- Feather edges by lightly dabbing with a clean, dampened sponge to blend transitions.
Work in manageable sections and step back frequently. The finish looks “busy” under work lights and calms down in ambient room lighting. If you want a warmer, sandier look from Sicilian Sand, emphasize the light and mid tones; if you want more contrast, use more of the darkest accent and less blending.
Note: the sample practice sheet included is too flimsy to mimic real absorption or texture. If you want to practice, roll a bit of primer on a scrap of primed wood or a cardboard panel and try your pattern there first.
Topcoat: clarity, gloss, and pitfalls
The acrylic topcoat is the make-or-break step. It’s food-safe when cured, low odor, and levels well, but like all clear finishes it’s unforgiving of missed spots and lint. I applied two coats:
- First coat: light-to-moderate thickness with a foam roller, tipping off edges with the sash brush.
- Second coat: perpendicular to the first, focusing on even film build and watching for sags on vertical surfaces.
Bright lighting is essential. Rake a flashlight across the surface as you roll—dry patches will appear dull; wet coverage will glisten. The edges and backsplash are the hardest areas. Self-leveling helps, but gravity works against you on verticals. Apply thinner passes there and revisit after a few minutes to catch drips before they set.
The cured sheen is a true high gloss. It makes the stone pattern pop and adds depth, but it will highlight dust nibs if your space isn’t clean. If you do pick up debris, let the coat cure, de-nib lightly with very fine sandpaper, wipe, and recoat.
Coverage and timing
I covered roughly 30 square feet with one kit and had enough left for a second topcoat. The 35-square-foot claim is fair if you’re not overbuilding the topcoat; if you want extra insurance on the clear finish, consider buying a second can of topcoat or plan very efficient coverage.
Dry times are reasonable: color layers tack fast, the clear coat becomes handle-dry within hours, and the system is usable in light duty after a couple of days. Full chemical cure takes longer. I treated the surface gently for two weeks—no standing water, no abrasive cleaners, and trivets for anything warm.
Durability after use
After months of daily use, the finish has held up as expected for a water-based acrylic. It resists light scratches and routine cleaning with mild soap. Two behaviors are worth noting:
- Temporary water marks: cold, wet items can leave faint rings. They vanish as the moisture evaporates, but it can be disconcerting the first time.
- Edge wear: the front edge where you lean in sees the most abrasion. My solution was adding felt pads to a couple of cabinet doors that rub and being diligent with cutting boards and trivets.
If your kitchen is particularly hard on surfaces, Giani sells a separate epoxy topcoat that’s more abrasion-resistant. Epoxies bring their own learning curve (bubbles, working time, edge control), so the included acrylic was a sensible choice for me.
The look
Sicilian Sand skews warm, with sandy tan and cream tones over the dark base. Under indirect light it reads as a restrained, contemporary granite—enough movement to feel natural without shouting. High gloss enhances depth; if you prefer satin, this kit isn’t configurable to a lower sheen out of the box.
The finish hides small imperfections nicely. Seams, repaired chips, and old stains visually disappear under the stone effect. Up close, you can tell it’s a coating; from a normal standing distance, it passes as a solid surface upgrade.
Limitations and caveats
- Not a miracle worker on bad substrates: soft or swollen particleboard under damaged laminate will telegraph. Stabilize or replace those sections first.
- Vertical surfaces are fussy: expect extra time on backsplashes and edges to avoid sags.
- Gloss is polarizing: it looks premium but shows smudges and crumbs more than matte surfaces.
- Heat tolerance is finite: never set hot pans directly on the finish.
- You’ll need extra supplies: plan for tape, trays, sponges, and good lighting.
Tips that helped
- Overmask generously; you’ll thank yourself during the clear coat.
- Keep baby wipes handy for quick cleanup of stray dabs on fixtures.
- Work midday with plenty of light; check the clear coat at a low angle with a flashlight.
- Build your pattern gradually—easier to add contrast than to take it away.
- Tip off the front edge and backsplash with a lightly loaded brush after rolling.
- Respect cure times; the finish gets tougher over the first two weeks.
Who it’s for
- Homeowners and renters (with permission) looking for a budget-friendly refresh
- DIYers comfortable with paint and finish work who want a weekend project
- Anyone with serviceable but unattractive laminate, Corian, tile, or cultured marble
Less ideal for:
- Heavy commercial kitchens
- Surfaces with water damage or structural issues
- Those who dislike high-gloss finishes
Recommendation
I recommend the Giani kit for budget-conscious DIYers who want a meaningful aesthetic upgrade without demolition. It’s low odor, comparatively easy to apply, and produces a convincing granite look with a durable, food-safe finish. It won’t rival quartz for hardness or heat resistance, and you should expect some maintenance and care. But if you can give it a careful prep, work under good light, and let it cure properly, the value-to-impact ratio is excellent.
Project Ideas
Business
Countertop Refresh Service for Realtors & Flippers
Offer a fast, high-margin countertop refinishing service targeting realtors and house flippers who need quick, cost-effective kitchen updates before listing. Market turnaround of 'one weekend' and the food-safe topcoat as selling points; price by linear foot and bundle with cabinet hardware swaps or minor repairs.
Mobile Weekend Makeover Pop-Ups
Run scheduled weekend pop-up services (Saturdays) where you refinish 1–3 kitchens a day. Use social media to promote before/after reels, offer tiered packages (standard Sicilian Sand, premium textured finish, express 24-hour cure), and collect lead photos for quick estimates.
DIY Workshops & Classes
Host hands-on two- to four-hour workshops teaching homeowners how to use the three-step system on a small workspace (vanity, bar cart, or sample counter). Charge per seat, include a mini kit or discount on full kits, and upsell follow-up installations or in-home consultations.
Staging & Airbnb Refresh Partnerships
Partner with home stagers and short-term rental hosts to offer periodic refreshes between bookings. Position the service as a fast, low-disruption upgrade that increases perceived value and guest satisfaction — offer subscription-style scheduling for maintenance and seasonal touch-ups.
Kits + Content E‑commerce Bundle
Sell the paint kit bundled with application tools (high-density sponges, micro-rollers, masking materials) and a step-by-step printed guide or QR-code linked video tutorials. Use Instagram/TikTok content, time-lapse application videos, and influencer partnerships to drive online sales and offer professional installation credits to hybrid customers.
Creative
Weekend Kitchen Makeover
Refinish an entire run of laminate or Formica counters in a single weekend using the three-step system to achieve an authentic granite look in Sicilian Sand. Use the sponge-on technique to build natural texture, finish with the food-safe high-gloss topcoat, and refresh cabinet hardware and a new backsplash for a dramatic budget-friendly transformation.
Two-Tone Island Accent
Make a kitchen island the focal point by refinishing the island countertop in Sicilian Sand while keeping perimeter counters a complementary neutral. Apply the kit’s finish to the island with a slightly heavier sponge pattern for contrast; pair with a painted island base for a custom designer look without replacing surfaces.
Tile-to-Seamless Counter Conversion
Cover ceramic-tiled or cultured marble countertops to create a continuous, easy-to-clean surface. The kit adheres to tile and grout when applied per instructions and the durable acrylic topcoat makes the surface feel like solid stone, ideal for rental flips or mid-century homes with dated tile.
Upcycled Furniture & Butcher Block Tops
Use the kit to transform worn butcher block tabletops, buffet tops, or dresser vanities into high-gloss, food-safe surfaces. The water-based formula and sponge/roll application let you create subtle stone effects on furniture pieces to match kitchen counters or create coordinated surfaces.
Faux Stone Accent Table or Bar Cart
Create a faux-granite accent table or bar cart top by layering the acrylic base and sponging stone details, then sealing with the gloss topcoat for durability. Because the product is low-odor and water-based, it’s great for indoor projects where quick turnaround and low VOCs matter.