Features
- Expands To Fill: Loctite Tite Foam Gaps & Cracks fills, seals, and insulates effectively around gaps and cracks up to 1 inch in size
- Premium Durability: Polymer foam based on purified and concentrated ingredients withstands harsh UV rays for long-lasting results
- High Density Foam: Offers high density with a uniform cell structure for durability and overall insulation for your remodeling needs
- Superior Flexibility: Withstands building and material movement without compromising its seal
- Strong Adhesion: Sealant bonds to most building materials like wood, concrete, brick, stone, metal, pvc, and more
Specifications
| Color | Red |
| Size | 1 Pack |
| Unit Count | 1 |
Related Tools


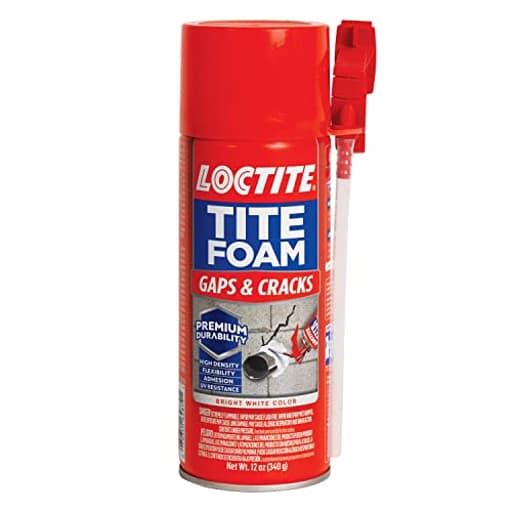
Spray-applied polyurethane expanding foam sealant designed to fill, seal, and insulate gaps and cracks up to 1 inch in size. It cures to a high-density, UV-resistant foam with a uniform cell structure that remains flexible to accommodate movement and adheres to wood, concrete, brick, stone, metal, PVC and other common building materials.
Loctite Tite Foam Gaps & Cracks Spray Foam Sealant, 12 fl oz Can, 1 Pack - Polyurethane Expanding Insulation Review
A hands-on look at Tite Foam for sealing everyday gaps
A drafty, cobwebbed basement window was my first real test of Tite Foam, and it turned into a useful lesson in how expanding foam behaves. I needed to seal a new panel around a vent opening where nothing was square, the gaps varied from hairline to about three-quarters of an inch, and the frame wasn’t friendly: a mix of old metal, crumbly mortar, and rough masonry. Tite Foam turned a fussy, leaky perimeter into a solid, insulated, and weather-tight seam—once I respected the learning curve.
What it is—and where it fits
Tite Foam is a polyurethane expanding foam formulated for sealing gaps and cracks up to about an inch. It adheres to common building materials—wood, masonry, metal, PVC—and cures into a high-density foam that stays slightly flexible. In practice, that combination of density and give is exactly what you want for perimeter seals that see a little movement: window panels, rim joist penetrations, plumbing and AC lines, sill plates, and fractured mortar joints that don’t justify full repointing.
If you’re trying to fill larger cavities, stabilize a loose assembly, or meet a specific fire-blocking code requirement, this isn’t the product. For those, you’d use a “big gap” foam, a foam gun system with backer rod, or a code-rated fireblock foam. But for standard 1-inch-and-under voids, this is right in the sweet spot.
Application: the learning curve that matters
My first passes were clumsy. I started by running beads along exposed edges and vertical seams. Gravity punished that choice immediately: the foam slumped and smeared on the panel face rather than staying put. The fix was simple, and it completely changed the experience: inject the foam into the gap, not onto the surface.
Here’s what worked consistently for me:
- Seat the straw firmly until it clicks in place. A half-seated straw oozes and drips at the valve.
- Shake the can thoroughly and keep it upside down while dispensing.
- Use the lightest possible pressure on the trigger. You don’t need volume; you need placement.
- Insert the straw tip into the void so the foam is delivered inside the gap. It then bonds to both sides and resists sliding.
- On verticals, work in short lifts, moving the straw with the foam front so you’re always filling the space, not laying it on a face.
- Fill to about 50–60% of the visible volume and let expansion do the rest.
Once I adopted that approach, the results were tidy, firm, and continuous. The foam skinned over in minutes and was ready to trim cleanly with a utility knife not long after. Full cure takes longer—plan on coming back the next day for paint or final finishing.
Adhesion and durability
Adhesion on my mix of materials was excellent. The foam locked to old masonry and metal framing without flaking, and it bridged small inconsistencies where mortar had chipped away. After cure, it had that “high-density” feel—less spongy than commodity foam—so it didn’t tear when I trimmed it flush. It also retains a bit of elasticity, which helps keep the seal intact when the panel shifts with temperature changes or vibration.
The manufacturer claims better UV resistance than typical foams. I can say it held up outside better than most of the generic cans I’ve used, but I still treat any exposed foam as temporary: prime and paint or otherwise cover it if it’ll see sun. UV stability buys you time; a coating provides durability.
Expansion, trimming, and the finish line
Expansion is assertive, so restraint is your friend. It’s easy to overfill if you try to “see” the final shape on your first pass. My best results came from a light initial fill, a short wait to judge expansion, then a quick top-up in any low spots. Trimming with a sharp blade yields a clean edge; sanding is possible but tends to fuzz the surface. Once trimmed, the foam takes paint well, which helps it disappear against trim or masonry.
The mess factor (and how to avoid it)
There’s no way around it: this can be messy if you rush. Two things keep it under control:
- Properly seated nozzle: Make sure you get a positive click when attaching the straw. A loose connection will leak and gum up the valve.
- Gentle trigger control: A slow, low-flow bead puts foam where you want it and minimizes drips.
Wear disposable nitrile gloves and old clothes. Keep a scrap of cardboard or a putty knife handy for catching drips. Uncured foam can be removed from tools with acetone or a foam cleaner; don’t use solvents on skin. Once it cures, removal is strictly mechanical. I also lay a drop cloth below my work area—one stray bead will find your floor.
One reality of straw-dispensed cans: reuse is hit-or-miss. If you know you’ll need the can again soon, keep the straw attached and try to purge air after use, but don’t count on a reliable reopening days later. If you have a lot of linear footage to seal or want better control, a pro-style foam gun with replaceable tips is worth the investment.
Performance in mixed conditions
I used the foam across joints ranging from hairline to roughly 3/4 inch, inside and outside. Lightly dampening the surfaces with a fine mist of water improved cure and adhesion, especially in dry conditions. Temperature matters too; you’ll get more consistent flow in the mid-range (roughly room temperature). In cold weather, the bead can sputter and expand less; in heat, it can be overly eager.
Once cured, the seal was airtight and did a good job of blocking dust and insects. Around the AC vent panel, the combination of adhesion and density eliminated rattles and soft spots. Weeks later, it’s still tight with no cracking at transitions.
Safety and limitations
A few guardrails:
- Not a fire-rated fireblock: Don’t use it to meet code in fire-stopping applications unless the product is specifically labeled for that.
- Not load-bearing: It’s a sealant/insulator, not a structural fix.
- Avoid continuous water immersion: Occasional wetting is fine once cured, but submersion isn’t what it’s designed for.
- Ventilate, protect skin and eyes, and follow the can’s safety instructions. Cured foam on skin is more or less a waiting game.
Value and who it’s for
Compared with bargain foams, Tite Foam costs a bit more, but the payoff is in control, density, and durability. If you’re sealing a few penetrations or a window perimeter, that translates to fewer re-dos and a better-looking finish after trimming. If you’re tackling an entire house worth of sill plates and rim joists, a gun-applied system may be more economical and precise. For typical homeowner jobs—window/door perimeters, pipe chases, cable and AC lines, gaps in masonry—it’s a strong choice.
Tips for best results
- Pre-fit any panels or backer material so gaps are consistent before foaming.
- Lightly mist surfaces with water in dry environments to aid cure.
- Inject foam into the void, don’t lay it on faces.
- Fill partially and let expansion work; top up only where needed.
- Trim with a sharp utility knife once cured; paint or cover if exposed to sunlight.
- Expect the can to be a single-session tool; plan your work so you use most of it at once.
Recommendation
I recommend Tite Foam for sealing and insulating everyday gaps up to an inch around windows, doors, masonry, and penetrations. It adheres well to mixed substrates, cures to a dense yet slightly flexible fill that trims cleanly, and holds up better outdoors than many alternatives. The caveat is application: it rewards a light touch, proper nozzle seating, and injecting foam into the gap rather than smearing it on surfaces. If you can live with those habits—and wear gloves—it delivers a neat, durable, and effective seal. For larger voids, code-driven fireblocking, or frequent use, look to a product designed for those tasks or step up to a foam gun system. For the typical homeowner punch list, this can earns a steady spot in the kit.
Project Ideas
Business
Weatherproofing & Air-Sealing Service
Offer targeted gap- and crack-sealing for homes and small businesses: doors, window jambs, rim joists, plumbing and electrical penetrations. Combine with energy-audit consultations (blower-door test partners or checklist) and provide before/after photos, estimated energy savings, and packaged maintenance plans. Charge per linear foot plus a minimum service fee.
Tiny-Home / RV Insulation Retrofits
Position as a niche retrofit service for tiny homes, vans, and RVs where tight spaces and many penetrations require precise sealing. Provide overnight mobile service, focused on waste/vent penetrations, cabinetry seams, and external wall gaps. Upsell moisture-control and thermal-wrap options for year-round comfort.
Landlord Turnover & Pest-Reduction Kits
Create a standardized turnover package for property managers: seal gaps around utilities, gaps in baseboards, and attic access to reduce drafts and pest entry during unit turnover. Offer discounted recurring contracts for multiple units and deliver photo documentation and short maintenance reports to streamline inspections.
Custom Faux-Stone Panels & Scenic Work
Produce and sell lightweight faux-stone panels and scenic pieces to landscapers, event designers, and theater companies. Use sprayed foam cores finished with cementitious coats, stain, and seal. Offer design, production, shipping, and on-site installation — market through local venues, rental houses, and staging companies.
Creative
Faux Rock & Stone Sculptures
Use expanding foam to build lightweight rock forms and wall panels for garden features or stage sets. Spray foam into cardboard or foam-core armatures, let cure, then carve/sand shapes and coat with a cement slurry or acrylic stucco for a realistic stone texture. Finish with outdoor paint and sealant for durable, weather-resistant pieces.
Custom Planter Shells & Raised-Bed Edging
Create custom-sized, lightweight planters by spraying foam into simple molds (plastic tubs, cardboard forms). After curing, trim and hollow as needed, reinforce/coat the interior with waterproofing or concrete thinset, add drainage holes and a decorative finish (faux concrete, stone paint, mosaic). Great for odd spaces, balcony gardens, or upcycled container lines.
Costume Armor & Prop Bases
Spray foam makes fast, shaped cores for cosplay armor, helmets, and large props. Build a rough armature, apply expanding foam to bulk out shapes, then sand and hard-coat (PVA + plaster, resin, or filler). Lightweight finished pieces are easy to paint and mount, ideal for makers creating replicas or theatrical costume parts.
Acoustic Baffles & Decorative Wall Panels
Form irregular, sculptural acoustic panels by spraying foam into shallow frames. Carve texture and cover with fabric or a thin hard coat to tame sound reflections and add custom wall art that doubles as functional acoustic treatment for studios, home theaters, or cafes.