
Features
- Universal Compatibility – Works with Hardie fiber cement and LP SmartSide engineered wood siding for seamless installation
- One-Person Installation – Holds siding in place, allowing for fast, precise nailing without extra hands or complex layout
- Adjustable Siding Reveals - Works with Hardie and LP Smartside planks from 4 inches to 8 inches tall, creating consistent reveal spacing on every project
- Heavy-Duty Support – Designed for 12 foot Hardie boards and 16 foot LP SmartSide planks, helps ensure reliable performance
- Non-Marring Design - Features a protective rubber locking grip to help prevent scatches on primed and pre-finished siding
Specifications
| Color | Green |
| Size | Universal: 5/16"–5/8" for Hardie & LP Siding |
| Unit Count | 2 |
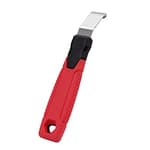
Related Tools
Handheld siding gauge that holds fiber cement and engineered wood planks in position so one person can set and nail boards. Adjustable for 4–8 inch reveals, it supports 12‑foot and 16‑foot planks and uses a rubber locking grip to protect primed and pre‑finished surfaces.
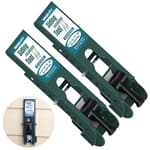
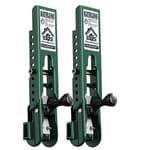
PacTool Universal Gecko Gauge Siding Tool – One-Person Installation for Hardie Fiber Cement & LP SmartSide Engineered Wood, Durable Grip, Heavy-Duty Support for 12’ & 16’ Planks Review
Why I Reach for the Gecko Gauge on Siding Days
The first time I hung a long run of fiber cement solo, I remember balancing a plank on my knee, a pry bar, and pure optimism. It worked—barely—but it wasn’t precise or sustainable. The PacTool Gecko Gauge (SA913) changed that rhythm completely. With a pair of gauges clipped onto the previous course, I get a stable shelf, a dead-consistent reveal, and free hands for fastening. It’s not a flashy tool, but it’s one of those quiet upgrades that pays off on every course.
Setup and Adjustments
Out of the box, the Gecko Gauge is straightforward. The pair comes preassembled and color-coded green, with an adjustable reveal mechanism that covers 4 to 8 inches. The adjustment is positive and repeatable; once I’ve set a reveal, it stays put. If you’re planning a story pole layout, it’s easy to match your first three courses to a fixed reveal and lock the gauges there for the rest of the wall.
Compatibility is where this model earns its “universal” tag. It spans the common thickness range for Hardie fiber cement and LP SmartSide engineered wood (roughly 5/16 to 5/8 inch). It does not belong on vinyl or cedar bevel—this is a lap-siding tool, and it’s happiest living with those denser, straighter products.
Solo Workflows That Actually Work
A single pair is enough for standard 12-foot fiber cement planks at reachable heights. I can clamp the gauges onto the previously fastened course, hoist the next board, rest it on the gauge shelves, and nail off at my own pace. With good stud layout lines, I start in the middle to lock the board, then work outward.
On 16-foot LP SmartSide, I strongly prefer two pairs (four clamps total). The extra support reduces sag on long spans, especially on second-story work where wind and ladder movements can shift a board just as you’re tacking it. With two pairs, the board stays put like it’s on temporary ledgers.
A small but meaningful detail: the locking grip uses rubber to grab the lower course. On primed or prefinished boards, that protection matters. I still wipe the pads periodically; dust, fiber cement chalk, or sawdust can reduce friction. In colder weather the rubber stiffens a bit, but I haven’t had issues as long as I seat the clamp correctly.
Accuracy and Reveal Consistency
Consistency is this tool’s calling card. Whether I’m running full courses across a big wall or stepping reveals around windows, the gauges eliminate guesswork. The reveals align tightly across openings and corners if you stay honest with your starter strip and keep courses square. On wavy sheathing or uneven foam, remember that gauges can’t flatten a wall—if the substrate bows, the reveal will mirror that.
I’ll add a tip for tricky areas: at corners and near penetrations, I’ll take a quick measurement off the story pole before locking the next course, just to ensure the reveal lands where it should when it ties into trim. The adjustment wheel makes those small tweaks painless.
Build and Durability
The body is a composite/plastic build with metal hardware. If you’ve only used all-metal hangers, plastic might raise an eyebrow, but these feel purpose-built rather than flimsy. Mine have taken a few ladder drops without any cracks or bent parts. The moving bits—adjustment mechanism, clamp pivot, and lock—have stayed tight with basic care. Every few jobs I check fasteners and wipe the pads; that’s about it.
The clamping action is secure when you seat it properly. If you’re casual with the lock or if debris is trapped under the pads, it can slip. I make a habit of giving each clamp a tug before lifting a board. It takes two seconds and prevents heartburn.
Speed and Ergonomics
This tool doesn’t turn siding into magic, but it takes a pile of small inefficiencies off the table. I stopped fiddling with temporary ledgers and custom spacers. I also eliminated most of the measuring for each course. Over a full wall, those minutes matter. More importantly, I’m not wrestling the board and the nailer at the same time. Less strain, fewer mishaps.
Using a nailer with a belt hook helps, as does laying out studs clearly before you start. I keep both gauges set to the same reveal and mirror them left/right so my hand motions are identical at each station. With the shelf holding the board, I can focus on nail placement, tight joints, and sealing cuts—not just keeping the plank off the ground.
Surface Protection and Finishes
The non-marring pads do their job. On dark prefinished boards, I still add a sliver of painter’s tape or a scrap of housewrap between the pad and the board if I’m working fast and dusty. It’s cheap insurance. The pads are replaceable in a pinch; I’ve also seen pros use a bit of fabric or a sacrificial film for long days on high-visibility elevations. If you keep the pads clean, you probably won’t need the extras.
Where It Shines—and Where It Doesn’t
Shines:
- Solo or two-person crews installing 12-foot Hardie or 16-foot LP SmartSide.
- Projects that demand consistent reveals around lots of openings.
- Homeowners who want pro-grade accuracy without an extra set of hands.
- Jobs where surface protection on prefinished boards matters.
Doesn’t shine:
- Long-span installs with one pair only, high on ladders in windy conditions. Yes, it works, but two pairs are safer and more stable.
- Substrates with significant plane issues. The gauges can’t correct a wavy wall.
- Materials outside its design—vinyl, cedar bevel, or non-lap products.
Practical Tips from the Field
- Use two pairs for 16-foot planks or anything above first-story height. The weight distribution and stability are noticeably better.
- Set the reveal once, then verify on courses 1–3. After that, lock and leave the adjustment alone to avoid creeping errors.
- Keep pads clean. Fiber cement dust is slick; a quick wipe restores grip and prevents scuffs.
- Test the clamp before lifting. Seat, lock, and give it a tug. If it moves, it wasn’t set right.
- Nail from the center out to prevent the board from rotating off the shelves.
- Mark studs boldly. You’ll work faster and avoid hunting behind the plank.
- Around windows and doors, measure off a story pole to sync reveals with trim heights.
Value and Who It’s For
The Gecko Gauge isn’t the cheapest option in the category, but the combination of universal thickness compatibility, clean adjustment range (4–8 inches), and non-marring grip justify the price for me. If you’re only hanging a couple of short runs, you might get by with homemade spacers. If you’re siding a garage, addition, or whole house, the time savings and quality bump are real.
It’s a tool I’d recommend to:
- Pros who want to maintain pace with a small crew or solo.
- DIYers who plan to side a structure on weekends and need reliable, repeatable reveals.
- Anyone working with a mix of Hardie and LP SmartSide products and wants one setup that covers both.
Recommendation
I recommend the Gecko Gauge. It makes one-person installation viable, maintains accurate reveals from course to course, and protects finished surfaces with a thoughtful clamping design. With a second pair for long or high runs, it becomes a stable, confidence-building system rather than just a clever clamp. If your siding plan includes fiber cement or engineered wood, this is the kind of tool that quietly improves your workflow and the final look of the wall.
Project Ideas
Business
One‑Person Siding Install Service
Start a low-overhead siding installation service that leverages the gauge for solo installs of trim, accent walls and small exterior jobs. Market savings from reduced crew costs and faster turnaround; emphasize consistent reveals and damage-free handling thanks to the rubber grip.
Tool Rental + DIY Video Package
Offer short-term rentals of the siding gauge bundled with step-by-step video tutorials and a cut list template. Target DIY homeowners tackling small exterior or interior projects—charge daily rates plus a refundable deposit and upsell pre-cut siding or fasteners.
Siding Prep & Staging Microservice
Provide on-site prep services: stage, square, set reveal spacing and pre-mark nailing lines using the gauge before the customer's contractor arrives. This reduces site time, minimizes mistakes and can be sold as a value-add to builders and remodelers.
Hands‑On Workshops & Certification
Host short paid workshops teaching homeowners and small contractors to install fiber cement and engineered siding using the gauge. Charge per participant, sell tool kits and siding starter bundles at the class, and offer a simple 'certified DIY' certificate to boost customer confidence.
Content Creation + Affiliate Partnerships
Produce tutorial videos, time-lapses and before/after reels showcasing one-person installs, clever reveals and repair tips. Monetize via ads, affiliate links to the gauge and siding materials, and partner with local suppliers or manufacturers for referral business and sponsored content.
Creative
Shiplap Accent Wall Kit
Use the siding gauge to install interior shiplap from fiber cement or engineered wood with perfectly consistent 4–8" reveals. The tool lets one person hold, align and fasten each plank without extra hands; protect prefinished surfaces with the rubber grip and cut boards to room width for a polished, contractor-grade feature wall.
Weatherproof Outdoor Bench & Backrest
Build a durable outdoor bench with a cladded backrest using Hardie or LP planks. The gauge keeps long 12'–16' planks straight while you fasten them, ensuring even reveals and a sleek, modern look. Use shorter offcuts for seat slats and stain/finish for extra weather protection.
Modular Garden Privacy Screen
Create freestanding or framed privacy panels made from siding planks set with consistent spacing. The adjustable reveal (4–8") creates airflow and light control; panels can be linked or stacked for patio, balcony or raised-bed enclosures. The non-marring grip preserves factory finishes on visible faces.
Headboard / Feature Panel Art
Turn prefinished siding into an oversized headboard or gallery-style feature panel. Use the gauge to get tight, repeatable reveals and single-person installation for large pieces. Mix plank orientations or paint selected boards for a custom, textured focal point.