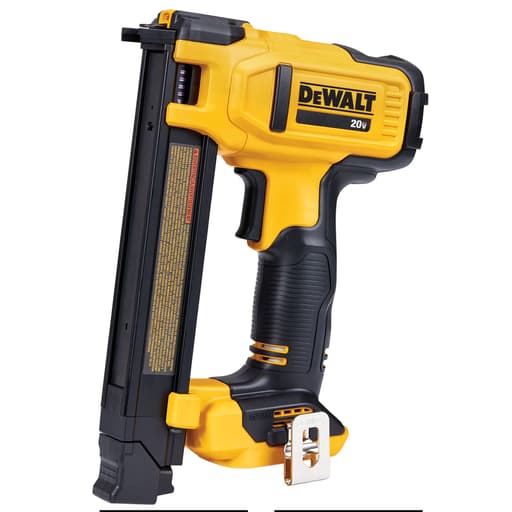
Features
- Proprietary cable guide to align staples over cable
- Center-mounted LED for work-area illumination
- Extended trigger for use in multiple orientations
- Adjustable belt hook (left or right)
- Magazine holds up to 34 staples (bottom-load)
- Designed to accept 1 in. insulated cable staples (sold separately)
- Compatible with 20V MAX batteries
- Made in the USA with global materials
Specifications
| Battery Chemistry | Lithium Ion |
| Battery Type | Lithium Ion |
| Battery Voltage (V) | 20 |
| Power Source | Cordless |
| Collation Type | Strip |
| Color | Yellow |
| Firing / Actuation Mode | Sequential |
| Integrated Belt Hook | Yes |
| Set Included | No |
| Magazine Angle (Deg) | Straight |
| Magazine Capacity | 34 |
| Magazine Loading | Bottom Load |
| Max Staple Length (In) | 1 |
| Staple Crown Type | Medium |
| Tool Weight (Lb) | 5.4 |
| Product Dimensions (H X W X D) | 12 in x 3 in x 7.75 in |
| Warranty | 3 Year Limited Warranty; 1 Year Free Service; 90 Days Satisfaction Guaranteed |
Related Tools
Related Articles

A battery-powered cable stapler intended for residential wiring tasks, primarily fastening NM (Romex) and other low-voltage cables to wood. It uses a cable alignment guide to position staples over the cable, has a compact frame for use in confined spaces, and includes a center-mounted LED for illumination. Uses 1 in. insulated cable staples (sold separately). Battery and charger are sold separately.
DeWalt Cordless Cable Stapler Review
Why I wanted a cordless cable stapler
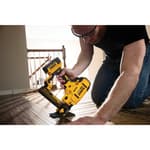
Running NM-B and low-voltage drops in occupied homes is where speed and neatness matter, and swinging a hammer near finished surfaces is my least favorite part of the job. That’s what pushed me to try DeWalt’s cordless cable stapler. I wanted something I could holster, climb a ladder with, and quickly secure Romex and comms cable without nicking jackets or fumbling with loose insulated staples.
After several days of residential wiring—new circuits on pine studs, retrofit runs in old fir, and a handful of low-voltage pulls under soffits—I’ve got a clear sense of where this tool shines and where it doesn’t.
Build, ergonomics, and setup
The tool has the familiar DeWalt 20V MAX footprint, and at roughly 5.4 lb bare it’s no featherweight. Balance is good with a compact 2.0Ah pack; a 5.0Ah makes it feel nose-light but adds fatigue overhead. The frame is compact enough for between-stud work, but the height and nose profile limit access in really tight corners and around crowded junctions.
A few details help in daily use:
- The cable alignment guide is the star of the design. It centers the staple over the cable and makes repeatable placement easy on straight runs.
- The center-mounted LED does a better job than side LEDs at lighting the work in shadowed stud bays.
- The extended trigger allows odd hand positions, which matters when you’re reaching around ductwork or working overhead.
- Bottom-load magazine takes up to 34 of the 1 in insulated staples. Loading is quick and intuitive.
- Belt hook is reversible; I set it left and had no issues with retention.
It’s sequential-only, and that’s fine. This isn’t a machine you want bump-firing around live cable.
Importantly, it accepts only 1 in insulated cable staples. If you’re thinking of using standard T25-style or uninsulated staples, this isn’t that tool. Plan on stocking the correct insulated strips.
Power and penetration
This is the section everyone wants to skip to. In soft to moderate SPF studs with straight, clean grain, the stapler drives insulated staples over 12/2 and 14/2 NM-B reliably and nearly flush with consistent pressure. I could walk a stud bay at 16 in spacing and get tidy, repeatable fastening with one pull per staple. For twin cable runs (say 2x 14/2), the crown and guide still keep alignment straight, and drive was surprisingly solid.
Where the limitations show is in denser or treated lumber and on thin low-voltage jackets:
- Pressure-treated lumber and older, tighter-grain framing often left the staple sitting proud. Preloading the nose firmly against the surface helps, but I still needed to follow up with a hammer tap more often than not.
- Over thin Cat6 cable on hard substrates, the tool tends to err on the side of caution. The built-in pressure/drive system won’t crush the jacket (good), but it also won’t punch the legs fully home in tougher material (less good). Expect to carry a hammer for those occasional taps.
- Knots are a no-go; you’ll be better off shifting placement than trying to power through.
The behavior makes sense—this stapler is tuned not to damage cable, and I’d rather tap a staple than replace a run—but if you’re counting on one-trigger perfection everywhere, adjust expectations. In most interior framing the performance is quick and clean. On outdoor fascia, treated decking, or hardwood joists, it’s workable with a follow-up tap.
Speed and workflow
Even with the occasional hammer assist, the stapler is dramatically faster than hand-driving insulated staples. The alignment guide eliminates the fumbling of holding a staple, positioning it, and notching it evenly; your free hand can manage the cable. On longer ladder runs the time savings and reduction in hand strain are real.
Battery runtime on a compact pack was a non-issue in my testing. I ran through multiple magazines on a 2.0Ah battery with plenty left. There aren’t big current spikes, and the motor/transmission sound is consistent and controlled.
Reset time between shots is minimal, but because it’s sequential you’ll find a rhythm—press the nose flat, preload a bit, squeeze, and move. The LED is actually useful in this cadence; it lands light exactly where the staple will hit.
Jams, misfires, and maintenance
Jams were rare. I had one misfeed when a staple strip was slightly bent from the box; pulling the battery, dropping the magazine, and clearing the strip took under a minute. Keep the magazine and guide path free of dust; a quick blow-out at the end of the day prevents grit from hanging up the staples’ plastic carrier.
The safety interlocks are predictable. You won’t get a dry-fire, and the nose has to be fully seated to fire. That’s a plus around cable; the tool isn’t going to snap a staple halfway on a loose cable and pinch it improperly.
Accuracy and cable protection
Cable protection is where this stapler earns its keep. The insulated staples cradle the jacket, and the guide keeps the crown centered. On NM, especially 14/2 and 12/2, the results look professional—parallel runs, consistent spacing, and no crushed jackets. On low-voltage, you can’t be sloppy about cable drift; make sure the guide is actually capturing the cable before you pull the trigger. Once you get the feel, it’s consistent.
The drive system’s “conservative” nature is a built-in safeguard. I never saw jacket damage, even when I intentionally preloaded hard to test it. If you’ve ever seen overdriven metal staples chew into insulation, you’ll appreciate the restraint here.
Ergonomics in real spaces
Overhead use is where the weight shows up. One-handed above shoulder height for a long stretch will tire your wrist. The extended trigger helps you get comfortable hand angles, and the belt hook is sturdy when you need to rest the tool while rerouting cable. The nose profile is slim enough for most stud bays, but it’s not a corner specialist; you’ll still find spots where a manual stapler or individual insulated staples and a hammer are the only way to land a staple exactly where you want it.
Cost and consumables
The tool is sold bare, so you’ll need a 20V MAX battery and charger if you’re not already on the platform. The proprietary insulated staples cost more than generic options, and you’ll go through them quickly on big runs. Factor that into your bid or budget. For me, the time saved and consistent finish offset the consumable cost on interior work. On projects heavy in treated lumber, the extra hammer step chips away at that advantage but doesn’t erase it.
Tips for best results
- Use the correct insulated staples and keep them straight in the magazine; toss any that arrive bent.
- Preload the nose firmly and square to the work before pulling the trigger.
- Avoid knots and end grain; shift placement slightly for better penetration.
- Keep a light hammer handy for the odd proud staple in hard material.
- Run a compact battery to improve balance for overhead and ladder work.
- Keep the guide and magazine clean; dust build-up causes most misfeeds.
Warranty and service
DeWalt backs it with a 3-year limited warranty, 1-year free service, and 90-day satisfaction guarantee. That’s standard for the line and appropriate for a pro-facing tool. Given the specialized nature, having that 90-day window is helpful—use it hard on a few jobs and make sure it fits your workflow.
Who it’s for
- Electricians and remodelers who frequently secure NM-B in interior framing.
- Low-voltage installers who want cleaner, faster fastening indoors and are okay with occasional hammer taps in hard or treated substrates.
- Trades already on the 20V MAX platform who value the convenience of a cordless, guided stapler for neat, repeatable results.
If your work skews heavily toward treated lumber, exterior substrates, or dense old framing, expect more follow-up with a hammer or consider whether a different fastening approach suits those conditions better.
Recommendation
I recommend this cable stapler for interior residential wiring where NM and low-voltage runs make up the bulk of the work, especially if you’re already on DeWalt’s 20V MAX platform. It’s fast, consistent, and gentle on cable, with a guide that removes guesswork and an LED that actually helps in real-world shadows. Its limitations are clear: in treated or especially hard lumber it can leave staples a touch proud, and the weight shows up during long overhead sessions. The proprietary staples add cost, too.
If you need perfect one-pull seating in the hardest materials, this won’t replace a hammer every time. But for most interior framing, it meaningfully speeds the job, improves finish quality, and reduces the risk of jacket damage. That balance makes it a worthwhile addition to my kit.
Project Ideas
Business
Smart-Home Drop Installer
Offer menu-priced installs of PoE cameras, doorbells, Wi‑Fi access points, and TV hardlines. The stapler lets you secure low-voltage runs quickly in attics, basements, and crawlspaces, reducing time on site and delivering clean, code-conscious work.
Attic and Crawlspace Cable Cleanup Service
Pitch a before/after tidy-up for homeowners and property managers: re-support sagging NM and LV cables, consolidate routes, label, and document. Charge per linear foot or per zone; the cordless stapler’s LED and compact body shine in tight, dark spaces.
Event and Venue Cabling Safety
Provide temporary low-voltage cable securing for weddings, pop-ups, and seasonal displays on wood stages, sets, and booths. Fast, neat stapling reduces trip hazards and setup time; include removal and surface touch-up in the package.
DIY Low-Voltage Drop Kit Rental
Rent a ready-to-go kit—cordless cable stapler, fish tape, bits, labels, and a quick guide—for homeowners running doorbell, speaker, or Ethernet lines to wood framing. Upsell insulated staples and offer optional on-call coaching or a final QC visit.
Rough-In Speed Subcontractor
Partner with electricians and integrators as a production helper focused on cable securing during rough-ins. Your tool plus a streamlined workflow (34-staple magazine, belt hook, sequential firing) cuts labor hours and keeps inspections smooth.
Creative
Attic Cable Cleanup and Labeling Sprint
Use the stapler’s cable guide and LED to tidy existing NM and low-voltage runs across rafters and joists in cramped attics. Add service loops, staple within code-required distances from boxes, and label each circuit or data run for a professional, future-proof layout.
Van/Camper 12V Wiring
Secure 12V lighting, fridge, and charge-controller cables to wood furring strips inside a camper build. The compact frame and sequential actuation let you staple in cabinets and tight bays without pinching insulation, keeping wires safe and rattle-free.
Pergola/Deck Low-Voltage Lighting
Run landscape lighting and speaker wires along pergola beams or deck joists using insulated staples. Create tidy paths with drip loops at fixtures, use UV-rated cable, and leverage the LED for dusk installs to transform outdoor spaces cleanly and safely.
Networking Closet Makeover
Mount a plywood backboard, then route Cat6 and low-voltage power neatly to a patch panel, modem, and access point. The bottom-load magazine speeds repetitive stapling while the guide keeps parallel runs straight for a showroom-grade closet.
Home Theater Speaker and Sub Runs
In unfinished spaces or equipment cabinets, staple speaker, subwoofer, and trigger wires along studs and joists. Keep gentle bends, leave service loops at devices, and align staples consistently for a clean, buzz-free AV setup.