Features
- 【Professional Grade RV Sealant Tape】 Repairing RV roof leaks could be expensive and exhausting. With our industrial grade material made RV roof tape, RV roof repair sealant could be easy and permanent. Saving time and money by using our RV roof sealant tape.
- 【Wide Compatibility Sealant Tape】With high coefficient of expansion, this roof repairing tape could be using as camper roof tape, metals, motorhomes, trailers,fifth wheels, airstreams, vans, buses repairing tape and etc. Effectively sealing leaks, and rectifying cracks, tears, and seams for long time protection.
- 【UV-Resistant and Weatherproof】UV and bad weather could be the main reason of leaks, cracks and seams of RV. With protective silicone coating, our RV seam tape could protect your RV from extreme weather rain, snow and temperature from -40°F to 140°F.
- 【Easy Installation】Say goodbye to your trouble of leakage after 3 simple install steps, first of all clean the leaking area, secondly remove the protective film of the RV roof sealant tape, thirdly lay it down and press the RV sealing tape firmly. It remains durable for a long time on surface such as EPDM,metal, galvanized steel, TPO, Hypalon, wood, and fiberglass.
- 【Long lasting & Durable Protection】The RV sealing tape remains durable for a long time on surface such as EPDM,metal, galvanized steel, TPO, Hypalon, wood, and fiberglass. With natural pure white color, it won’t ruin the look of your RV roof fixture and appearance.
Specifications
| Color | White |
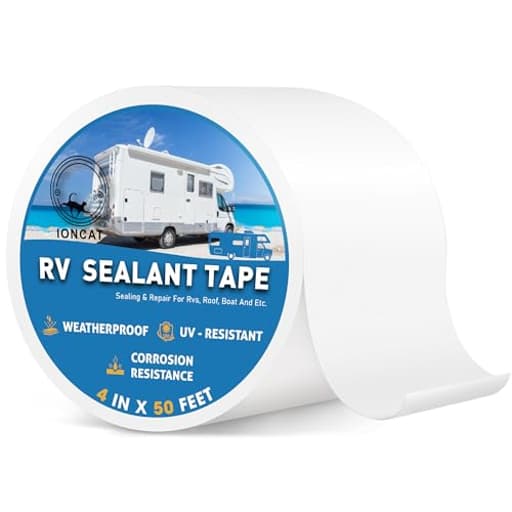
| Size | 4 Inch x 50 Ft |
| Unit Count | 1 |
Related Tools
This 4-inch by 50-foot white roof sealant tape is a silicone-coated, UV-resistant repair tape designed to seal leaks, seams, cracks and tears on RVs, campers, trailers and boats. It adheres to surfaces including EPDM, metal, galvanized steel, TPO, Hypalon, wood and fiberglass and is rated for temperatures from −40°F to 140°F. Installation involves cleaning the area, removing the protective film and firmly pressing the tape into place.
IONCAT RV Roof Sealant Tape, 4 Inch X 50 Feet RV Repair Seal Tape for Camper Trailer Boat Seam Leaks Roofing, UV Resistant & Weatherproof, White Review
What I used it for
I brought the IONCAT sealant tape onto a well-worn EPDM RV roof to address persistent leaks around a front seam and a skylight, plus a few hairline cracks at screw lines. I also tested short runs on painted aluminum trim and a fiberglass hatch to see how it behaved across common rig materials. Over a few weeks, the tape saw heavy rain, two long highway drives, and full summer sun. My goals were simple: reduce maintenance time, avoid the mess of re-caulking, and get a clean, durable seal that blends with a white roof.
The tape at a glance
This is a 4-inch-wide, 50-foot roll of white, silicone-coated sealing tape designed for RVs, trailers, and boats. It’s a pressure-sensitive product: clean the surface, peel the liner, lay it down, and press it in firmly. The topcoat resists UV and weather, while the tacky layer underneath conforms to seams, fasteners, small cracks, and microtexture. It’s rated from −40°F to 140°F, which covers most use cases short of extreme desert roofs or winter installs in deep freeze.
In hand, it feels like a professional-grade roof tape: substantial thickness, a slightly slick white top surface, and a very aggressive adhesive that wants to grab immediately. That aggressiveness is a double-edged sword—great for sealing, less forgiving during application.
Installation experience
Prep determines success. I scrubbed the work areas with a mild detergent, rinsed, let them dry, then wiped with isopropyl alcohol to remove residual oils. On chalky EPDM, a firm scrub is worth the effort; a clean, dry, dust-free surface is critical. I rounded the tape’s corners (reduces lift), dry-fit each run, and snapped a light chalk line to help keep long spans straight.
Application is straightforward:
1) Peel back a foot of the release liner and anchor one end.
2) Roll out 6–12 inches at a time while pulling the liner away.
3) Press lightly to position, then firmly to bond.
A small J-roller or even the rounded back of a plastic scraper helps immensely, especially at overlaps and edges. I overlapped joints by about an inch and set the seams with pressure. On screw lines, I centered the tape to leave equal margin on both sides.
Two practical notes:
- Temperature matters. In direct sun or on a hot roof, the adhesive can get stringy. Working in the morning or shade made application cleaner and more controlled.
- It is unforgiving if it touches itself. Keep a hand under the loose end and avoid letting the sticky side fold over. If it does, you’ll likely cut that section out.
Adhesion and sealing performance
On EPDM, adhesion was excellent. Once rolled, the tape conformed cleanly to minor texture and swallowed shallow imperfections around seams and fastener heads. After a day’s dwell, the bond felt confident—edges stayed down, and the surface looked uniform without ridges or trapped bubbles.
The real test is water. After two prolonged storms, there were no damp spots under the skylight or along the front seam. I intentionally left one screw un-taped as a control and found moisture there, while the taped section stayed dry. That’s exactly the difference you want from a repair tape: a predictable, repeatable barrier where water wants to sneak in.
On fiberglass and painted aluminum, adhesion was similarly strong. On galvanized trim, it held fine once fully cleaned; any lingering oxidation or oils will undermine bonding, so take prep seriously.
UV and weather resistance
The silicone-like topcoat sheds grime and doesn’t chalk the way some elastomeric coatings do. After weeks in direct sun, the surface stayed bright white with no softening or edge curl. Heat cycling from day to night didn’t telegraph through as ridging or wrinkling. This is where a UV-resistant cap makes a difference—lots of tapes seal well on day one but prematurely age under UV. No such signs here in early use.
The white finish blends into typical RV roofs and skylight frames, and it didn’t collect much dirt compared to bare sealants. If you’re concerned about appearance, it looks tidy, especially on long, straight runs.
Where it shines—and where it doesn’t
Strengths:
- Horizontal and gently curved surfaces on EPDM, TPO, fiberglass, and painted metals.
- Seams, lap joints, skylight and vent perimeters, antenna removals, and patching prior screw holes.
- Quick containment of an active leak when you don’t have time to fully re-coat a roof.
Less ideal:
- Vertical surfaces. While it will stick, application is fussy, especially in warmth; the aggressive adhesive can grab in the wrong place and stretch or string before you seat it perfectly. I had better results with short, carefully supported pieces on vertical trim, but I wouldn’t choose it for tall runs.
- Very rough, porous substrates without prep. On chalky or oxidized surfaces, you’ll need thorough cleaning; a compatible primer can help if you plan to topcoat the roof after.
Practical tips for better results
- Work cool. Early morning or shade reduces adhesive stringing and gives you more control.
- Pre-plan cuts. Measure, mark centers, and round corners for clean terminations.
- Use a roller. Pressure is what finalizes the bond, especially over fasteners and lap edges.
- Stagger overlaps. If you’re doing multiple courses, avoid stacking all seams in one line.
- Avoid touching the adhesive. Wear disposable gloves and peel the liner gradually.
- Store the roll sealed and cool. It keeps the adhesive fresh.
- For removal or repositioning, gentle heat helps—but assume removal will be a chore. This is a permanent solution, not a temporary patch you’ll pull up next week.
Compatibility with coatings and primers
I topcoated a test section with an elastomeric roof coating after allowing the tape to dwell for a day. The coating adhered fine to the tape’s top layer and surrounding EPDM, yielding a uniform look. If you plan to repaint or re-coat the roof, install the tape first, roll it down thoroughly, and let it set before coating. Primers vary by brand and substrate, so confirm compatibility with your chosen system.
Durability outlook
Early performance has been strong: no edge lift, no weeping, and no sign of UV fatigue. The -40°F to 140°F rating suggests it will handle typical seasonal swings. The top surface is tough enough to resist scuffs from kneeling or light foot traffic during roof inspections. As with any pressure-sensitive tape, longevity relies on good prep and edge protection. Rounded corners, solid rolling pressure, and avoiding ponding water at terminations all contribute to a longer service life.
Value
A 4-inch by 50-foot roll goes a long way. I covered a front seam, a skylight perimeter, and a handful of screw-line patches with plenty left for future maintenance. Compared to re-caulking every season or paying for a full roof coat to fix localized leaks, this is a cost-effective middle ground. It’s also faster—clean, apply, roll, and you’re done—without waiting for caulk to skin over or coatings to cure.
Who will appreciate it
- RV owners with aging sealant lines who want a cleaner, longer-lasting fix than piling on more caulk.
- DIYers tackling skylight, vent, or antenna reseals.
- Trailer and camper owners who need a quick, reliable perimeter seal before or after a roof coating.
- Folks who value a neat, white finish that blends in rather than drawing the eye.
If you routinely work on vertical seams or need a product you can easily reposition, this tape’s aggressive tack will frustrate you. For those scenarios, a different approach may be better.
Pros and cons
Pros:
- Excellent adhesion on common RV substrates when prepped properly
- UV-resistant, weatherproof top layer; stays bright and clean
- Fast, simple installation with the right technique
- Strong water-blocking performance on seams and penetrations
- Long roll provides good coverage for the price
Cons:
- Very sticky; mistakes are hard to correct once it touches down
- Adhesive can get stringy in heat; apply in cooler conditions
- Not the best choice for long vertical runs
- Removal, if needed, requires patience and often heat
Recommendation
I recommend the IONCAT sealant tape for RV and trailer owners who need a dependable, tidy way to seal horizontal seams, skylights, vents, and screw lines on EPDM, TPO, fiberglass, or painted metal roofs. It delivers the core promises: strong adhesion, credible UV resistance, and real-world leak prevention, without the mess and maintenance cycle of piling on more caulk. Apply it in cooler conditions, use a roller, and commit to your placement, and you’ll get a durable, professional-looking seal that holds up to weather and sun. If most of your work is on vertical surfaces or you want a product you can easily reposition, look elsewhere. For roof seams and penetrations, though, this tape is an easy recommendation.
Project Ideas
Business
Mobile RV Emergency Seal Service
Offer on-call service to RV owners for quick, durable leak repairs using the silicone sealant tape. Market as a fast, cheaper alternative to permanent roof replacement—perform a site inspection, clean and apply tape patches, then offer a follow-up check. Upsell seasonal roof inspections and small maintenance tasks (caulking vents, resealing seams) for recurring revenue.
Pre-Cut Patch Kits & Digital How-To Guides
Create and sell curated repair kits (multiple pre-cut patch sizes, cleaning wipes, alcohol pads, a roller and laminated instructions) online or at RV rallies. Bundle with short, branded video tutorials for DIYers. Offer tiered kits for RVs, boats and campers and include QR codes linking to troubleshooting videos—good margins and scalable through e-commerce platforms.
Marina & Boatyard Contract Repairs
Partner with marinas, boatyards and storage facilities to provide on-site seasonal seam and leak repair services. Use the tape for rapid patching of small leaks on docks, covers and hulls between haul-outs. Offer maintenance contracts for in-season checks and emergency patching; supply boat owners with branded patch kit add-ons.
Workshops & Community Classes
Run hands-on workshops teaching RV and outdoor-gear owners how to inspect and repair roofs, awnings and tents using the tape. Charge a fee for attendance and sell starter kits at the event. Partner with hardware stores, RV dealerships and community centers to host classes—creates local credibility, direct product sales and repeat customers for follow-up services.
White-Label Repair Services for Dealerships
Offer a white-label service to RV dealerships and rental fleets to handle quick turnaround repairs before delivery or between rentals. Provide branded tape patch kits and a trained technician team that dealerships can rely on to keep assets leak-free. This reduces downtime for dealerships and creates a steady B2B revenue stream.
Creative
Waterproof Planter Liners
Line the inside of wooden or metal planters with the silicone-coated tape to create a long-lasting, watertight barrier. Clean the planter, lay strips overlapping by 1/2–1 inch, press firmly and trim edges for a neat finish. Add drainage holes through the tape with a heated nail or punch and cover with a ring of silicone or extra tape to prevent leaks. Result: custom-shaped, weatherproof planters that won’t rot or leach soil onto patios.
Awnings, Tents & Sail Repair Kit
Assemble a compact repair kit for camping and outdoor gear: pre-cut tape patches in various sizes with instructions and a small cleaning wipe. Use the tape to quickly seal rips, reinforce seams, and patch corners of awnings, tents or tarps. For a finished look, trim edges flush and press firmly—great for weekend repairs or as a creative emergency accessory to gift fellow campers.
DIY Waterproof Outdoor Cushions
Upgrade or make outdoor seat cushions by sealing seams of fabric liners with the tape (applied to inside seams on sturdy backing) to create a moisture barrier. The tape adheres to wood, fiberglass, vinyl and many coated fabrics—use it to create removable, washable cushion shells that protect stuffing from rain, humidity and mildew while keeping a clean aesthetic with the white finish.
Boat & Kayak Accent Patching
Use the white silicone tape as both a functional repair and a styling element on small boats, kayaks and paddleboards. Patch dings and stress cracks on fiberglass or metal, then run decorative parallel stripes or geometric accents to hide repairs and add contrast. The UV resistance keeps accents bright while adding a protective layer over high-wear areas like rub rails or bow seams.
Outdoor Lighting & Reflector Projects
Create inexpensive reflectors, light-diffusing panels or weatherproof covers for patio lighting by applying the tape to thin plywood or corrugated plastic. The white, UV-resistant surface reflects light well and resists weathering—use cut pieces to make lantern collars, directional reflectors for solar lights, or backing for DIY LED panels that stay outdoors year-round.