Features
- Stylish, Affordable, Easy And Quick Assembly, Vented Heat Resistant Interlocking Tiles Will Cover Any Shape Or Size Radiator!
- Fits Most Small to Medium Size Radiators - Each Tile Measures 7x7 Inches And Connect Both Straight And At a Right Angle - Measure the Front, Sides, And Top Of Your Radiator To See How Many Tiles You Need.
- Decorative Tile Design Will Look Great In Any Room
- Great For Child Safety - Baby Proof Any Room By Creating A Barrier Between your Little Ones And The Hot Radiator.
- Vented Tile Design Allows Heat To Pass Through Easily While Staying Cool To The Touch. Tiles will Keep their Shape And Not Discolor. This Product Is To Be Used As a Steam Heat Cover NOT FOR PORTABLE ELECTRIC HEATERS *Patent Pending
Specifications
| Color | Charcoal |
Related Tools

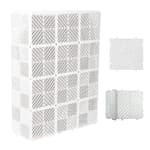
A set of 30 interlocking 7×7 inch vented, heat-resistant tiles that assemble around most small to medium steam radiators to cover the front, sides, and top. Tiles connect straight or at right angles, allow heat to pass through while staying cool to the touch, and provide a physical barrier for child safety; not for use with portable electric heaters.
Ready Covers - Radiator Cover Heating Cabinet For Your Home And Office Fits Most Small and Medium Size Radiators: CHARCOAL - 30 Tiles! Review
Why I tried modular radiator tiles
Old steam radiators are great at heating and terrible at blending in. In my apartment, the one in our nursery was both an eyesore and a hazard once our toddler started cruising. I wanted a solution that would make the radiator less accessible without choking off heat or drilling into walls—ideally something renter-friendly. That put me squarely in the market for modular covers, and I ended up testing the Ready Covers tiles in the charcoal finish (the 30‑tile set).
What you get and how they’re made
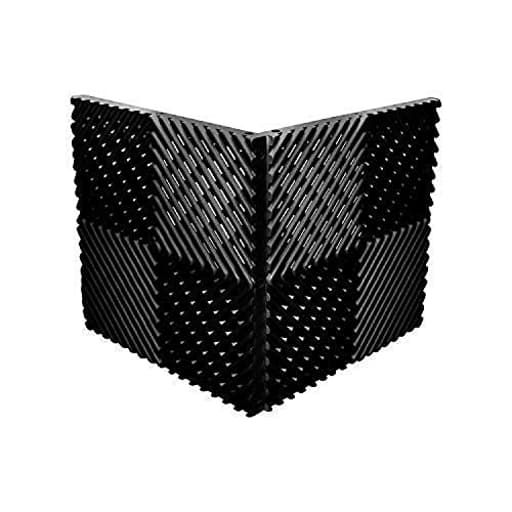
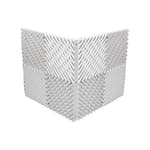
Each tile is a vented 7 x 7-inch square made from heat-resistant plastic with a matte charcoal tone. The face has a decorative lattice that reads more “architectural screen” than “toy grid,” and the edges are ringed with tabs and slots so tiles can click together both in a straight run and at a right angle. That means you can build up the front, sides, and top of a radiator, then turn corners without extra hardware.
In hand, the tiles feel rigid and slightly textured. The lattice is open enough to move air but not so open that you can easily poke a hand through. Edges are softly rounded, and once linked, the panels feel continuous. There’s no dedicated base, feet, or corner posts in the box—you build your own geometry out of the tiles themselves. It’s a simple idea that keeps the price and complexity down, and it’s easy to recombine if you move or change radiators.
A small but important note on sizing: the “7 inches” refers to the tile face. The interlocking connectors add a tiny bit of overall dimension when you string many tiles together. If you’re measuring a very tight alcove, give yourself a little tolerance so you’re not forcing a near-press fit.
Setup: easy in concept, better with a few tricks
The assembly process is essentially “tab A into slot B.” I laid out the design on the floor first: a row of tiles for the front, two shorter rows for the sides, and a panel for the top. Snapping them together is straightforward, but it does require some hand pressure to fully seat the tabs. A few tips from my build:
- Work on a rug or towel to avoid scuffing the tiles and to give yourself some grip.
- A soft-faced mallet makes seating stubborn connections easier and saves your thumbs.
- Gloves help if you’re building a larger cover.
- Disassembly is possible but stiffer than assembly; plan your layout before you lock everything in.
Because there’s no separate frame, stability comes from how you design the box. For a small-to-medium radiator, a three-sided enclosure with a top feels surprisingly solid once you nudge it into place. For longer, low radiators, the top can span a wide distance; in that case, I used two spare tiles vertically on the inside as “ribs” to support the top panel. Zip ties through the vent holes make those braces quick and removable without modifying the tiles.
One safety reminder: this system is for steam/hot-water radiators, not portable electric heaters. The airflow pattern and surface temperatures are very different on electric units.
Fit and coverage on a real radiator
On a typical small cast-iron radiator (about 24 inches tall, 24 inches wide, and 8 inches deep), the 30‑tile set was enough to cover the front in two rows of four tiles, each side in two tiles, and a top out of eight tiles, with a couple left for internal bracing. If your radiator is taller, deeper, or if you want full coverage on both sides and a return around the back for stability, expect to need more tiles.
Because the tiles are square, the system is inherently modular rather than custom. If your radiator sits in a niche or has piping that interrupts a clean edge, you’ll be choosing between a slight overhang or a small exposed gap. I wouldn’t recommend cutting these tiles; it’s better to design around those compromises and keep the interlocks intact.
Clearance matters. I kept roughly a finger’s width between the tiles and the radiator on all sides to respect airflow and avoid any hot spots. The open lattice does a lot of work here—air rises easily, and the cover doesn’t feel like it’s smothering the radiator.
Heat performance and safety
The biggest question I had was whether enclosing the front, sides, and top would slow heating or make the tiles too warm to touch. After a few cold nights with the cover on, the room heated as it usually does. You can place your hand over the lattice and feel the convective plume rolling out. The tiles themselves get warm, but never uncomfortably hot in my use. Even after the radiator had been running for hours, the surface stayed in the “safe to graze with a curious hand” territory.
As a physical barrier, the system works well. It blocks direct contact with hot metal and creates a continuous surface without finger-sized gaps along edges. It’s not a climbing deterrent, though—if you have a determined toddler, anchor the structure. I pushed the sides back to kiss the wall on either side of the radiator, which locked the cover laterally. In a more open setting, you could add a discrete L‑bracket to the wall and attach to the tile lattice with a zip tie, maintaining clearance from the radiator itself.
Living with it: aesthetics and maintenance
The charcoal finish reads neutral and contemporary, blending into darker baseboards and radiators nicely while toning down the industrial look. You won’t mistake the cover for a bespoke furniture piece; it’s clearly modular. In our minimal nursery, that was fine—clean lines, consistent pattern, no flaking paint, and far less visual clutter than the bare radiator and piping.
The lattice does collect dust over time. Wiping with a microfiber cloth or giving it a quick pass with a vacuum brush keeps it tidy. Because it’s plastic, occasional drips or fingerprints clean up easily with a damp cloth. I didn’t see any warping or discoloration after weeks of regular heating cycles.
Durability and reusability
The interlocking tabs are the only moving parts. If you muscle pieces apart at the wrong angle, it’s possible to stress a tab. Taking your time and flexing along the seam prevents that. Once assembled, the panels don’t rattle, and the structure tolerates being nudged as people pass. The real durability advantage is that the cover comes apart when you move or change radiators, and you can repurpose the tiles for different shapes (even to mask steam riser pipes).
Value and where it makes sense
Custom metal covers are beautiful, stable, and expensive. DIY wood enclosures look great too, but they require tools, time, and careful attention to airflow and heat tolerance. The Ready Covers tiles hit a sweet spot for renters, parents, and anyone who needs something immediately functional, safe, and reversible. One caveat is scale: larger radiators will need more tiles, and the cost adds up. For a small-to-medium unit, though, the value is strong.
Limitations to keep in mind
- No base or dedicated corners: stability depends on your layout. Internal bracing or a simple wall tether may be needed.
- Modular look: if you want a furniture-grade cover, this isn’t it.
- Tight tolerances: plan a bit of wiggle room in your measurements to account for connectors.
- Not for portable electric heaters: this is for steam/hot-water radiators only.
None of these were deal-breakers for me, but they’re worth planning around.
Practical setup tips
- Measure the front, both sides, and top of your radiator, and sketch your tile plan before ordering.
- Add a few extra tiles to your count for internal ribs or to accommodate last-minute changes.
- Assemble on a soft surface; use a rubber mallet and gloves for comfort.
- Maintain at least a finger’s width of clearance from the radiator on all sides.
- Keep access points open: don’t cover valves or thermostatic controls.
Recommendation
I recommend the Ready Covers tiles for small to medium steam or hot-water radiators if you need a quick, renter-friendly way to reduce burn risk and tidy up the look without compromising heat output. The system is genuinely modular, the charcoal finish blends well, and assembly—while a bit hand-intensive—is straightforward with the right approach. It’s not a substitute for a custom, furniture-grade cover, and you’ll want to plan for stability if your radiator is unusually long or sits in the open. But as a practical, adaptable, and affordable solution, it makes a real difference with minimal fuss.
Project Ideas
Business
Radiator Makeover Kits
Create and sell curated kits that bundle the tiles with decorative add-ons: heat-safe veneer strips, seasonal decal sheets, mounting clips, and a measuring template. Offer tiered kits (basic, designer, childproof) online with guided instructions and before/after photos to attract homeowners and staging professionals.
Installation & Childproofing Service
Offer a local service installing the tiles for parents, landlords, and property managers who need quick, non-permanent childproofing. Include measurement, on-site custom fitting (angles/corners), and optional padding/cushion tops as an upsell; market to pediatricians, daycares, and real-estate agents.
Seasonal Skin Subscription
Sell a subscription for replaceable decorative skins or decals sized to the tiles that customers can swap each season or holiday. Customers keep the base tiles and receive fresh designs quarterly (holiday, minimalist, botanical, textured), creating recurring revenue and high repeat engagement.
B2B Partnerships with Landlords & Renovators
Pitch the tiles as a non-invasive solution for multi-unit buildings and historic properties where altering radiators isn't allowed. Offer volume pricing, installation training for maintenance staff, and co-branded safety-focused marketing (e.g., 'childproofed apartment' packages) to increase adoption.
Workshops & DIY Classes
Host hands-on workshops teaching creative uses of the tiles (cover builds, bench accents, room dividers) and sell starter kits at the event. Partner with craft stores, community centers, and interior designers; record the classes to create paid online tutorials and downloadable measurement templates.
Creative
Custom Decorative Facade
Use the interlocking tiles to build a front-facing decorative facade that matches a room's style without altering the radiator. Add removable, heat-safe fabric or thin wood veneer panels clipped to the tiles' outer face (leave vents clear) to create patterns — chevrons, geometric insets, or a faux-shiplap look — that can be swapped seasonally.
Child-Safe Play Nook
Assemble the tiles into a low enclosure around the radiator that creates a safe, ventilated barrier and doubles as a cozy reading bench perimeter. Add a cushioned top (heat-tolerant) and a corner-mounted pocket organizer for books and toys so the area is both safe and inviting for kids.
Modular Plant Shelf
Build a lightweight shelf structure over the radiator using the tiles as side panels and a slatted, heat-tolerant top that lets warm air rise to plants. Arrange heat-loving, low-water houseplants (e.g., succulents, spider plants) and use the tiles' charcoal backdrop as a neutral contrast for greenery.
Temporary Room Divider / Screen
Connect tiles at right angles and stack them to craft a freestanding, ventilated room divider that can stand in front of a radiator or be moved elsewhere. Personalize it with removable magnetic artwork, printed heat-safe adhesive skins, or hanging planters clipped to the tiles.
Upcycled Furniture Accents
Use tiles as decorative side panels or backdrops for small furniture projects: a radiator-adjacent bench, shoe cubby sides, or a pet bed surround that keeps animals safely away from hot metal. Because they interlock, you can make curved or boxed shapes to fit odd spaces.