Features
- Suitable for drilling into glass and tile materials
- Available in multiple sizes (4-piece and 8-piece) to cover a range of diameters
Specifications
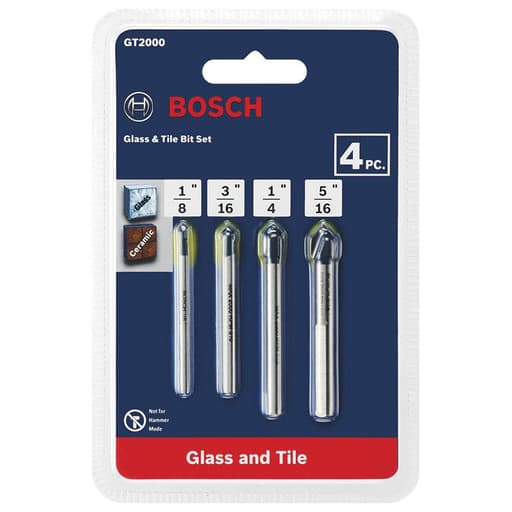
| Kit Variant | 4-piece (GT2000) |
| Pack Quantity | 4 |
| Diameters (In) | 1/8, 3/16, 1/4, 5/16 |
| Total Length (In) | 2 |
| Working Length (In) | 1.5 |
| Kit Variant | 8-piece (GT3000) |
| Pack Quantity | 8 |
| Diameters (In) | 1/8, 3/16, 1/4, 5/16, 3/8, 1/2, 5/8, 3/4 |
| Total Length (In) | 4 |
| Working Length (In) | 3 |
Related Tools
Related Articles

Drill bit sets designed for drilling into glass and tile. Offered in two kit sizes with defined diameters and lengths to cover a range of small to larger holes.
Bosch Glass & Tile Bit Set Review
Why I reached for these bits
I first reached for the Bosch glass-and-tile bits to tackle two very different jobs: adding drainage holes to a glazed ceramic planter and installing grab bars and shelves over tiled walls. Both tasks demand clean starts, chip-free exits, and confidence that a bit won’t grenade a finish you can’t replace. After a few weekends of use across ceramic, porcelain, and a couple of test holes in bottle glass, I’ve got a clear picture of where these bits shine—and where they run out of steam.
What you get and how they’re built
The set comes in two sensible ranges:
- 4-piece kit: 1/8, 3/16, 1/4, 5/16 in bits, with a compact 2 in overall length and 1.5 in working length.
- 8-piece kit: 1/8 through 3/4 in, with 4 in overall length and 3 in working length for better reach.
The spear-point geometry is a classic for this category: a carbide tip brazed to a steel shank. That profile helps the bit “find” its center, reduces skating, and grinds rather than fractures brittle surfaces. This is the right approach for glass and softer ceramic tile. It can work on porcelain, but technique becomes critical and durability takes a hit.
Setup and technique matter
If you’ve never drilled tile or glass, the learning curve is more about restraint than force:
- Use low RPM in a drill’s low gear—think slow and steady, not high speed.
- Keep the work cool. I use a putty dam and a squeeze bottle of water; a wet sponge works in a pinch.
- No hammer mode, ever. These are not masonry bits.
- Start with light pressure, let the tip score a shallow divot, then increase pressure modestly.
- For larger holes, step through sizes rather than jumping straight to the final diameter.
- Tape helps. A small “X” of painter’s tape reduces skating on glossy glazes and glass.
Used this way, the bits behave predictably. Ignore those guidelines, and the tips overheat, dull, or even separate—heat is the enemy here.
Performance on ceramic tile
On standard glazed ceramic wall tile, these bits are excellent. My 1/4 in and 5/16 in holes for anchors went through cleanly, with minimal surface chipping and no cracking. Starts were controlled with a single strip of painter’s tape; once the tip scored, I removed the tape to monitor the cut. With periodic dips into water and a slow rhythm—about three seconds of drilling, one second pause—edges stayed crisp.
The compact 4-piece lengths are useful around corners and fixtures, but the 8-piece set’s longer shanks provide nicer sightlines and a more comfortable stance if you’re drilling over a vanity or near a wall junction. Either way, ceramic tile is the sweet spot for these bits.
Performance on porcelain tile
Porcelain is a different animal. It’s denser, harder, and more heat-sensitive at the contact patch. I drilled four 1/4 in holes in porcelain wall tile for a shower accessory, stepping from 1/8 to 3/16 to 1/4. The bits made the holes, but I had to babysit them—very slow speed, constant water, and gentle pecking. By the end, the 1/4 in bit had noticeably slowed and the leading edges felt duller.
You can get a handful of porcelain holes out of the set if you’re careful, but the wear rate is high, and pushing them leads to heat damage or tip failure. For a bathroom full of porcelain, I’d reach for diamond core or hole-saw bits and save these for the odd anchor.
Performance on glass and glazed pottery
This is where the spear tip earns its keep. I put two 3/16 in drain holes in a thick glazed planter and a test hole in a glass bottle. Starts were controlled, round, and clean with gentle pressure and water. On glass, particularly, resist the urge to hurry. Once through the glaze and into body material, the cut becomes more predictable. A wood backing block on the exit side helps prevent breakout and keeps the hole edge tidy.
The smaller diameters (1/8 and 3/16) are the heroes for glass; I’d avoid jumping straight to large sizes in brittle glass and instead step up gradually.
Durability and failure modes
A few realities after mixed-material use:
- The carbide tips will dull if overheated. You’ll feel it in slower cutting and see it in a glazed-looking tip.
- Small shanks can snap if you side-load. Keeping the drill square matters.
- Because the tips are brazed, catastrophic overheating can cause tip separation. That’s a user-manageable risk—coolant and low speed stave it off.
Across ceramic tile work, the bits held up well with only light edge wear. On porcelain, wear accumulates fast. After those four stepped holes, my 1/4 in bit was serviceable but not something I’d rely on for a long run of holes.
Precision and hole quality
Hole roundness and edge quality were solid, especially in ceramic and glass. The spear geometry makes fairly round holes even without a guide. For critical alignment—think hardware with tight tolerances—I still prefer to mark carefully and use a simple cardboard or 3D-printed guide. On polished tile, painter’s tape plus a steady wrist was enough to start accurately without walking.
Chip-out at the surface was minimal. On the backside of thin materials, you can get a fleck of breakout if you rush the last millimeter. A backing block or feather-light pressure on breakthrough cleans that up.
Value and kit selection
The 4-piece kit covers the common anchor sizes many DIYers need. It’s compact and cost-effective if your main task is a few holes in ceramic tile or occasional work in glass. The 8-piece set gives you reach and the larger diameters, but be realistic: once you’re above 3/8 in on tile, diamond hole saws begin to make more sense for speed and bit life.
If your project slate includes mostly ceramic and glass with occasional porcelain, the Bosch bits are a fair value. If you’re facing a bathroom of porcelain or a dozen-plus holes, they become a consumable—budget accordingly or switch to diamond.
Tips for best results
- Mark precisely and stabilize the start with tape.
- Set your drill to its lowest gear; stay in the few-hundred RPM range.
- Keep a steady trickle of water on the cut. A putty dam around the hole works well.
- Peck drill: short cuts, brief pauses to cool.
- Step up sizes for larger holes instead of going in one pass.
- Avoid lateral pressure—keep the bit square to the surface.
The bottom line
The Bosch glass-and-tile bits are reliable performers in their intended lane: clean, controlled holes in glass and ceramic tile when used with proper technique. They can handle porcelain in small doses, but you pay with accelerated wear and a narrower margin for error. The shorter 4-piece set is handy for common anchor sizes; the 8-piece expands your options but doesn’t change the underlying physics—big holes in hard tile are better served by diamond.
Recommendation: I recommend these bits for homeowners and pros who need a dependable solution for glass and ceramic tile, and who are willing to use coolant and slow speeds. They’re a good fit for occasional porcelain holes if you’re careful, but I wouldn’t choose them for heavy porcelain work or large-diameter cuts. For that, go diamond and keep these as your clean-start, chip-free option for the rest.
Project Ideas
Business
Tile Hardware Drilling Service
Offer a mobile service drilling porcelain/ceramic tile for towel bars, shower shelves, hooks, and grab bars without cracking finishes. Partner with remodelers and Airbnb hosts; charge per hole plus a call-out fee and bundle with anchor installation.
Upcycled Bottle Lighting Shop
Sell drilled glass bottle pendant lights, sconces, and chandeliers on Etsy and at markets. Use the bit set to create clean cord and ventilation holes, offer custom branding/etching, and upsell matching tiled switch plates and canopies.
Aquarium Bulkhead Pre-Drilling
Provide pre-drilling for aquarium sumps and overflow kits on non-tempered glass tanks and lids. Offer standard hole sizes (1/2–3/4 in) for bulkheads, include grommets and templates, and sell complete plumbing bundles.
Custom Glass/Tile Signage
Produce modern business and house signs on glass or large-format tiles, using drilled holes for stand-offs and concealed lighting. Target boutiques, salons, and offices; price by size, hole count, and LED options.
Workshops: Drill-and-Design Craft Nights
Host paid workshops teaching safe drilling of glass and tile to make wind chimes, coasters, and lamps. Sell tool add-ons, kits, and finished examples; partner with makerspaces and community centers for recurring events.
Creative
Backlit Mosaic Tile Art
Create a mosaic on a glass or porcelain tile panel and drill clean holes to embed mini LED fairy lights from behind. Use smaller bits (1/8–1/4 in) for wiring pass-throughs and larger bits for grommets or standoffs to wall-mount the piece.
Sea-Glass Wind Chimes
Drill holes in flat sea glass, beach-found bottle shards, or glass pendant blanks to string with nylon line and driftwood. Vary diameters for different attachment points and add small tile discs as accents for a coastal suncatcher.
Upcycled Bottle Pendant Lights
Convert wine or spirit bottles into pendant lamps by drilling a cord outlet near the neck and optional ventilation holes near the base. Use 3/8–1/2 in bits for strain relief grommets and create a matching tiled canopy plate with mounting holes.
Tiled House Number Plaque
Design a porcelain tile plaque with vinyl or painted numbers, then drill precise mounting holes for stand-offs and a rear channel for low-voltage LED backlighting. The clean holes prevent tile cracking and give a professional, floating look.
Custom Glass Terrarium Ports
Turn large glass jars into terrariums by drilling misting and air-exchange ports. Use 1/4–1/2 in holes for tubing grommets and add a tiled base plate with drainage holes for layered soil and charcoal.