Features
- Universal fitment for most major oscillating tool brands (no adapter required)
- Triangular head for sanding in corners and tight spaces
- Hook-and-loop (Velcro-style) attachment for sanding sheets
- Pad designed for extended service life
Specifications
| Application Type | Sanding |
| Blade Width | 3-1/2 in. |
| Number Of Pieces | 1 |
| Power Tool Accessory Type | Oscillating Tool Accessory/Part |
| Returnable | 90-Day |
| Tools Product Type | Power Tool |
| Attachment Type | Hook-and-loop |
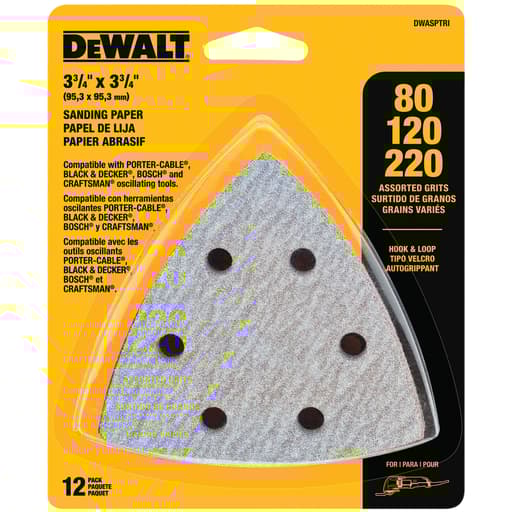
| Compatible Sandpaper Size | Approximately 3-3/4 in. triangle sheets (manufacturer part DWASPTRI) |
Related Tools
Related Articles

Triangular sanding pad attachment for oscillating multi-tools with universal fitment for most major brands. The shaped head helps reach corners and other confined areas. Sanding sheets attach via hook-and-loop.
DeWalt Oscillating Sanding Pad Review
First impressions and setup
Corners are where oscillating tools earn their keep, so I was eager to see how the DeWalt triangular sanding pad would handle trim, cabinets, window sash, and patch work. Out of the package, it’s the straightforward accessory you’d expect: a rigid backplate with a hook-and-loop face, cut into a 3-1/2 in. triangular profile that reaches deep into tight spots. It’s billed as a universal-fit accessory, meaning it clamps onto most bolt-style oscillating tools without an adapter.
Mounting on my DeWalt 20V brushless multi-tool was instant and secure. I also ran it on Milwaukee (M18), Bosch OIS-style, and an older Porter-Cable—no drama there. On a Rockwell Sonicrafter, it tightened, but indexing was fussier and the plate felt slightly oversized for the nose; I wouldn’t call that pairing ideal. If you’re on a Starlock-only tool (Fein/Bosch with no bolt), you’ll need an adapter—this pad isn’t a snap-in Starlock accessory.
Design and feel
The triangle is a touch larger than many generic 93 mm sanding pads. That’s a plus for coverage on broad faces, but it has a catch: standard third-party triangles may not fully cover the pad. You can still use them, but exposed hook material around the perimeter is more likely to get chewed up, or it’ll snag on edges. DeWalt’s own sheets fit properly and cover the face as intended. The face is compliant enough to contour slightly, but it’s not a soft foam sponge; think “controlled flexibility” that keeps edges crisp in corners.
There’s no onboard dust extraction path—typical for this style. Plan on a vacuum and frequent clearing of the paper to keep loading at bay.
In use: sanding performance
I tested the pad across common touch-up tasks:
- Feathering wood filler on pine casing and maple face frames
- Scuff-sanding lacquered cabinet doors before repaint
- Cutting back paint ridges on stair stringers
- Knocking down putty on window muntins
- Cleaning up epoxy squeeze-out on red oak
Corner access is excellent. The point is precise enough to chase right into inside corners without rounding them over, and the edges track tight along profiles. With 120–150 grit, the pad leaves a predictable scratch pattern that blends quickly to a paint-ready surface. On bare hardwoods, 180–220 grit with a light touch produced an even finish without cross-hatch chatter.
The pad is happiest when you let the machine do the work. Moderate speed, light pressure, constant movement—that combo kept heat down and cut consistent. Push too hard and you’ll feel it: paper loads fast, the tool bogs slightly, and the pad face gets hotter than it should.
Hook-and-loop behavior and longevity
Hook-and-loop durability is the make-or-break on any multi-tool sanding pad. After several sessions, here’s what I found:
- With standard paper (non-mesh) that fully covered the pad and was swapped before it glazed, the hooks held reliably. No sheet creep, no premature release.
- With mesh abrasives (which I like for dust control), the hooks started to cake with fines after longer runs, especially on wood filler. That contamination reduces grip, and once hooks are fouled, paper can peel off under vibration.
- Heat is the enemy. If you lean hard on the pad at high oscillation speed, you can soften the face and accelerate hook wear. Think of this as a finishing tool, not a belt sander.
Preventive maintenance helped a lot. A quick brush with a nylon detailing brush (or a blast of compressed air) kept the hooks clean. An inexpensive interface pad or sacrificial protector disc extended life notably when using mesh sheets or working on sharp edges. With those habits, my pad face remained intact after multiple job days.
Paper sizing and availability
Because the pad is slightly larger than many third-party triangles, sizing matters:
- DeWalt’s sheets sit flush with the edges and behave best.
- Common 93 mm triangles will “work,” but they often leave a fringe of exposed hooks. That’s workable in a pinch, but it accelerates face wear.
- If you’re married to a favorite brand of paper, buy the next size up and trim to fit the triangle. It’s five seconds with a utility knife and saves the hooks.
I ran 80 through 220 grit. The pad tracked flat with coarse grits and didn’t gouge on edges, provided I stayed mobile.
Vibration and control
On my brushless tool, vibration was present but not fatiguing. The pad’s rigid backplate transmits feedback cleanly, which I prefer over overly soft foam that can mute feel and round over details. Balance was good—no wobble, and the point didn’t chatter out of corners unless I pushed at awkward angles. On thinner moldings, I found slowing the oscillation rate one notch improved control.
Where it excels
- Inside corners and tight spots where a 5 in. ROS won’t reach
- Feathering filler and joint compound without rolling edges
- Scuff-sanding before paint or stain in built-ins and casing
- Fast profile cleanup on stair parts and sashes
It’s a finisher’s helper, not a stock-removal monster. If you need to hog off material, switch to a rasp or a different platform.
Where it frustrates
- Compatibility with Starlock-only tools: you’ll need an adapter.
- Paper mismatch: generic triangles that don’t fully cover the face can shorten pad life.
- Heavy pressure with mesh abrasives: heat and dust can foul hooks and degrade grip.
None of this is unique to this pad, but the larger footprint makes paper selection a little more critical.
Tips to get the best results
- Match the sheet to the pad’s footprint; trim if needed.
- Use light pressure and keep the pad moving to avoid heat build-up.
- Clean the hooks periodically with a nylon brush or compressed air.
- Consider an interface/protector pad when using mesh abrasives or sanding near sharp corners.
- Step through grits; don’t jump from 80 to 220 and expect miracles.
Durability over time
With good technique and proper sheet coverage, the pad held up well over multiple jobs. The hook face remained flat and grippy, and the triangle edges stayed true. The only time I saw early wear was after an extended session on filler with mesh sheets and too much pressure; a quick clean restored most of the grip, but a few hooks were visibly matted. Since then, using a protector pad and easing up on pressure eliminated the problem.
The bottom line
The DeWalt triangular sanding pad does what you want a multi-tool pad to do: reach where other sanders can’t, leave a controllable scratch pattern, and hold paper securely—so long as you respect heat and keep the hooks clean. The slightly larger triangle is a double-edged sword: better coverage and stability, but you’ll want correctly sized sheets for best longevity.
Recommendation: I recommend this pad for users on OIS/bolt-style oscillating tools who need reliable corner sanding and are willing to match their paper to the pad’s footprint. It’s a solid performer with good control and edge access. If your tool is Starlock-only without an adapter, or you rely exclusively on standard 93 mm triangles and don’t want to trim or buy size-specific sheets, you may be happier with a pad that matches your existing paper stock. With appropriate setup and light-handed technique, this DeWalt pad becomes a dependable finishing accessory in the kit.
Project Ideas
Business
On-Site Cabinet Door & Face-Frame Refinishing
Offer a 2–3 day kitchen refresh: degrease, mask, scuff-sand doors, drawers, and face frames—especially panel corners—with the pad, then spray a durable enamel. Sell by kitchen size with clear tiers. USP: crisp panel corners and minimal downtime.
Realtor-Ready Trim & Baseboard Touch-Up
Target pre-listing makeovers. Scuff-sand scuffed baseboards, door casings, stair stringer corners, and window stools where rollers can’t reach. Quick prime/paint for a clean, ‘new’ look. Price per room or linear foot; fast turnaround is the hook.
Historic Window Sash Rehab Micro-Service
Specialize in sash and muntin cleanup: remove loose paint, smooth tight joints, and prep for glazing/paint. Market to owners of pre-war homes. Offer per-sash pricing and optional weatherstripping or storm fitment upsells.
RV/Boat Interior Woodwork Refresh
Tight spaces abound in cabins and RVs. Provide mobile sanding/prep of cabinet faces, bunk corners, and trim where bulk sanders fail. Finish with marine or waterborne coatings. Partner with local marinas/dealers for steady referrals.
Etsy Shop: Distressed Frames & Shadow Boxes
Produce small-batch frames and shadow boxes with intentionally aged, corner-detailed finishes. The pad lets you control wear in tight corners for a believable vintage look. Sell bundled sets, custom sizes, and personalization add-ons.
Creative
Corner-Perfect Jewelry/Keepsake Box
Build a small hardwood box with an inset panel lid. Use the triangular pad to flush-sand glue squeeze-out and smooth the tight inside corners of the box and lid rabbet without rounding edges. Progress grits 80/120/180/220, then apply wipe-on poly. Add felt lining and small brass hardware for a premium finish.
Custom Picture Frames with Clean Rabbets
Mill and miter frame stock, route a rabbet for glass/backer, then use the pad to tidy the rabbet’s tight inside corners where a router leaves tiny radiuses. Create sets in varying sizes and finishes (stain, paint, distressed) with perfectly fitting glass thanks to crisp corners.
Geometric Wall Art Panel
Glue up a plywood or MDF panel and apply thin strips to form triangles/chevrons. The pad reaches every acute corner to flush-sand seams and remove squeeze-out. Finish with color blocking or gradient stains for a modern, clean-lined piece that relies on sharp corners.
Built-in Bookcase or Cabinet Refresh
Mask off and scuff-sand face frames, shelves, and the hard-to-reach back corners. The pad preps tight spots for paint/varnish without removing shelves. Finish with enamel or conversion varnish for a factory look in place.
Window Sash and Muntin Restoration
Carefully strip loose paint and smooth the tiny inside corners where muntins meet sash rails. The triangular pad excels at these junctions, yielding sharp paint lines and clean glazing transitions on vintage or modern windows.