Features
- Fully Protect the Inside and Outside Wall Corners from Abrasion and Damage, Provides Clean, Crisp Lines on Corners
- Improve the Corners Strength, Make the Corners More Straight,Firm and More Obvious at 90 Degrees
- It Is Widely Used for Home Renovation, Residential Remodel, Workshop Renovation, Old House Renovation
- For the Protection of Arch, Arc and Wall Corner, Such As Vaulted Ceilings, Cathedral Ceiling, Bay Windows etc
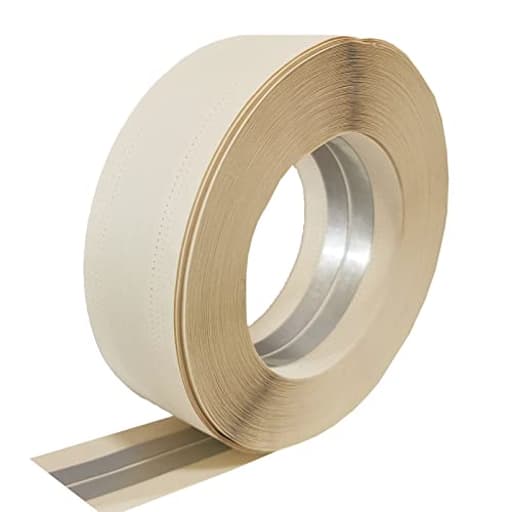
- Material: Kraft Paper Composite With 2 PC *0.43 IN Width Rustproof Galvanized Steel Strip, 1 * ROLL 2 IN*100 FT
Specifications
| Color | Beige |
| Size | 2 inches x 100 feet |
| Unit Count | 1 |
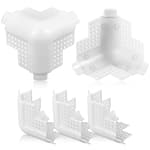
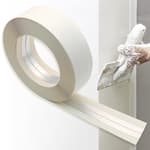
Related Tools
Reinforced drywall corner tape for protecting and strengthening inside and outside wall corners. Made of kraft paper composite with two rustproof galvanized steel strips (0.43 in each), 2 in × 100 ft, and without adhesive backing so it must be embedded in joint compound; it improves corner straightness, creates crisp 90° edges, and protects straight and curved corners (arches, vaulted ceilings, bay windows) from abrasion and damage.
UNRUNFO -Reinforced-Drywall-Corner-Tape-for-Walls - Drywall Inside Outside Corner Tape with Metal, 2IN*100FT,1*ROLL, No Adhesive Side Review
What it is and where it fits
I’ve been using UNRUNFO’s reinforced corner tape on a couple of remodels—mostly kitchens and a spare-room refinish—and it’s turned into a dependable middle ground between plain paper tape and rigid corner bead. It comes as a 2-inch-wide, 100-foot roll of kraft paper bonded to two narrow galvanized steel strips (about 0.43 inches each), with no adhesive backing. You bed it in joint compound just like paper tape. The pitch is straightforward: straighter, crisper corners than paper alone; more flexible and easier to store than 8-foot beads; usable on both inside and outside corners, including curves.
Build and materials
The construction is simple but smart. The paper is stiff enough to handle without curling itself into a knot, and the two galvanized strips give the sides structure without turning the whole thing into a spring. On my calipers, I measured roughly 0.2 mm at the paper-only center and about 0.4 mm over the strips. That small jump matters in finishing: it’s thin enough not to feel like a clunky bead, yet it’s substantial enough to straighten minor imperfections and bridge small gaps in corners.
The strips are galvanized, so they’re appropriate for normal interior use. I wouldn’t push them into perpetually humid or wet environments (unvented bathrooms, unsealed basements) without careful sealing and priming—standard practice anyway, but worth underscoring. The paper is a standard beige kraft that sands predictably once it’s buried in compound.
Installation experience
There’s no adhesive, so your first coat of mud does all the holding. I’ve had the best results bedding with a setting-type compound (hot mud) for the initial pass, then switching to all-purpose or lightweight for the build and finish coats. The process has been consistent:
- Apply a generous bed coat along the corner. Err on the heavy side so the metal strips have compound beneath them.
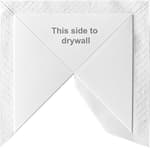
- Fold the tape along the centerline. For inside corners, fold inward; for outside corners, reverse the fold so it creates a clean ridge.
- Press the tape into the mud, aligning the center with the corner line. I use a corner trowel for the first squeeze-out and a 6-inch knife to fine-tune each side.
- Remove excess compound and check that both steel strips are fully embedded—no hollow spots or dry gaps under the edges.
- Let it set. Follow with a wider coat (10–12 inches per side) to feather out the edges. Finish with a third skim as needed.
Because of the metal reinforcement, it doesn’t cup or wrinkle the way plain paper can if you skimp the mud. It also resists telegraphing minor framing or drywall irregularities. The flip side is that the metal makes cutting different: you’ll want snips or a multitool with shears. A utility knife will only get you partway through.
One installation advantage I appreciate is how workable it is on arches and gentle curves. The roll naturally conforms as you move along a radius; you don’t have to fight a rigid bead or make a bunch of relief cuts. For outside curves, keep the radius reasonable—tight bends ask more of the paper bond than it’s designed for. For cathedral ceilings and bay windows, it’s a time-saver.
Performance and finish
On straight inside corners, the finish quality is excellent. The reinforced sides act like guides, so you can straighten a corner that’s a little out-of-true and end up with a crisp 90-degree line. On outside corners, impact resistance is better than paper-only solutions but not as tough as a solid vinyl or metal bead. In low-traffic living areas, I’ve had no issues; in a high-traffic stairwell, I’d still lean toward a heavy-duty bead if the corners take abuse from moving furniture or kids’ backpacks.
Feathering is predictable. Because the edges are a bit thicker where the steel runs, plan to go wider with your finish coats. A 10-inch second pass and a 12-inch final feather hide the transition cleanly. Sanding is straightforward as long as you avoid over-sanding the paper right over the strips—common sense with any reinforced tape.
The biggest benefit for me is how it handles slight gaps and uneven framing. If your sheets don’t meet perfectly at the corner, the reinforcement spans that space and prevents the tape from collapsing into the gap. It also resists wavy lines that you sometimes get with paper tape when the corner is not perfectly straight.
Coverage and convenience
A 100-foot roll goes further than you might expect. For standard 8-foot corners, you’ll get roughly twelve full-height corners out of a single roll (with some offcuts for windows or door returns). Compared to buying individual 8-foot beads, storing a roll takes almost no space. It tosses into a bucket or drawer, which I appreciate on jobs where space is tight or I’m moving between sites.
Where it shines
- Inside corners that need to be straightened or trued up
- Outside corners in normal-traffic rooms where you want a clean profile without hauling long beads
- Curved features: arches, bay windows, and vaulted ceilings
- Remodels and repairs where transporting and storing 8-foot bead is a pain
- DIY-friendly installs where a corner trowel and knives are already on hand
Limitations and caveats
- Impact resistance: Good, not great. For garages, stair landings, or commercial spaces, consider a beefier vinyl/metal bead.
- Cutting: Plan on tin snips. It’s not a “knife-only” product.
- Feathering: You’ll need wider coats to hide the metal-edge build. Budget an extra pass if you’re chasing a Level 5 finish.
- Moisture: Galvanized steel is fine for typical interiors, but I wouldn’t use it in persistently damp areas without meticulous priming and ventilation.
Tips from the field
- Use setting-type compound for the first coat. It locks the tape quickly and reduces shrinkage under the strips.
- Don’t starve the bed coat. If there’s not enough mud under the metal, you’ll trap air and get bubbles or hollows.
- Start and end cleanly. Snip the ends at a slight angle and fully embed them so a sharp metal edge doesn’t sit at the surface.
- Reverse the crease for outside corners. The center fold should make a ridge that lands right on the corner.
- Go wide on your second and third coats. A 10-inch then 12-inch sequence feathers the reinforced edges reliably.
- Mind the curve. For arches, test-fit the radius dry before embedding to see how the tape wants to lay.
Value
Per foot, this is a cost-effective way to reinforce corners, especially when you factor in reduced waste and easier storage versus rigid bead. For anyone doing a mix of inside, outside, and curved corners, one roll covers a lot of scenarios without multiple SKUs on the shelf. It’s not a replacement for heavy-duty bead everywhere, but it fills a big middle ground at a friendly price.
Bottom line and recommendation
UNRUNFO’s reinforced corner tape strikes a practical balance: more structure and straighter lines than plain paper, with the convenience and versatility of a roll product that handles both inside and outside corners—including curves. Installation is familiar if you’ve ever embedded paper tape, with a couple of extra considerations (use snips, don’t starve the bed coat, feather wider). The finished results are clean, crisp, and consistent.
I recommend it for remodelers, DIYers, and pros who want one product that can tackle most corner scenarios without hauling long beads. Use it confidently in living spaces, bedrooms, and kitchens, and reserve rigid vinyl/metal bead for corners that routinely get knocked around. If your priorities are straight lines, a professional-looking finish, and easy storage, this tape delivers solid value and performance.
Project Ideas
Business
Corner Repair & Finish Service
Offer a niche contractor service focused on repairing, reinforcing and refinishing interior corners (including arches and bay windows). Market to homeowners with older plaster, landlords, and small commercial properties; use the reinforced tape to deliver durable, crisp results faster than traditional full-repairs.
Pre-Finished Corner Kits for DIYers
Create and sell DIY corner reinforcement kits: pre-cut lengths of tape for common applications (90° corners, arches), small tubs of compatible joint compound, sanding pads and finish paint. Include video instructions and sell kits online or via local hardware stores.
Specialty Renovation Contractor Partnership
Position yourself as the go-to sub for precision corner work and partner with renovation contractors who want reliable, fast corner finishing for high-end remodels. Offer volume pricing and on-call scheduling to be bundled into kitchen/bath or whole-house remodel bids.
Workshops & Online Courses
Host hands-on workshops teaching arch restoration, trim shaping, and corner reinforcement techniques using the tape. Create paid video courses and downloadable templates for DIY homeowners and small contractors — monetize via platform sales and local classroom events.
Contractor Supply Bundle
Assemble and wholesale bundles tailored to trade pros: multiple rolls of the 2" x 100' tape with complementary metal bead options, bulk joint compound pouches, and finishing tools. Sell through a small e-commerce site or local building supply co-op and offer quick local delivery.
Creative
Crisp Archway Restoration
Use the reinforced paper tape to re-form and strengthen historic or damaged arched and vaulted openings. The metal strips keep a true radius while the paper accepts joint compound for a seamless finish — ideal for restoring character archways without ripping out plaster.
Decorative Corner Molding
Create custom corner moldings by embedding the tape into layers of joint compound, shaping bevels or fillets, then sanding and painting. Add patterns or small reliefs over the tape to turn a functional corner guard into bespoke trim for living rooms or entryways.
Curved Shelf Edge Accents
Form smooth, durable rounded or 90° edges on built-in shelves, window seats or bay window benches. The tape provides a straight, protected edge that resists dings — especially useful where people sit or place objects on the ledge.
Plaster Art Frames
Use the tape as the structural edge for plaster or skim-coat picture frames and wall niches. The metal strips give crisp lines for the frame border while the paper accepts texture; finish with metallic paint or faux-aged plaster for gallery-style accents.
Wear-Resistant High-Traffic Corners
Apply the tape to create reinforced corner strips around stairwells, hallway corners, and garage-to-house thresholds. After embedding and finishing, corners look integrated and withstand constant impact and abrasion without needing metal corner beads.