Features
- The 3 way inside corner is the most time consuming part of drywall finishing. It takes the most skill and experience to not have any defects.
- With our innovative design anyone can put in a 3WAY and finish like a pro!
Related Tools
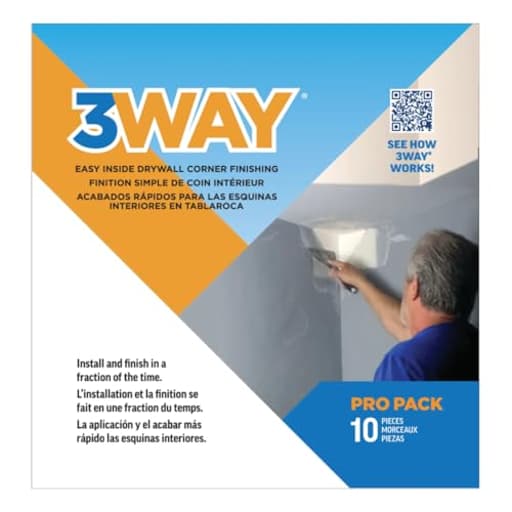
Pack of ten inside drywall corner tools used to form and finish internal drywall corners. Each piece has a shaped profile that guides joint compound and tape to produce consistent corner geometry and reduce the skill required for a smooth finish.
3Way Inside Drywall Corner Review
Why inside corners punish even decent tapers
Drywall can be forgiving across a broad field. Inside three-way corners—the junction where two walls meet a ceiling or where three walls converge—are not. They magnify tiny framing errors, swallow time, and can turn a clean room into a patchwork of fussed-over fixes. I put a pack of 3Way corner inserts to work on a recent bedroom remodel to see if they could tame those intersections and make the results more predictable.
What the corner inserts are
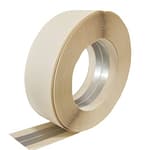
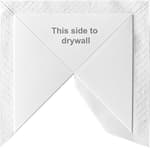
These are preformed, paper-faced inserts designed specifically for three-way inside corners. Each piece folds into a precise triangular form that establishes the geometry of the junction and gives you a clean, consistent apex on all three planes. They’re consumables—meant to be embedded in compound and become part of the wall. The pack contains ten, which in most rooms will cover the majority of the tri-corners you’ll encounter, but you’ll still use standard tape or a corner bead for the straight legs running away from each corner.
Setup and the mud that plays nicest
I tried bedding a few with premixed all-purpose and a few with setting compound (hot mud). Both work, but I preferred a 20- or 45-minute setting mud for the first pass. It locks the insert in place quickly, reduces the chance of movement as you wipe, and gets you to the next coat sooner. If you stick with premix, mix it a hair thicker than you’d use for regular paper tape.
One small quirk: the back face of the insert—what contacts the mud—is fairly smooth. It adheres fine, but it’s slippery while the mud is still wet. Two easy mitigations helped:
- Lightly scuff the back with 120–150 grit before install.
- Let the bed coat “tack” for a minute or two before setting the insert.
Neither is mandatory, but both cut down on the tendency to skate while you wipe.
Installation workflow that worked for me
Here’s the sequence that gave me reliable results without chasing the corner:
- Prefill and true up: If the framing left big voids at the junction, I prefilled with setting mud and knocked it flat. You don’t need perfection—just remove the worst gaps.
- Bed coat: Spread a generous, even bed of mud across all three planes, a bit wider than the insert’s perimeter.
- Fold and place: Pre-fold the insert along its score lines and seat it into the corner, pressing first at the apex, then out along each leg.
- Lock it in: Using a 4- or 5-inch knife (or a corner roller if you have one), apply firm, even pressure from the corner outward to squeeze out excess compound and seat the flanges.
- Feather: With a 6-inch knife, feather the edges around the perimeter so you’re not left with a hard ridge to chase later.
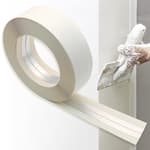
- Tape the legs: Once the insert is locked in, run your preferred inside-corner tape down each leg. I like paper for this because it finishes crisp, but a flexible composite bead works too. Overlap the tape slightly onto the insert’s flange.
- Second coat: After the bed sets, a lean second coat on the legs and a light skim over the perimeter is usually all it needs.
The big advantage here is sequence. Instead of juggling three converging tape seams and trying to keep them from bunching or tearing, the insert establishes the geometry for you. You then treat the legs like any other inside corner.
Fit on less-than-perfect framing
The inserts are precisely made and want to land at a true 90° on each plane. That’s great when the framing is square; it gives a crisp, repeatable apex that looks machine-made. On corners that were a few degrees out, I could still seat them without drama. If you’re dealing with a wildly out-of-square junction, you can still use an insert, but you’ll do a bit more skim work feathering around the perimeter to hide the mismatch. For really wonky cottages and basements, a flexible angle bead on the legs complements the insert nicely.
On-the-wall results
The finish is the standout. With the insert setting the peak, it’s hard to create the blobby buildup that often creeps into three-way corners. The apex stays sharp all the way into the corner, and I didn’t get the paper puckers or stretched tape that show up when you try to force three seams to meet cleanly. Once dry, sanding was minimal—a quick pass with a fine sanding sponge along the legs and a scuff over the feather was it.
I also noticed fewer hairline cracks than I’ve seen on hand-built corners, especially where truss uplift can move a ceiling independently of the walls. That’s anecdotal, but after a few weeks of temperature swings, everything still looked tight.
Time saved (and where it’s saved)
I didn’t clock it with a stopwatch, but the difference is obvious. The first couple corners felt slow as I adjusted to a new sequence. After that, each three-way went in minutes. The time savings don’t come from magic; they come from avoiding rework. You aren’t chasing tape bunching in the apex, you aren’t carving away excess compound built up in a lump, and you aren’t revisiting corners multiple times to get the geometry consistent across the room.
A practical note on pack size: count your three-way corners before you start. It’s easy to forget closet tops and soffits. If you run short, you can still finish the remaining corner the traditional way, but the contrast in effort is noticeable.
Durability and what lives behind paint
Once embedded, these behave like paper tape: paint bonds well, they don’t telegraph through, and they don’t crack when installed over a solid bed. I primed with a standard PVA and finished with washable latex. No flashing or weirdness over the insert versus the surrounding skim.
Drawbacks and nitpicks
- The slick back face is the main quirk. It adheres, but it wants a little more care on install. Scuffing or letting the mud tack resolves this.
- Because the geometry is so consistent, it can highlight framing that’s not. That’s not a fault of the insert, but be ready to feather a bit wider in out-of-square corners.
- Cost per corner is higher than just paper tape. If you’re finishing one basement and trying to squeeze every dollar, the value proposition depends on how much you weigh your time and tolerance for rework.
Tips to get pro-looking results fast
- Use setting-type compound for the bed coat to lock the insert and keep it from sliding.
- Pre-fold the insert before you load mud. That way you’re not wrestling paper and a hawk at the same time.
- Wipe from the apex out to the legs, not the other way around.
- Feather the perimeter wide on the first coat to minimize sanding later.
- Keep a small corner trowel on hand for a final light pass; it helps maintain a uniform apex without digging into the flanges.
Who benefits most
- DIYers: If inside corners make you nervous, these flatten the learning curve. You still need to handle tape on the legs, but the toughest part—the three-way apex—is handled.
- Pros and remodelers: On punch-list rooms, occupied homes, or anytime speed and consistency matter, these make it easier to standardize results across a crew with mixed experience levels.
Value
They’re a premium consumable, no question. But measured against the labor they replace—especially the hidden labor of fixing problem corners—they earn their keep. For me, shaving even 10–15 minutes of fussing per corner across a dozen corners more than offset the cost, and the finishes were reliably clean.
Recommendation
I recommend these corner inserts. They make the most finicky part of drywall finishing faster and more consistent, with a notably sharper apex and less rework. Be aware of the slick back face and either scuff it or work with a slightly tacky bed coat, and plan to feather a bit wider on out-of-square framing. If you value predictable, professional-looking three-way corners—and you’d rather spend your time on the rest of the room—these are worth having in the bucket.
Project Ideas
Business
Rapid Corner-Finish Service
Offer a specialized finishing service that guarantees flawless three-way corners in a fraction of the usual time by using the toolset. Market to contractors and builders who want to speed up punch-lists and reduce rework while maintaining pro-quality results.
Hands-On Training Workshops
Run short, paid workshops teaching DIYers and apprentice finishers how to install perfect inside corners using the tool. Include a take-home starter kit (tool, tape, compound) and a certificate for attendees to build trust and word-of-mouth referrals.
Tool Rental & Consumables Subscription
Create a rental program for the ten-pack tool plus a subscription that delivers consumables (joint compound, tape, corner beads) and how-to guides. Target small contractors and weekend renovators who need pro tools without upfront purchase costs.
Turnkey Drywall Finishing Franchise
Build a franchisable system around the standardized corner process—branding, training manuals, pricing packages, and supply chains. Franchises can undercut general finishers on time and consistency by leveraging the tool-focused workflow.
Content + Kit E‑Commerce Funnel
Produce high-quality video tutorials and before/after case studies demonstrating how the tool transforms 3-way corner work, then sell branded kits (tool pack + tape + compound) through an online store. Monetize via kit sales, affiliate tools, and premium coaching calls for contractors.
Creative
Built-in Corner Niche Shelves
Use the inside corner tools as templates to form small recessed display niches or stepped shelves in inside corners. The shaped profile ensures uniform, professional-looking geometry for a run of multiple niches—great for plants, candles, or small art pieces.
Corner Light Cove for LED Strips
Create a clean, continuous inside-corner cove that hides LED strips and diffuses light evenly. The tool guides joint compound and tape for a smooth, repeatable channel so you can produce subtle ambient lighting in stairwells or hallways.
Decorative Plaster Corner Panels
Make decorative plaster inserts for interior corners using the tool as a forming guide to achieve consistent profiles. Paint or gild the finished corners for architectural accent pieces—ideal for upcycling a plain room into a boutique-feel space.
Three-Way Corner Alcove for Small Objects
Use the 3-way finishing capability to create small triangular alcoves in tight spaces (e.g., at a stair landing or between closets). The tool reduces the skill barrier so you can craft crisp, symmetrical alcoves suitable for sculptural displays or niche storage.
Patterned Corner Mold Series
Develop a series of repeatable textured or fluted corner profiles by pairing the tool with light molds or stamps pressed into wet compound. Produce matching interior architectural details across a room to elevate the design with consistent, handcrafted flair.