Features
- High Quality Material: The tile caulking tool is made of polyurethane material, durable, tough and wear-resistant, not easy to break.
- Home Improvement Helper: This is a useful tool for smoothing seal lines and caulking lines for any edge, corner, gap etc. and helps to save sealant when sealing jobs.
- Easy to Clean: Simply wipe with a damp cloth and rinse with water for the next use. Saves a lot of time.
- Reusable: The caulking tool is reusable and can be used on any edge, corner, gap etc.
- Fast and Efficient: Gripping the caulking tool and gently sliding it around quickly fills the gaps between tiles, saving you a lot of time in getting beautiful joints.
Specifications
| Color | Black |
| Unit Count | 4 |
Related Tools
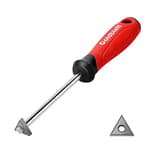

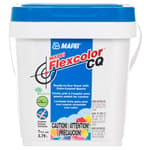
Set of four polyurethane caulking and grout applicator tools for smoothing and shaping sealant lines around tiles, edges, corners and gaps. Durable and reusable, they are easy to clean with water and are designed to apply and remove excess sealant for consistent joints across all tile angles.
SYAYVO 4 Pcs Grout Tool Applicator – Tile Tools for Smooth Finish, Caulking Tool Kit for Precise Sealing of Gaps, Edges & Corners, Works on All Tile Angles Review
Why I reached for this kit
I had two projects queued up: refreshing the grout on a bathroom plank-tile floor and running new silicone in a shower and along a kitchen backsplash. I usually default to a rubber float for grout and a finger or a silicone smoother for caulk. This time I put the SYAYVO grout tool kit in the rotation to see if dedicated polyurethane profiles could speed up the work and tighten the finish.
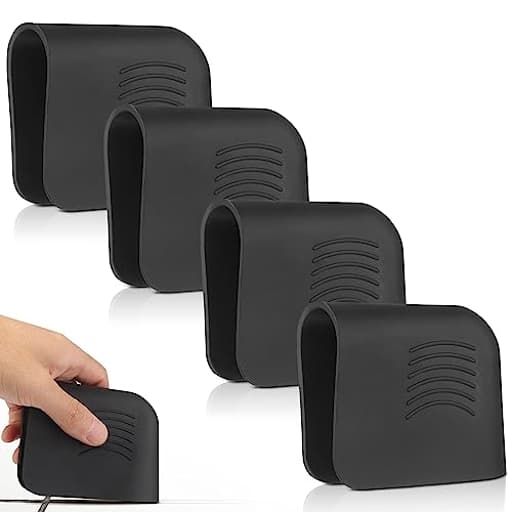
What’s in the box and how it feels in hand
The kit includes four black polyurethane applicators with different edge profiles for flats, inside corners, outside corners, and various joint widths. They’re solid pieces—no moving parts, no hollow cavities—just shaped, slightly stiff plastic that’s tougher than it looks. The edges are sharp enough to cleanly strike joints but not so sharp that they gouge typical ceramic or porcelain glaze.
Out of the package, they feel a bit rigid. That’s not a defect; it’s the nature of polyurethane at room temperature. A quick soak in hot water makes them notably more compliant, which pays off when you want the edge to conform to slight tile irregularities or when you’re shaping silicone.
Setup and the learning curve
My first pass with cement-based, sanded grout on the plank floor was messier than I’d hoped. The culprit wasn’t the tools; it was technique and material consistency. Here’s what turned it around fast:
- Mix grout to the stiffer end of the manufacturer’s range. Too loose and you just smear.
- Prewarm the applicators in hot water for a few minutes to add a touch of flex.
- Work in smaller loads. These tools reward controlled, linear passes.
- Keep a barely damp sponge nearby to feather edges, not to scrub.
Once I dialed those in, the kit began to shine.
Grouting performance
On the plank floor (rectified porcelain, 1/8-inch joints), the flat-edge profile did two jobs at once: pack the joint and strike it flush. I’d deposit a small bead of grout along the joint—either directly dumped from the mixing bucket or lifted with the edge of a float—then pull the applicator at a shallow angle with moderate pressure. It acts like a precision squeegee, compressing grout into the joint while squeegeeing excess off adjacent tiles. After two or three passes, the joint sat flat and evenly filled, and the neighboring tile needed only a light wipe.
Speed-wise, I was faster on long, straight runs than with a float because I wasn’t constantly re-wiping overfilled tiles. On short, intersecting joints, the float is still hard to beat for sheer coverage, but the applicators made depth and width consistency almost automatic.
Where these tools struggle: busy layouts and textured surfaces. On a sheeted mosaic sample, the profiles tended to bridge high and low spots, leaving voids that required extra passes from multiple directions. A rubber float, which rides over and packs across many small joints simultaneously, still wins there. On heavily textured or tumbled stone, the stiffer profiles can leave chatter marks that take more cleanup.
I tested both sanded cement grout and a two-part epoxy grout in a shower niche. The kit handled both, provided I kept the working area small and cleaned the tools promptly with the right solvent (water for cement, manufacturer-recommended cleaner for epoxy). With epoxy, the precision of the profiles helped limit smearing, which turned into real time savings later.
Caulking and sealant shaping
This is where the kit really pulled ahead of my usual habits. I ran silicone in two inside corners (shower verticals), one tub edge, and the backsplash-to-counter joint. Using the concave and 90-degree profiles, I could lay a bead, mist a light soapy water release, and pull a single continuous pass that left a crisp, slightly concave line. The edges don’t chatter like some metal tools and they don’t stick like a fingertip will.
Two tips that made the difference:
- Tape for show faces; skip tape where minor smudges won’t be visible. The tools let you confidently skip tape in many cases.
- Wipe the edge with a paper towel after each pull. Residual silicone on the tool will track if you don’t.
Cleanup was easy. For water-based caulk, a rinse under the tap was enough. For silicone, I wiped the tool with a rag dampened with mineral spirits before the bead skinned over. The polyurethane didn’t swell or soften.
Ergonomics and control
There’s no handle; you pinch-grip these, which gives excellent feel but can fatigue your fingers if you’re striking joints for hours. On the floor, I alternated between a pencil grip and a broader palm press to keep pressure consistent without hot spots. The edges held up across a weekend of use. I did pick up one small nick after hitting a metal lippage clip—my fault. A quick kiss with 600-grit sandpaper restored the edge.
Because the profiles are precise, they force you to be precise. That’s the upside and the challenge. If you overload the edge with grout, you’ll leave a heavy smear beside the joint. The remedy is simple: load less material and slow your pull slightly. Once I adjusted, I spent less time sponging haze and more time moving forward.
Where it fits alongside a traditional float
A rubber float remains my first choice for:
- Sheeted mosaics and very irregular stone
- Rapid coverage across large, intersecting joint patterns
- Forcing grout deeply into wider joints in a single, sweeping pass
The SYAYVO kit excels at:
- Long, straight grout lines on rectified or consistently spaced tile
- Walls and vertical surfaces where control matters more than brute force
- Edges, corners, and perimeters where you’d otherwise switch tools
- Caulk and sealant where crisp, repeatable profiles are the goal
In practice, I found the sweet spot was using a float to spread and push grout broadly, then using the applicators to strike and finish joints to a uniform profile. On smaller jobs or touch-ups, I skipped the float entirely and worked only with the applicators to keep the mess controlled.
Durability and maintenance
After multiple sessions, the polyurethane shows minimal wear. It’s stiffer at room temperature and softens slightly with heat, which you can use to your advantage but also means don’t leave them sitting on a hot dashboard. Rinse them clean as you go, especially with epoxy or silicone, and they’ll stay slick and accurate. If you do damage an edge, a fine abrasive can true it back up in seconds.
Value
This is a straightforward, inexpensive kit that replaces a handful of single-purpose caulk caps and gives you more control over grout striking than a float alone. It won’t eliminate all cleanup, and it won’t magically fix improper grout consistency or poor joint prep. But used correctly, it reduces the amount of scrubbing and haze removal later—and that’s where the time savings add up.
Final thoughts and recommendation
I’d recommend the SYAYVO grout tool kit, with a couple of caveats. If your work is mostly straight grout lines, backsplash seams, tub edges, and shower corners, these applicators are faster and cleaner than a float and a bare finger. They shine on walls and perimeters and make silicone work look professional with very little fuss.
If you primarily set mosaics or heavily textured tile, or if you expect a single tool to replace a rubber float on every floor, you’ll be frustrated. There’s a learning curve, and material consistency matters. Once you get the feel—small loads, steady pulls, and warmed tools when you need a little flex—the payoff is crisp joints, less haze, and a more controlled workflow. For me, they’ve earned a permanent spot in the tiling bucket as both finishers and sealant shapers.
Project Ideas
Business
Mobile Tile Finishing Service
Offer a specialized, on-site grout and caulk finishing service for homeowners and contractors—focused on clean, consistent joints, color-matching, and fast turnaround. Pricing model: per linear foot plus minimum visit fee; packages for kitchens, bathrooms, and whole-house touch-ups. Marketing: local SEO, before/after photos on social media, partnerships with tile installers and realtors. Upsells: mildew-resistant sealant, grout recoloring, annual maintenance visits.
Branded DIY Caulk Kits (E‑commerce)
Package the 4-piece tool set with a curated selection of commonly used caulk/grout colors, mixing cups, masking tape and a printed how-to card. Sell on Etsy, Amazon, and your own Shopify store accompanied by short tutorial videos. Business angles: bundle seasonal colors, offer starter kits for homeowners and premium pros kits for contractors, subscription refills for sealant tubes.
Tile-Finishing Workshops & Certification
Run hands-on weekend workshops teaching professional finishing techniques to DIYers and subcontractors—covering smoothing profiles, edge work, and waterproofing best practices. Charge per seat and offer a paid certification or digital badge for pros who complete the course. Additional revenue: sell tool kits and starter consumables at the class, offer private corporate training for small contractors.
Micro-Contracting for Short Notice Touch-Ups
Build a micro-contracting business focused on small, high-margin jobs: grout refreshes, caulk replacements, shower re-seals, and rental-turnover touch-ups for property managers/Airbnb hosts. Fast scheduling and reliable quality are your differentiators. Pricing: flat-rate packages for common jobs, priority rush fees. Scale: hire and train technicians using your branded method and the 4-piece toolset to maintain consistent results.
Custom Grout/Seal Design Service for Interiors
Collaborate with interior designers to add custom grout or caulk design accents (contrasting grout lines, colored seams, decorative ribs) to high-end projects. Offer mockups, color sampling, and precision finishing using the toolset. Revenue from design fees plus installation labor; market through designer networks, trade shows, and portfolio-driven social media.
Creative
Colored Grout Accent Wall
Create a feature wall by installing tile or faux tile panels and using brightly colored grout or caulk to form bold, graphic lines or patterns. Use the 4-piece caulking kit to apply consistent beads and the different shapes to get either crisp V-shaped grooves or smooth rounded seams. Materials: tiles or tile-look panels, tinted grout or colored silicone, masking tape for straight lines. Result: a modern, low-cost accent wall with professional-looking, repeatable grout lines.
Raised-Relief Furniture Inlay
Add tactile, raised grout lines to furniture (tabletops, cabinetry fronts) to give a custom, modern relief pattern. Lay thin strips of caulk in your chosen design, smooth with the appropriate tool profile to get a uniform lip, let cure, then paint or seal the whole surface. Materials: sanded acrylic caulk (paintable), primer/paint, the smoothing tools. Result: unique furniture pieces with durable, paintable raised designs that look like built-in trim.
Waterproof Planter Seams & Decorative Ribs
Build or refurbish indoor/outdoor planters by sealing joins with waterproof silicone and using the tools to shape decorative ribs or grooves around the pot. Use the long, rounded tool for smooth continuous bands or the corner tool to finish tight junctions. Materials: polyurethane or silicone sealant, planters (concrete/wood), optional paint. Result: leakproof planters with a custom, architectural finish.
Custom Shower Niche & Shelf Trim
Upgrade a shower niche by applying caulk as both a waterproofing seal and a visual trim—use contrasting grout color for a designer look. The kit’s different profiles let you finish inside corners and rounded edges neatly for a polished, tile-store quality niche. Materials: mildew-resistant silicone, grout for surrounding tiles, cleaning supplies. Result: a watertight, spa-like niche with crisp, durable seams.
DIY Terrazzo-Coaster Molds
Use the caulking tools to shape silicone or caulk-edged molds for making small concrete or resin terrazzo coasters. Smooth the mold seams so cast pieces release cleanly and have consistent edges; you can also use the tool to add a subtractive groove for aesthetic detail. Materials: silicone caulk or mold putty, resin or concrete mix, terrazzo chips. Result: handmade coasters with professional edges and custom groove details.