Features
- 14.25 sq. ft. per box.
- Ultra realistic stone veneer product
- Individual stones allow for a natural appearance compared to repetitious panelized products
- Can be face nailed in the same fashion as traditional siding or installed with primer/adhesive
- Stone cuts with ease using any standard woodworking tool
Specifications
| Color | Phantom Shadow |
| Size | 14x22 |
| Unit Count | 1 |
Related Tools

This non-rated flat stone veneer supplies 14.25 sq. ft. per box of individual stone pieces in Phantom Shadow (size 14x22). The pieces can be face-nailed like traditional siding or installed with primer and adhesive, and they can be cut with standard woodworking tools to create a varied, non-repetitive cladding.
Kimberly Bay District View Non Rated Flat Stone Veneer (14.25 sq. ft. per Box) Review
Why I reached for this veneer
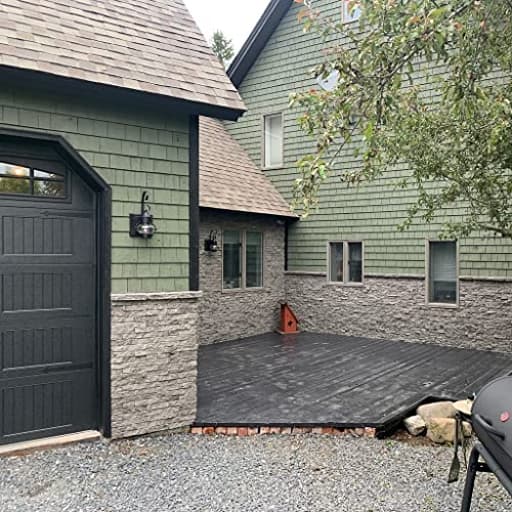
I had two small-to-midsize projects that called for a stone look without the mess or weight of real masonry: a backyard grill surround and a curb-facing mailbox column. For both, I wanted speed, repeatable results, and believable texture. The District View veneer, in Phantom Shadow, checked those boxes on paper: individual stones instead of repetitive panels, 14.25 sq. ft. per box, and the option to either face-nail like siding or stick it with primer and adhesive. After running it through a weekend’s worth of cutting, fitting, and fastening, here’s how it actually performed.
What’s in the box
Each box covers 14.25 sq. ft., and the pieces are individual stones rather than locked-together panels. That matters. With panels, your eye tends to find repeating seams. With these, I was able to shuffle sizes and tone variations to avoid patterns, especially on broad faces. The Phantom Shadow color reads as a deep charcoal with subtle shifts—enough variation to keep the surface lively without straying into patchy or noisy.
The stones are surprisingly light and cuttable. Calling them “stone” is about the look and texture, not the density. That’s a design choice that unlocks most of the speed gains: you can lift, trim, and place pieces one-handed, and they don’t need a ledger board or wet saw.
Installation experience
I installed the veneer two ways to see what I preferred: face-nailing on the mailbox column and primer/adhesive on a portion of the grill surround. Both are valid; they just serve different situations.
- Substrate prep: I wrapped the wood framing, flashed transitions, and added a rainscreen on the grill surround to let the assembly breathe. You can install directly over sheathing (per manufacturer guidance), but a rainscreen is cheap insurance for exterior projects.
- Layout: I snapped level lines and dry-laid the first two courses on the ground, mixing pieces from multiple boxes to blend tones. With individual stones, the pattern you choose matters—take an extra 10 minutes here and you’ll save time later hiding seams.
- Fasteners: For the face-nailed section, I used a 16-gauge finish nailer with 2" stainless nails. Stainless or hot-dipped galvanized is important outdoors. I shot into studs whenever possible and kept nails near the top edge of each piece so the next course hides them. The holding power was better than expected; no rattling or creep after a week of wind and two heavy rains.
- Adhesive: On the adhesive section, I primed the substrate with the recommended primer and ran beads of construction adhesive rated for exterior use. The bond was solid after cure, but set time slowed my pace. If you’re alone and working methodically, adhesive is tidy. If you’ve got a helper and a nailer, face-nailing is at least 2x faster.
- Cutting: I cut everything with a standard miter saw fitted with a fine-tooth woodworking blade. The pieces cut cleanly, even on thin rips for infill. It throws some dust but not the slurry you get from a wet saw, so cleanup is quick. Wear eye and respiratory protection like you would with fiber cement or engineered siding.
- Corners and terminations: Without dedicated corner pieces, I mitered outside corners for a continuous look. That worked well and held after nailing. For inside corners, a simple overlap with staggered cuts disguised the joint. At transitions—like where the veneer meets siding—I used metal flashing and a small shadow gap rather than a visible trim board.
All in, the mailbox took an afternoon. The grill surround took a day, including rainscreen and flashing. That’s dramatically faster than traditional stone veneer, which would have added mixing time, scratch coat, and cure periods.
Fit and finish
From five feet away, this veneer is very convincing. The casting picks up grain, ridges, and fractured edges cleanly, and the surface doesn’t have the plasticky sheen that gives some faux products away. Up close, it still holds up; only when you touch it do you notice the lighter weight and slightly warmer feel than real stone. The biggest win is the absence of repeating patterns—you can keep shifting pieces until the wall reads as organic.
The Phantom Shadow tone works nicely with both warm and cool palettes. On bright days the facets catch light without looking glossy. On cloudy days, the wall sits back and feels monolithic. If you’re matching existing masonry, bring a sample outside; the color is cohesive, but it’s dark enough that it can make small walls look very solid.
Durability and limitations
A few practical notes from use and inspection:
- Non-rated: This is a “non-rated” veneer, which I take to mean it is not intended for fire-rated assemblies. For outdoor kitchens, observe clearances to open flames and high-heat appliances per code and appliance manuals. I kept a setback around the grill firebox and used metal and cementitious materials inside that zone.
- Weather: After the first storms, I saw no cupping, gapping, or telegraphing of nails. As with any cladding, the weak link is usually detailing. Use corrosion-resistant fasteners, flash penetrations, and consider a rainscreen over sheathing in wet climates.
- Impact: It feels tougher than typical foam-backed faux stone but it’s not quarried rock. Don’t plan on it taking repeated impacts from wheelbarrow handles or snow shovels at grade. A small kickplate or thoughtful landscaping can help in high-traffic spots.
- Maintenance: I expect occasional rinsing to remove dust and pollen. I avoid pressure washing at close range on any cladding.
I can’t speak to long-term UV stability yet, but the pigments appear well integrated rather than surface-applied paint.
Planning and coverage
Each box covers 14.25 sq. ft. For clean rectangles, I budget 10% extra. For lots of corners and cuts, bump that to 15%. Examples:
- 28 sq. ft. wall: 2 boxes (28.5 sq. ft.) if simple; 3 boxes if corner-heavy.
- 40 sq. ft. surround: 3 boxes (42.75 sq. ft.) plus one extra if you want freedom to cherry-pick pieces.
You’ll also want to plan accessories the box doesn’t include: flashing, rainscreen, primer/adhesive if you’re not nailing, and corrosion-resistant nails. If you’re meeting existing siding, a simple metal Z-flashing and a shadow gap create a clean termination without extra trim.
Who it’s for
- DIYers who want a stone look but don’t want to mix mortar or rent a wet saw.
- Remodelers who need fast, predictable installs on light framing, sheathing, or over existing surfaces with proper prep.
- Designers chasing a modern dark-stone aesthetic without the weight or substrate demands of real stone.
If you’re doing a code-required fire-rated wall, a high-abuse commercial corridor, or a hearth where heat exposure is intense, this isn’t the right material.
Pros
- Fast, clean installation—face-nails like siding
- Individual stones avoid the repeating look of panel systems
- Cuts with ordinary woodworking tools; no wet saw needed
- Convincing texture and color from typical viewing distances
- Light weight reduces substrate demands
Cons
- “Non-rated” limits use on fire-rated assemblies and near high heat
- No dedicated corner pieces included; you’ll miter or design around corners
- Long-term UV and abrasion performance still to be proven
- You’ll need to source rainscreen, flashing, and adhesives separately
Final take
The District View veneer delivers on the promise of a stone look with the speed and simplicity of siding. The ability to face-nail, combined with easy cutting on a miter saw, turns what is usually a multi-day masonry job into a single-weekend project. The individual-piece format and the Phantom Shadow color help the installation read as natural rather than patterned, and finishing details—miters at corners, clean terminations—are straightforward with basic carpentry tools.
I recommend this veneer for exterior accents, low walls, columns, and outdoor kitchens where you want a convincing stone aesthetic without the labor, mess, and weight of real masonry. Plan your detailing, respect clearances around heat sources, and buy an extra box to widen your layout options. If you do those things, you’ll get a clean, durable result that looks far more “custom” than the time and tools would suggest.
Project Ideas
Business
Portable Sample Panels for Sales & Staging
Build portable 2x2 or 3x4 sample panels showcasing different layouts, grout/no-grout looks, and edge treatments using the 14.25 sq. ft. boxes. Use these as sales tools for contractors, designers, and showrooms or rent them to real estate stagers who want a quick curb-appeal boost. Portable panels demonstrate how individual stones create a natural, non-repetitive appearance.
Productized Small-Project Packages
Offer fixed-price renovation packages targeted at quick high-impact upgrades: fireplace makeovers, mailbox/entryway facelifts, planter wraps, or bar fronts. Because the veneer installs via face-nailing or adhesive and cuts easily, you can streamline labor and turnaround. Market packages to homeowners and realtors as fast, affordable curb-appeal improvements.
DIY Kits & Online Tutorials
Create and sell curated DIY kits for common projects (e.g., mailbox wrap kit, 3-panel fireplace trim kit). Each kit includes pre-measured pieces (or cutting guides), adhesive/fastener recommendations, and step-by-step video tutorials showing tools and techniques. Sell kits online or through local hardware stores—appeals to homeowners who want pro results without hiring a mason.
Workshops & Hands-On Classes
Host paid weekend workshops teaching homeowners and hobbyists how to design and install the stone veneer. Cover measuring, cutting with carpentry tools, face-nailing vs. adhesive techniques, and finishing options. Workshops build community, generate product sales (boxes sold at the class), and create social-media-ready before/after content you can use to market larger installation services.
Creative
Fireplace Accent Surround
Use the individual Phantom Shadow stones to clad a fireplace surround or mantel wall. Because the pieces cut easily with standard woodworking tools, you can shape stones to fit tight corners and create a custom, non-repetitive pattern. Install by face-nailing for a traditional look or adhesive for a seamless finish; add a thin grout or leave it dry-stacked for different aesthetics. Add recessed LED lighting in the mantel to highlight texture.
Raised Garden Beds & Planter Faces
Wrap raised beds, retaining walls, or freestanding planters with the flat stone veneer to create a natural, upscale garden feature. The individual pieces allow you to curve and stagger stones for a natural appearance. Use primer and adhesive for outdoor durability and seal as needed. Combine with potted plants, trailing vines, or built-in irrigation to make a living stone display.
Entryway Feature Wall with Mailbox/Niche
Create a dramatic façade at your front door: build a short stone feature wall that incorporates house numbers, a recessed mailbox niche, and a light. Cut pieces to form a clean opening for the mailbox and use face-nailing to anchor larger stones. The Phantom Shadow color provides a moody, modern look that photographs well and elevates curb appeal.
Outdoor Kitchen or Bar Front
Clad the front of an outdoor kitchen island or backyard bar with the veneer to get a custom stone look without heavy masonry. Individual stones let you shape around corners, foot rails, or outlets; use adhesive with primer for a secure bond on exterior-rated substrates. Finish with a sealed countertop and weatherproof trim for a durable entertaining centerpiece.