Features
- Danco 11-Piece repair kit for Delta helps restore a leaky faucet
- Replacing the worn out parts in the faucet will create a better seal and help prevent water leaks
- This kit is ideal for single-handle faucets and contains the parts needed to Repair Delta old-style and new-style faucets
- Package dimensions: 5.0" L x 3.0" W x 6.0" H
Specifications
| Color | No Color |
| Size | Pack of 1 |
| Unit Count | 1 |
Related Tools
An 11-piece repair kit for single-handle faucets that replaces worn components such as the ball assembly, seats, and seals to stop leaks. The parts are compatible with both older and newer single-handle faucet designs to restore a watertight seal.
Danco 86971 Repair Kit for Delta with Number 212 SS Ball Review
A dripping single‑handle Delta faucet was wasting more water than I care to admit, so I reached for the Danco Delta repair kit. I’ve rebuilt a fair share of ball‑type valves over the years, and this kit aims to be the one‑box fix: ball, seats, springs, seals, and the cam/packing to pull an old faucet back into shape. Here’s how it did in my hands.
What’s in the kit and what it’s for
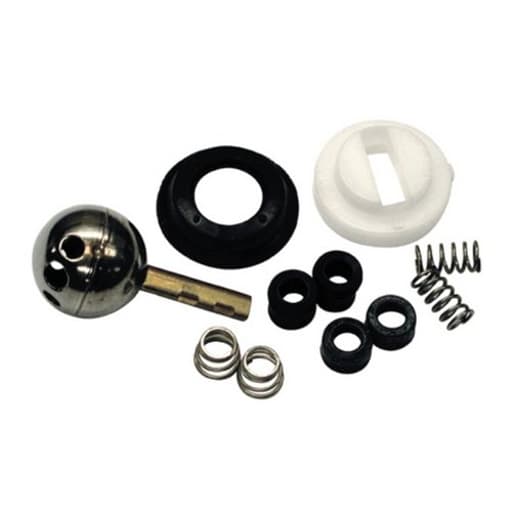
This is an 11‑piece set designed specifically for Delta single‑handle ball faucets. It includes:
- A stainless steel control ball (the “212” ball)
- Rubber seats and springs
- A cam and packing (the white plastic cup and its seal)
- Assorted O‑rings/gaskets
If your faucet uses a ball to mix hot and cold (common on many Delta models from the 1970s through the 1990s, and still seen on some newer single‑handle designs), this kit targets exactly that style. If your Delta has a cartridge (many “Monitor” and later series), this is the wrong product.
In short, the Danco kit is meant to stop drips, restore smooth handle movement, and bring back predictable temperature mixing without swapping the whole valve or trim.
Compatibility and fit
On my test fixtures—a mid‑’90s tub/shower valve and an older bathroom sink—the parts matched up well. The stainless ball is the correct profile and port size for standard Delta ball valves. The kit includes two styles of rubber seats and springs; choosing the right pair matters. Using the conical springs with the matching seats usually yields the best seal and feel. The included cam/packing fit snugly, but I did have one instance where the new cam made the handle a bit stiff until I backed off the adjustment ring slightly.
A few practical notes from the bench:
- Seats and springs: Spring length and tension vary by generation. If the new springs don’t sit the seats securely or make the handle excessively stiff, reuse your originals if they’re still intact.
- Large O‑ring: On one older tub valve, the new bonnet O‑ring felt a hair oversized, which made threading the retainer cap fussy. A light coat of silicone grease and a patient hand‑thread solved it, but in a pinch, reusing a still‑supple original O‑ring is acceptable.
- Cam thickness: If you experience binding after assembly, try loosening the adjusting ring slightly or, if your old cam is undamaged, consider reusing it. Cams generally don’t “wear out” like seats and springs do.
Bottom line: compatibility is very good for Delta ball‑type faucets, but tolerances on older housings vary. Keep your original parts on a towel as a fallback during the rebuild.
Installation experience
Working from the front side, I shut off the water, removed the handle and dome cap, and exposed the ball assembly. After lifting out the old ball, I pulled the seats and springs. Here’s the workflow that produced the best results:
- Clean the cavity: Mineral buildup hides in the seat pockets and around the bonnet threads. A nylon brush and vinegar helped loosen scale without scratching.
- Grease smartly: A dab of food‑grade silicone grease on the seats, the ball, and the cam packing makes assembly smoother and prolongs seal life. Avoid petroleum‑based products.
- Seat the springs: I slid each spring into its rubber seat, then used the tip of a screwdriver as a guide to set them into their pockets. This prevents the springs from tipping.
- Drop in the ball: Align the ball’s slot with the stem orientation for your handle. A light coat of grease on the ball reduces stiction and improves feel.
- Install the cam/packing: Align the notch on the cam with the index in the valve body so the stop plate will later make sense for your handle travel.
- Adjust tension: Snug the adjusting ring until the handle moves smoothly with no wobble, then stop. Overtightening will cause binding and premature wear.
- Reassemble the cap and handle: Hand‑tighten the cap to avoid cross‑threading, and set the handle so you have a full range of motion.
The first faucet took me about 45 minutes end‑to‑end, including cleaning and testing. The second one, with everything laid out and a feel for the order, took less than half an hour.
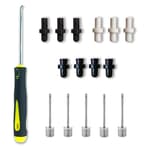
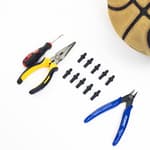
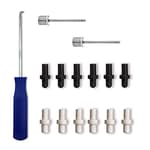
Tools I found helpful:
- 1/8‑inch hex key (for many Delta handles)
- Needle‑nose pliers (to retrieve old seats/springs)
- A small flat screwdriver (as a spring/seat guide)
- Dry cloth or strap wrench (to snug the dome cap without marring)
Performance after the rebuild
Results were immediate. The lingering drip stopped, handle wobble vanished, and temperature control regained a predictable “center.” With the stainless ball and fresh seats, the handle feel went from gritty to glassy. On the tub/shower, fine control through the warm range improved noticeably—no more jumping from tepid to too hot with a tiny bump.
After a month of daily use, there’s no seepage around the dome cap, no mid‑arc dripping, and the handle still tracks smoothly. That’s the hallmark of a proper ball‑and‑seat refresh: once set, it should feel boringly reliable.
Durability and materials
The stainless steel ball is the star here. Stainless resists pitting and mineral scoring better than plated soft metals. The rubber seats felt appropriately pliable without being spongy, and the springs provide firm but not excessive preload. The cam/packing is a standard polymer; it relies on proper lubrication and adjustment to last.
Longevity in ball valves largely comes down to water quality and how carefully they’re assembled. With silicone grease and moderate tension on the adjusting ring, you should get years before the next refresh.
Where it falls short
No kit is perfect, and this one has a few caveats:
- Fit variances: Older valves can be finicky. The included cam can feel tight in some housings, and the bonnet O‑ring may be a snug fit. Keeping old parts on hand as a fallback is wise.
- Not fully comprehensive: It doesn’t include the metal retainer/bonnet, stop plate, or handle hardware. If those are damaged or corroded, you’ll need additional parts.
- Instructions are generic: The included guidance is adequate if you’ve done this before, but first‑timers may want to consult a Delta diagram or a vetted video to match seats/springs correctly and align the cam.
None of these are deal‑breakers, but they’re worth noting if you’re walking into an unknown 30‑year‑old valve.
Tips that make the job easier
- Shut off water at the valve if available; otherwise, kill the house supply and open a nearby faucet to relieve pressure.
- Photograph the handle and stop plate positions before disassembly. It’s cheap insurance for reassembly.
- Pre‑assemble seats and springs before dropping them into the pockets.
- Use food‑grade silicone grease sparingly but deliberately on moving and sealing surfaces.
- Adjust the tension ring last and resist the urge to overtighten.
- If the handle binds after reassembly, back off the cap slightly or test with your old cam to isolate the cause.
Value equation
Compared with replacing the entire faucet or swapping a shower valve behind the wall, a seat/ball rebuild is the most cost‑effective path to a drip‑free, smooth‑operating Delta single handle. The Danco kit brings all the common‑wear items together, which saves a run back to the store when you discover your old springs are tired or a seat has nicked. The stainless ball is a meaningful upgrade over worn originals.
Who it’s for
- DIYers with a leaking Delta single‑handle ball faucet looking to fix drips and restore smooth control without opening the wall.
- Property managers or homeowners maintaining older Delta 600‑series tub/shower valves and similar sink faucets.
- Anyone comfortable with light plumbing who wants a predictable one‑hour repair instead of a full replacement.
If your faucet is cartridge‑based, or your valve body is cracked/corroded, this kit isn’t the solution.
Recommendation
I recommend the Danco Delta repair kit for anyone servicing a Delta single‑handle ball faucet. It reliably stops drips, restores smooth operation, and brings back predictable temperature mixing at a fraction of the cost and effort of replacement. The stainless ball and fresh seats/springs deliver the performance gains you’re after, and while fit can be a touch snug on some older housings, careful assembly and a dab of silicone grease solve most hiccups. Keep your old cam and O‑ring handy during the rebuild, and you’ll have everything you need to turn a tired faucet into a solid, leak‑free performer.
Project Ideas
Business
Mobile Faucet Repair Service
Start a low-overhead on-call service focused on single-handle faucet repairs using compact kits like this one (11 pieces covers old and new styles). Offer fixed-price visits for common leaks, keep a stock of kits in your van, and upsell replacement faucets if needed. Market via neighborhood Facebook groups, Nextdoor, and local SEO. Typical first-year model: 1–2 techs, $75–$150 per call depending on region.
DIY Repair Kits with Video Guides
Bundle the repair kit with custom step-by-step printed instructions and short how-to video access (QR code). Sell on marketplaces (Etsy, Amazon) and optimize listing for keywords like "fix leaky Delta faucet". Offer a premium variant that includes simple hand tools and lifetime email support. Digital video upsells boost margin and reduce returns.
Maintenance Contracts for Property Managers
Offer contracted preventative maintenance for landlords and small property managers: regular inspections and quick repairs using these repair kits to prevent tenant water damage. Charge a monthly per-unit fee or a discounted service bundle. Contracts reduce emergency calls and create steady recurring revenue.
In-Person & Online Repair Workshops
Host workshops teaching homeowners how to fix common faucet leaks using the 11-piece kit. Workshops can be in-person at community centers or live online with mailed kits. Charge per attendee and sell kits at the event. Add a ‘certified DIY plumber’ mini-course and offer discounts on follow-up service visits.
Branded Emergency Repair Packs for Realtors
White-label small repair kit packages as ‘Welcome Home Emergency Repair Kits’ for realtors, home stagers, or moving companies to give new homeowners. Include a short instruction card, a QR-linked how-to video, and your contact info for jobs you can’t handle DIY. Sell B2B bulk packs for a solid margin and recurring bulk orders.
Creative
Custom Drawer & Cabinet Knobs
Turn the ball assembly and larger metal parts into unique drawer or cabinet knobs. Clean and polish the ball, drill a centered hole (or use the kit's threaded stem if compatible), epoxy a mounting bolt in place, and finish with clear coat or patina. These industrial-style knobs work great in kitchens or bathrooms for a subtle plumbing-themed accent.
Mini Steampunk Sculptures
Use the metal ball, seats, seals, and any small screws/springs in the kit to build tiny steampunk sculptures or desktop curios. Mount components on a small wood base, add brass accents, apply patina or antique finish, and seal. These sell well at craft fairs or online as desk art.
Plumbing Jewelry & Accessories
Repurpose rubber seals and small metal parts into necklaces, cufflinks, or earrings. Clean and antibacterial-coat rubber pieces, add jump rings or small posts, and assemble into minimalist industrial jewelry. Package as a novelty line for makers markets or gift shops.
Hands-On Faucet Repair Demo Board
Build a durable demo board with an old single-handle faucet and use the 11-piece kit to show before/after repairs. Label each part (ball, seats, seals) and create step-by-step photos or a pull-out panel. Great for classroom demos, maker spaces, or in-store displays to teach customers how the kit restores watertight seals.
Upcycled Home Accent Set
Create small home accent sets: fridge magnets from seals, coasters inset with polished metal pieces, or a soap dish with a decorative ball centerpiece. Group several repurposed items into a gift set marketed as "Upcycled Plumbing Chic" for home decor markets.