Features
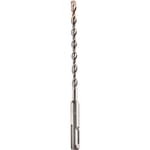
- Multigrind carbide tip with multiple cutting edges to reduce walking and improve cutting
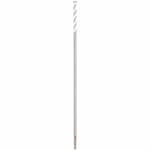
- Flute-less bit design for drilling through tiles
- Intended for low-speed drilling without impact (though compatible with rotary/impact drills)
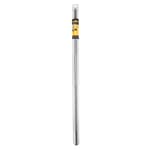
- Cylindrical shank compatible with three-jaw drill chucks; three-flat shank on 3/8" (9.53 mm) bits and larger to reduce slippage
- Carbide construction for increased wear resistance
Specifications
| Bit Sizes | 1/8" (3.18 mm); 3/16" (4.76 mm); 1/4" (6.35 mm); 5/16" (7.94 mm) |
| Total Length | 2 in (50.8 mm) |
| Working Length | 1.5 in (38.1 mm) for each size |
| Pack Quantity | 4 |
| Shank Type | Cylindrical; three-flat on ≥3/8" (9.53 mm) bits |
| Tip Material | Carbide |
| Design | Multigrind head; flute-less |
| Recommended Materials And Use | Natural stone tile, slate, granite and similar hard tiles; not recommended for porcelain; drill without impact at low speeds |
Related Tools
Related Articles

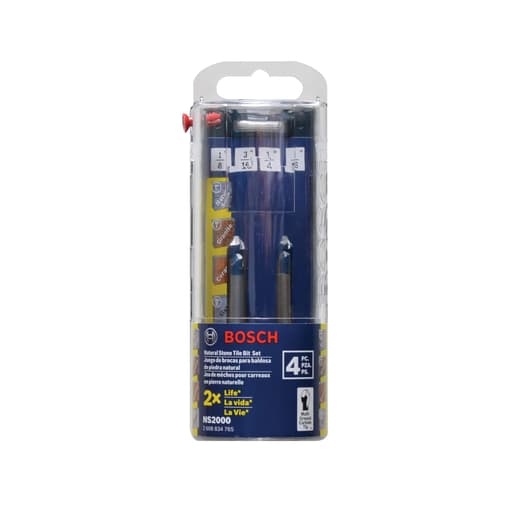
Set of tile drill bits intended for drilling natural stone tile, slate, granite and other hard tile materials. Bits have a multigrind carbide tip intended to reduce walking and improve cutting performance. Designed for low-speed, non-impact drilling; may be used in rotary drills and drill/drivers. Not recommended for porcelain tiles.
Bosch Natural Stone Tile Set Review
First impressions and where it shines
My first test with the Bosch stone tile set was a pair of holes for a bath hardware install across a slate backsplash and a granite threshold. This kit is purpose-built for that kind of job: slow, controlled drilling in dense, natural materials without hammer action. The multigrind carbide tip starts cleaner than spear-style glass/tile bits I’ve used, and the flute-less body feels odd at first but makes sense once you see how it works—it doesn’t try to auger out chips so much as grind, lubricate, and slurry its way through brittle surfaces.
If you’re dealing with natural stone tile, slate, or granite, this set is in its element. If you’re facing porcelain, it’s not the right choice; use a diamond bit or core for that. The packaging says as much, and my testing backs it up.
What you get and how it’s built
The kit includes four sizes—1/8 in, 3/16 in, 1/4 in, and 5/16 in—each with about 1.5 in of working length (2 in overall). All four bits in this set are cylindrical shank; the three-flat anti-slip shank Bosch uses on larger sizes doesn’t apply here. The tips have multiple cutting edges on a carbide head. That geometry does two things well:
- It resists skating when you touch down on a glossy tile face.
- It spreads the load across several edges so the tip cuts and grinds rather than plows, which reduces chipping on fragile surfaces.
The flute-less design is intentional. On tile, flutes can catch and chip the surface; these grind and polish their way through. The tradeoff is you need to manage dust and heat actively.
Technique matters more than usual
The set rewards good technique and punishes rushing. Here’s the method that gave me the best results:
- Mark, tape, and guide: Painter’s tape over the mark helps visibility and reduces initial chip-out. For big installs, a plywood template with a pilot hole keeps the bit from walking.
- Start at a low angle: A couple of seconds at a 10–15° angle establishes a divot, then go perpendicular.
- Slow speed, steady pressure: Use your drill’s low gear. I had the best control at roughly 300–500 RPM on granite and around 600–900 RPM on softer stone or ceramic.
- No impact: Hammer mode will kill these tips quickly and chip the tile.
- Peck and cool: Drill for 10–20 seconds, back out, dip the bit in water or spray the hole, and clear the slurry. Repeat. A putty “dam” around the hole lets you pool a little water for continuous cooling.
With that routine, the bits start cleanly and maintain a predictable pace. Skip the cooling or push the RPMs and the tips heat-soak, dull, and slow to a crawl.
Performance on different materials
- Slate: This is the easiest in the “hard tile” group. A 1/4 in hole took me under two minutes with minimal chip-out. The multigrind tip’s tendency to self-center was obvious on the irregular clefts of honed slate.
- Granite: Dense, polished granite is the real test. Expect slow progress, but steady. My 5/16 in holes for anchors averaged around 5–8 minutes each with a pecking cadence and frequent water. The edges stayed sharp enough to keep chip-out modest; masking tape and low entry pressure made the finish clean.
- Glazed ceramic: Not the primary use case here, but these will do small holes in softer ceramics. The risk is the glaze: if you let the bit dance or you apply too much pressure, the glaze can spall. I had better luck starting with the 1/8 in bit, then stepping up, rather than trying to take a 5/16 in hole in one pass.
- Porcelain: This set is not for porcelain. A diamond-tipped tile bit or a diamond core will be faster, cleaner, and far more durable on porcelain. If you push these into porcelain, you’ll overheat the tip quickly and the edge will go.
Heat management and speed
The most common failure mode with tile bits is heat. Carbide likes pressure more than speed, especially on brittle materials. Two changes made the biggest difference for me:
- Slowing down and pecking often. A 20-second peck with a water dip clears abrasive slurry and puts a lot of life back into the edge.
- Using a small-to-large progression. A 1/8 in pilot dramatically reduces heat and torque when you move to 1/4 or 5/16 in.
I experimented with higher RPMs on slate where the risk is lower. It can work if you’re disciplined about cooling, but it doesn’t buy much time on granite and it increases the chance of glazing the carbide. For most users, staying in low gear is the safe bet.
Durability and lifespan
Measured against other carbide tile bits, these hold up well in their intended lane. In slate and softer stone, the 1/4 in bit was still sharp after a dozen holes. In granite, I’d budget 6–10 clean holes per bit at 1/4–5/16 in, assuming you use water, peck often, and avoid hammer mode. Abuse them—dry drilling at high RPM, constant contact, no cooling—and you can cook a tip in a hole or two.
The short overall length is a quiet win: it keeps runout low and helps you maintain a straight, controlled hole. The downside is obvious: you’ve got about 1.5 in of working depth. For thicker thresholds or mounting through backer plus tile, plan accordingly.
Fit, grip, and compatibility
All four bits in this kit are cylindrical shank, and they fit fine in a three-jaw chuck. Because there’s no three-flat, tighten the chuck firmly and check it occasionally—especially when stepping up sizes—so the bit doesn’t spin in the chuck and create heat. These run happily in standard drill/drivers. A drill press is overkill for most tile installs, but if you’re doing repetitive holes on a benchtop slab, the added control and constant feed are nice.
Where it sits against alternatives
- Compared with spear-point glass/tile bits: The multigrind tips walk less and chip less on stone. Spear points can be quicker on soft ceramic but are more fragile on granite.
- Compared with diamond tile bits: Diamonds will outlast carbide on porcelain and are faster on very hard stone, but they cost more per size and usually need more water management. For a handful of holes in natural stone, this Bosch set is more cost-effective.
- Compared with spade-style tile bits: These grind more predictably and stay on target better. Spade bits are cheap but tend to skate and chip.
Limitations and quirks
- Not for porcelain. If your tile is porcelain, pick diamond.
- Short, shallow reach. You only get 1.5 in of working length.
- Flute-less equals slower chip clearing. You must peck and cool. If you like to lean on a bit and push straight through, these will frustrate you.
- Size spread is basic. The 1/8, 3/16, 1/4, and 5/16 in sizes cover common anchors, but if you need 3/8 in or larger, you’ll be shopping for a separate bit.
Practical tips
- Use painter’s tape, start slightly angled, and then square up once you’ve created a small seat.
- Make a small putty dam and feed water with a syringe or spray bottle for continuous cooling.
- Pilot with 1/8 in, then step up to final size. It’s slower per step but faster overall and easier on the bit.
- Let the bit do the work. If dust turns to smoke or the tip squeals, you’re running too fast or too dry.
Recommendation
I recommend the Bosch stone tile set for DIYers and pros tackling a modest number of holes in natural stone tile, slate, and granite, especially where clean starts and low chip-out matter. The multigrind carbide tips track well on slick surfaces, the short bodies keep things steady, and with proper cooling they last respectably. If your work is porcelain-heavy, or you need deeper holes or larger diameters, this set isn’t the right match—go with diamond bits or cores. But for its intended materials and technique, it’s a dependable, cost-effective kit that rewards a careful hand.
Project Ideas
Business
Custom Slate Sign Studio
Offer personalized house-number/address plaques and wedding/event signs on slate and natural stone tiles. Precise, non-impact drilling enables clean mounting holes for stand-offs or hidden hardware. Sell online with options for sizes, fonts, and finishes.
Bulk Event Favors (Branded Slate Coasters)
Produce sets of slate coasters with drilled ribbon holes or rubber feet holes for corporate gifts and weddings. The multigrind tips help keep holes centered for consistent production; add laser etching or paint-fill logos for upsell.
Upcycled Stone Jewelry & Decor
Source stone offcuts and create pendants, earrings, and wind chimes by drilling 1/8–3/16 in pass-throughs. Market as eco-friendly, one-of-a-kind pieces. The carbide construction stands up to abrasive materials for efficient small-batch runs.
On-Site Stone Accessory Mounting
Provide a mobile service to drill small holes in installed natural stone backsplashes and shower walls (not porcelain) for towel hooks, soap dishes, and shelves. Low-speed, non-impact drilling reduces crack risk and dust; charge per hole plus hardware.
Hands-On Workshop: Drill Stone Like a Pro
Host classes teaching safe, low-speed drilling in slate/granite with take-home projects (plaque or cheese board). Partner with local makerspaces or tile shops; generate revenue from tuition, kits, and tool add-on sales.
Creative
Slate House-Number Plaque
Use a natural slate tile to make a weatherproof address plaque. Mark two or four mounting points and drill at low speed with the 1/4 in bit; the multigrind carbide tip reduces walking on the slick slate surface so holes line up for stand-offs or screws. Paint or stencil numbers and seal.
Rustic Stone Wind Chime
Drill 1/8–3/16 in holes in small slate/granite offcuts and string them with fishing line on a driftwood bar. The flute-less design helps prevent chipping on thin pieces, and low-speed drilling avoids cracking. Mix lengths for pleasing tones.
Granite Cheese Board with Leather Handle
Turn a granite tile into a serving board by drilling two 1/4–5/16 in holes near one edge to thread a leather strap. The carbide tip’s reduced walking helps place holes symmetrically. Add food-safe mineral oil for a rich finish.
Garden Herb Markers
Cut or buy small slate rectangles, drill a 3/16 in corner hole for hanging, then paint herb names with outdoor acrylic. The bits’ wear-resistant carbide handles abrasive stone so the markers last through seasons.
Slate Key/Leash Rack
Use a slate tile as a backing board, drill two mounting holes and several pilot holes for screw-in hooks. The three-flat shank (on larger sizes) resists chuck slip, giving clean, controlled holes for a neat wall piece.