Features
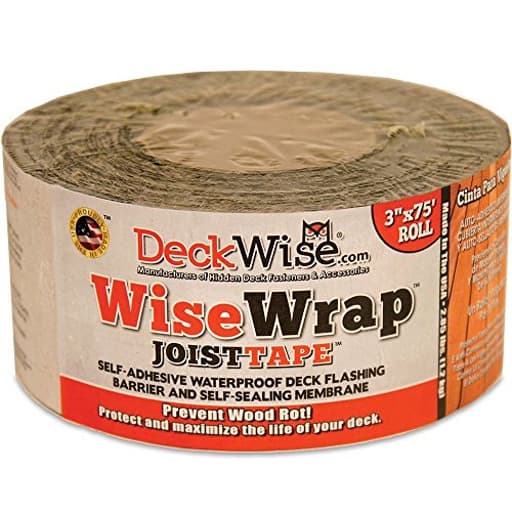
- 3" x 75' of Tape
- Malleable Polyethylene Waterproof Flashing
- Easily Apply to Deck Joists, Around Deck Support Posts and Over Ledgers
- Helps Create a Waterproof Seal That Prevents Decay
- "Super Grip" Rubberized Asphalt Adhesive
Specifications
| Color | Black |
| Size | Full Size |
| Unit Count | 1 |
Related Tools
This 3-inch x 75-foot self-adhesive deck joist flashing tape is made from malleable polyethylene with a rubberized asphalt adhesive. It is applied to joists, support posts, and ledgers to create a waterproof seal that helps prevent wood decay and is compatible with hardwood, thermal wood, PVC, pressure-treated, and composite decking.
DeckWise WiseWrap JoistTape 3" x 75' Self-Adhesive Deck Joist Flashing Tape for Hardwood, Thermal Wood, PVC, Pressure Treated, and Composite Decking Review
Why I reached for WiseWrap Joist Tape
Rebuilding or resurfacing a deck is the perfect moment to give the framing some protection. I’ve used a handful of joist tapes over the years, and this time I went with WiseWrap Joist Tape for a composite refacing project. It’s a 3-inch-wide, 75-foot roll of malleable polyethylene flashing with a rubberized asphalt adhesive. In practice, that combination gives you a flexible, tough surface on top and a tenacious, self-sealing adhesive underneath.
My goals were straightforward: shed water off the tops of joists, seal around fasteners, and provide a bit of cushion between the framing and the new boards. WiseWrap delivered on those basics with only a few quirks worth noting.
Setup and application
I prepped the framing by blowing off dust, knocking down splinters, and letting morning dew evaporate. Clean and dry wood makes a huge difference with any flashing tape.
Application technique that worked best for me:
- Pre-cut manageable lengths (I liked 6–8 feet).
- Lightly position the strip, keeping the liner on until it’s aligned.
- Peel the liner back a foot at a time, press into place, and follow with a laminate roller or a rounded block to really seat the adhesive.
- For 1.5-inch joists, center the tape on the crown and fold the extra down both sides.
The 3-inch width is practical. It covers the top and gives you enough to dress the edges. On narrower blocking or when I wanted to stretch coverage, I ripped the roll lengthwise into two strips with a sharp utility knife. The product is easy to cut and can be coaxed around corners, fastener heads, and over ledger irregularities without tearing.
One minor frustration: the release liner occasionally split instead of peeling off in one clean sheet. Creasing the tape sharply along the fold before peeling helped, as did nicking the liner with the tip of a razor to get it started. Plan on a bit of finesse here.
Adhesion and temperature performance
The rubberized asphalt adhesive is aptly named “super grip.” On clean, dry lumber it bites quickly and stays put. I applied most of the tape in mild weather (50–60°F), then tested a few pieces on a cold morning in the upper 30s. Even in the chill, it stuck well with firm pressure, though you do need to press it in with a roller or block to ensure full contact. In hotter conditions later that week, I didn’t get the stringy bleed-out some asphalt tapes show, just a slight edge tack that dusted over and disappeared.
The tape self-seals around screws driven through the decking. That’s a big plus for composite installs where hundreds of screws pierce every joist. I drove test screws, backed them out, and could see the adhesive flow to close the hole. It’s not a substitute for proper flashing at the house ledger, but for joists, beams, and post tops, the self-seal quality is exactly what you want.
Where it sticks best (and where it doesn’t)
WiseWrap excels on horizontal surfaces. On single joists, the top adhesion is excellent; the folded-down flanges along the sides will sometimes relax and lift on vertical grain, especially on rough sawn or dusty stock. I don’t mind this behavior—it still protects the top, which is where water sits longest—but if your expectation is a wrap that hugs the sides like paint, that’s not what this product does consistently.
On doubled joists (sistered members) and beams, the 3-inch width sits fully on top and looks tidy. I also used it on post tops before hardware went on, and over the beam-to-post interface to prevent water from pooling around the hardware. It conformed well and stuck tight in those spots.
Durability and weathering
After installing, the deck sat uncovered through a stretch of heat and heavy rain. The tape stayed anchored and shed water as intended. The surface film is a matte black polyethylene that takes scuffs without tearing and isn’t slippery when wet, which is useful while you’re working. I don’t expect it to see much UV because decking covers it, but even the exposed edges didn’t chalk or curl during the build window.
There’s a faint asphalt smell when you unroll it, typical of this adhesive chemistry. It dissipated quickly outdoors. Under composite boards, it also dampens minor squeaks and adds a very slight cushion, which is a nice side effect.
Compatibility and use cases
I used WiseWrap over pressure-treated framing under composite decking. It also makes sense under hardwood or thermally modified boards where fastener sealing and top-grain protection matter. For PVC and composite boards in particular, anything that helps prevent trapped moisture on joist tops is worth the time. The tape’s black finish blends in and won’t shout from the gaps between boards.
One clever bonus: it works as a shim in small doses. A couple of layers can bring a low joist up by a hair without introducing another material. It compresses slightly, so I wouldn’t build height with it, but for fine tuning, it’s handy.
Coverage and planning
A single 75-foot roll goes faster than you think. To plan:
- Add up the total linear feet of joists and beams you intend to cover.
- Divide by 75 to estimate rolls.
- Factor in offcuts, post tops, and ledgers if you’re protecting those as well.
If you’re wrapping both sides of every joist fully, you’ll consume more per joist than a simple top run. For large decks, budget accordingly; protection isn’t free, but it’s cheaper than replacing framing later.
Tips for best results
- Clean, dry wood: Blow off dust and let moisture flash off before applying.
- Warm is better: If you’re near freezing, keep rolls inside and warm them before use; a heat gun on low helps seat corners.
- Pressure matters: Use a J-roller or block to burnish the tape down—adhesives need pressure to bond well.
- Don’t skip ledger flashing: This tape is supplemental protection, not a replacement for code-required metal flashing at the house.
- Cut smart: Pre-cut lengths and lightly fold a crease to help the liner release cleanly.
- Fastener sequence: If you can, install the tape, pre-drill decking, and drive screws straight—avoid spinning screws in place which can tear any flashing.
How it compares
Rubberized asphalt tapes like WiseWrap generally offer aggressive tack and good self-seal at a fair price. Butyl-based alternatives can be cleaner in extreme heat and may adhere better to some surfaces with less edge ooze. In my use, WiseWrap struck a good balance: strong adhesion, little mess, and reliable sealing with less cost per foot than premium butyl options. If you often work in scorching sun on dark framing or need pristine edges, butyl might be worth the upgrade. For most residential decks, WiseWrap is more than capable.
Shortcomings
- Release liner can tear or split, slowing installation.
- Side adhesion on vertical faces is inconsistent; expect excellent top protection but not a perfect wrap.
- For very large decks, the material cost adds up quickly, so plan coverage strategically (tops and high-risk areas first).
None of these are deal-breakers for me, but they’re worth knowing before you start.
The bottom line
WiseWrap Joist Tape does the core job extremely well: it protects the top of joists, self-seals around fasteners, and stands up to wet, hot weather during the build. It’s easy to cut and shape, and the matte black finish is unobtrusive once the boards go down. The adhesive is confident without being messy, and while the liner can be finicky, a little technique goes a long way.
Recommendation: I recommend WiseWrap Joist Tape for anyone resurfacing or building a deck who wants to extend the life of their framing. It’s especially worthwhile under composite or PVC decking where trapped moisture is common. If you’re working in extreme heat or you insist on flawless adhesion down the sides of joists, a butyl alternative may suit you better. For most installs, though, this tape provides durable, effective protection with minimal hassle and a sensible cost-to-benefit ratio.
Project Ideas
Business
Deck Joist Flashing Installation Service
Offer a targeted service installing joist flashing on existing decks and new builds. Package options: inspection + tape retrofit, full joist-tape replacement, and annual maintenance. Charge per linear foot and upsell ledger flashing and post sealing. This is a high-value niche for homeowners wanting to extend deck life.
DIY Kit + Video Course for Homeowners
Create and sell a branded DIY kit containing pre-cut lengths of tape, gloves, a roller, and step-by-step printed instructions plus an online video series. Market via social ads and home improvement groups. Kits reduce customer friction and position you as the go-to small brand for deck preservation.
Pre-Lined Planter Manufacturing
Produce and sell premium wooden planters pre-lined with the joist tape to garden centers, nurseries, and online. Buyers get ready-to-use, rot-resistant planters. Offer B2B bulk pricing to landscapers and subscription reorders for seasonal lines to build recurring revenue.
Contractor Supply & Training Workshops
Supply small contractors, deck builders, and handymen with roll packs, branded tools, and best-practice installation guides. Run local workshops or partner with lumberyards to teach proper flashing techniques, earning reseller margins and creating loyalty with repeat buyers.
Creative
Waterproof Raised Planter Liner
Line the interior of wooden raised beds and planter boxes with the joist tape to create a long-lasting waterproof barrier. Cut and press tape into corners and over seams, overlap 2 inches, and heat-gun lightly to conform. The rubberized adhesive bonds to wood and composite, preventing soil moisture from contacting and rotting the boards while keeping the planter neat and reusable.
Outdoor Bench and Table Edge Trim
Use the malleable polyethylene tape as a durable edge trim on outdoor benches, picnic tables, or shelving. Wrap and adhere tape to seat and tabletop edges to protect exposed end grain from water and wear. You can trim the tape flush and paint or add a decorative rope or metal cap for a rustic-industrial look that prolongs furniture life.
Weatherproof Post Bases and Garden Sculptures
Build wooden garden sculptures, signs, or post-mounted planters and seal the parts that meet soil or concrete with the flashing tape. Wrap the tape around the base of posts or where wood meets concrete to block moisture wicking. The tape's flexibility lets you create custom collars and internal barriers for mixed-material art pieces.
DIY Covered Firewood Rack
Construct a simple wooden firewood rack and use the joist tape to line the bottom and the roof seams. This creates a moisture barrier for the wood that sits on the rack and protects the structure's joints from rot. Combine with slatted sides for airflow so firewood stays dry longer.