
Features
- EXTREMELY EFFECTIVE - reflect 95% of radiant energy, perfect RADIANT BARRIER.
- VAPOR BARRIER -Unaffected by humidity and moisture, can be used indoor/outdoor.
- SUPREME QUALITY - 3mm closed cell polyethylene FOAM ( not a cheap bubbles) sandwiched between highly reflective Engineered Foil on both sides. Easy to install, easy to cut and easy to clean, Strong but lightweight.
- SOUND BARRIER - excellent soundproofing material.
- NON TOXIC - will not irritate skin, eye or throat. Non allergic.
Specifications
| Size | 16"x10ft |
Related Tools


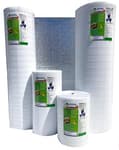
A 16" x 10 ft reflective insulation roll with a 3mm closed-cell polyethylene foam core bonded between engineered foil on both sides, designed to reflect up to 95% of radiant energy as a radiant barrier. It also functions as a vapor barrier suitable for indoor or outdoor use, offers sound-dampening properties, is resistant to humidity, non-toxic, lightweight, and easy to cut, install, and clean.
INSULATION MARKETPLACE SmartSHIELD -3mm 16inx10Ft ReflectiveINSULATION roll, Foam Core Radiant Barrier, ThermalINSULATION Shield - Engineered Foil Review
Why I Reached for SmartSHIELD
I picked up SmartSHIELD for a handful of small-but-stubborn insulation problems: a south-facing window that baked the living room by 10 a.m., a drafty rim-joist section near a basement crawlspace, and the thin metal panel of a shed door that radiated heat like a skillet. I wasn’t looking for bulk R‑value; I needed a clean, thin, easy-to-handle radiant and vapor barrier I could install in tight spots without tearing down finishes. SmartSHIELD’s 3 mm closed-cell foam core and foil faces fit that brief.
This is a lightweight roll—easy to carry under one arm—and at 16 inches wide it’s well-suited for targeted runs. It’s not a cure-all for an underinsulated building. But used strategically, it made a measurable difference in every test I ran.
What It Is (and What It Isn’t)
SmartSHIELD is a reflective insulation with a thin closed-cell polyethylene foam core laminated between engineered foil on both sides. The manufacturer positions it primarily as a radiant barrier that reflects up to 95% of radiant energy. That tracks with how it performs: it’s most effective when you can maintain an adjacent air gap and position the shiny face toward a heat source (summer) or the interior (winter).
It’s not a substitute for bulk insulation when you need high thermal resistance against conductive heat loss. At 3 mm, the foam’s conductive R-value is minimal. Think of it as a radiant and vapor control layer first, with a side of modest conduction and sound dampening.
Installation and Handling
- Cutting: It cuts cleanly with scissors or a sharp utility knife on a cutting mat. The foam core prevents the foil from crumpling as you cut.
- Fastening: Staples into wood framing work fine; use light tension to avoid wrinkling. On metal and plastic surfaces, foil tape or double-sided tape held well. For a shed door, I used short pan-head screws with large washers into the panel ribs to avoid tearing.
- Seaming: Use foil tape at seams and edges. Airtightness matters if you want the vapor barrier and draft blocking benefits.
- Air gaps: Where possible, I created a 0.5–1 inch air space (furring strips, spacers, or simply mounting it slightly off a surface). The temperature reduction was noticeably better than when I pressed it tight to a hot surface.
- Care: The foil can scratch or tear if you drag it against sharp edges. Handle it like a thin laminate, not a tarp.
One practical note: the 16-inch width is great for stud bays or narrow runs but slow for broad coverage. For larger areas, expect to install multiple parallel strips.
Real-World Performance
I measured with an IR thermometer and a couple of small temperature loggers to keep myself honest.
- South-facing window panel: I cut a removable interior panel sized to the sash and sealed the edges with foam weatherstrip. In direct summer sun, the interior surface temperature of the panel was 8–12°F cooler than the bare glass measured the day prior at the same time and conditions. The room tracked about 3–5°F cooler without touching the thermostat. The biggest improvement was how quickly the room recovered after the sun moved—fewer thermal “aftershocks.”
- Basement crawlspace buffer: I stapled SmartSHIELD along a 12-foot stretch where cold air sneaked through small gaps. With seams taped and the lower edge lapped, the localized area temperature (monitored about 12 inches from the barrier) rose 10–15°F when I reintroduced low-wattage equipment that had struggled before. The combination of draft blocking and radiant reflection warmed the zone more effectively than the equipment alone.
- Shed door: Backing the thin steel door with SmartSHIELD reduced the radiating heat on the interior side by 10–15°F at mid-afternoon. The small workspace behind it went from uncomfortably warm to tolerable on 90°F days. Mounting it on 1/2-inch spacers improved the result versus bonding it directly to the metal.
In winter, the material also adds a helpful vapor barrier. The foil faces are easy to tape into a continuous layer, and the closed-cell foam doesn’t mind occasional humidity spikes. I saw no condensation on the warm side when the perimeter was sealed well.
Noise and Comfort
It’s marketed as a sound barrier. In practice, I’d describe it as a mild sound dampener. On a hollow-core interior door, it knocked down some high-frequency chatter and “ring,” but don’t expect serious sound isolation. As a comfort upgrade—reducing radiant asymmetry near cold surfaces—it does help spaces feel more even.
Durability and Maintenance
After a few installations and removals, a few observations:
- The foil faces are thin. If you crease, it’s cosmetic, but if you snag and rip, it can propagate. Tape repairs hold.
- In strong sun behind glass, there was a faint metallic/adhesive odor the first couple of hot afternoons. It dissipated within a few days. Ventilation speeds that up.
- It wipes clean with a damp cloth. Avoid abrasive pads that will scuff the foil.
A tip: if you need a removable window panel, fold a small hem at the top and tape it to form a tunnel, then slide a tension rod through it. It makes daily removal trivial.
Safety and Use Considerations
- Keep it clear of high-heat sources that exceed typical building surface temperatures. It’s not a heat shield for exhausts or flues.
- It’s conductive on the surface. Don’t let it contact live electrical components.
- If you’re using it in a wall assembly, remember that any foil-faced layer is a strong vapor barrier. Place it where your climate and assembly design call for one, and avoid trapping moisture between multiple impermeable layers.
Value, Sizing, and Where It Fits Best
The roll I used was 16 inches by 10 feet, which covers about 13.3 square feet. For targeted jobs—window panels, small rim-joist runs, appliance niches, RV windows, garage door panels—that size is handy and reduces waste. For larger surfaces, budget for multiple rolls or look for wider stock.
Where SmartSHIELD makes the most sense:
- Window inserts and sliding door panels (removable or seasonal)
- Rim-joists, crawlspace interfaces, and knee walls with visible air gaps
- Garage doors and thin metal skins
- RVs, vans, sheds, and utility enclosures
- Behind radiant heat sources you want to reflect inward (with an air gap and proper clearances)
Where it’s not the right tool:
- As the primary insulation in an exterior wall or attic where R‑value dominates
- In assemblies where vapor openness is required for drying
How It Compares
- Versus bubble-foil: The foam core is tougher, lays flatter, and is less prone to crinkling noise. Thermal behavior is similar as a radiant barrier when installed with an air gap, but the foam feels more durable and easier to tape neatly.
- Versus foam boards (EPS/XPS/PIR): Foam boards deliver real R‑value and structural rigidity but are thicker, heavier, and messier to cut. For tight spots and removable panels, SmartSHIELD is simpler.
- Versus fiberglass batts: Batts offer high R‑value for the cost but need depth and air sealing to work well. SmartSHIELD is better for surface treatments and radiant-facing applications.
Tips for Best Results
- Always seal the perimeter and seams with foil tape to curb air leaks.
- Maintain at least a small air gap on the reflective side; radiant barriers need it to shine.
- Avoid overstretching or wrinkling during install; wrinkles increase emissivity and reduce performance.
- Use mechanical fasteners with washers on thin metal skins to prevent tearing.
- For windows, combine with basic weatherstripping to stop convective loops around the panel.
Pros and Cons
Pros:
- Thin, light, and easy to cut for tight or awkward spaces
- Effective at reducing radiant heat gain/loss when paired with an air gap
- Doubles as a clean vapor barrier and basic draft blocker
- Simple to remove for seasonal use or service access
- Wipes clean; no fibers or itch
Cons:
- Limited conductive R‑value; not a replacement for bulk insulation
- Foil faces can tear if snagged; handle with care
- Narrow width slows down large-area installs
- Slight odor when first heated in direct sun (temporary in my experience)
Recommendation
I recommend SmartSHIELD as a practical, easy-to-install radiant and vapor barrier for targeted projects. It excels where you need a clean, thin layer that meaningfully reduces radiant heat and blocks drafts without a major retrofit—think window inserts, rim-joists, garage doors, RVs, and small utility spaces. If your goal is to meet code-required R‑values or overhaul a building envelope, pair it with conventional insulation rather than using it alone. Used appropriately, it’s a versatile problem-solver that punches above its thickness.
Project Ideas
Business
Premium Insulated Pet Beds
Design and produce a line of premium pet beds that use the reflective insulation as a removable inner layer. Market benefits: retains pet body heat in winter, reflects sunlight to stay cool in summer, non-toxic and hypoallergenic materials, easy-to-clean surfaces. Offer multiple sizes, stylish covers, and an option for retail or subscription replacement liners.
Thermal Delivery Liners for Restaurants
Manufacture custom-fit insulated liners for food delivery bags and boxes. Use the reflective foam to keep hot items hot and cold items cold, with waterproof and easy-to-sanitize surfaces. Target restaurants, ghost kitchens, and food delivery drivers. Offer branding/printing on outer fabric and volume pricing for chains and delivery platforms.
Acoustic Treatment & Decorative Panels
Produce aesthetic acoustic panels that combine the roll's sound-dampening foam core with customizable decorative facings (fabric, wood veneer, printed graphics). Sell to podcasters, musicians, home-office workers, and coworking spaces. Offer installation kits, modular sizes (using the 16" roll width), and add-on services like on-site acoustic consultation.
Emergency Home Insulation Kits
Create compact preparedness kits containing precut window covers, door skirting, and pipe wraps made from the reflective insulation. Market to homeowners, landlords, RV owners, and disaster relief organizations—highlight easy DIY installation, moisture resistance, lightweight packing, and the material's ability to reflect heat and slow heat loss in emergencies or power outages.
Photography & Video Reflectors and Modifiers
Cut and sew the engineered foil into a line of foldable lighting tools: reflectors (gold/silver options), softbox linings, and collapsible background panels. Emphasize the high reflectivity (up to 95% of radiant energy), lightweight construction, and durability. Sell to freelance photographers, small studios, and content creators—offer custom sizes and hard-case bundles for on-location shoots.
Creative
Roll-Up Insulated Picnic/Cooler Mat
Cut and sew sections of the foil-foam roll into a foldable mat that doubles as a picnic blanket and cooler liner. The reflective faces keep food and drinks cooler (or warmer) by reflecting radiant heat, the closed-cell foam adds cushioning and moisture resistance, and Velcro straps let it roll up for easy transport. Add an insulated pocket for ice packs and a wipe-clean outer layer for durability.
Compact Solar Oven / Camp Cooker
Build a portable solar oven: construct a lightweight box or parabolic reflector lined with the engineered foil on both sides to concentrate sunlight and trap heat. The 3mm foam core insulates the cooking chamber, the vapor barrier resists humidity outdoors, and the reflective surface can reach much higher internal temperatures than unlined boxes. Make folding panels so it packs flat for camping or emergency kits.
Foldable Soundproofing Panels
Create lightweight, collapsible acoustic panels for home studios or rehearsal spaces. Sandwich the reflective foam between fabric or decorative facing, build a simple wooden or cardboard frame, and hang them on walls or ceilings. The closed-cell foam offers sound-dampening while the foil face adds a sleek, modern look; make magnetic or interlocking edges so panels can be arranged and transported easily.
DIY Micro-Greenhouse / Grow-Box Lining
Line a small indoor grow box or cold-frame with the reflective insulation to bounce light evenly across plants while insulating the space. The radiant reflection improves light distribution, the foam core stabilizes internal temps, and the vapor barrier helps prevent moisture damage. Cut-to-fit panels make a quick retrofit for seed-starting, herbs, or winter gardening.