
Features
- Professionally fix your drywall with our precisely cut drywall panel designed for multiple applications.
- Moisture resistant drywall - Actual Size 12”x12”x0.5"
- Easy to Install: Superior score and snap for cleaner edge and faster install.
- Can be used for tile substrate in dry locations.
- Made in USA - 100% Satisfaction Guarantee.
- Box Content: (2 Pack) 12”x12”x0.5" Drywall Panel
Specifications
| Color | Green |
| Size | 12 x 12 inches |
| Unit Count | 1 |
Related Tools
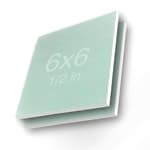

This 12" x 12" x 1/2" moisture‑resistant drywall repair panel is designed for patching and repairing interior drywall. It features a score‑and‑snap edge for cleaner cuts and faster installation and can be used as a tile substrate in dry locations. Pack contains two panels and the product is made in the USA.
Denex Drywall Repair Panel - 12"x12"x1/2" - (2 Pack) - Moisture Resistant Review
A handy fix for mid-sized drywall damage
Two recent repairs pushed me to try the Denex repair panels: a knee-sized hole in a hallway and an 8-by-10-inch ceiling patch after a light move. I didn’t want to wrestle a full 4x8 sheet for either job, so a pair of 12-by-12-inch, 1/2-inch panels was the right compromise. These moisture‑resistant, green-faced panels behaved like standard drywall where it counts—cutting, fastening, and finishing—while adding a small margin of protection in humid spaces.
Build and materials
Each panel is a true 12" x 12" at 1/2" thickness with a moisture‑resistant facing. The core is consistent and not overly crumbly, and the paper face adheres tightly—important when you’re scoring, snapping, and fastening near edges. There’s no tapered edge on these squares (most small panels won’t have one), so plan on a bit more feathering with joint compound to hide seams.
The green moisture‑resistant facing isn’t a free ticket to wet areas. It’s fine for humid rooms and for use as a tile substrate in dry locations, but I wouldn’t use it inside a shower, behind a tub surround, or anywhere that calls for cement board or a true wet‑area solution.
Cutting and handling
The score‑and‑snap action is clean. With a sharp utility knife and a decent straightedge, I scored once or twice and the board snapped predictably with minimal edge fuzz. The back paper cut easily to free the piece. I also cut a small notch around an existing cable plate; the paper didn’t tear unpredictably, which is a good sign of face integrity.
One minor note: expect a bit of gypsum dust in the packaging. It’s not unusual for drywall, but open it where you can vacuum easily.
Installation experience
On the hallway patch, I squared up the damaged opening to about 9 by 9 inches. To support the panel, I used two 1x2 cleats that spanned the opening and grabbed the surrounding drywall with 1-1/4-inch coarse-thread screws. The panel landed flush with the existing wall (most interior walls are 1/2 inch, but check yours—garages and some ceilings can be 5/8 inch).
Fastening was drama-free. The paper didn’t blow out when I set screws about 3/8 inch from the edge; the core held well with a slight dimple, and the screws buried just below the surface without tearing the face. On the ceiling patch, I did the same cleat method and added two perimeter screws into a nearby joist. Both patches felt solid once fastened.
Because there’s no factory taper, joint treatment matters. I used an alkali-resistant mesh tape on the ceiling and paper tape on the wall to compare. Both worked, but paper with a setting-type compound (I used a 20-minute “hot mud”) gave me the cleanest transition. Hot mud is less prone to shrinkage for the first fill, which helps when you’re spanning a butt joint. I feathered the final coats out to about 12–14 inches. After sanding, priming with PVA primer, and two coats of wall paint, the patches disappeared.
Moisture resistance and tile use
The moisture‑resistant facing adds a bit of peace of mind in entryways, laundry rooms, or half baths. I wouldn’t rely on it to fight chronic leaks, but it holds up against occasional dampness better than standard white-faced drywall. To test the “tile substrate in dry locations” claim, I set a few leftover ceramic tiles on a scrap piece with premixed mastic. Bond felt normal, and the substrate stayed true—exactly what I’d want for a small backsplash or a do-over after removing a wall tile soap dish. Just remember: dry locations only; for wet areas, cement board or fiber cement is the safer choice.
Finish quality
The face paper takes primer and paint evenly. After finishing, my wall patch blended seamlessly with the existing surface. On the ceiling, texture is always the real test; I used a light orange-peel spray and it matched well because the base was flat and the joints didn’t telegraph. With no tapered edges, you do have to commit to wider feathering than you might on factory edges, but that’s expected with square-cut patches.
Value and convenience
Per square foot, these panels cost more than buying a full sheet. But convenience matters: they’re lightweight, easy to store, and quick to deploy for common repairs. The two‑pack is practical—one panel covered my wall patch, the other took care of the ceiling. If you routinely do small repairs or keep a service kit in the truck, not having to manage a big sheet pays for itself in time.
If you’re doing a larger repair or multiple rooms, a full sheet (or half sheet) makes more financial sense. For small to medium holes, this two‑pack hits the sweet spot.
Limitations and fit considerations
- Thickness: These are 1/2 inch. If your surface is 5/8 inch (typical for some ceilings or attached garage walls with a fire rating), you’ll need 5/8-inch board or shims.
- Edge profile: No tapered edges, so expect wider feathering.
- Not for wet areas: Moisture‑resistant doesn’t equal waterproof. Avoid showers and tub surrounds.
- Patch size: 12x12 limits you to roughly a foot-wide area; larger damage calls for a bigger piece or a different product.
Tips for a cleaner patch
- Square the hole: Irregular cuts are harder to tape cleanly. Use a level or a drywall square to cut a neat opening that matches the panel.
- Back it up: Install wood cleats or a drywall repair backing before you set the patch to prevent movement and cracks.
- Use setting compound first: Start with a 20- or 45-minute setting-type joint compound for the first coat, then switch to a lightweight ready-mix for finishing.
- Paper tape on butt seams: Paper plus hot mud often produces fewer hairline cracks than mesh for square, untapered joints.
- Feather wide: Plan on a final feather at least 12 inches out to hide the lack of a factory taper.
- Prime before paint: A PVA primer helps unify porosity between the new patch and existing wall so color and sheen match.
Who it’s for
- Homeowners managing occasional repairs—kids, pets, movers, and doorstop misses.
- DIYers who value quick, predictable results without buying and storing full sheets.
- Pros who want a compact option in the van for small service calls, thermostat moves, and punch lists.
The bottom line
The Denex repair panels do what they’re supposed to do: they cut cleanly, fasten securely, and finish like standard drywall while offering a little extra moisture insurance in humid spaces. The 12x12 format is genuinely useful for common hole sizes, and the two‑pack keeps costs sensible for a couple of targeted patches. You’ll still need good taping and feathering technique because there’s no tapered edge, but that’s an inherent tradeoff with square patch pieces, not a fault of the product.
Recommendation: I recommend these panels for small to medium interior repairs where 1/2-inch drywall is appropriate, especially in humid but not wet locations. They’re convenient, consistent, and easy to work with. If you’re tackling larger sections, need 5/8-inch Type X for fire-rated assemblies, or are working in wet areas, choose the appropriate material instead. For everyday wall and ceiling patches, though, this two‑pack earns a spot on the shelf.
Project Ideas
Business
Ready‑Made Art Tile Sets
Produce and sell themed 12x12 tile art sets (seasonal, botanical, geometric) at craft fairs, boutiques, or online. Market them as easy‑install wall accents — lightweight, moisture‑resistant, and made in USA — and offer custom color/pattern commissions.
Portable Finish Sample Kits for Contractors
Assemble compact sample boards demonstrating paints, textures, stains, and trim details on the 12x12 panels and sell to painters, remodelers, or interior designers. Include labels and care instructions; market as a professional sales tool for client consultations and trade shows.
DIY Drywall Repair Kits + Video Tutorials
Bundle a repair panel with adhesive, mesh tape, basic joint compound, sandpaper, and a step‑by‑step video/course teaching quick patch techniques. Sell kits online or at local hardware stores and upsell hands‑on repair workshops or on‑call repair services.
Etsy/Homeshop Line: Coasters & Plaques
Produce a line of sealed epoxy coasters, trivets, and wall plaques made from cut and finished 12x12 panels. Position products as affordable, handmade home goods; use attractive packaging and social media advertising to reach gift‑shoppers and home decor buyers.
Educational Workshops & Pop‑Up Classes
Host paid classes teaching both practical drywall repair and creative upcycling (mosaic panels, sample boards, epoxy coasters). Sell the panels and starter materials at the event and build repeat customers by offering follow‑up advanced sessions or subscription craft kits.
Creative
Mini Mixed‑Media Tile Art
Use the 12x12 panels as individual ‘tiles’ for small mixed‑media art. Paint or apply texture paste, collage paper or fabric, then seal with varnish or epoxy for durability. The moisture‑resistant green core and score‑and‑snap edge make clean trims and mounting easy — combine several panels into a grid for a custom gallery wall.
Epoxy Coasters & Trivets
Score and snap the panel into coaster‑ or trivet‑sized pieces, prime and coat with clear epoxy resin to create hard, water‑resistant surfaces. Embed pigments, metallic leaf, or dried botanicals before the pour. Finish edges with sanding and a sealed trim for a professional gift line.
Fabric‑Covered Bulletin/Pin Boards
Stretch decorative fabric over the 12x12 panel and glue for instant small bulletin boards. Add grommets for hanging or mount in a wooden frame. These are lightweight, low‑cost craft fair items and make attractive organization pieces for offices or craft rooms.
Sample & Demo Boards for Finishes
Create textured finish samples (veneer, plaster, paint techniques, tiles) on individual panels. The size is perfect for presenting different colors, textures, or small tile applications to clients or for your own reference wall in the studio.
Small Mosaic or Tile Substrate Panels
Use the panel as a tile substrate in dry locations to make decorative mosaic pieces, backsplashes, or faux‑tile accent panels. Thinset small tiles or glass pieces onto the panel, grout, and edge with trim — ideal for bathroom accent art (not for wet zones) and statement pieces.