
Features
- Add instant curb appeal to your home in just 4 hours
- For use on exterior or interior doors
- Ideal for painted steel, aluminum and wood, the standard materials of most front and interior doors
- Simple, 3-step application and quick-dry formula allows you to paint and close your door in the same day
- Pairs well with Antique Brass, Satin Nickel, and Polished Brass door hardware
Specifications
| Color | English Oak |
| Size | 16 Ounce (Pack of 1) |
| Unit Count | 1 |
Related Tools
A 16-ounce paint kit that creates an English Oak wood-look finish for front and interior doors. It is formulated for painted steel, aluminum, and wood doors and uses a simple three-step application with a quick-dry formula so the door can be painted and closed the same day; compatible with antique brass, satin nickel, and polished brass hardware.
Giani Wood Look Paint Kit for Front & Interior Doors Review
My front door started life as a nondescript painted steel slab—sturdy, weather-tight, and absolutely lacking character. I wanted the warmth of wood without committing to a full replacement or the upkeep of real stain on a constantly sunbaked surface. That’s what pushed me to try the Wood Look kit in English Oak. I hoped for “convincing from the curb.” What I got was a surprisingly believable woodgrain finish that passed from 10 feet, then kept holding up as I leaned in for a closer look.
What the kit is (and who it’s for)
This is a paint system designed to transform painted steel, aluminum, or wood doors—front or interior—into a wood-look finish in a single day. It’s a straightforward three-step process: a base coat, a pigmented wood-tone “grain” coat, and a clear protective finish. Dry times are quick enough that you can keep your home secure overnight without leaving the door propped open.
It’s a great fit if:
- Your door is sound but bland (or an unfortunate color from a previous owner).
- You want a wood look without stripping or replacing the door.
- You’re comfortable with careful masking and working methodically for a few hours.
What’s in the box and setup
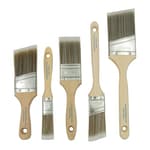
The kit includes the coatings you need and an applicator mitt for the graining step. You’ll still want common prep items on hand: cleaner/degreaser, a scuff pad or fine sandpaper, a couple of quality brushes (including a sash brush for recessed profiles), and painter’s tape. A small foam brush helps reach tight corners.
Prep matters. I cleaned thoroughly, deglossed lightly, and masked hardware and weatherstripping. For a front door with panels, I taped off to work vertical sections first, then horizontals, which helps maintain a believable grain direction.
Application: three steps, one patient afternoon
1) Base coat
The base is opaque and levels well. I brushed recessed panel areas first, then rolled the flats. It covered the previous paint in one pass, though I did a second thin coat for uniformity. On a hot day, the base was dry to the touch in around 30–45 minutes per coat. Key tip: don’t lay it on heavy—thin, even passes reduce the risk of tape lifting later.
2) Grain coat
This is where the magic happens. The pigmented coat is translucent, which lets you pull convincing “planks” out of the base. The included mitt lays color quickly and creates soft, organic striations. I found the best results with this rhythm: mitt to distribute, then a dry, soft brush to straighten and refine the grain while it’s still open. On the recessed profiles, I skipped the mitt and used a small brush to keep the direction consistent. I did two light graining passes for depth instead of one heavy coat; the second pass is where the look really came together.
3) Clear coat
The sealer locks everything in and adds a subtle sheen typical of a finished wood door. It dries quickly and doesn’t amber excessively over the English Oak tone. One even coat was sufficient on my interior face; I used two on the exterior face for added resilience.
With moving efficiently, I completed a full exterior face plus the interior side the same day, with time to rehang and latch the door by evening.
Finish quality and realism
English Oak lands in that versatile, mid-tone sweet spot—not so light that it looks washed out, not so dark that it reads painted. The grain reads as oak-like without exaggerated faux patterns. The effect is most convincing on the broad flats of the door; it’s trickier in the panel recesses, but careful direction control makes those areas blend. Up close, it’s a painted faux finish; from conversational distance and definitely from the curb, it looks like stained wood.
Hardware pairing is flexible. I mocked up satin nickel and antique brass against the finish; both worked. The warmth in the tone also plays nicely with polished brass if that’s your style.
Dry time and workflow
This kit favors momentum. On a warm, low-humidity day, I moved from base to grain to topcoat with 30–60 minutes between steps. That quick turnaround is the difference between a project you start and a project you finish. If you’re working in cooler temps, build in longer windows and resist the urge to overwork coats as they tack—touch-ups are far easier than repairing lift or drag marks.
Durability and maintenance
Short-term durability has been solid. The clear coat resists casual scuffs and the finish wipes clean without smearing. I let the door cure for a couple of days before reinstalling a wreath and avoided strong magnets or tape for a week. For a high-exposure entry, two clear coats are smart insurance.
A note on heat and odor: the coatings are low-odor during application, but I did notice a faint varnish/plastic smell the first few afternoons when direct sun heated the slab. It dissipated as the finish fully cured. If your door bakes behind a storm door, give the finish extra cure time before closing things up, or crack the storm door for a few days to vent heat build-up.
Where it shines
- Believable wood tone without stripping: It delivers the warm, wood-like appearance on steel, aluminum, or painted wood without solvent-heavy stripping or sanding to bare substrate.
- Manageable process: The three steps are clear, repeatable, and beginner-friendly with a little patience.
- Same-day closure: The quick-dry formula remains the standout—highly practical for a front door.
Where it stumbles
- The mitt: It lays color fast, but it’s oversized and can feel clumsy in tight profiles. Mine shed a little lint until I de-linted it with painter’s tape. I ended up using the mitt for broad fields and a brush for control and cleanup passes.
- Tape lift risk: If the base coat is applied heavy or the tape is aggressive, you can lift edges when removing. Use a delicate-surface tape and pull at a shallow angle while the paint is just past tacky.
- Heat sensitivity during cure: Expect a temporary warm-plastic odor when the sun hits a newly finished door. It fades, but plan ventilation if the door gets significant afternoon heat.
Pro tips for a better result
- Scuff thoroughly and clean well; adhesion and leveling start with surface prep.
- Map grain direction before you start. Do vertical stiles, then horizontal rails, then the center panel last.
- Keep the grain coat thin and build depth with a second pass rather than trying to nail it in one.
- De-lint the mitt with painter’s tape before use; keep a soft, dry brush handy to straighten grain and feather overlaps.
- Use a small foam or sash brush in recessed profiles—don’t force the mitt into tight corners.
- Remove tape at a 45-degree angle while the paint is slightly soft to avoid bridging and tearing.
- Let the door cure longer if it sits behind a storm door or in strong sun.
Value
Against the cost and disruption of replacing a door—or the time and mess of stripping to bare wood—this kit is a cost-effective upgrade. The 16-ounce set provided plenty for a standard entry door inside and out with careful application, and the finish looks like a much more expensive change than it is. Your sweat equity is the main investment, but the learning curve is gentle.
Final thoughts and recommendation
The Wood Look kit does exactly what it promises: it turns a flat, painted door into a warm, wood-look surface in an afternoon, with a process that’s accessible to most DIYers. The finish quality is convincing at everyday viewing distances, it pairs well with common hardware finishes, and the quick-dry system makes it practical for an exterior door you actually use. The mitt and tape management introduce some quirks, and you should plan for extra cure time in high heat, but those are manageable with a little care.
I recommend this tool for anyone looking to add curb appeal or character without replacing a door. It rewards methodical prep and light-handed technique with a result that looks pricier than it is—and it sends you to bed the same night with your front door safely closed.
Project Ideas
Business
Same-Day Door Refresh Service
Offer a mobile service that refinishes front and interior doors using the quick-dry kit. Market to realtors, Airbnb hosts, and landlords as an affordable, fast curb-appeal upgrade. Price per door with package discounts (e.g., 3 doors, whole-house). Include optional hardware polishing or replacements to increase revenue.
DIY Kit + On-Demand Video Course
Package the paint kit with a small toolkit (graining tool, brushes, masking materials) and sell it with access to a premium video course (beginner to advanced). Upsell one-on-one virtual coaching or troubleshooting calls. Sell online through a simple e-commerce site and promote via before/after social media ads.
In-Store Workshops & Demonstrations
Partner with hardware stores or home centers to run paid weekend workshops showing the three-step application and tips for realistic grain. Charge per seat; sell kits at the event. Use workshops to capture leads for door-refinishing jobs and to upsell hardware upgrades.
Realtor & Stager Partnership Program
Create a referral program for real estate agents and home stagers: offer discounted door refinishes or staging bundles that include a freshly finished entry door and hardware polish. Provide quick-turn calendars and a portfolio of before/after photos to demonstrate ROI on listings.
Commercial & HOA Maintenance Contracts
Target property managers and homeowner associations with a subscription-style maintenance plan: scheduled touch-ups, seasonal refreshes, and quick repairs for common wear on doors. Offer tiered plans (basic touch-up, premium hardware replacement, full refinishes) for recurring revenue and predictable cash flow.
Creative
Mini Barn-Door Accent
Use the kit to fake an English Oak barn-door look on closet or pantry doors and cabinet fronts. Prep with degreaser, apply the three-step system, then add faux metal strap hinges or decorative hardware for a farmhouse vibe. Try distressing edges lightly with sandpaper after curing to make the finish look aged.
Quick Curb Appeal Front-Door Makeover
Transform a bland exterior door in a single day: clean and sand, apply the base coat from the kit, use the included glaze and wood-grain tool for the English Oak effect, then seal. Finish with compatible brass or nickel hardware to complete the look. Ideal for sellers or renters who need instant curb appeal before photos or open houses.
Two-Tone Raised-Panel Entry
Highlight door panels by painting recessed panels in English Oak and leaving raised portions a complementary solid color (e.g., deep charcoal or sage). This creates a custom, designer look without replacing the door. Use painter's tape and precise masking to keep crisp lines between the faux-wood panels and painted areas.
Upcycled Furniture Facelift
Apply the wood-look finish to drawer fronts, a dresser top, or a console table to make inexpensive furniture read as solid oak. Combine with new hardware (antique brass or satin nickel) and light distressing for a high-end reclaimed look. Great for thrift-store flips or staging pieces.
Faux Wood-Plank Door Paneling
Create the illusion of vertical wood planks on a flat steel or fiberglass door by masking evenly spaced 'planks' with tape, applying the English Oak finish across the whole surface, then removing tape for visible seams. Add subtle shadow glazing between planks for depth and realism.