Features
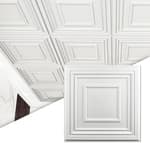
- INSTALLATION-Easily lay into a standard 15/16" T-bar drop ceiling grid system or glued over any flat substrates
- MATERIAL ADVANTAGE: It's made out of lightweight PVC, flexible and will not crack, water and corrosion resistant for exceptional durability, safe and fully recycable
- PACKING QUANTITY: It contains 12 tiles of sized 24"x24", covering 48 sq.ft
- CONSTRUCTION: It's thin and lightweight, pretty easy to work with, paintable, cut with a snip, scissors or utility knife for quick and easy installation,
- MULTIPURPOSE: These elegant stylish 3D designs are excellent no matter for remodeling or new construction to ceiling or wall decoration
Specifications
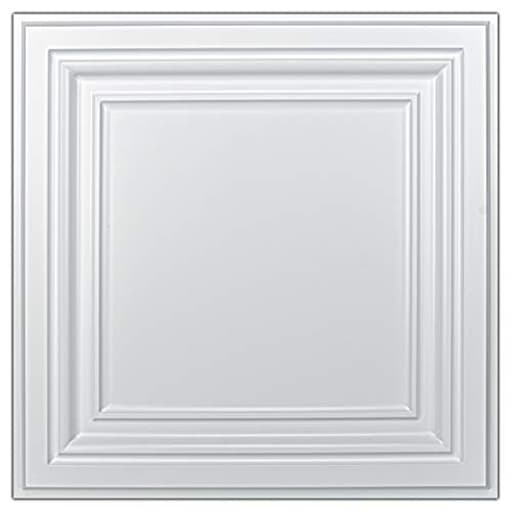
| Color | White 1 |
| Size | 24"x24" |
| Unit Count | 12 |
Related Tools
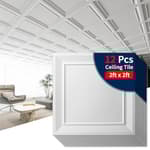

These 24" x 24" PVC ceiling tiles are sold as a 12-pack covering 48 sq ft and can be laid into a standard 15/16" T-bar drop ceiling grid or glued over flat substrates. Made of lightweight, flexible, water- and corrosion-resistant PVC, they are paintable, cuttable with snips or a utility knife, and suitable for ceiling or wall decoration.
Art3d PVC Ceiling Tiles, 2'x2' Plastic Sheet in White Review
Why I reached for these tiles
I’ve been on a streak of ceiling refreshes lately, and the Art3d PVC tiles ended up being the cleanest, least-mess route I tried for both a tired drop ceiling and a stubborn popcorn ceiling. They’re 24-by-24-inch, thin, and very light, which makes them easy to handle overhead. More importantly, they’re impervious to moisture and won’t crumble like mineral fiber. That combination—lightweight, water-resistant, and reasonably stylish—makes them a practical upgrade in basements, bathrooms, and anywhere a ceiling has seen better days.
What stood out during installation
These tiles are designed for two modes: drop-in on a standard 15/16-inch T-bar grid, or glue-up on a flat substrate. I did both across two rooms, and the experience couldn’t have been more different.
Drop ceiling: The tiles sit neatly in the grid with minimal fuss. Because they’re flexible, I could bow them slightly to slip past light fixtures and HVAC covers. The pattern alignment stayed consistent across the grid, which goes a long way toward a professional look. I highly recommend using hold-down clips on select rows if you have strong supply vents; the tiles are featherweight and can lift in a pressure breeze. Starting from the center of the room with snapped chalk lines kept the pattern square and emphasized the symmetry of the 3D relief.
Glue-up: Over a painted popcorn ceiling, the glue-up took more prep. I locked down any loose texture, skimmed a couple of trouble spots, and primed with a bonding primer designed for plastics and glossy surfaces. For adhesive, a high-tack FRP/construction adhesive (applied in a perimeter bead and a big “X”) gave me instant grab without bracing. If your substrate is truly flat, these tiles lie nicely; if it’s wavy, expect to caulk seams or add a border to hide minor gaps. I finished with a small bead of paintable acrylic-latex caulk in the seams and corners, then painted the whole ceiling a single color to unify the look.
Cutting and the reality of the 3D pattern
If you only cut straight edges, you can get by with heavy-duty shears or a sharp pair of tin snips. The moment you need to navigate the raised ridges or achieve a flawless edge near a vent, a different approach helps:
Tools that worked: Tin snips for quick straight cuts; an oscillating multi-tool or a fine-tooth laminate blade in a track of scrap wood for cleaner edges along raised details. A utility knife can score through flat sections, but it will skate on the glossy PVC unless you rough the surface first.
Technique: Support the tile fully on a sacrificial board and cut slowly to avoid chatter. Lightly warming the cut line with a hair dryer softened the PVC just enough for smoother, less ragged edges—don’t overdo it or you’ll warp the panel. A quick pass with a fine sanding sponge deburred sharp spots.
Edges: Because these tiles have depth, a cut edge can expose hollow channels. On glue-ups, a thin line of caulk hides that cleanly. In a grid, I trimmed only the lower relief so the “face” of the pattern still lands on the grid flange; that kept the border tiles looking finished without resorting to flat fillers.
The finish and how it holds up
Out of the box, the tiles have a bright white, satin finish. They clean easily with a damp cloth—dust, fingerprints, and even stray caulk wiped right off for me. The PVC doesn’t absorb stains and doesn’t shed dust like fiberboard tiles. In a bathroom, the moisture resistance is a clear win; I’ve had no warping, sagging, or discoloration.
If you plan to paint, prep matters. I degreased with a mild detergent, scuff-sanded lightly, and primed with a bonding primer intended for plastics. A high-quality 100% acrylic topcoat laid down nicely, and bumping the surface later didn’t flake the paint. Skip the primer and you risk easy scuffs or peeling.
One note on acoustics: PVC is reflective. You’ll gain brightness from the white surface but lose some sound absorption compared to mineral fiber. In my basement, I added lightweight acoustic pads above a few tiles to tame echo without sacrificing the clean look.
Aesthetics and use cases
The appeal here is the geometric 3D profile. On a drop grid, the pattern hides the utilitarian grid lines and makes the ceiling feel intentional rather than “afterthought.” In a living space, that matters. On a glue-up, the relief disguises small imperfections in the substrate and, once painted, reads as a single, crisp plane.
This design also plays nicely with trims: crown molding along the perimeter makes glue-ups look built-in, while in a grid the shadow lines add depth you rarely get with standard tiles.
Practical limitations to know before you start
Cutting complexity: The raised pattern demands attention. You can absolutely DIY it, but be prepared to use the right tools and take your time on edges that will remain visible.
Rigidity: The flexibility is great for handling, but it means the tiles can telegraph substrate irregularities. On a glue-up, good prep is non-negotiable.
Edge treatment: Hollow channels at cut edges require caulk or a border trim for a finished look, especially on glue-ups.
Code and fire considerations: These are PVC; if you’re installing in a commercial space or near heat sources, check local code and the product’s fire test data. For residential work away from heat, they’ve been fine in my projects.
Sound: Don’t expect acoustic performance. If you need sound control, plan for supplemental measures.
Packaging and handling: The tiles themselves showed up clean and flat for me, but I learned to store the boxes flat and not stack heavy items on top to avoid warping.
Tips from the bench
Plan your center: Snap perpendicular chalk lines and dry-fit the first nine tiles around the crosshair. That locks in square alignment for the whole ceiling.
Test your adhesive: On glue-ups, do a small bond test on scrap or an offcut. Not all construction adhesives bite glossy PVC equally.
Use clips strategically: In a grid, place hold-down clips near HVAC vents and along the room perimeter to keep everything tight and even.
Hide the cuts: Reserve full tiles for the most visible sightlines and push cuts to the walls and behind fixtures.
Paint smart: If painting, use a bonding primer for plastics. Roll thin coats to avoid pooling in recesses, which can blunt the crisp relief.
Value and who it’s for
Per square foot, these aren’t bargain-bin tiles, but they undercut many decorative alternatives and save substantially on labor compared to scraping texture or replacing sagging mineral fiber. The durability and washability are real upsides in damp or messy environments. If you’re chasing acoustic dampening or absolute precision at every cut without trim, expect to put in more effort or choose a different material.
For DIYers, the learning curve is manageable, and the weight makes solo installs realistic. For pros, the speed on a drop grid is hard to beat, especially in basements, retail refreshes, and bathrooms where moisture resistance matters.
Final recommendation
I recommend the Art3d PVC tiles for anyone upgrading a drop ceiling or covering a dated ceiling where a glue-up makes sense. They’re light, water-resistant, easy to keep clean, and the 3D profile elevates the room beyond a plain grid. The trade-offs are fair: cutting requires care, edges need finishing, and you won’t get acoustic absorption. If you plan your layout, use the right cutting tools, and select a proper adhesive and primer for glue-ups, you’ll end up with a ceiling that looks sharper than its price suggests and holds up well in the spaces where typical tiles struggle.
Project Ideas
Business
Custom Ceiling Tile Painting Service
Offer a service painting and customizing PVC ceiling tiles for commercial and residential drop ceilings—custom murals, faux metals, patinas, or brand logos for cafes and boutiques. Market to contractors, interior designers, and small businesses; provide samples and small-run custom packs (e.g., 12–48 sq ft) with installation options.
Ready-Made Decorative Panels for Etsy/Shop
Produce and sell finished wall panels, headboards, and decorative tiles on marketplaces. Use the lightweight, cuttable PVC to make modular products that ship economically; create themed collections (farmhouse, art deco, boho) and offer matching corner/trim pieces and painted finishes as upsells.
Event & Staging Rental Packages
Rent or stage removable decorative ceilings and wall panels for pop-ups, photoshoots, weddings, and real-estate staging. Create easy-install kits sized for standard T-bar grids or self-supporting frames; charge per event with delivery/installation and offer quick-change painted finishes to suit client branding.
DIY Kits + Workshops
Sell do-it-yourself tile kits (tiles, paint, templates, adhesive) and run hands-on workshops teaching techniques like faux-finish painting and pattern cutting. Target maker spaces, craft stores, and community centers—kits are low-cost to produce, simple to package, and open recurring revenue through repeat classes and seasonal designs.
Creative
Faux Tin Accent Wall
Arrange and glue the 24"x24" PVC tiles in a repeating pattern to create an accent wall that looks like pressed tin. Cut tiles with a utility knife to fit edges and corners, prime and paint with metallic spray or rub-through antique finishes for a high-end vintage look that resists moisture and is easy to clean.
Backlit Ceiling Panels
Cut decorative patterns or geometric windows into tiles and mount them over shallow LED lightboxes or a drop-ceiling grid with LED strips above for a soft, diffused glow. The lightweight PVC diffuses light nicely, is safe in damp environments, and can be painted translucent colors for mood lighting in a bar, studio, or home theater.
Padded Headboard/Wall Art
Create a modular headboard by mounting several tiles to a plywood backing, adding foam or fabric over selected tiles for a mixed-texture look. Paint surrounding tiles, attach to bed wall with cleats or heavy-duty Velcro for a removable, washable decorative focal that fits any bedroom size.
Decorative Outdoor Shower or Privacy Screen
Build a simple framed screen and attach PVC tiles to produce a water-resistant, attractive privacy panel for patios, balconies, or outdoor showers. The tiles' corrosion resistance makes them ideal outdoors; paint with exterior-grade paint and seal edges for longevity.