Features
- PRECISE SIZE - Designed for standard diameter 3.89" ventilation ducts. Overall dimensions of the vent cap are 4.13". Flange insertion depth is 1.18". Compatible with most residential and commercial HVAC ducting.
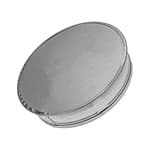
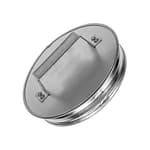
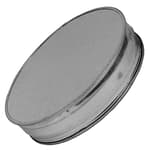
- This metal end cap is made of high quality galvanised metal, ensuring a long lifespan and resistance to corrosion. It has a diameter of 4 inches, making it the perfect size for most vent ducts.
- Installing this end cap for your dryer duct is easy and fast, so you can get your ducts up and running in no time.
- The cap is used at the end of ducting to fit over pipe fittings.
- The perfect solution to finish off your ventilation system.
Specifications
| Size | 4 Inches |
Related Tools
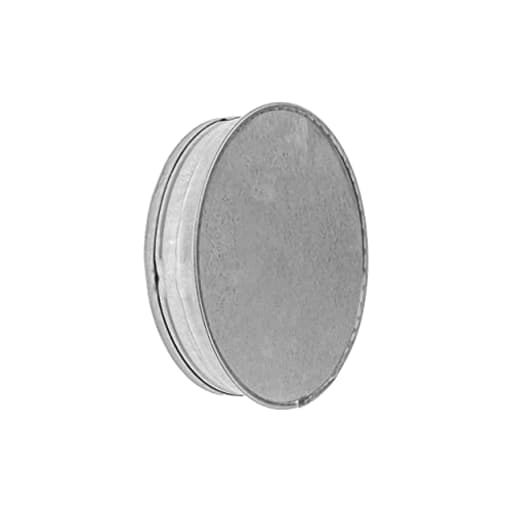
Galvanized metal end cap for 4-inch ventilation ducts, sized to fit standard 3.89" duct diameter with a 4.13" overall diameter and a 1.18" flange insertion depth. It provides a corrosion-resistant closure for dryer and HVAC ducting by fitting over the pipe end to finish and seal the ventilation run.
HVAC OV Galvanized Metal Duct End Cap - 4 Inch Fit - Available in Different Sizes to Suit Your Needs Review
Why I picked up this 4-inch galvanized end cap
I needed a straightforward way to terminate a couple of unused branch runs on a small HVAC retrofit and to close off a temporary dryer bypass I’d set up during a remodel. A simple cap is the cleanest solution—no hacky tape balls or makeshift plugs that come loose over time. This 4-inch galvanized end cap looked like the right fit for standard residential round duct, and I was curious if it would avoid the two common pitfalls I see with caps: flimsy metal that deforms as you install it, and sizing that never quite matches the nominal duct.
Fit and sizing
On paper, the spec hits the right notes: it’s designed for standard 4-inch ventilation duct, which in the real world typically measures around 3.89 inches on the outside. The cap’s overall diameter is listed at 4.13 inches, and the insertion flange is 1.18 inches deep. In practice, that translated into a snug, predictable fit over my 4-inch snap-lock pipe and an older length of rigid dryer duct. The cap slid on evenly without fighting me or wobbling. I didn’t have to resort to crimping the pipe to make it work, though I could see that being helpful on heavier-gauge spiral or on oddball metric tubing.
A couple of notes from my installs:
- On thin, older duct that had been slightly out-of-round, the cap still seated well, but I had to gently oval the duct back with hand pressure to avoid a gap on one side.
- Over semi-rigid dryer duct, it fit, but I prefer capping semi-rigid by transitioning to a short section of rigid first; you’ll get a cleaner seal and won’t crush the flex with screws.
The 1.18-inch insertion depth is what I’d call “right-sized” for a 4-inch cap: deep enough to get a reliable mechanical connection with two or three short sheet-metal screws, but not so deep that it becomes a wrestling match in tight soffits.
Build quality and materials
The galvanized steel feels substantial and holds shape under pressure. It doesn’t collapse when you apply side force to seat it, and the flange remains true after screwing it down. The coating is even, with no bare edges I could see, and the seams were clean. It’s still sheet metal, so you should wear gloves—there’s no hemmed safety edge—but it’s far from the tissue-thin caps you find in some big-box bins. After a couple of months in a damp basement mechanical room, I haven’t seen any rust bloom or discoloration.
Installation experience
This cap installs the way a good cap should: slip it over, square it, secure, and seal.
My process:
1. Dry-fit to confirm the flange seats fully.
2. Pre-drill with a 1/8-inch bit if the duct is heavy or you’re working at an awkward angle.
3. Run two or three 3/8-inch #8 sheet-metal screws spaced evenly around the circumference.
4. Seal the seam with foil HVAC tape or, for a more permanent seal, a thin smear of water-based mastic around the joint.
Tips from the field:
- If the duct end is crimped (male), you can still use this cap—it goes over the pipe. Just ensure you don’t have any severe crimps or burrs that will keep the flange from seating.
- If you’re capping a line that might see higher static pressure (e.g., a short-cycling booster fan), add a third screw for peace of mind.
- For dryer applications, avoid cloth “duct tape.” Use UL 181 foil tape or mastic for a safe, code-appropriate seal.
Total time per cap was under five minutes with a driver and tape in hand.
Airtightness and performance
A cap is only as good as its seal. Dry-fitting, I noticed minimal light gaps, which is a good start. With foil tape applied around the perimeter, leakage dropped to negligible levels on a quick smoke test. On a capped branch tied to a low static pressure system, there was no noticeable whistle or vibration. The rigidness helps here; thin caps tend to buzz when you’ve got a turbulent T upstream.
For dryer use, the cap has held fast and stayed clean. I wouldn’t use it as an exterior termination (it’s not designed for that), but for capping an interior run or temporarily taking a leg out of service, it’s ideal.
Compatibility considerations
- Standard 4-inch round: Excellent fit on typical snap-lock and rigid round duct with an approximate 3.89-inch OD.
- Semi-rigid dryer duct: Works, but I recommend transitioning to rigid for a secure, code-friendly termination.
- Spiral duct or thicker-gauge pipe: You may find the fit slightly tighter. A light crimp on the pipe end or careful dressing of the edge can help.
- Flex duct: Not directly, unless you install a starting collar or short rigid stub first.
Measure your actual duct OD if you’re working in an older home. Nominal “4-inch” can vary enough to cause a headache.
Durability and corrosion resistance
Galvanized steel is the right choice for interior HVAC and dryer runs. It shrugs off humidity and ordinary condensation, and it can handle the temperatures associated with dryer exhaust without deforming. I’ve knocked it with a driver, dragged it along a joist, and it still looks clean. The flange doesn’t warp after a few removals and re-installs, which is handy if you need to reopen a branch for testing or future expansion.
Safety and handling
Edges are reasonably finished but still sharp enough to cut. Gloves are smart, especially when you’re reaching above shoulder height. Pre-drilling can save you from the cap “walking” as you set the first screw at an angle.
Value and use cases
For finishing off a ventilation system, shutting down an unused takeoff, or temporarily closing a run during maintenance, this cap does exactly what it should. The sizing is honest, the metal is stout, and installation is quick. The payoff is a sealed, stable termination that won’t sag, buzz, or weep over time.
Common scenarios where it’s a good fit:
- Capping a branch takeoff while you balance or renovate.
- Closing an old dryer route after relocating the appliance.
- Temporarily isolating a line while you diagnose airflow issues.
- Finishing an exhaust run stub during a phased project.
What I’d like to see improved
- A hemmed safety edge would be welcome. It would add a bit of cost, but it makes handling safer—especially for DIY users.
- Including a brief sizing note on the packaging (e.g., “fits 3.89-inch OD”) would help reduce confusion for folks expecting a 4.00-inch exact slip.
- Offering the same cap with a deeper 1.5–2.0-inch flange option could be useful on high-static or insulated runs where you want extra bite.
None of these are dealbreakers; the cap already performs well in the most common residential and light commercial contexts.
Bottom line
This 4-inch galvanized end cap is the kind of simple, dependable fitting I like to keep on hand. It fits standard duct properly, the steel holds its shape, and it installs in minutes with a solid mechanical connection and clean finish. If you measure your duct and seal the joint correctly, you’ll get a durable, airtight termination that won’t require babysitting.
Recommendation: I recommend this cap for anyone needing to terminate a 4-inch round duct in HVAC or dryer applications. It combines accurate sizing, good build quality, and straightforward installation, making it a reliable choice for both pros and attentive DIYers. The only caveat is to wear gloves and confirm your duct’s actual outside diameter, especially on older or spiral pipe. With that small bit of diligence, it just works.
Project Ideas
Business
Upcycled Home Decor Line
Produce a small collection of upcycled home goods using the duct end caps (planters, candle holders, hooks). Position the line as industrial-chic decor and sell on Etsy, local craft fairs, and boutique home stores. Offer limited-edition finishes (patina, powder coat, hammered) and bundled sets for higher price points.
HVAC Finishing Kits for Contractors
Create value-added finishing kits that include the galvanized end cap, a gasket/sealant strip, self-tapping screws, and an installation card. Market to small HVAC installers and home remodelers as a faster way to finish duct terminations with a clean look. Offer bulk pricing, customization with contractor branding, and fast local delivery.
DIY Craft Kits & Tutorials
Develop beginner-friendly craft kits that include one or more duct caps plus the materials and instructions to make a planter, luminary, or desk organizer. Sell through an online shop, Amazon Handmade, or subscription-box platforms. Include video tutorials and sell add-on bundles (paint sets, succulents, LED tealights).
Maker Workshops & Pop-up Classes
Host hands-on workshops at makerspaces, community centers, or home-improvement stores teaching how to repurpose duct end caps into decor items. Charge per attendee and offer a retail option to buy extra caps on-site. Use classes to build a local customer base and cross-sell finished products or kits.
Custom-Branded Hardware Supply
Supply pre-finished or custom-stamped 4" end caps to boutique HVAC contractors, remodelers, and cabinetry shops who want a branded, finished look for exposed duct terminations. Offer services like powder-coating in standard colors, logo stamping, and pre-assembly with gaskets. Target regional contractors with samples and small-volume production runs.
Creative
Mini Succulent Planter
Turn the 4" duct end cap into an industrial-style planter for succulents or small air plants. Drill a few small drainage holes in the bottom, smooth the edges, add a layer of pebbles and cactus soil, and paint or patina the exterior for a finished look. These make great windowsill groupings, tiered centerpieces, or gifts.
Tealight Luminary
Create a warm, rustic luminary by cutting patterns around the cap or punching decorative holes, then fitting a small glass tea light holder inside. The galvanized metal will reflect light interestingly; you can also line the inside with copper leaf or heat-safe paint for a golden glow. Use several in a row for a table runner or hang them as pendant accents.
Industrial Hook & Shelf Bracket
Use the cap as the visible end of a wall-mounted hook or small shelf bracket. Attach a short length of threaded rod or wood post through the insertion depth, secure inside with epoxy or weld, and mount the flange to a board. The cap provides a finished, decorative end for coat hooks, towel holders, or small utility shelves.
Desktop Parts Organizer
Make a magnetic workstation organizer: glue a thin neodymium disc inside the cap and mount several caps to a wooden board or metal tray to hold screws, nails, drill bits and other small metal parts. Label each cap or paint them in bright colors for an attractive, practical tool bench accessory.
Steampunk Pendant Cluster
Assemble multiple 4" end caps into a clustered pendant light with exposed bulbs for an industrial-steampunk fixture. Thread lamp cord and small lamp sockets through the insertion depth, secure with grommets, and stagger the caps at different heights. Finish with antique brass or matte black spray for a cohesive look.