Features
- Headless 23-gauge design minimizes nail visibility
- Chisel point to reduce splitting of the workpiece
- Coated finish intended for interior use
- Compatible with most 23-gauge pin nailers
- Suited for finishing tasks (moldings, miter returns, small trim)
Specifications
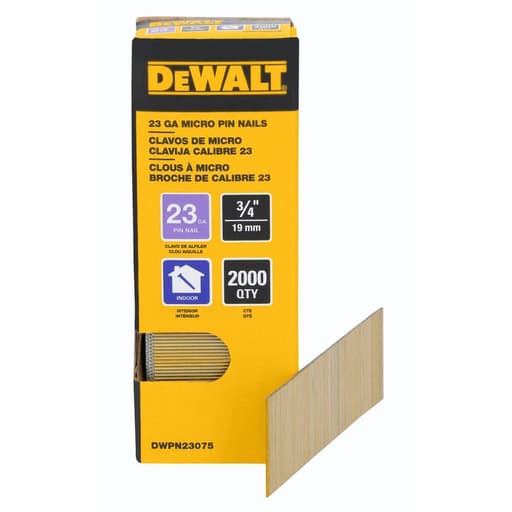
| Fastener Type / Gauge | 23 Gauge pin nail |
| Finish | Coated (interior use) |
| Head Type | Headless |
| Point Type | Chisel |
| Product Length (In) | 1-1/2 |
| Quantity | 2000 per pack |
Headless 23-gauge pin nails with a chisel point and a coated finish intended for interior finishing work. Designed for use in 23-gauge pin nailers and suitable for applications such as decorative and small moldings, miter returns, and kitchen moldings.
DeWalt Pin Nail, Chisel Point, 1-1/2 in, 23 GA, 2000 pk Review
Why these 23-gauge pins have earned a spot in my trim cart
Small moldings, delicate returns, and tight-grained hardwoods don’t tolerate much fuss. That’s where 23-gauge headless pins shine, and these DeWalt 1-1/2-inch pins have become a dependable option in my interior finishing kit. I’ve used them across a few recent projects—kitchen crown returns, cabinet applied moldings, and scribe work—where I needed temporary clamping, minimal surface disruption, and a clean finish.
What they are and why that matters
These are 23-gauge, headless, 1-1/2-inch pins with a chisel point and an interior-only coated finish. A few practical implications:
- Headless profile: The entry holes are tiny and easy to hide, even under clear finishes on light hardwoods. On painted trim, I can usually leave them alone or hit them with a quick swipe of filler if I’m being picky under raking light.
- Chisel point: This helps the pin cut and follow the grain rather than wedge it apart, reducing the chance of splitting fragile profiles.
- Coated finish: The light coating improves friction and holding power. It’s intended for interior use—these aren’t for exterior trim or wet areas.
- Length: At 1-1/2 inches, they reach through thicker returns and secure small moldings with better purchase than shorter 23-gauge pins. The trade-off is a slightly higher chance of deflection in very hard or knotty stock (more on that below).
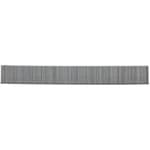
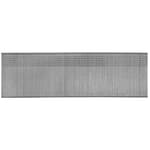
Each pack comes with 2,000 pins, collated in clean, straight strips that load easily and resist breaking in the magazine.
On-the-job performance
I ran these primarily in a pneumatic 23-gauge pinner rated for 1-1/2-inch headless pins. The strips fed consistently, and I didn’t fight misfires or tailing pins. At 85–95 PSI on poplar and primed pine, they set flush with no driver divots. In white oak and hard maple, I nudged the pressure up slightly to ensure a clean bury without overdriving. The coating seems to help with both entry and hold—pin heads didn’t polish and slip out during vibration, which I’ve seen with uncoated wire.
Visibility is where these pins earn their keep. On painted crown returns, the holes were barely detectible after a single coat of primer. On natural-finished walnut edge banding, I had to hunt for them at arm’s length; a tiny dab of burn-in stick blended them out completely. The chisel point behaved as promised on delicate profiles. I pinned a 3/8-inch ogee molding to a poplar face frame without any splits, even near miter tips.
Holding power and the “glue clamp” role
No 23-gauge headless pin should be treated as a structural fastener, and I never use them that way. I treat them as discreet, instant clamps that pair with glue. In that role, these pins are excellent. The 1-1/2-inch length provides noticeably better resistance to shear than shorter pins in thicker stock, which helps with slightly springy moldings and longer miter returns.
For example:
- Cabinet applied molding: Two or three pins per side held the molding aligned while the glue set, with no creep.
- Miter returns on stair trim: A pair of pins through the return into the rail edge kept everything tight without splitting the small piece.
- Scribe on pantry panels: I could tack right at feather-thin edges without bursting out the side.
If you need more mechanical hold, step up to 21-gauge pins or 18-gauge brads. For ultra-delicate veneer work, consider shorter 23-gauge pins to minimize the chance of a wandering tip.
Hardwood behavior and deflection
The downside of longer, very slender pins is the potential for deflection in dense woods or when you intersect grain at an angle. In hard maple, I had a couple of pins curl and just graze the surface about an inch away from the entry—easy to snip and sand, but worth noting. To minimize that:
- Angle the tool so the pin path exits away from show faces.
- Avoid shooting toward end grain in hardwoods.
- Use a sacrificial backer when tacking thin returns.
- If the grain is unpredictable, drop to a 1-1/4- or 1-inch pin or switch to a slightly heavier gauge.
With those habits, blowouts were rare for me, even in oak.
Compatibility isn’t universal—check your pinner’s max length
These pins are standard headless 23-gauge, but not every 23-gauge pinner accepts 1-1/2-inch lengths. Many cordless models top out at 1-3/8 inch, and quite a few compact pneumatics do as well. My pneumatic pinner accepts 1-1/2-inch pins without issue, but a coworker’s cordless unit wouldn’t take them simply due to the magazine’s length limit. That’s not a fault of the pins; it’s a reminder to check your tool’s specs before stocking up.
Also, a handful of pinners prefer slight-headed “micro pins” for extra holding. These are truly headless, so if your tool calls out headed variants, verify compatibility.
Surface finish and corrosion considerations
The coated finish is meant for interior work. I’ve had no staining or bleed on painted trim and no discoloration under clear finishes on walnut, maple, or oak. Still, I wouldn’t use these in high-moisture environments or on exterior doors, porch ceilings, or humid bath areas. For cedar, redwood, or anything exposed to moisture, stainless or specifically rated fasteners are the safer bet.
In tannin-rich woods like oak, I always test on a scrap when the finish schedule is fussy. So far, these pins haven’t telegraphed through waterborne or solvent finishes in my tests.
Loading, feeding, and day-to-day handling
The strips are straight and sturdy enough to survive the bottom of a tool bag. They separate cleanly in the magazine without crumbling, which helps avoid partial feeds. Over a few boxes, I had a single light strike linked to a dusty magazine rail—cleaning the track resolved it. If you run pins all day, a quick brush-out of the magazine and a drop of tool oil on pneumatics keeps everything smooth.
The chisel points arrived consistent and sharp; I didn’t see bent tips in the sticks, which is more common with bargain pins and a leading cause of misfires.
Practical tips for cleaner results
- Let glue do the heavy lifting. Use the pins to tack alignment and keep springy profiles in place while adhesive cures.
- Tune your depth. Increase air pressure or power just enough to set the pin flush; avoid driver marks that can telegraph through paint.
- Shoot with intent. Angle away from show faces and thin edges, especially in dense hardwoods.
- Pre-finish when you can. Headless pins are easy to hide, but it’s even easier if you’re just dotting a clear coat later.
- Keep spares in shorter lengths. If a profile is especially delicate, step down in length to reduce the chance of a wandering pin.
Value and pack size
At 2,000 pins per pack, I can get through a kitchen’s worth of light trim, a run of closet built-ins, or a set of stair returns without running out mid-task. The consistency is what I’m paying for here: uniform lengths, true headless shanks, straight strips, and reliable chisel points. For professional trim work, that consistency saves time and touch-ups.
Recommendation
I recommend these DeWalt 23-gauge, 1-1/2-inch headless pins for interior finish carpentry where you want invisible fastening and you’re using glue as the primary bond. They drive cleanly, resist splitting, and leave tiny, easy-to-hide holes with better purchase than shorter pins. Just make sure your pinner is rated for 1-1/2-inch headless pins—many aren’t—and avoid using them in high-moisture or exterior situations.
If your nailer’s max length is 1-3/8 inch or you need a bit more mechanical hold, opt for a shorter 23-gauge pin or step up in gauge. Within their intended use, these pins are reliable, tidy, and worth keeping on hand.
Project Ideas
Business
Realtor-ready trim touch-up service
Offer fast, tidy fixes for listings: reattach loose shoe molding, repair baseboard miter returns, secure cabinet bead/scribe, and pin panel caps. Invisible holes and minimal putty mean same-day paint and photo-ready results.
Custom framing and shadow box micro-shop
Sell made-to-order frames, memorabilia boxes, and gallery sets online or at markets. Use 23-gauge pins to achieve near-invisible joins and delicate applied profiles, upselling to conservation glass and custom finishes.
Kitchen and bath trim upgrades
Productize small, high-ROI cabinet enhancements: install light rail, scribe, crown returns, and toe-kick details using glue plus 23-gauge pins for clean finishes on paint-grade trim without visible nail heads.
Decorative wall molding packages
Sell turnkey ‘box trim’ or wainscot upgrades per room or per wall. Pins act as temporary clamps for adhesive-set moldings, speeding installs and reducing patch/paint time—a great upsell for renters or staging projects.
Flooring partner add-on: shoe molding and return finishes
Partner with flooring installers to handle delicate shoe/quarter-round installs and all the tiny miter returns around stairs, cabinets, and radiators. 23-gauge pins keep fills minimal and schedule tight for rapid turnovers.
Creative
Gallery-grade picture frames and shadow boxes
Build custom frames and deep shadow boxes with mitered corners and tiny applied moldings. Use headless 23-gauge pins as invisible clamps to secure miters and hold profiles while glue cures, leaving nearly no fill work. Great for floating mat frames, jersey boxes, or specimen displays.
Applied box-molding accent walls
Create elegant wall panels by gluing paint-grade panel molding into box patterns and tacking it with 23-gauge pins so there are virtually no visible fasteners. The chisel point minimizes splitting even on thin MDF profiles; pins simply hold while construction adhesive sets.
Acoustic panel frames with fabric wrap
Assemble lightweight pine or poplar frames for acoustic insulation, then staple fabric and use pin nails to secure thin trim battens that hide staples. The headless pins disappear after paint, yielding a clean, professional look for studios and home theaters.
Keepsake and jewelry boxes with delicate edge beading
Make small hardwood boxes and add tiny beaded or cove trims to lids and bases. Pins prevent shifting during glue-up and won’t blow out fragile profiles. Perfect for gift sets, ring boxes, or tea chests where visible fasteners would ruin the aesthetic.
Miniatures and dollhouse furnishings
Build scale furniture, window and door casings, and stair details. The 23-gauge, headless pins let you attach slender parts and miter returns without splitting balsa/basswood, keeping details crisp and requiring minimal touch-up before paint.