Specifications
| Release Date | 2015-09-15T00:00:01Z |
| Unit Count | 1 |
| Pages Count | 272 |
| Publication Date | 2015-09-15T00:00:01Z |

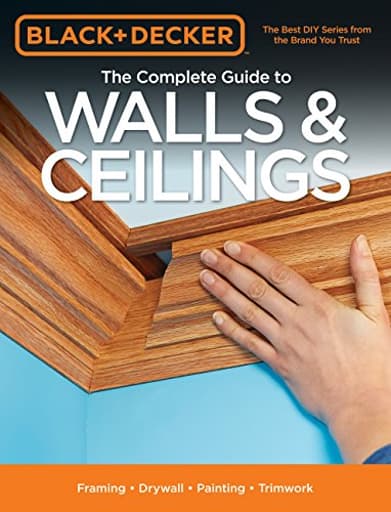
A 272-page illustrated manual that explains how to build, finish, and repair interior walls and ceilings, covering framing, drywall hanging and finishing, painting, and trimwork. It provides step-by-step procedures, material and tool guidance, and troubleshooting techniques for new construction and renovation projects.
Cool Springs Press Black & Decker The Complete Guide to Walls & Ceilings: Framing - Drywall - Painting - Trimwork Review
Why I reached for this guide
I picked up the Black & Decker guide as I started refreshing two rooms and a hallway in my 1950s bungalow. The plan: straighten a wavy partition, rehang a sagging ceiling, repair a constellation of wall patches, and finish everything with paint and new trim. I wanted something practical I could keep on the sawhorses—clear procedures, solid photos, and troubleshooting I could trust. This guide delivered on those essentials, and it did it in a sequence that mirrors how work actually happens on site.
What it actually covers
Despite the title’s breadth, this is fundamentally a drywall-and-trim book with framing and painting presented as the setup and finish phases around them. That’s not a knock—most interior wall and ceiling work in modern homes revolves around gypsum board and the finish carpentry that makes it look intentional. The guide walks through:
- Planning and framing for interior partitions, soffits, and ceiling drops
- Drywall hanging on walls and ceilings, including fastening patterns and seam layout
- Taping, mudding, and sanding (the full three-coat approach plus quick-setting compound use)
- Repairs, from nail pops and stress cracks to larger hole patches and corner failures
- Painting systems: priming, cutting-in, rolling techniques, and sheen selection
- Trimwork basics: baseboard, casing, crown, and simple wainscot-style upgrades
If you’re expecting deep coverage of plaster, masonry, or specialty wall systems, you won’t find it here. The plaster content is minimal. For houses like mine with some plaster remaining, I used this guide for the drywall zones and looked elsewhere for traditional plaster techniques.
Clarity where it matters
The sequencing is what makes this book useful on a real job. Each task starts with a clear tools-and-materials callout so you can load the cart correctly on your first store run. Steps are broken into tight photo series—no giant leaps between frames—and the captions do real work: fastener spacing numbers, trowel angles, and joint compound types are spelled out rather than hand-waved.
A few details that show the authors have done this on actual job sites:
- Seam planning diagrams that push butt joints away from high-visibility zones and stack tapered edges where you can hide them with trim or furniture
- Ceiling-first hanging strategy with a reminder to run walls up tight to lock the lid in—simple, but easy to forget in the moment
- Fastener depth visuals that make it obvious what “just dimpled” actually looks like
- Corner bead options compared (metal, vinyl, paper-faced) with good guidance on where each shines
- Repair decision trees that keep you from overtreating a small issue—or undertreating a problem that will reappear in six months
I found the sound control section particularly practical. It covers the basics—insulation density, resilient channel or clips, double layers of board with staggered seams, bead of acoustic sealant at perimeters—and does so without turning into a building-science lecture. If you’re trying to quiet a home office or a nursery, those pages are worth tabbing.
Field notes from a weekend remodel
I put the guide through its paces on three tasks that many DIYers face.
1) Straightening a crooked partition and reframing an opening
The framing chapter strikes a good balance: enough detail to lay out plates, mark stud centers, and keep openings plumb and true, without drowning in code tables. The tip to crown studs consistently saved me from a wavy wall later. The book’s door-opening sequence (jack studs, header, cripple placement) made it easy to fix an out-of-square jamb and get clean casing reveals.
2) Hanging and finishing a 12x12 ceiling
If you’ve ever wrestled 5/8-in sheets overhead, you know the job is about planning as much as strength. The guide’s advice to rent a drywall lift and to orient the sheets perpendicular to the joists (staggered seams) kept things tidy. The fastening pattern graphic was pinned to the wall until I could recite it. For finishing, the three-pass method (tape coat, fill coat, feather coat) with different knife widths was explained plainly. Two standout tips I keep using:
- Switch to a setting-type compound for deep fills and first coat; it cures hard and fast, reducing shrinkage.
- Use a raking light during sanding to spot ridges before paint makes them permanent.
3) Patching a large hole and a cracked outside corner
The book offers both the classic “California patch” and a backer-board method; I used the latter for durability since the hole was near a doorway. The corner repair walked me through removing a damaged bead and installing paper-faced bead with spray adhesive and compound—faster and cleaner than wrestling metal into a tight corner.
Trimwork and paint: the polish that sells the room
The trim section is where this guide surprised me. It doesn’t try to turn you into a finish carpenter, but it absolutely gets you to clean, repeatable results. The coping method for inside corners, the small reveal around door and window casing, and hints like back-beveling miters on slightly out-of-square corners all translated into fewer gaps and less caulk. If crown molding intimidates you, the miter saw setup diagrams (with spring angles called out) and the advice to mark “top” and “wall” on the pieces before cutting reduce the learning curve.
On paint, the coverage is more technique than product-centric: priming new drywall with a PVA, boxing multiple gallons for color consistency, cutting-in with a sash brush held like a pencil, and a rolling pattern that minimizes lap marks. Straightforward, practical, and easy to execute.
Small wins that add up
A handful of tips from the guide that paid off immediately:
- Use a screw-depth setter on your drill to avoid breaking the paper face—a simple accessory that solves a common sin.
- Pre-fill butt joints with a narrow strip of fast-set compound, then feather wide with lightweight topping to minimize joint telegraphing.
- Swap to dust-control compound for the final coat in lived-in spaces; sanding is less messy.
- Scribe baseboards to uneven floors before nailing; you save time you’d otherwise spend caulking or staring at gaps.
- Seal drywall perimeters in sound-sensitive rooms with acoustical caulk before trim goes on; you’ll actually notice the difference.
Layout and day-to-day usability
This is a book you can work from. The photo quality is high enough to study hand position and tool angle, and the captions are dense with information without feeling academic. The index is good, and the section headers make it quick to jump from hanging to finishing to repair without hunting. It’s a perfect size for the shop or the back of a truck; a couple of binder clips kept my page open while I worked.
Where it falls short
The most important caveat is scope. If your house leans heavily on plaster and lath, or you’re tackling lime-based repair, you won’t get what you need here. The guide is aimed at gypsum board, modern framing, and common trim profiles. It also doesn’t go deep on specialty finishes (coffered ceilings, elaborate crown build-ups, raised-panel wainscoting) or high-end carpentry techniques—fine if your goal is clean, modern lines, less so if you’re restoring a Victorian parlor. Finally, building codes are acknowledged but not explored; expect to check your local requirements for framing specifics, fire-blocking, or rated assemblies.
Who will benefit most
- DIYers tackling their first full-room refresh who want a reliable, start-to-finish playbook
- Homeowners comfortable with tools who need confidence around taping and trim
- Pros and apprentices looking for a clear reference to standardize technique among a crew
If you already tape and mud for a living or specialize in historic restoration, this will feel elementary in places. For the vast majority of remodel tasks in drywall-clad homes, it’s right on target.
Recommendation
I recommend this guide for anyone planning interior wall or ceiling work in a drywall-based home. It’s a clear, well-organized manual that translates directly to good results on site: smarter seam layout, fewer finishing flaws, and trim that sits right the first time. The troubleshooting sections earn their keep the first time you face a popped fastener or a corner crack, and the sound control guidance is concise and actionable. Just be aware of its boundaries—plaster and advanced finish carpentry are beyond its scope—and you’ll get a dependable companion from layout through the final coat of paint.
Project Ideas
Business
Weekend DIY Workshops
Offer hands-on classes that teach homeowners basic framing, drywall hanging/finishing, painting, and trimwork using the manual as a curriculum. Market small group sessions (4–8 people) for weekend projects: accent walls, small built-ins, or trim installs. Charge per attendee and provide printed step guides, tool checklists, and after-class support.
Mobile Patch & Refresh Service
Run a local service specializing in rapid drywall repair, paint touch-ups, and trim repair for landlords, Airbnb hosts, and realtors. Use the book's troubleshooting and finishing techniques to guarantee seamless repairs. Offer tiered packages (same-day patching, full-room refresh, emergency board replacement) with clear pricing per square foot.
Custom Trim & Feature-Wall Installations
Position a specialty business that installs high-value architectural details—coffers, wainscoting, built-ins, and picture-frame walls—for homeowners and small contractors. Use the manual to standardize estimating, material lists, and quality-check procedures; upsell painting and finishing for turnkey delivery.
Digital How-To Content & Templates
Create a paid digital product line: step-by-step video courses, printable project plans, material calculators, and pricing templates derived from the manual. Target DIYers and handypersons who want to level up. Sell on a website or platforms like Patreon/Teachable and bundle consultation calls for higher-priced tiers.
Creative
Shiplap Accent Wall with Hidden Shelving
Use drywall finishing and trim techniques to create a faux shiplap feature wall with recessed hidden shelving. Frame shallow recessed boxes into the stud cavity, hang and finish drywall for a seamless look, then add narrow trim battens to simulate shiplap. Paint in a high-contrast color and install LED strip lighting inside the recesses for a modern, custom built-in appearance.
Coffered Ceiling with Painted Highlights
Build a lightweight coffered ceiling grid using framing principals for non-structural beams, drywall for the soffits, and trimwork for clean edges. Use the manual's drywall and finishing guidance to achieve crisp joints and smooth surfaces, then paint the coffers in a secondary color to add depth and architectural interest to a living or dining room.
Window Seat Reading Nook with Trim Details
Frame a window seat into an existing alcove, use drywall to create side jambs and a finished knee wall, then add baseboard, crown, and panel trim for a custom look. Finish seams and corners per the guide, paint and install a cushioned top and storage drawers beneath for a charming multifunctional nook.
Decorative Wainscoting and Picture-Frame Wall
Combine drywall leveling with trimwork to install classic picture-frame wainscoting. Use the manual's finishing techniques to float the drywall smooth above the chair rail, then apply evenly spaced trim frames and baseboard. Finish with eggshell paint on the lower panels and matte on the upper wall for a high-end look.