Features
- 【HEAVY DUTY QUALITY THICK CLEAR ACRYLIC SHEETS】These plexiglass sheets are made of high quality acrylic, which features ultra-transparency like glass, but 17 times stronger than glass. The weight of acrylic is just the half of glass, you will enjoy the convenience very much.
- 【WIDE APPLICATION】 Great for both indoor and outdoor use. These plexiglass sheets can be used for creative DIY occasions like photo/poster frame, drawing,handcrafts, artwork display, Wedding welcome board,house decoration and waterproof application,like table top,protective barriers,shelf,holders,gaskets,games etc. If you want to change the shape, you can use heat to mold and bend the sheets to your desired shape. If you want to change the size,please cut with reverse saw blade/laser/heavy-duty scissor. If you drill holes on it, it will not crack.
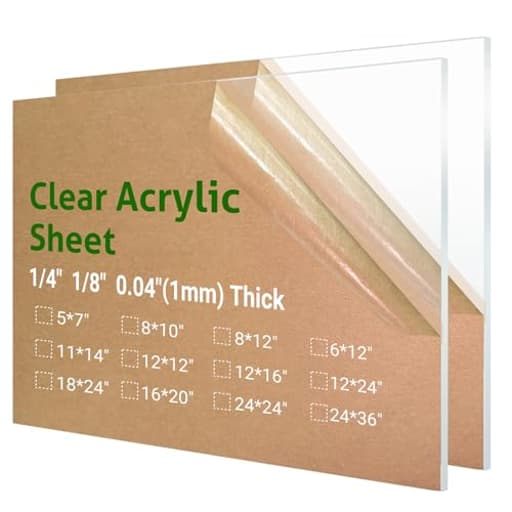
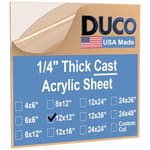
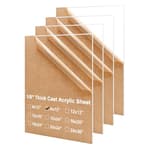
- 【SIZE】Available in various sizes and thicknesses for you to choose, please measure the size you need before you make order.
- 【FEATURE】 For long lasting use, these acrylic sheets have an outdoor durability guarantee of up to 30 years. They are very firm and sturdy, waterproof,UV resistant, can withstand high levels of UV rays and extreme temperature (from -40 to 190 degrees Fahrenheit ) without cracking, fogging, or losing strength and finish.
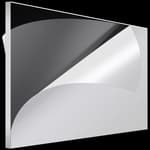
- 【PACKAGE&CUSTOMER SERVICE】Our sheets are packaged securely, on both sides you can see protective films, which help prevent the sheets from being scratched or damaged, please remember to peel them off before you use. PS: if it is hard to peel them off, we suggest that you start from the edge. If you have any questions about these acrylic sheets, please let us know at any time, we promise 100% satisfaction.
Specifications
| Size | (2 Pieces) 8" x 12" |
| Unit Count | 1 |
Related Tools
Two clear acrylic (plexiglass) sheets, each 8 × 12 inches and 1/8 in (3 mm) thick, suitable for craft projects, signs, displays, and protective barriers. The sheets can be cut with saws or hand tools, drilled without cracking, heat-formed for bending, and are UV-resistant and waterproof with a temperature range of about -40 to 190°F; protective film covers both faces for shipping.
CHENYAOAI 2 Pieces 8 x 12” Clear Acrylic Sheet Plexiglass - 1/8”(3mm) Thick, Use for Craft Projects, Signs, DIY Projects and More; Cut with Saw or Hand Tools, No Laser Cut Review
Acrylic is one of my workshop staples, and this two-pack of 8 x 12-inch, 1/8-inch thick sheets quickly found its way into several projects. I used the CHENYAOAI acrylic sheets as replacement glazing in a picture frame, as a small clear door panel on a bathroom cabinet, and as a simple sign board for an event. Across those tasks, they delivered reliable clarity, clean machining, and predictable handling, with a few quirks worth knowing before you start.
What you get and first impressions
This set includes two clear sheets, each true to the listed 8 x 12 inches and right on the 3 mm (1/8 inch) thickness mark on my calipers. Both sides ship with an adhesive protective film. The packaging protected the corners well, and the film kept the faces scratch-free during transit and shop handling.
One important note: remove the film before judging clarity. With the film on, it reads as slightly hazy; once peeled, the plastic is optically clean with no tint. If the film is stubborn at the corner, lift it with a fingernail or a bit of painter’s tape folded over on itself. I typically leave the film on for cutting and drilling, then peel at final assembly.
Optical quality and finish
For picture framing, optical clarity matters more than marketing claims. Head-to-head next to glass, these sheets are impressively transparent, with minimal color cast and no visible internal haze. Edges come saw-cut and serviceable; a quick pass with 220-400 grit sandpaper removes the faint machining marks and makes the edges presentable. If you want a polished edge, wet-sand to 1000-2000 grit and buff with plastic polish. I wouldn’t bother with flame polishing unless you’re comfortable with acrylic and have good ventilation; wet-sanding plus buffing is safer and consistent.
Reflection is typical of standard acrylic—there’s no anti-reflective treatment—so glare is similar to standard frame glass and higher than matte glass. For wall art, that may influence placement under strong lighting.
Cutting and sizing
At 3 mm thick, these sheets are easy to work with using common shop tools:
- Scoring and snapping: For straight cuts, a sharp utility knife and a metal straightedge work well. Score 10–15 passes, align the score over an edge, and snap downward with even pressure. Tape both sides of the cut line to reduce chipping.
- Saws: A fine-tooth jigsaw blade or a circular saw with an acrylic or non-ferrous metal blade makes clean cuts. Support the work to prevent vibration, keep feed rates steady, and avoid forcing the cut. I covered both sides with painter’s tape and left the film on—edges came out clean with minimal burrs.
- Sanding: Deburr edges lightly after machining. Avoid power sanding at high speed on the edge; acrylic can melt and smear with excessive heat.
I don’t recommend laser cutting these sheets. The labeling indicates they’re intended for saws and hand tools, and in practice that’s the safer route. Acrylic can release irritating fumes when lasered, and without knowing the exact formulation and protective film type, you risk edge charring and film melting.
Bending and heat forming
Acrylic heat-forms predictably if you respect its temperature range. These sheets are listed as tolerant from -40 to 190°F, but forming requires much higher localized heat. I used a strip heater to create a single 90-degree bend for a small stand. Warm slowly and evenly until the bend line softens; bend over a jig and hold until set. Remove the film near the bend line beforehand to avoid imprinting or melting the adhesive into the plastic. For gentle curves, a heat gun works in a pinch—keep the gun moving and test on scrap first.
Drilling and fastening
Drilling acrylic is where many projects go sideways, but with the right approach it’s drama-free:
- Use a step bit or a sharp twist bit with a modified cutting angle. A step bit is forgiving and resists “grabbing.”
- Back the sheet with scrap wood, clamp securely, and run the drill at low speed. Let the bit do the work.
- For holes near edges, leave at least a sheet thickness (3 mm) of material from the hole to the edge; more is better.
- Lightly chamfer the hole edges after drilling to reduce stress cracks when tightening screws.
In my tests, holes were clean with no star cracks. For mounting with screws, use nylon washers and don’t overtighten; acrylic doesn’t like point loads. For bonding, solvent cements made for acrylic (Weld-On 3/4 for capillary bonds, 16 for gap fill) produce strong, clear joints.
Durability, weather, and UV
The brand claims long outdoor durability and UV resistance. I can’t validate multi-decade performance, but a week outdoors in fall sun showed zero yellowing or surface haze—what I’d expect from decent PMMA. Acrylic is inherently UV-stable compared to polycarbonate; it won’t yellow quickly and keeps its clarity. It’s also waterproof and dimensionally stable in normal temperature swings. If you’re using it outside, support it well; a 12-inch span at 3 mm can bow slightly under weight or heat. For tabletops or larger panels, step up thickness.
One trade-off: surface hardness. Acrylic scratches more easily than glass. For high-touch surfaces, be prepared to baby it or plan for periodic polishing with plastic polish. Clean with mild soap and water or a dedicated plastic cleaner; avoid ammonia or alcohol-heavy cleaners that can cause crazing over time.
Project results
- Picture frame glazing: Swapping in one sheet as a glass replacement took minutes and immediately solved weight and breakage concerns. The 1/8-inch thickness added a snug fit, which eliminated any rattling in the frame. If your frame relies on thin glass and tight backer tolerances, check that 3 mm won’t make the stack too thick.
- Bathroom cabinet door insert: I routed a shallow rabbet and used the acrylic as a clear panel. The sheet cut cleanly and drilled without chips for the small mounting screws. In a damp environment, it hasn’t fogged or warped.
- Event sign: Vinyl lettering adhered well after a wipe with isopropyl alcohol and full evaporation. Static can attract dust during application; a quick pass with a tack cloth and a humid room helps. The sheet’s clarity made the lettering pop, and it wiped clean after the event.
Across these uses, the consistent theme was predictability: sizing was accurate, surfaces were clean under the film, and machining behaved as expected for cast/extruded acrylic of this thickness.
Practical limitations
- Not scratch-proof: Expect hairline marks if you slide it across rough surfaces. Use microfiber cloths and avoid dry-wiping dusty panels.
- No anti-glare: If glare control is critical, look for matte or coated acrylic. These are standard clear sheets.
- Laser cutting caution: I’d stick to hand and power tools. If you must laser, test scraps and manage fumes, but the safe guidance is to avoid it.
- Thickness constraints: The 3 mm thickness is sturdy for small spans and frame glazing, but too flexible for unsupported shelves. Conversely, it may be too thick for ultra-thin frame channels designed for 2 mm glass.
Tips for best results
- Keep the protective film on during cutting and drilling; peel at final assembly.
- Use painter’s tape along cut lines to minimize chipping.
- Score-and-snap for straight, small cuts; switch to a fine-tooth saw for complex shapes.
- Drill at low speed with backing, and chamfer hole edges.
- Clean with mild soap and water; dry with a microfiber cloth.
- For bonding, use acrylic solvent cement rather than CA or epoxy for the clearest joints.
Verdict
The CHENYAOAI acrylic sheets strike a useful balance of clarity, stiffness, and ease of machining for small-format projects. They arrived well-protected, measured true, and handled cutting, drilling, and limited heat forming without surprises. They’re not a substitute for tempered glass in abrasion resistance, and they’re not the right pick if you rely on laser cutting workflows. But for hand-tool and saw-based shop work—framing, signage, protective panels, and small enclosures—they do the job cleanly and consistently.
Recommendation: I recommend these sheets for makers and DIYers who need clear, durable acrylic in a manageable size and thickness. They’re particularly good as glass replacements in frames, cabinet inserts, and small sign panels where clarity and break resistance matter, and where you’re working with common shop tools rather than a laser.
Project Ideas
Business
Custom Wedding & Event Acrylic Signs
Offer personalized 8×12 or custom-size welcome signs, table numbers, menus, and directional signage using vinyl, hand-painting, or printed inserts. Sell as ready-made designs or custom commissions. Pricing model: $30–$150 depending on complexity and finishing. Marketing: list on Etsy, Instagram, wedding marketplaces; partner with event planners and local venues. Production tips: build a small library of templates to speed fulfillment; ship flat with protective film on faces.
Countertop Safety Shields & POS Barriers (Kits)
Make and sell small countertop sneeze guards, cash register shields, and register-mounted flip panels for small retailers, salons, and market stalls. Offer pre-cut sizes and DIY kits (sheet, clamps, rubber feet, instructions) so customers can retrofit their counters. Pricing: $15–$75 per shield or $20–$40 per kit. Sales channels: local B2B outreach, farmer’s markets, online listings. Scale: create templates and batching jigs for quick routing, drilling, and packaging.
Retail Display & Jewelry Stand Manufacturing
Produce small, polished acrylic displays: earring cards, necklace stands, ring risers, phone holders, and small risers for market booths. Target indie makers and craft sellers who need attractive, lightweight displays. Sell in sets or bulk to Etsy sellers, boutiques, or at craft fairs. Pricing: $5–$30 per piece/set depending on finish. Tips: offer customization (names, logos) via vinyl, use consistent production templates to maintain margins.
DIY Craft Kits & Local Workshops
Bundle short-form craft kits (pre-cut acrylic panels, adhesive, LED strip or small hardware, instructions) for projects like the lightbox, shadowbox, or phone stand. Sell kits online or at local craft stores, and run paid workshops teaching scoring, drilling, and heat-bending techniques. Revenue streams: kit sales, workshop fees, private party bookings. Margins: kits have good markup; workshops add higher-margin in-person revenue. Production tip: pre-cut or partially-assemble kits to reduce user difficulty and returns.
Creative
LED Edge-Lit Art / Mini Lightbox
Sand the sheet edges to diffuse light, mount a thin LED strip along one edge, and sandwich printed/translucent artwork or etched design between the two 8×12 sheets. Use a small drilled hole for the power cable and silicone or clips to hold the sandwich together. Variations: use translucent paper, printed vinyl, or hand-painted acetate. Tools/skills: fine grit sandpaper, adhesive or clips, small drill, basic wiring. Time: 1–3 hours.
Layered 3D Shadowbox / Photo Depth Frame
Cut the sheets into slightly smaller panels to create multiple layers; mount art, photos, or pressed flowers on each layer and glue them together with clear acrylic solvent or tiny clear spacers to create depth. The result is a floating, frameless shadowbox that’s weatherproof. Tips: use templates for repeated cuts and disposable gloves when using solvent. Tools/skills: scoring knife or jigsaw with fine blade, solvent cement, ruler. Time: 1–4 hours.
Heat-Bent Stands & Holders (phone, tablet, jewelry)
Heat a strip of the acrylic until pliable and bend into a 45–90° bracket to make phone/tablet stands, or form U-shaped earring/jewelry holders. Drill small holes for earring displays without cracking. Finish edges with flame polishing or sanding for a professional look. Variations: make tiered earring displays or multi-angle phone stands. Tools/skills: heat gun or strip heater, small drill with acrylic bits, sanding. Time: 30–90 minutes per piece.
Wedding/Event Welcome Board & Tabletop Covers
Use the sheets as small welcome signs, menu boards, or temporary tabletop protectors. Apply vinyl lettering, hand-letter with paint pens, or create a printed insert between the two sheets for a weatherproof sign. For centerpieces, cut circles or small domes by heat-bending for cloche effects. Tools/skills: vinyl cutter or paint pens, scoring/cutting tools, heat-forming for custom shapes. Time: 30–120 minutes.