Features
- Refractory mortar that is ideal for joining or repairing masonry flue tile in any gas or wood fireplace and wood, coal, or pellet stove chimney
- Dry mix cement, just add water and trowel into place
- Can be used as a parge coating (thin over-coat) when building or repairing fireboxes
- Dark grey finish
Specifications
| Color | Dark Gray |
| Size | Air Cured Fire Cement |
| Unit Count | 1 |
Related Tools
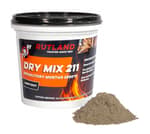
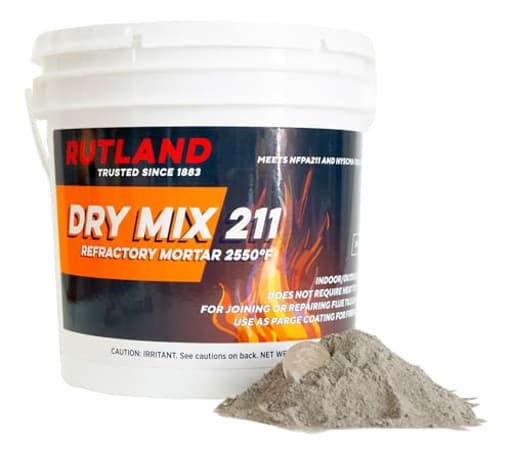
Dry-mix refractory mortar for joining and repairing masonry flue tile, fireboxes, chimneys, and other high-temperature masonry such as fire pits, kilns, forges, and pizza ovens. Mixes with water and is troweled into place; it cures as an air-cured fire cement with a dark gray finish and is rated to withstand temperatures up to 2550°F.
RUTLAND PRODUCTS Rutland Dry Mix 211 Refractory Mortar 10 Pound - USA-Made High Temperature Mortar for Masonry - 2550°F Fire Cement Patch for Fireplace Brick, Fire Pit, Kiln, Forge & Pizza Oven Repair Review
What it is and where it shines
I’ve used my share of refractory mortars across fireplaces, small forges, and outdoor ovens, and the Rutland 211 mortar has become a reliable option for those jobs. It’s a dry mix: you add water, trowel it into place, let it air cure, and then bring it up to temperature gently. The dark gray finish blends nicely with many firebricks and flue tiles, and the 2550°F rating puts it comfortably in the range for wood-fired fireboxes, flues, forge liners, and pizza ovens.
Two things stood out for me early on. First, it bonds well to properly prepared masonry. When I cleaned, dampened, and keyed the surface, it grabbed and stayed put. Second, it’s more sensitive to water content than some premixed fireplace mortars. You get rewarded for mixing thoughtfully and punished if you rush.
Mixing and workability
This is a “just add water” product, but the details matter:
- Add water slowly and mix to a peanut-butter consistency. If you overshoot and go loose, the mix loses body and wants to slump off verticals. Better to creep up on the water than chase a soupy mix by adding more powder.
- Let it sit (“slake”) for a few minutes, then remix. The texture tightens up and spreads more uniformly after a short rest.
- Mix small batches. It sets up faster than everyday Type N or S mortar, and you’ll get better results working fresh material than fighting a bucket that’s stiffening while you trowel.
- Dampen, don’t drench, the substrate. I like a spray bottle or a damp sponge to pre-wet the brick or existing refractory. That keeps the surface from sucking moisture out of your fresh mortar and helps bond.
For application, it trowels cleanly and feathers nicely. I’ve also piped it into joints using a grout bag for tight spots and smoothed with a gloved hand. It sponges off faces well before it takes a set, which makes cleanup straightforward in a firebox where you want crisp joints but not smeared brick.
Curing and first heat
Rutland 211 is an air-cured fire cement, so give it time to dry thoroughly. My routine:
1) Shape and smooth, then let it air dry at least 24 hours with good ventilation; a small fan nearby helps.
2) For thicker repairs or parge coats, extend the air dry to 48 hours (or more if humidity is high).
3) Bring it to temperature gradually. Start with a low, gentle fire or low burner setting and step up in stages over a couple of hours.
Handled this way, I see minimal shrinkage and far fewer nuisance cracks. If you shortcut the drying or hit it hard with heat right away, steam pressure can open up fissures or pop edges.
Performance in use
- Fireplaces and fireboxes: For patching eroded joints and parging a worn firebox floor, it adheres well and cures hard. I’ve had it hold up through winter burn cycles without spalling. Hairline surface cracks can appear, especially where patches transition from thin to thick; those have been cosmetic for me when the substrate was sound. The dark gray finish looks intentional rather than “patched.”
- Chimneys and flue tiles: As a jointing mortar, it beds tiles securely when the contact faces are clean and uniformly buttered. The working time is long enough to align sections if you stage your mix sensibly.
- Forges and kilns: I’ve used it as a coating over ceramic fiber to lock down fibers and create a tough hot face. Thicker coats (applied in two passes) resist cracking better for me. Thin skim coats can craze under high heat cycling; they typically stay bonded, but a beefier layer looks better and lasts longer.
- Pizza ovens and outdoor builds: It’s temperature-capable and cures hard in dry conditions. Outdoors, protect it from rain during the cure and early days of firing, and ramp heat gently to avoid steam-driven damage.
Overall, once cured, it’s impressively hard. I’ve dropped small tools against finished surfaces without chipping. In areas that see mechanical abuse (e.g., a forge front lip), expect occasional touch-ups—nothing unusual for refractory.
Finish quality and cleanup
The dark gray tone is consistent from batch to batch. I like to strike joints and lightly sponge the faces right after placement; that leaves crisp lines with minimal haze. Once it sets, it’s harder to clean than standard masonry mortar, so timely cleanup pays off. It takes a steel trowel well and can be floated to a smooth parge if you want a clean firebox or oven interior.
Coverage and quantity
The 10 lb pail goes further than it looks for jointing and patching, but full parge coats or oven builds consume material quickly. Plan your coverage up front—nothing stalls a project faster than running short mid-course. If you’re just coating a small forge, one pail is plenty and then some. If you’re building a larger oven or doing a full firebox refinish, consider buying a bit more than your estimate so you can maintain continuity in your mix and finish.
What I like
- High temperature rating with real-world durability across fireplace, forge, and oven use.
- Strong adhesion to properly prepared masonry and fiber-lined shells.
- Forgiving application on the trowel: it spreads cleanly and feathers nicely.
- Air-cure convenience: no special heat cure chemistry required, just patience and a proper first fire.
- The dark gray finish looks professional and hides minor imperfections.
Where it can bite you
- Water sensitivity: it’s easy to overwater. A soupy mix slides and weakens. Add water in small increments and let it slake.
- Thickness management: very thin skins tend to craze under high heat; very thick single-pass layers can trap moisture. Build up in 1/4–1/2 inch lifts when you need thickness, with full dry time between.
- Substrate prep is non-negotiable: dust, ash, and soot will sabotage bond. Brush, vacuum, and dampen or you’ll chase failures.
- Limited color choice: the dark gray is great for most firebrick, but it won’t match buff mortars. Not a dealbreaker for performance, just aesthetics.
- Packaging size: for tiny jobs, the pail is more than you need. For large builds, you’ll go through several.
Tips from the bench
- Pre-wet the substrate until it’s uniformly damp with no standing water.
- Mix small batches and keep a second clean pail handy for rinsing tools and sponges.
- For vertical work, err on the stiffer side of peanut-butter consistency.
- Stage thick sections in multiple lifts and extend the air-dry between lifts.
- Cure with patience: gentle heat cycles beat one big burn every time.
- Wear a respirator when mixing; refractory powders often contain silica.
Alternatives to consider
If you need a tiny quantity for hairline crack repairs, a premixed refractory mortar in a caulk tube may be more convenient, though most of those top out at lower temperature ratings and don’t parge as well. For castable shapes or thick linings, a true castable refractory is better suited than a mortar. For high-abuse forge floors, I sometimes pair this mortar with a kiln shelf or hard firebrick wear surface.
Bottom line
Rutland 211 mortar does what a refractory mortar should: it bonds, cures hard, and holds up to serious heat when mixed and cured correctly. It isn’t the most forgiving if you rush the mix or the cure, but with basic masonry discipline—clean, damp substrate; thoughtful water addition; staged thickness; and a slow first fire—it produces durable, professional results across fireplaces, flues, forges, and ovens.
Recommendation: I recommend this mortar. The performance-to-price ratio is solid, the temperature headroom is generous, and the application is straightforward if you respect the mix and cure. For anyone repairing a firebox, bedding flue tile, or lining a small forge or oven, it’s a dependable, no-nonsense choice that rewards good prep and patience.
Project Ideas
Business
Specialized Fireplace & Chimney Repair Service
Offer a focused masonry repair service that uses high-temperature refractory mortar for flue tile joints, firebox parging, and chimney patching. Market to homeowners, property managers, and realtors for safety-focused repairs and seasonal maintenance packages.
Custom Pizza Oven Build & Finish Studio
Build turnkey backyard pizza ovens (shell, insulation, and refractory finish) and provide custom decorative facades using the mortar as parge and grout. Upsell design options (mosaics, stamped textures) and provide post-install maintenance or repair plans.
DIY Refractory Repair Kits + Online Tutorials
Assemble and sell small repair kits (pre-measured bag, gloves, mixing tool, simple trowel, and illustrated instructions/video) for homeowners to patch fireboxes, hearth cracks, or damper areas. Offer tiered kits and how-to videos, and monetize via an online storefront or marketplace.
Hands-On Workshops and Team Events
Host local workshops teaching how to build and finish backyard ovens, repair chimneys, or create decorative refractory art panels. Market as weekend maker classes, team-building corporate events, or instructor-led community courses; charge per seat and sell material add-ons.
Wholesale & Private-Label Supply for Artisans and Masons
Source bulk refractory mortar and package it for contractors, artisan builders, and mosaic studios. Offer private-label options, technical support sheets, and volume discounts. Combine with complementary products (fiberglass mesh, small trowels, safety gear) to create bundled offerings for trade customers.
Creative
Decorative Pizza-Oven Facade
Use the refractory mortar as a heat-resistant parge and grout to create a decorative tile or stone facade for a wood-fired pizza oven. Trowel a thin parge layer over the oven shell, press mosaic tiles or thin stone veneers into the mortar, and finish joints with the dark-gray mortar for a unified, durable look that withstands repeated high heat.
Textured Fire Pit Liner
Apply the mortar as an interior lining for a metal or masonry fire pit to protect the structure and add custom texture. While still workable, stamp or sculpt patterns (concentric rings, channel grooves, or relief motifs) so the finished liner is both functional and decorative when the pit is lit.
Fireplace Relief Panels
Sculpt thin ornamental relief panels (floral, geometric, or custom logos) by troweling mortar onto a wire mesh backing. Once cured, mount the panels around a fireplace surround or on an exterior chimney as heatproof architectural art.
Custom Grill or Forge Repairs & Upgrades
Patch and reshape the inside of barbeque grills, small forges, or backyard smokers by rebuilding hot zones with refractory mortar. Use it to form durable heat-resistant shelves, ledges, or ash channels that extend the life and customize the function of metal or masonry units.
Kiln-Style Planters and Fire-Resistant Garden Features
Create outdoor planters, pedestals, or decorative hearth blocks that are resistant to thermal shock by molding and curing the mortar in forms. Their dark gray finish complements rustic and industrial garden themes and they can be placed near fire features without degrading.