Features
- Durable 2-Part Epoxy Formula – Provides a long-lasting, professional-grade finish for garage floors, workshops, and basements. More resilient than traditional 1-part epoxy paints.
- Quick & Easy Application – Applies easily with a roller; walk-on ready in 24 hours and vehicle-ready in 72 hours for minimal downtime.
- Chemical & Hot Tire Resistant – Protects against oil, gasoline, antifreeze, salt, and hot tire pickup, making it ideal for high-traffic garage areas.
- High-Gloss Finish – Delivers a sleek, showroom-like finish that enhances the look of any indoor concrete surface.
- Low Odor & VOC Compliant – Safe for indoor use with low odor and low VOCs, ensuring a comfortable application environment.
Specifications
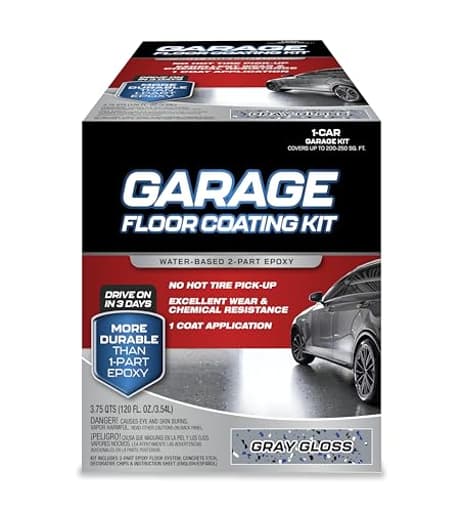
| Color | Gray |
| Size | 120 Fl Oz (Pack of 1) |
| Unit Count | 1 |
Two-part epoxy coating for indoor concrete floors that creates a high-gloss, chemical- and stain-resistant surface suitable for one-car garages, workshops, and basements. Applies with a roller, is walk-on ready in 24 hours and vehicle-ready in 72 hours, and is formulated for low odor and low VOCs while resisting oil, gasoline, antifreeze, salt, and hot-tire pickup.
COLOR CARE Garage Floor Kit – 2-Part Epoxy Coating for Concrete Floors, High-Gloss Finish, Chemical & Stain Resistant, Indoor Use, 1-Car Garage Coverage Review
A good garage-floor epoxy should do three things: bond reliably to concrete, shrug off the fluids and friction that garages invite, and look good doing it. COLOR CARE’s garage floor epoxy nails much of that brief—especially the low-odor application and chemical resistance—but my testing surfaced some consistency issues that DIYers should factor into their plans.
What I tested and how I used it
I coated two indoor concrete spaces: a single-bay garage using one kit and a larger double-bay area where I needed multiple kits. Both slabs were relatively new, uncoated, and free of major spalls. The product is a two-part epoxy, gray, with a high-gloss finish and claims of resistance to oil, gasoline, antifreeze, salt, and hot-tire pickup. It’s billed as walkable in 24 hours and vehicle-ready in 72 hours.
Surface prep matters more than anything
Epoxy—any epoxy—won’t forgive poor prep. I degreased thoroughly (twice), etched with a citric-based etch, neutralized, and rinsed until a clean white rag stayed white. Moisture is the silent killer of epoxy floors, so I taped down plastic overnight at several spots to check for condensation and ran a simple calcium chloride test in the larger space. If you skip this step and your slab is “green” or wicks moisture, no coating will save you.
I also mechanically opened the surface in the larger garage with a Diamabrush on a rental floor buffer. That’s not strictly required by the kit, but it evens out suction and dramatically improves adhesion.
Mixing and application experience
Each kit contains Part A (resin) and Part B (hardener). I pre-warmed the components in a heated space (about 70–72°F), then mixed Part B into Part A with a low-speed drill paddle for three minutes, scraping sides and bottom. In one kit, I encountered undissolved gritty crystals in Part A. Warming the can helped, and extended mixing got most of it to dissolve, but a few granules remained. If you feel grit after a minute of mixing, don’t ignore it—gently warm the can in a water bath and mix again.
I gave the mix a short “induction” rest of a couple minutes before rolling, then poured a ribbon and worked sections with a 3/8-inch microfiber roller. Pot life felt typical for a 2-part garage epoxy—long enough to move steadily, short enough that you don’t wander off. Back-rolling crosswise helped lay down an even film. I wore spiked shoes to move through wet areas without marking the film.
Application is straightforward and friendly, especially given the low odor. Even in an enclosed basement room, I didn’t feel overwhelmed, though I still wore a respirator and kept fans running for cross-ventilation.
Coverage and appearance
On the single-bay floor, one kit covered the space at a medium build with a bit left over for touch-ups. The finish flashed out to a convincing, glossy gray that instantly modernizes a beat-up slab. Edges and cut-ins blended well with the field coat.
The story changed in the larger space where I needed multiple kits. Despite identical prep and technique, I saw subtle shade differences between kits—three panels of gray that didn’t quite match under daylight. One section also cured to a lower sheen, closer to satin than high-gloss. That can happen with batch-to-batch variation or if a part is slightly off ratio or older stock. To minimize this, “box” multiple kits together: pre-mix each kit separately, then combine half of each into shared buckets so the color intermixes. If your project spans more than a single kit, plan your breaks at logical transitions (door seams or saw cuts) so variance is less obvious.
Note: high gloss looks great but can be slippery when wet. For garages in snowy or rainy climates, I recommend adding a fine anti-skid grit on the final back-roll.
Cure time and early performance
Walk-on in 24 hours proved accurate in both spaces. Vehicle traffic at 72 hours was fine in the warmer single-bay test. In the cooler, larger space, I waited an extra day—epoxy is temperature-sensitive, and pushing it early can invite hot-tire scuffing.
I did encounter an issue on one panel where the film “crazed” (hairline cracking) as it leveled. In hindsight, that section went on thicker, and the slab temperature was a few degrees cooler. Keep your film build moderate and the workspace between 60–80°F; roll out ridges promptly.
Durability and chemical resistance
I spot-tested with drips of used motor oil, coolant, and gasoline. After an hour, they wiped clean with no visible staining, and the gloss held. I also parked a car hot from a highway run. After a week of normal use, I saw no hot-tire pickup in the areas that cured glossy. The lower-sheen panel held up, too, but time will tell if that section is under-cured. If you live where road salt is a seasonal reality, this coating’s resistance is a strong selling point; it cleans up without leaving a chalky cast.
Impact resistance is in line with other 2-part epoxies: dropping a socket didn’t chip it, but a sharp pry bar tossed point-down left a pinpoint mark. No surprises there.
Odor, VOCs, and indoor friendliness
The kit’s low odor and VOC compliance are noticeable. Compared to solvent-heavy coatings, this is a much more pleasant indoor project. I didn’t detect any lingering smell after a day, and there was no yellowing or amine blush during cure, even in the basement space. Still, don’t skip gloves, eye protection, and a respirator cartridge rated for organic vapors.
Where it falls short
- Batch consistency: Using multiple kits side-by-side exposed shade differences and a sheen mismatch in one panel.
- Occasional mixing anomalies: One resin can had crystalline bits that took extra work to disperse. If you encounter gritty resin, contact the manufacturer; you may have an older or cold-stressed batch.
- Sensitivity to conditions: Like most epoxies, it doesn’t love cold slabs or high humidity. In marginal conditions, expect slower cure and a higher risk of surface defects.
- Limited color options: At the moment, the gray palette is narrow. If you’re picky about tone, you’ll want to see a swatch first or consider chips to break up uniformity.
Tips for better results
- Prep like a pro: Degrease, etch or mechanically profile, and moisture-test. Grind if you can.
- Condition your materials: Store the cans at room temperature for 24 hours. If you feel crystals, warm Part A in a water bath until they dissolve.
- Box multiple kits: Intermix kits to minimize color variation and work to natural breaks.
- Mind film build: Apply a consistent, moderate coat. Avoid pouring puddles; back-roll promptly in both directions.
- Control the environment: Target 65–75°F, low humidity, and a dry slab. Use fans for airflow without blowing dust.
- Add traction: Mix in anti-skid grit on the final back-roll, especially near doors and ramps.
- Respect cure times: Walk at 24 hours, tools at 48, vehicles at 72+ depending on temperature. Err on the side of patience.
Who it’s for
If you’re coating a one-car garage, basement, or workshop and can complete the job with a single kit, this epoxy is attractive: it rolls on easily, doesn’t stink up the house, and hardens into a glossy, chemical-resistant surface that cleans up well. For larger spaces that demand multiple kits and a perfectly uniform appearance, you’ll need to take extra steps to manage batch variation—or look for a system with tighter color control or a pigmented urethane topcoat to unify sheen.
Recommendation
I recommend COLOR CARE’s garage floor epoxy with some caveats. For small, indoor concrete areas you can cover with a single kit—and where low odor, straightforward application, and strong chemical resistance matter—it’s a solid choice that looks sharp and stands up to oil, antifreeze, salt, and hot tires. If you’re tackling a larger multi-kit job where seamless color and gloss uniformity are critical, plan to box your kits meticulously and work to natural breaks, or consider alternatives. The performance is there, but consistency between batches can make or break a big, uninterrupted slab.
Project Ideas
Business
Mobile Garage Floor Revamp Service
Offer a fixed-price, one-day service to coat single-car garages with the kit. Market to homeowners for quick turnarounds (walk-on in 24 hours, vehicle-ready in 72 hours). Add optional flake or logo upgrades for higher margins.
Epoxy Add-On for Local Contractors
Partner with home remodelers, realtors, or property managers to offer epoxy floor upgrades as an add-on service for listings, rental turnovers, or finish carpentry jobs. Emphasize low VOC and quick readiness to minimize disruption.
Productized DIY Kit & Coaching
Create bundled DIY packages: kit + custom color/flakes + step-by-step video and 1-hour virtual coaching session. Sell to homeowners who want pro results but prefer doing the work themselves; charge for premium support.
Commercial Small-Biz Flooring Packages
Target small businesses (cafes, boutiques, studios) with branded epoxy flooring packages—logo inlays, color-matched bases, and commercial-grade sealing. Offer maintenance plans (annual recoat/seal) for recurring revenue.
Workshops & Training Courses
Run local hands-on classes teaching proper surface prep, mixing, rolling technique, and decorative finishes using the kit. Charge per attendee and upsell kits and supplies. Great for building reputation and generating leads for installation work.
Creative
Flake-Finish Garage Makeover
Use the epoxy as a base and broadcast colored vinyl flakes while it’s wet to create a durable, slip-resistant, showroom-style floor. Pair gray base with black/white flakes for a modern look or metallic flakes for a premium finish. Great for turning an ordinary garage into a car-display or hobby zone.
Custom Logo & Stencil Inlay
Pour a smooth epoxy base and embed custom stencils or vinyl cutouts (team logos, family name, workshop brand) into the wet coat, then seal with a glossy topcoat. Produces a professional, high-gloss branded floor ideal for home gyms, man caves, or business entryways.
Epoxy Accent Zones
Create defined zones in a workshop or garage—tool island, bike parking, welding station—by rolling epoxy in different colors or finishes. Use tape to mask shapes, then remove for crisp edges. The chemical- and oil-resistance protects high-use areas and makes cleanup easy.
Epoxy-Coated Workbench & Tabletops
Apply the epoxy to plywood or MDF tabletops (with appropriate priming) to make chemical-resistant, high-gloss work surfaces for potting benches, craft tables, or garage workbenches. The fast cure and durable finish withstands spills and heavy use.
Decorative Basement Floor Renewal
Refresh dingy basement concrete with a full epoxy coating for a bright, reflective floor that resists moisture and stains. Add metallic pigments or tinted coatings for unique marbled effects that lift the whole space.