Features
- Chisel point to reduce splitting
- Smooth shank for consistent drivability
- Round head finish
- Plastic (glue) collation for strip loading
- Sold in a 2500‑piece pack
Specifications
| Fastener Type | Collated finishing/casing nail |
| Nail Length (In) | 1.50 in |
| Nail Gauge | 16 gauge |
| Nail Angle | Straight |
| Collation Material | Plastic (glued/plastic collated) |
| Fastener Material | Steel (bright / hot‑dip galvanized finish) |
| Nail Head Style | Round head |
| Shank Type | Smooth shank |
| Point | Chisel point |
| Package Quantity | 2500 |
| Nail Penny Size (D) | 4d |
| Loading Type | Strip |
| Product Weight | 3.27 lb |
| Returnable | 90‑Day |
| Intended Use | For use with 16‑gauge straight finish nailers |
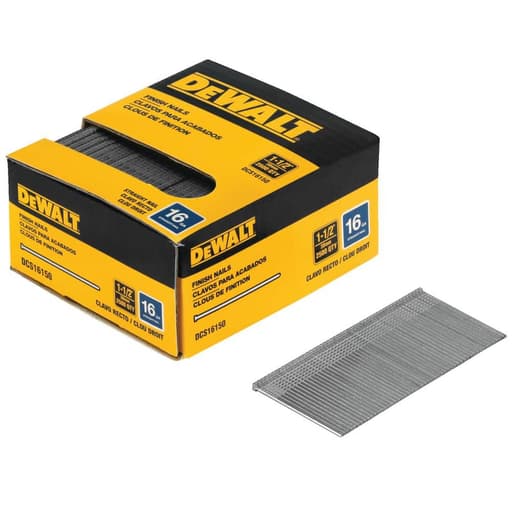
16‑gauge straight finish nails for finishing applications. The nails are steel with a bright/hot‑dip galvanized finish and are collated on a plastic strip (glue/plastic collation) for use in compatible 16‑gauge straight finish nailers. Packaged in a 2500‑piece box.
DeWalt 1-1/2 in. x 16-Gauge Plastic Collated Straight Nails (2500 per Box) Review
What I used and where I used it
I ran a full box of DeWalt 1-1/2 in. 16-gauge finish nails through a straight 16-gauge finish nailer across a typical mix of trim jobs: new baseboard in a hallway, poplar window casing, MDF crown returns, and a few oak thresholds that needed shoe molding. The nails are plastic-collated strips with a smooth shank and a chisel point—about as standard as it gets for this category. At 1-1/2 inches, they’re sized for light to medium interior trim where you want solid hold without leaving craters to fill.
Compatibility and setup
These are straight 16-gauge strips, so they drop into any compatible straight 16-gauge finish nailer. I used them primarily in a DeWalt gun but also checked feed and firing in an older Porter-Cable straight nailer without issue. Strips were consistent length and sat flat in both magazines. Collation is plastic/glue; the strips stayed intact in the box and didn’t crumble or shed excessively during loading, even after some time bouncing around the van.
One note on air setup: at 90–105 PSI, I got clean, flush drives in pine, poplar, and MDF. In denser oak and at door jambs where you may hit doubled-up framing, I needed closer to 110 PSI to bury the heads without overdriving. As always, set your depth-of-drive so the head sits just below the surface—16-gauge can crush fibers if you’re too aggressive.
Driving performance
Day to day, drivability was predictable. The smooth shank and chisel point combination sailed through softwoods and MDF with minimal resistance. In poplar casing, I could run a steady rhythm in sequential mode without a single partial drive. In oak, nail behavior gets more interesting—as it does with most 16-gauge finish nails. When I skewed the nose slightly or crossed a pin knot, I saw the occasional nail deflect or track with the grain. That’s a function of the chisel point more than the steel itself; orienting the chisel so the flat faces across the grain (not with it) reduced deflection and helped prevent edge splits.
I had two jams in roughly a thousand shots. Both were traceable to me trying to work too fast in bump fire while moving across varied material density (MDF into pine backing), and both cleared quickly. Feed was steady, and the driver blade didn’t chew the strip.
Plastic collation and debris
Plastic-collated nails typically shed a little at the muzzle when fired. These were no different: you’ll see small plastic fragments with high-rate firing, particularly in warmer temperatures where the collation softens slightly. It’s nothing unusual, but it’s worth noting for cleanup and eye protection. I didn’t experience any melted glue buildup in the nose, though I make it a habit to blow out the magazine after a long run.
Holes, surface quality, and fill
For interior trim, the head and shank profile left predictable, easy-to-fill holes. In primed MDF and poplar, a skim of lightweight spackle or wax fill took care of the holes. In stained oak, a touch of tinted filler blended acceptably, though 16-gauge will always leave a larger mark than 18-gauge brads. If you’re working delicate profiles, I’d step down to 18-gauge; for baseboard, casing, jamb extensions, and most crown, 16-gauge is the right call.
I didn’t see any notable tearing or mushrooming around the head in MDF once the depth-of-drive was set correctly. Overdrive can crater the surface with a 16-gauge fastener, so dial it in and resist the urge to crank up PSI to “speed things up.”
Holding power
Smooth-shank 16-gauge nails have good holding power in trim work, especially when paired with construction adhesive or wood glue at joints. On 3/4-in. poplar casing into SPF studs, the nails held tight with no spring-back. For tall baseboards (5-1/4 in. and up) or those going over uneven plaster, I prefer a longer nail (2 in. or 2-1/2 in.) in conjunction with adhesive. The 1-1/2-in. length is ideal for lighter profiles, narrow casing, and shoe molding, or when you’re fastening into a plywood backer rather than a stud.
If you need extra resistance to pull-out—stair skirts or scribe-heavy situations—ring-shank finish nails offer more bite, but you’ll trade off easier patching. For general interior trim, these hit the sweet spot.
Behavior in different materials
- Pine and SPF framing: Clean, straight drives with low air pressure. Very low split risk thanks to the chisel point.
- Poplar and primed finger-jointed trim: Consistent, minimal surface damage; easy fill.
- MDF: Reliable penetration; set your depth carefully to avoid “mushrooming” around the head.
- Oak and other hardwoods: Occasional deflection at knots or severe grain transitions. A slower sequential pace, proper nose alignment, and chisel orientation reduce problems. If you’re frequently trimming in hardwood, consider stepping to 2 in. length for better embedment.
Durability and consistency
Across the box, nail consistency was solid. Shaft straightness looked good, plating was uniform, and strips didn’t vary in stiffness. I didn’t encounter brittle breaks or odd bends coming out of the magazine, which sometimes crop up with bargain nails. The occasional bent nail I did see was clearly the result of hitting old fasteners hidden in the wall or catching a knot at a bad angle.
On finish, you’ll typically find bright steel versions suited for dry interior work and hot-dip galvanized options for higher humidity or light exterior exposures. For bathrooms, laundry rooms, or anywhere moisture might be a factor, I’d reach for galvanized to avoid rust bleed-through under paint. For standard interiors, bright steel is fine and leaves a cleaner hole.
Value and packaging
A 2,500-count box is a practical quantity for a small trim job or two, and the price-to-performance ratio is good given the consistency and low jam rate I experienced. The strips came bagged inside the box, which helped keep dust and moisture off. Weight and box size are manageable for tossing in a tote without exploding into a mess of loose nails.
Tips for best results
- Set PSI around 90–105 for softwoods/MDF and 105–110 for dense hardwoods; rely on your depth-of-drive for final tuning.
- Align the chisel so the flat is perpendicular to the wood grain to reduce deflection and splitting near edges.
- Use sequential fire for precise placement and to minimize magazine bounce and misfires.
- Avoid knots and existing fasteners; if you can’t, angle slightly to increase your odds of a clean drive.
- Pair with adhesive for tall base or wavy walls; the nails will clamp while the glue does the long-term holding.
- Clean out the magazine and nose periodically to keep plastic debris from accumulating.
Where these nails fit—and where they don’t
These DeWalt 1-1/2-in. 16-gauge nails are right at home on baseboard up to standard heights, door and window casing, shoe, and cabinet scribe strips—especially in pine, poplar, and MDF. They’re also useful for light carpentry tasks like tacking jamb extensions before screwing off. If you’re trimming in very hard woods regularly, or you need deeper penetration into studs behind layered substrates, step up in length. And if you’re doing exterior or wet-area work, choose the hot-dip galvanized version instead of bright steel.
They won’t work in angled 16-gauge nailers, and they’re overkill for delicate profiles where an 18-gauge brad is a better aesthetic match.
Recommendation
I recommend these nails for interior trim carpenters and serious DIYers who run straight 16-gauge finish nailers and need a reliable, consistent 1-1/2 in. fastener. They feed smoothly, drive predictably across common trim materials, and leave clean, patchable holes. While you’ll see the occasional deflection in dense hardwood or over knots—that’s true of most 16-gauge chisel-point nails—it’s manageable with correct chisel orientation, air settings, and firing technique. For the price, pack size, and overall consistency, they’re an easy choice for day-in, day-out trim work inside the house. If you need longer length, angled strips, or exterior corrosion resistance, choose accordingly; otherwise, these get the job done without fuss.
Project Ideas
Business
Accent Wall Installations
Offer fixed-price packages for slat walls, board-and-batten, and shiplap features. Market with before/after photos, quick 1–2 day turnarounds, and dust control. Upsell LED reveals, integrated shelves, and paint.
Trim Refresh Service
Provide baseboard, casing, and crown upgrades in lived-in homes or rentals. Use finish nails for fast, clean installs; bundle caulking, patching, and repainting. Sell by linear foot with tiered profiles and materials.
Prefabricated Wainscoting Kits
CNC or hand-cut MDF rail/stile kits sized to common wall heights. Ship flat with layout guide, adhesive, and recommended nail schedule. Customers DIY install with a finish nailer; offer virtual measuring and paint options.
Mobile Punch-List Carpentry
Target realtors, landlords, and GC punch-lists: repair loose casings, squeaky treads, trim gaps, and dinged baseboards. Flat call-out fee plus hourly. Keep a finish nailer, filler, and paints on the van for same-day fixes.
Picture Ledge + Gallery Design
Design, fabricate, and install custom-length picture ledges, then stage clients’ art with a hanging plan. Offer packages by room, include paint matching, and upsell seasonal rotation service to keep galleries fresh.
Creative
Shaker-Style Wainscoting
Transform a plain hallway or dining room with simple box-and-rail wainscoting made from 1/2 in. MDF or lattice strips. Use construction adhesive and 1-1/2 in., 16-gauge finish nails to tack rails and stiles to the wall, then fill holes and paint for a crisp, classic look.
Slat Accent Wall
Create a modern vertical slat feature using 1x2 or 1x3 strips over painted drywall or a backer panel. The smooth 16-gauge nails secure each slat without splitting thanks to the chisel point; fill, sand, and finish for a clean, contemporary statement wall.
Picture Ledge Gallery
Build long, low-profile picture ledges from 1x4 shelves with a 1x2 lip. Glue and finish-nail the front lip and rear cleat, then mount to studs. Great for rotating art, kids’ books, or photos without putting dozens of holes in the wall.
Craftsman Window/Door Casing
Upgrade builder-grade openings with Craftsman-style casing: head cap, apron, and side legs. Use the nails to attach casing to jambs and framing, then add a backband profile for depth. Caulk and paint for a custom, built-in feel.
Entry Bench With Beadboard Back
Build a simple mudroom bench with a beadboard or shiplap back and integrated hooks. Use finish nails to assemble face frames, attach trim, and fasten panels cleanly before painting for a polished, functional drop zone.