Features
- Versatile Access Panel: Provides access to plumbing, electrical, Internet, TV, security, sprinkler, and HVAC systems. This access panel also conceals wires, valves, and wall or ceiling openings
- Premium Quality Drywall Access Panel: Impact-resistant UV-stabilized plastic won’t fade or corrode. Paintable white surface; water-repellent for basements, attics, or bathrooms
- Easy Installation: Overall size 7 11/16 x 10 5/7 in, mounting 6 x 9 in. Cut along pencil outline, apply sealant, and press the access panel for drywall firmly into place
- Time-Tested Design: Plumbing access panel can be flush or surface mounted. Hinged door opens 180° or is removable. No screws needed, sits flush to wall/ceiling, lightweight and easy to clean
- Repairs Made Easy with Bozzon drywall access panels. Available in multiple sizes for a perfect fit. Backed by Lifetime Warranty and Money Back Guarantee with hassle-free refunds
Specifications
| Color | White |
| Size | 6 x 9 |
Related Tools
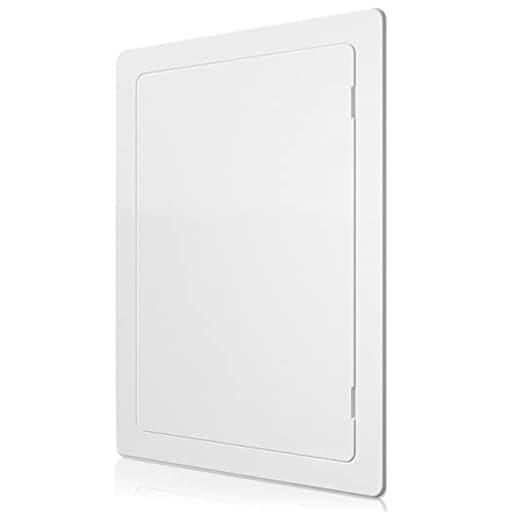
This drywall access panel (mounting opening 6 x 9 in; overall frame 7 11/16 x 10 5/7 in) provides access to plumbing, electrical, data/TV, security, sprinkler, and HVAC components while concealing wires and wall or ceiling openings. Made of impact-resistant, UV-stabilized, water-repellent plastic with a paintable white finish, it installs by cutting along the provided outline, applying sealant and pressing the frame into place (no screws required) and features a hinged door that opens 180° or can be removed for flush or surface mounting.
BOZZON Access Panel for Drywall - 6 x 9 inch - Wall Hole Cover - Access Door - Plumbing Access Panel for Drywall - Heavy Durable Plastic White Review
Why I reached for this panel
A small, awkward hole behind a bathroom vanity started this whole thing. I needed repeat access to a shutoff valve without committing to a permanent patch-and-paint cycle. I tried the Bozzon access panel (6 x 9) because it promised a clean look, tool-light installation, and enough durability to live in a damp space. After a few installs in different rooms—including one ceiling—I have a good handle on where it shines and where you might want something else.
Build and design
The panel is made from a heavy, impact-resistant plastic that doesn’t feel brittle. It’s UV-stabilized and water-repellent, so it won’t chalk or yellow quickly and is fine for bathrooms, basements, and attics. The finish is a flat white that takes paint well once prepped (more on that below).
The size choices are sensible. The 6 x 9 inch opening gives you practical access for shutoffs, junctions, and cleanouts, and the outer trim lands around 7-11/16 x ~10-3/4 inches—enough flange to cover a slightly messy cut without looking oversized. The door hinge opens a true 180 degrees and the door can be lifted off the hinge pins entirely. That sounds minor, but being able to pop the door off instead of contorting a wrench through a doorway is genuinely helpful.
The latch is a simple friction catch. There’s a shallow notch so you can open it with a fingernail or a flat putty knife. It’s not lockable and it’s not gasketed; it’s meant to conceal and provide access, not to secure, seal, or soundproof.
Installation: as simple as glue, press, and tape
No screws are required—this is a glue-in frame. Here’s what worked best for me:
- Dry-fit first. Use the back of the frame as your tracing guide. The molded step gives you a clean perimeter for your pencil line.
- Cut the opening with a drywall saw, aiming just inside your line; sneak up on the fit with a utility knife as needed.
- Vacuum and wipe the drywall edge so the adhesive has clean paper to bite into.
- For adhesive, painter’s acrylic-latex caulk works well if you’re painting the perimeter later. For a higher-grip bond (especially on ceilings), a few dabs of construction adhesive (PL Premium or similar) at the corners plus a perimeter bead of paintable caulk has been rock solid.
- Orient the hinge where you want it (I prefer it on the top in bathrooms to minimize dust entry) and press the frame in evenly.
- Use painter’s tape to hold it tight while the adhesive cures. On a ceiling install, I added a couple of temporary sticks (a T-brace) for 30 minutes, then tape for the remainder of the cure.
From first trace to cleanup, my first wall install took 25 minutes. The ceiling took longer mainly due to bracing while the adhesive set.
A couple of notes:
- There’s no paper template in the box, but the frame itself doubles as an accurate template.
- If your hole is larger than the 6 x 9 opening, you can still surface-mount the panel and let the flange cover it; you just won’t have the “flush” look of a recess-fit. The panel is designed for either approach.
- On textured walls, skim a thin ring of joint compound under the flange area if you want the panel to sit uniformly. Otherwise, a heavy texture can telegraph a small gap at the edge.
Fit, finish, and in-use impressions
Once seated, the panel sits nearly flush to the wall—close enough that it reads as part of the surface rather than a boxy add-on. There is a hairline reveal around the door, which is expected. The hinge action is smooth with no squeaking, and the door doesn’t rattle. The friction catch lands with a positive feel; you’ll need a fingernail or thin blade to pop it, which is good for incidental kid-proofing but not a security feature.
Access-wise, the 6 x 9 opening is generous for its footprint. I’ve comfortably reached angle stops, swapped a P-trap, and reset a coax splitter without feeling cramped. On a ceiling, the 180° swing (or just removing the door) is especially useful.
Paint and blend
If you want it to disappear, paint it. Here’s the process that gave me a clean match:
- Lightly scuff the face and door with 220-grit to knock down the sheen.
- Wipe with a damp microfiber to remove dust.
- Apply a bonding primer that’s suitable for plastics (Stix, Zinsser 123, or an adhesion primer).
- Topcoat with your wall paint. If you’ve caulked the flange to the wall, run a thin, neat bead first, smooth it, and prime over the caulk too.
After paint, the panel reads as a faint outline rather than a separate object—exactly what I want for living spaces.
Where it works best
- Bathrooms and laundry rooms where valves and traps should be accessible.
- Behind TVs or network hubs to cover cable nests while staying serviceable.
- Ceilings for junction boxes and duct dampers, as long as you don’t need a fire-rated solution.
- Rental units and managed properties where you want standardized, repeatable installs.
The plastic build is a nice middle ground—lighter and easier to work than metal, less prone to corrosion in damp rooms, and simple to clean. Being UV-stable is a bonus for utility rooms with a bit of sunlight exposure.
Limitations to keep in mind
- Not fire-rated. Don’t use it where a fire-rated barrier is required (e.g., garage-to-house separation or certain multi-family assemblies). Use a code-compliant fire-rated panel there.
- Not lockable. For security-sensitive locations, look for a locking or metal alternative.
- Not airtight or watertight. It conceals and provides access; it doesn’t seal against odor, moisture, or pressure.
- Adhesion matters. Dusty, glossy, or highly textured surfaces need prep for a reliable glue bond. On tile or masonry, specialty adhesives may work, but a screw-in panel is often easier.
- Slightly proud. While it sits close to flush, it’s not an invisible hatch. If you need a zero-reveal, mud-in “frameless” panel, this isn’t that category.
Durability and maintenance
After a few months, the door action is unchanged and the plastic hasn’t scuffed easily. A damp cloth removes fingerprints and caulk residue. The panel hasn’t warped in a bathroom with regular showers, and the UV-stable plastic looks the same as day one. As with any adhesive install, the long-term hold is only as good as the surface prep, so spend the extra minute cleaning drywall dust before glue-up.
Sizing and options
I used the 6 x 9, which feels like the sweet spot for small mechanicals. If you know you’ll need arm-in access or larger tools, the line includes bigger sizes; the design and installation approach are consistent across them. That makes mixing sizes in one property straightforward while keeping a uniform look.
Alternatives worth considering
- Metal, screw-in panels if you want mechanical fastening (tile backsplashes, block walls) or a more industrial look.
- Locking panels for security.
- Mud-in plaster/drywall hatches for high-end spaces where you want the panel to disappear entirely; they require more skill and time to install.
The Bozzon panel lands in the “simple, clean, and quick” category and does that job well.
Tips and small upgrades
- For ceiling installs, combine a few dabs of construction adhesive with painter’s tape to prevent sag while curing.
- Place the hinge at the top in dusty environments to reduce debris collecting in the reveal.
- If your wall is heavily textured, caulk the perimeter with a fine bead after install to eliminate hairline gaps and shadow lines.
- Label the inside of the door (fine-tip marker) with what the panel accesses—future you will be grateful.
Recommendation
I recommend the Bozzon access panel (6 x 9) for homeowners, DIYers, and property managers who want a fast, clean way to conceal and reach plumbing, electrical, and low-voltage components in drywall or ceilings. It installs in minutes without screws, sits nearly flush, takes paint well, and the door’s 180° swing and removable leaf make real-world access easy. It’s not a fit for fire-rated assemblies, security needs, or perfectly invisible installations, but for everyday access points it strikes a very good balance of simplicity, durability, and appearance. If those trade-offs align with your project—and they likely do—the panel is a smart, low-hassle choice.
Project Ideas
Business
Decorative Access Panel Product Line
Design and sell custom-finished access panels as decorative home accents—hand-painted patterns, faux-wood finishes, or printed graphics that disguise utility access. Market on Etsy, Shopify and craft fairs to homeowners wanting hidden function with style. Offer standard sizes and a paint-to-order service.
Retrofit Installation Service for Homes
Offer a specialty handyman service adding recessed access points (charging cubbies, plumbing/valve access, media hubs) to existing homes. Package includes cutting to template, sealant installation (no-screw fit), paint matching, and tidy cable/equipment installation. Market to remodelers, landlords and homeowners wanting clean, hidden solutions.
DIY Kits: Charging/Planter/Display Kits
Create ready-to-ship DIY kits that include the access panel, cut-to-fit backing/liner, LED strips or small power strips, waterproof tray for planters, installation template and step-by-step instructions. Sell these kits online and bundle versions (starter, pro) for hobbyists and renters who want a simple, low-damage upgrade.
Wholesale & Co‑Branding for Contractors
Supply panels in bulk to contractors, builders and property managers with options for pre-painting, custom sizes, or branded overlays. Provide installation training or quick-install kits to streamline site work. Position as a higher‑quality, paintable alternative to metal access doors—especially suitable for bathrooms, basements and rental units.
Upcycled Home Accessory Line
Turn surplus or imperfect panels into finished consumer goods—mini shelving units, pet-room peek doors, dollhouse windows or hanging shadowboxes. Finish, paint and add hardware, then sell at maker markets, gift shops and online. Low material cost and easy customization make attractive margins for a small craft business.
Creative
Hidden Jewelry / Valuables Nook
Install the access panel flush in an interior wall to create a low-profile safe for jewelry, passports or spare cash. Paint the panel to match the wall, line the interior with foam or fabric for protection, and use the 180° hinged/removable door for quick access. The water‑repellent plastic and removable door make it ideal for discreet storage in bathrooms, closets or behind pictures.
Recessed Shadowbox Display
Turn the panel into a recessed display case for small keepsakes, medals or mini sculptures. Use the 6×9 opening as the display cavity, mount a slim LED strip inside the frame for back/edge lighting, and paint or finish the door as a framed cover that opens for changing displays. The flush mount and clean edges give a professional built‑in look.
Mini Recessed Herb Planter / Hydroponic Niche
Create a small indoor herb garden by installing the panel in a sunny wall, lining the cavity with a waterproof tray, adding a thin layer of soil or a small hydroponic puck system, and using the door as an easy access hatch for watering and trimming. The UV‑stabilized, water‑repellent plastic and removable door make maintenance simple while hiding irrigation lines.
Hidden Charging Station & Cable Organizer
Build a recessed phone/tablet charging cubby: recess a small power strip or USB hub behind the panel, feed cables through a discreet notch, and use the hinged door to conceal devices while charging. Paint to match décor and add foam bumpers to protect devices. This keeps counters tidy and hides cords without visible hardware.
Modular 3D Wall Art / Geometric Niches
Combine several panels in a grid or staggered arrangement to create modular 3D wall art. Paint each door a different color or texture, mount small objects inside each niche (succulents, LED candles, tiny sculptures) and use the removable doors for interchangeable displays. The lightweight, paintable frames make customization fast and inexpensive.