Features
- Part Number: 0342692
- Boiler Relief Valve 3/4" 30Psi
Specifications
| Unit Count | 1 |
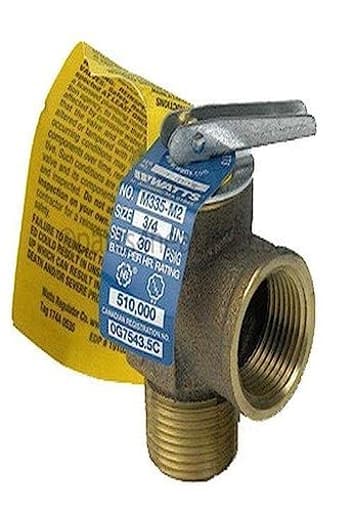
A bronze 3/4-inch boiler pressure relief valve set to open at 30 psi. It installs in the boiler system to discharge excess pressure and help prevent overpressure damage to the boiler and connected piping.
Watts Regulator 0342692 Boiler Relief Valve 3/4" 30Psi, No Size, bronz Review
A straightforward, dependable 30 psi boiler relief valve
I installed the Watts relief valve on a mid-2000s cast‑iron hydronic boiler as part of a routine safety refresh. It’s a simple component with an essential job: open at 30 psi to relieve excessive pressure and prevent the boiler and piping from becoming a hazard. In use, this is exactly what it does—without drama—and that’s what I want from a safety valve.
What it is and who it’s for
This is a bronze, 3/4‑inch NPT boiler pressure relief valve factory set to 30 psi. It’s a pressure-only device intended for hot-water (hydronic) boilers—not for steam boilers and not for domestic water heaters that require temperature-and-pressure (T&P) relief. If you run a typical residential hydronic system, 30 psi is the standard setpoint, and this valve drops in as a like-for-like replacement.
The chassis is compact enough to clear tight boiler jackets and nearby piping. The tag clearly identifies the set pressure, temperature rating, and certifications, which is helpful for inspectors and maintenance records. There’s no adjustability—nor should there be on this kind of safety valve.
Installation experience
Swapping it in was straightforward, but a safe install is about details:
- Isolation and cool-down: I let the system cool, isolated where possible, and dropped pressure to zero at a drain point.
- Removal and prep: The old valve backed out cleanly from the 3/4" tapping. I chased the threads and wiped the seat area to keep debris out of the new valve.
- Sealant and torque: I used two wraps of PTFE tape followed by a thin coat of pipe dope rated for glycol systems. The wrench flats on the new valve are substantial, and I snugged it in without over-torquing the cast‑iron block.
- Discharge piping: I reused the full‑size 3/4" discharge tube, running it down to near the floor with no valves, caps, or reductions. This is critical—never throttle a relief valve outlet.
- Orientation: I aligned the outlet downward to discourage sediment from settling in the seat and to keep the discharge path obvious and unobstructed.
From power-off to purge, the job took under an hour. If you’re doing this yourself, budget time to bleed the system afterward and to verify that the fill valve and expansion tank are healthy—those two components dictate whether your relief valve ever needs to open.
Performance under pressure
With the new valve installed, I refilled to 12 psi cold and fired the boiler. Hot operating pressure stabilized around 20–22 psi at 180°F, with no signs of seepage. For a functional test, I over-pressurized the system on a controlled basis using a calibrated gauge. The valve snapped open right around 30 psi and exhausted a short, decisive rush of water into the discharge tube—exactly what you want. After pressure dropped, it reseated promptly and remained dry at operating pressure.
I repeated that open/close cycle a few times across a week of regular operation. The valve behaved consistently and didn’t weep afterward. The seat sealed tightly, and there was no chattering or partial openings. In practice, once your expansion tank and fill valve are in good order, this valve should only ever be a spectator; my system never approached the setpoint during normal heating.
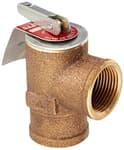
Build quality and design
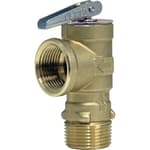
The bronze body feels stout, threads were clean, and machining looked tidy with no casting flash. The spring action was crisp in testing—no lazy or sticky behavior as it approached the setpoint. The rating tag is legible and securely attached. There isn’t much to “feature” on a part like this, and that’s fine. Simplicity is an asset.
One small but appreciated detail: the wrench flats give good purchase and line up predictably when you level the outlet, which helps avoid over-tightening just to get the orientation right.
Compatibility and selection notes
A few selection reminders to make sure this valve is appropriate for your system:
- Boiler type: Hydronic (hot water), not steam.
- Set pressure: 30 psi is standard for residential systems. Do not substitute a higher or lower setpoint unless your boiler’s manual specifies otherwise.
- Size: 3/4" NPT inlet. Match your boiler tapping.
- Discharge: Maintain full‑size 3/4" outlet piping to a safe termination. No valves or restrictions.
- Capacity: Relief valves are rated for a discharge capacity that must meet or exceed your boiler’s maximum input. Always confirm the capacity on the tag or datasheet against your boiler specs.
If you’re replacing an OEM part on specialized equipment (pool heaters, for example), verify the model’s setpoint and capacity match the original specification. A pressure-only 30 psi valve is not interchangeable with a temperature-and-pressure valve.
Troubleshooting and maintenance
If a freshly installed relief valve drips, don’t assume the valve is defective until you check the system basics:
- Expansion tank: A waterlogged or undersized tank is the most common cause of pressure spikes. Check the air charge cold; correct it or replace the tank if it won’t hold charge.
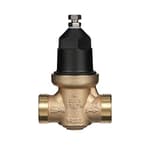
- Fill pressure: A misadjusted pressure-reducing valve can overfill the system. Verify 12–15 psi cold for most two‑story homes; adjust to your building height and boiler manual.
- Debris: Pipe dope, tape fragments, or scale can lodge on the seat and cause weeping. Sometimes a brief pressure cycle will clear it; otherwise, depressurize and inspect.
- Temperature: Overfiring or a failed control can drive pressure up as water expands; confirm aquastat settings and burner operation.
In normal service, I recommend documenting the install date and testing the valve annually by confirming system pressure behavior under load and inspecting the discharge line for signs of past opening. If a valve has opened due to actual overpressure, consider that a signal to evaluate the root cause, not just the symptom.
Limitations
- Single setpoint: It’s factory-set at 30 psi and not adjustable—by design—so it’s unsuitable for systems requiring a different relief pressure.
- Not a cure-all: If your system is creeping up in pressure, this valve will protect you, but it won’t solve the underlying cause. Budget time to correct expansion and fill issues.
- Capacity data: While the tag provides ratings, you’ll need to cross-check the capacity against your boiler’s input. Don’t skip this step if your boiler is on the larger side.
None of these are flaws with the valve; they’re simply realities of specifying safety components correctly.
Value and everyday use
Relief valves aren’t glamorous, but the Watts relief valve does its job quietly and predictably. It’s easy to install, behaves exactly at its setpoint, reseats cleanly, and stays dry in normal operation. That reliability matters, especially when a relief event can dump hot water into a mechanical room. In day-to-day use, I didn’t have to think about it—and that’s the best outcome for a safety device.
Recommendation
I recommend this Watts relief valve for residential and light commercial hydronic boilers that require a 3/4", 30 psi pressure-only relief. In my installation it opened right on spec, reseated without weeping, and has remained tight through regular cycling. The build quality is solid, the tagging is clear, and the install is straightforward as a one-for-one replacement. As long as you confirm the capacity matches your boiler and you pair it with a healthy expansion tank and correctly set fill valve, it’s a dependable, no‑nonsense choice that does exactly what a safety valve should do.
Project Ideas
Business
Upcycled industrial decor line
Create a product line of lamps, coat racks, fountains and wall art built from reclaimed valves and pipe fittings. Market to urban home-decor shops, online marketplaces, and interior designers who want authentic industrial/steampunk pieces. Source valves that are sold for decorative use or new surplus rather than used safety devices to avoid liability.
Maker workshops and DIY kits
Offer hands-on workshops teaching people how to turn valves and fittings into lamps, hooks, and small fountains. Sell DIY kits (valve, mounting hardware, wiring or pump, wood backing, instructions) and include safety guidance so attendees know not to reuse safety valves in pressurized systems.
Commissioned commercial installations
Build bespoke steampunk or industrial installations—statement lighting, reception desks, and feature walls—for restaurants, breweries, co-working spaces and retail. Position these as turnkey artistic builds with design mockups and durable finishes, charging for design, fabrication and installation.
Certified valve supply & replacement service
For a complementary technical business, supply new OEM relief valves and offer certified installation, testing, and replacement services for boilers and HVAC systems. Emphasize code compliance, pressure testing, and disposal of old safety devices—do not resell used relief valves for active boiler service without proper certification and testing.
Creative
Steampunk desk lamp
Turn the bronze relief valve into the visual centerpiece and on/off knob of an industrial-style desk lamp. Mount the valve on a reclaimed pipe arm, add an Edison LED bulb or strip, and use the valve handle as a tactile dimmer or decorative finial (do not use the valve as a pressure component; it should be purely decorative).
Industrial coat/key rack
Use the valve bodies as heavy-duty hooks on a reclaimed wood backing or a pipe frame to create a rugged coat rack or key holder. Their size and patina give an authentic industrial look; secure them with bolts and washers for stable mounting.
Tabletop fountain spout
Repurpose the valve as a sculptural spout or nozzle in a small tabletop fountain or garden bubbler driven by a low-pressure pump. The valve's shape makes an attractive water feature—ensure you never use it as a pressure relief device and isolate it from pressurized plumbing.
Kinetic / percussion sculpture
Integrate the valve into a kinetic sculpture or wind chime where the valve body and lever become part of the sound-producing elements. Use multiple valves of different sizes for varied tones; finish with bronze polish or a patina for contrast.