Features
- For use tuckpointing and sealing mortar joints
- Sanded acrylic formula that adheres to brick, block, stone and concrete surfaces
- Water-resistant acrylic formula remains relatively flexible, with minimal shrinkage and excellent adhesion
- Textured and colored to give the appearance of masonry mortar
- Unique square opening is ideal for filling 3/8" mortar joints
Specifications
| Color | Gray |
| Size | 5.5 oz |
| Unit Count | 1 |
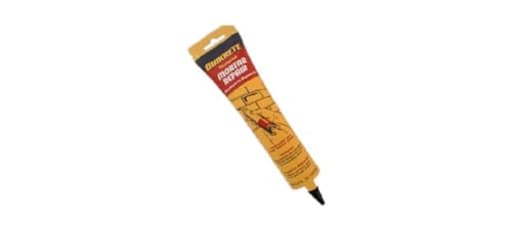
Mortar repair compound for tuckpointing and sealing mortar joints in brick, block, stone and concrete. The sanded acrylic, water-resistant formula remains relatively flexible with minimal shrinkage, is textured and colored to match masonry mortar, and dispenses through a square opening suited for 3/8" joints.
Quikrete CO 8620-05 Mortar Repair, 5.5 oz Review
Why I reached for this tube
I had a small punch list of masonry blemishes that didn’t justify mixing a bag of mortar or even loading a caulk gun: a few old anchor holes where a flower box used to live, hairline cracks in a brick column, and a couple of crumbly joints near a doorbell. I picked up the Quikrete mortar repair tube in the 5.5 oz size because it promised a sanded, mortar-like finish without the mess. For small repairs, that convenience matters.
What it is
This is a sanded acrylic mortar repair compound in a squeeze tube. The material is water-resistant once cured, remains a bit flexible to handle minor movement, and is colored and textured to resemble traditional mortar. The standout detail is the square nozzle: it’s designed to lay in a flat-sided bead that matches 3/8-inch joints, which is what you see on a lot of standard brickwork. It’s a compact tube—no caulk gun required.
Setup and surface prep
Surface prep is straightforward, but it’s worth doing right. I used a stiff brush and a pick to remove loose grit and any flakes in the joint, then vacuumed out the dust. For small drill holes, I undercut a bit with a masonry bit to give the filler a mechanical key. The acrylic will bond to masonry, but it won’t cling to dust. A clean, sound substrate is the difference between a repair that lasts and one that pops out.
The tube comes sealed; once the tip is cut and the seal punctured, it’s ready to go. I started with a very small cut at the square nozzle to test bead size, then trimmed back until it matched the joint. For hairline cracks, the narrowest opening keeps things tidy; for standard joints, opening the tip to a roughly square aperture helps the bead sit flush.
Application and tool feel
Squeezing force is moderate. Early on, it dispensed smoothly. Near the end of the tube, it took a bit more hand strength to coax out the remaining material. If grip strength is a concern, taking breaks or warming the tube slightly in a pocket can help. The square tip is more than a gimmick—it really does lay in a profile that fills a joint with fewer passes than a round tip would.
The working texture is sandy, exactly what you want to blend into masonry. I tooled the bead with a pointing tool and, in tight spots, a gloved finger. A light soapy water spritz on the glove kept it from dragging. The compound skins over fairly quickly, which lets you layer a second pass if the first settles or if you missed a corner. For deeper voids, I applied in two lifts, giving the first a few minutes to firm up before topping off. Shrinkage was minimal; I didn’t see the telltale halo that some repair caulks leave as they pull away from edges.
Finish and color
Out of the tube, the color is a standard gray—think fresh cement, not weathered sand. On my newer mortar joints, it blended well right away. On older, tan or beige mortar, the gray read a shade lighter and cooler. Texture helps a lot; because it’s sanded, it doesn’t look plasticky, and once tooled, it reads as mortar rather than caulk. If your existing joints are warm/beige, two tricks helped me:
- Lightly dust the surface with masonry dust while it’s tacky to knock down the gray.
- Use a damp, stiff brush to stipple the surface after initial set for a closer match in texture.
Color is the one area where you’re at the mercy of what’s in the tube. I’d love to see more tones available; most houses don’t have “one gray fits all.”
Adhesion and durability
Bond felt strong on brick, block, and concrete. The acrylic grabs well to properly cleaned joints. After several months of sun and rain, none of my patches cracked or separated, including a vertical joint that sees runoff. The water-resistant formula and flexible nature appear to be doing their job—no damp staining, no curling edges. I can’t speak yet to multiple freeze-thaw cycles over harsh winters, but the combination of flexibility and low shrinkage bodes better than a brittle patch.
The square nozzle advantage
That square opening deserves its own note. For 3/8-inch joints, you can insert the tip, pull steadily, and essentially tuckpoint in one pass. You’re left with a bead that’s the right geometry to compress and tool without smearing across the brick face. Rotating the tip changes the orientation of the square, letting you fine-tune the bead size for slightly narrower or wider joints. For cracks that aren’t full-depth joints, cutting the tip smaller gives you precise control, and the small opening is great for filling screw and anchor holes without making a mess.
Limitations and quirks
- Color matching: If your mortar is beige, buff, or heavily weathered, the default gray can read light or cool. You can mitigate it, but it won’t disappear on close inspection.
- Tube hardening after opening: Like most acrylics, once opened, the tip can clog if it sits. Purge a little material before capping, wipe the nozzle, and seal tightly. Even then, expect to trim the tip back slightly on the next use.
- Squeezing effort: The last ounce takes effort. A caulk gun makes long runs easier; this tube favors small, targeted repairs.
- Not for structural fixes: It’s a repair compound, not a replacement for repointing entire walls or addressing failed substrate.
Best use cases
- Filling drill and anchor holes in brick or mortar.
- Sealing hairline cracks in mortar joints to keep water out.
- Touch-up tuckpointing on short runs where mixing mortar is overkill.
- Blending small gaps around fixtures, utility penetrations, or trim.
If you’re repainting or sealing afterward, let it cure per conditions; it takes paint well once fully dry.
Practical tips for a cleaner result
- Mask the brick edges with painter’s tape if you’re new to tuckpointing; remove the tape as soon as you tool the joint.
- Clean aggressively. A vacuum nozzle and a narrow brush make a big difference.
- Pack deep voids in lifts; aim for no more than about half an inch per pass to avoid sag.
- Tool early. Once it skins, shaping gets tougher and you’ll lose the mortar-like texture.
- Keep a damp rag handy to wipe brick faces immediately; dried acrylic is stubborn.
Value and size
The 5.5 oz tube is ideal for punch-list work. Cost per ounce is higher than a larger cartridge, but you save on setup and you don’t need a caulk gun. For a couple of cracks and holes, I used about half a tube. If you’ve got an entire facade to repoint, this isn’t the way to go. For small, conspicuous repairs, it’s cost-effective because you’ll actually finish the job.
The bottom line
I reached for this tube to tackle small masonry blemishes without dragging out a full masonry kit, and it delivered. It’s easy to apply, tools to a convincingly mortar-like finish, adheres well, and shrugs off weather once cured. The square nozzle makes quick work of standard joints, and the sanded texture avoids the “caulked” look that ruins a patch.
It isn’t perfect. Color matching is the main limitation—gray won’t disappear on warm-toned or heavily weathered mortar—and squeezing out the last bit takes some hand strength. But for the kind of targeted repairs most homeowners and pros face between larger projects, the convenience and results outweigh those drawbacks.
Recommendation: I recommend the Quikrete mortar repair tube for small to medium patching of mortar joints, cracks, and anchor holes where speed and appearance matter. Choose it when you want a clean, mortar-like repair without mixing material or setting up a caulk gun, and be mindful of the gray color if your existing joints skew beige or tan.
Project Ideas
Business
Micro Tuckpointing Service
Offer a neighborhood-focused small-repair service (porches, chimneys, steps) using single-tube mortar repairs for owners who need quick, affordable fixes. Market by square-foot pricing for 3/8" joints and emphasize fast turnaround, color matching, and water-resistant results—ideal for landlords and homeowners.
DIY Mortar Repair Kit & Video Course
Package the 5.5 oz mortar tube with a small nozzle, joint tool, color-matching swatches, and step-by-step video tutorials. Sell kits online or at local hardware stores targeted to DIYers who want to fix small areas without hiring a mason; offer upsells like one-on-one virtual coaching.
Prop & Set Rental for Film/Photo
Produce lightweight faux-brick panels and small prop elements using the compound for realistic masonry joints, then rent them to photographers, film crews, and event planners. The textured, flexible finish reads well on camera and is easier to transport than real brick.
Workshops for Makers & Homeowners
Run half-day hands-on classes teaching basic tuckpointing repairs and creative applications (planters, frames). Charge per participant and sell starter tubes/kits at the workshop; partner with makerspaces and community centers to build repeat customers.
Niche E‑commerce Bundle for Property Managers
Create a subscription or bundled offering aimed at property managers: small-quantity mortar tubes, a color-matching card, a refillable nozzle pack, and quick-reference repair guides. Position it as a preventive maintenance product for quick site fixes between professional masonry visits.
Creative
Mini Brick Accent Planters
Give terracotta or wooden planters a brick-seam look by applying the sanded mortar compound in 3/8" grooves cut or scored into the planter surface. The textured, gray mortar creates realistic joints; because the formula is water-resistant and flexible, it holds up to watering and outdoor use.
Faux Tuckpointing Accent Wall Panel
Create removable wall panels (thin plywood or MDF) with shallow routed brick outlines and fill the joints with the mortar compound to mimic real tuckpointing. Use these panels as photo backdrops, headboards, or rental staging props—realistic texture and minimal shrinkage make the finish convincing close-up.
Masonry-Style Jewelry & Trinket Boxes
Transform small wooden or metal boxes into miniature masonry by applying the compound into carved or glued-on brick outlines. The sanded texture and gray color give small crafts an industrial/architectural aesthetic; finish with a matte sealant for durability.
Outdoor Mosaic Grout Alternative
Use the water-resistant acrylic as grout for outdoor tile mosaics where a coarse, mortar look is desired. Its flexibility reduces cracking on substrates that move (concrete pavers, wood bases) and the square nozzle makes filling narrow, consistent joints easy.
Aged-Brick Picture Frame Edging
Add a faux brick border to picture frames by scoring frame edges or adding thin brick-shaped wood pieces and filling seams with the compound. After curing, dry-brush with paint for an aged, reclaimed-brick finish perfect for rustic decor.