Features
- Filler and sandable primer is suitable for use on wood, metal and fiberglass surfaces
- Oil based 2 in 1 paint with Stops Rust formula saves time and provides rust resistant base coat for cars, trucks, and other vehicles
- Covers up to 10 sq ft and dries to the touch (and can be recoated) in 10 minutes
- Filler and sandable spray paint fills minor surface imperfections and sands smooth
- Provides superior top coat adhesion and flat finish yields a smooth surface when sanded
- The hi-build formula fills in minor imperfections
- Sands smooth for the ultimate finish
- 2 in 1 Primer features an advanced spray system that allows you to spray at any angle
- A comfort spray tip with wider finger pad
- Stops Rust formula
Specifications
| Color | Gray |
| Size | 12 Ounce (Pack of 1) |
| Unit Count | 1 |

An oil-based 2-in-1 filler and sandable primer spray that provides a rust-resistant base coat and fills minor surface imperfections on wood, metal, and fiberglass. It builds to a flat, sandable finish for improved topcoat adhesion, covers up to 10 sq ft, dries to the touch and can be recoated in 10 minutes, and features an advanced spray system and comfort spray tip for spraying at any angle.
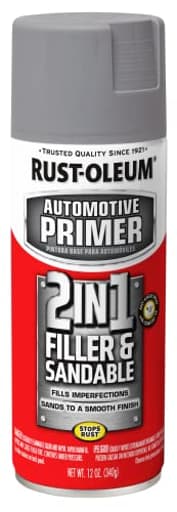
Rust-Oleum 260510 Stops Rust Automotive 2-in-1 Filler & Sandable Primer Spray, 12 oz, Gray Review
What it is and who it’s for
Rust-Oleum’s 2-in-1 filler primer is an oil‑based, high-build aerosol designed to do two jobs at once: fill minor surface imperfections and lay down a sandable, adhesion-friendly base for topcoats. I reach for it on small automotive repairs (think mirror caps, bumper scuffs, wheel touch-ups), but I’ve also used it on bare steel brackets and fiberglass parts. The formula includes Rust-Oleum’s Stops Rust protection, so it doubles as a rust-resistant undercoat on properly prepped metal. If you’re tackling spot work without a compressor or spray gun, this is an approachable, time-saving option.
Setup and surface prep
As with any primer, the results start with prep. I degreased with wax and grease remover, feathered surrounding paint with 320–400 grit, and spot-filled deeper dings with a proper body filler first. This primer will bridge small sanding scratches and shallow pinholes; it won’t erase craters or waves on its own.
On bare steel, I like to scuff with 180–220 first, then finish at 320–400 before spraying. On fiberglass, a uniform 320 grit scratch gives the best tooth. The can’s any-angle valve is handy for odd shapes, and the wider finger pad is genuinely more comfortable during longer sessions.
Application: build light, recoat quickly
This can is meant to build, but the key is stacking light coats. I lay a light tack coat, wait roughly 10 minutes, then follow with two to three medium-light coats, keeping the can 8–10 inches away and moving like a printer—side to side, advancing a half pass each sweep. The fast recoat window is a genuine timesaver; I was able to go from bare spot to block-sanding in under an hour for quick jobs in mild conditions.
If you flood it to fill a low spot, it will take longer to cure and can gum up sandpaper. Resist the urge; build gradually and sand between sessions. For small panels, one 12 oz can is enough. For larger, high-build work (like smoothing lots of sanding scratches), plan on two cans. Rust-Oleum rates a can at up to 10 square feet, which aligns with my experience when applying multiple coats for filling.
Filling and sanding performance
As a filler primer, it does what it claims within realistic limits. It bridges 180–220 grit scratches after a couple of coats, and 320–400 grit scratches almost disappear after three. Shallow pinholes and print lines on parts with light texture get noticeably smoother. For larger low spots or gouges, use a glazing putty or body filler first; then this primer is great for refining the surface.
Sanding is the strong suit. Dry sanding with 400–600 cuts cleanly without loading too fast, provided you’ve given it adequate dry time. For a higher-end finish, I wet sand at 600 and finish at 800 before topcoat. If you plan to wet sand, give it more time than the “to the touch” dry—an hour minimum in good conditions, longer if you applied heavier coats or if humidity is high. The flat gray finish makes high and low spots easy to read as you block.
Spray quality and ergonomics
The spray pattern is consistent, and atomization is good for an aerosol. I can spray at odd angles—inside wheel arches or under mirror edges—without sputter. Spitting was rare and only showed up near the end of an aggressively shaken can. The comfort cap matters if you’re laying multiple coats; finger fatigue is less of a thing compared to older, narrow nozzles.
Overspray is typical of a rattle-can high-build primer: plan for masking a generous margin and keep a tack cloth handy. I saw minimal orange peel when I stayed disciplined on pass speed and distance; light passes help the primer self-level.
Compatibility and versatility
Officially, it’s for wood, metal, and fiberglass. On metal, the Stops Rust component adds a nice margin of protection once the surface is fully sealed under a topcoat. On wood, it fills grain quickly for small trim repairs. Fiberglass parts took it well with proper scuffing.
I’ve also used it on sanded 3D-printed parts as a surfacer. With PLA and ABS, two to three light coats followed by wet sanding at 600 will knock back layer lines on moderately smooth prints. Because plastics vary, I recommend a test spot to confirm adhesion and to avoid trapping moisture inside porous prints—let the piece fully dry before re-coating if you wet sand.
As for topcoats, I’ve had success with enamel and acrylic automotive aerosols. If you’re using a hot solvent lacquer, give this primer a longer cure to reduce the risk of lifting. When in doubt, do a test panel and follow the recoat window guidance of your chosen topcoat.
Durability and rust resistance
For an aerosol 1K product, durability has been solid. Once topcoated, pieces I’ve exposed to normal road grime and a couple of wash cycles held up without telegraphing sanding scratches or losing adhesion. It’s still a 1K high-build primer; if you need chemical resistance, long-term UV stability under clear coats, or corrosion protection in severe environments, a 2K epoxy or urethane primer is the next step up. But for everyday spot work, this strikes a practical balance of protection and convenience.
Dry time reality check
“Dries to the touch in 10 minutes” is accurate in mild, low-humidity conditions and for light coats. Sandability depends more on total film build and environment. I typically:
- Recoat: 10–15 minutes between light coats
- Dry sand: 45–60 minutes after the last coat
- Wet sand: 60–120 minutes, longer if coats were heavy
- Topcoat: after 60 minutes for light builds, or next day if I applied lots of material
Impatience is the enemy here. Sand too soon and you’ll clog paper or leave soft edges.
Limitations
- Color: Gray only in this specific high-build variant. If you need a white undercoat for bright colors, you’ll need a separate primer pass.
- Not a body filler: It won’t fix deep dings or panel waves; pair it with a glaze or filler for true defects.
- VOCs and odor: It’s oil-based; wear a respirator and spray with good ventilation.
- Material usage: Because it’s a high-build product, you’ll go through a can faster than with a thin sealer, especially if you’re flattening a textured surface.
Practical tips
- Use a guide coat: A dusting of contrasting color makes high/low spots obvious while sanding.
- Focus on problem areas first: Hit recesses, seams, and inside corners before broad passes to avoid overspray texture.
- Don’t chase a wet look: Maintain consistent, light passes; fix coverage on the next coat rather than re-wetting mid-pass.
- Paper matters: Start with 400 for flattening, move to 600–800 for finishing. Add a drop of dish soap when wet sanding to reduce loading.
- Temperature counts: Aim for 65–85°F and moderate humidity for predictable dry times and flow.
Value
For small to medium spot repairs, the value is strong. You’re getting a filler and sandable primer in one, with fast recoat and an easy learning curve. Compared to breaking out a gun and a 2K primer, the convenience is hard to beat. If you’re resurfacing a whole panel or an entire 3D-printed prop with heavy layer lines, budget for multiple cans—or consider stepping up to a catalyzed primer for efficiency.
Recommendation
I recommend this Rust-Oleum 2‑in‑1 filler primer for DIYers and pros handling small automotive touch-ups, accessory parts, brackets, and fiberglass components who want a straightforward, sand-friendly build primer from a can. It fills light imperfections, sands cleanly, and speeds up the workflow with quick recoats and an easy spray pattern. It won’t replace proper body filler or a 2K primer on large, critical surfaces, and the gray-only color can be a constraint for certain topcoat plans. But as a versatile, time-saving base that builds and blocks like it should, it earns a spot on my shelf.
Project Ideas
Business
Mobile Auto Touch-Up & Rust-Stop Service
Offer a pickup-and-return or on-site mobile service for small paint repairs, rust-spot treatments, and panel priming. Use the 2-in-1 primer for fast spot restoration—its quick dry/recoat time and sandability reduce labor. Pricing: fixed rates for spot sizes (e.g., door ding, quarter panel) and add-on polishing/clear-coat. Market to local neighborhoods, dealerships with trade-ins, and used-car lots.
Upcycled Furniture Product Line
Source worn metal and wood furniture, restore with the sandable primer, then refinish into a cohesive product line (industrial, farmhouse, modern). The primer fills imperfections and creates a reliable topcoat base so you can deliver high-quality finishes at scale. Sell via Etsy, Instagram, local markets, and consignment shops. Keep margins by batching prep and using standard topcoat recipes.
DIY Restoration Kits + Online Tutorials
Assemble small kits for hobbyists that include a 12 oz can of the primer, sandpaper selection, masking film, applicator tips, and a printable step-by-step guide or video link. Position kits for specific projects (metal toolbox, small marine fairing, shelf brackets). Sell through an ecommerce store and promote via how-to short videos demonstrating the primer’s ease of use and fast recoat times.
Hands-On Workshops & Corporate Team Events
Run half-day workshops teaching rust repair, priming and finishing on metal/fiberglass/wood. Provide hands-on experience with the 2-in-1 primer (spraying at angles, filling imperfections, sanding to finish). Charge per attendee and offer add-ons like take-home mini kits. Market to maker spaces, community colleges, and corporate team-building programs interested in creative, practical activities.
Marine & Powersports Quick-Prep Service
Specialize in touch-up, small-panel repairs, and priming for boats, jet-skis, ATVs and fiberglass equipment. The primer’s compatibility with fiberglass and rust-resistant Stops Rust formula makes it ideal for pre-topcoat prep in marine environments. Offer seasonal tune-up packages before summer, partner with marinas and powersports dealers, and provide warranty-backed small-area repairs.
Creative
Weathered Metal Garden Sculptures
Create small outdoor sculptures and yard art from scrap metal (old tools, bike parts, sheet metal). Use the 2-in-1 filler & sandable primer to fill pits and minor corrosion, establish a rust-resistant base, and build a smooth, uniform surface for paint or faux-patina treatments. Sand the primer for a flat finish, then apply layered metallic or patina paints and a clear sealer for long-lasting garden pieces.
Reclaimed Wood + Metal Floating Shelves
Combine reclaimed wood planks with metal brackets fabricated from steel flat stock. Use the primer on the metal brackets to stop rust and fill weld marks or grinding gouges; sand smooth before topcoating with enamel or powder-coat alternative. The oil-based primer’s quick recoat and sandability speed up production so you can build consistent, durable floating shelves for kitchens and entryways.
Smooth-Finish Fiberglass Lamp Bases
Make custom lamp bases from fiberglass molds or found boat/fairing parts. The primer is designed for fiberglass — spray a hi-build coat to fill small imperfections and sand to a flawless finish suitable for glossy or rubbed-topcoats. The ability to spray at any angle and quick dry time lets you finish multi-sided pieces quickly for a professional look.
Vintage Toolbox Restoration
Restore old metal toolboxes and metal trunks for home storage or decor. Treat rust, prime with the Stops Rust 2-in-1 spray to seal and fill pitting, sand the cured primer smooth, then add color-matched enamel or stenciling. The result is a durable functional piece with a crisp, showroom finish — great as a gift or market item.
Automotive Accent Panels for Interior Decor
Harvest small car panels (dash inserts, trim pieces) and transform them into wall art or shelving by priming and smoothing surface imperfections with this spray. The rust-resistant base and sandable hi-build let you create flawless accent pieces that can be finished in metallics, high-gloss color, or textured finishes for a modern industrial look.